Main causes of malfunction
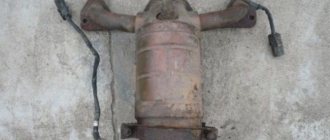
The engine exhaust manifold is a part that operates under high loads.
During the operation of the car, it is affected by such negative factors as:
- high temperature transmitted to it from exhaust gases;
- exposure to gasoline vapors caused by the fact that the VAZ 2114 intake manifold and exhaust manifold have a common gasket;
- exposure to exhaust gases;
- exposure to vibration transmitted from the motor.
All this leads to the fact that almost all cars that are more than 7 years old (with the exception of those whose owners drive a couple of times a year) have a badly worn manifold that requires replacement.
It is immediately worth noting that many car repair shops offer services for argon-arc welding of cracks in worn-out collectors. Such a service, as a rule, costs several times more than a new part, and the durability of such repairs in most cases does not exceed one year, after which new cracks appear.
It is for this reason that you should not think about possible repairs - if the collector fails, it needs to be replaced.
Another problem, which, for obvious reasons, occurs even more often, is a burnt-out manifold gasket 2114. With very active use of the car, it can fail almost every year. You can also replace it with your own hands, and the replacement procedure itself is no different from replacing the collector (its sequence will be discussed below).
Replacing VAZ 2109 pants with your own hands
Skoda Octavia RS Logbook Thermal gasket for the intake manifold
Appearance of VAZ 2109 pants
VAZ 2109 pants are replaced extremely rarely, since it is an all-metal unit. The gasket is changed more often, since the effect of hot exhaust gases on it is very strong. But to tell the truth, over the life of the car of 10-15 years, there is a possibility that the metal pipe of the VAZ 2109 pants will burn out.
And the reason is that hot gas, leaving the exhaust manifold, enters the exhaust pipe. Moreover, its metal has a relatively small thickness, and the result is the formation of cracks on its surface and the pants can simply fall off the bar. An example of such burnout is clearly visible in the photo; their service life was exactly 15 years.
What does a faulty collector affect?
There are many stories about the rupture (and even explosion) of a cracked manifold while the car is moving.
Of course, none of them are true, but nevertheless, a leaky manifold is a very serious problem that requires an immediate solution, and here’s why: through burnouts and cracks, air can enter the exhaust system, diluting the exhaust gases.
As a result of this, the lambda sensor will incorrectly determine their composition and incorrectly adjust the composition of the fuel-air mixture injected into the engine, which will lead to tripping, a drop in speed and carbon deposits on the spark plugs.
These same cracks will affect the crankcase ventilation, disrupting it. This will lead to timing problems and increased valve wear. And finally, exhaust gases escaping through the burnouts will enter the engine compartment and, partially, into the interior, causing unpleasant odors and discomfort during trips.
A severely burnt manifold gasket can lead to exactly the same consequences as cracks on the part itself.
Signs of a burnt gasket
The easiest way is for the owner of a car with an injection engine, the operation of which is monitored by an ECU (electronic control unit). It sends a signal about a gasket failure to the dashboard, where the Check light comes on. This means that the lambda probe, which is usually equipped with the manifold, detected a change in the volume of oxygen in the exhaust, informing the ECU. The engine begins to operate in emergency mode until the defect is eliminated.
“Symptoms” of a burnt gasket:
- the engine is unstable;
- makes an uncharacteristic sound during operation;
- The cabin smells like exhaust gases.
ATTENTION! The fact that the exhaust manifold gasket has burned out is indicated by a recognizable chirping sound created by gases that break through the seal. Motorists often say that the engine “cuts.”
Exhausts through ventilation and heating systems quickly penetrate into the cabin, which is fraught not only with a deterioration of the microclimate, but also with negative consequences for health. This is why replacing the exhaust manifold gasket becomes a forced but necessary measure.
How to make a replacement
In order to replace the exhaust manifold yourself, you will need the following tools:
- slotted screwdriver;
- open-end wrenches for 17, 13, 10 and 8;
- pliers (pliers);
- socket heads for 19 and 17;
- head knob.
A few days before the expected replacement of the exhaust manifold, all fasteners should be treated with VD-40 or its analogues 2-3 times a day.
Having selected the necessary tool, you should figure out how to remove the VAZ 2114 manifold. The first thing you will need to do is to process all the bolts and nuts with VeDeshka again (before the replacement itself), after which you can begin dismantling, which is performed as follows:
- Remove the negative terminal from the battery.
- Disconnect the cable from the throttle valve.
- Disconnect all fuel line connections.
- Disconnect the throttle position sensor.
- Disconnect the idle speed sensor.
- Remove the brake booster pipes and crankcase ventilation pipes.
- Remove the receiver.
- Disconnect injection control wires.
- Remove the fuel rail (there is no need to remove the injectors themselves).
- Remove the thermal shield protecting the collector.
- Remove the exhaust pipe.
- Disconnect the intake manifold and remove it.
- Unscrew the exhaust manifold fasteners.
- Remove the exhaust manifold.
- Remove the exhaust manifold gasket.
Installation of a new gasket and a new manifold, as well as reassembly, should be done in exactly the same order, but in reverse order.
It is imperative to replace the gasket when replacing the exhaust manifold - even if it does not look very worn.
In conclusion, it is worth saying a few words about which gasket is better to install instead of a burnt one, because their choice in car dealerships is quite wide. In addition to the original manifold gasket (catalog number 21083-1008081), Trialli GZ 102 0013 and AJUSA 13065200 gaskets have proven themselves to be good.
All of them are produced in Russia and have an extended service life. In turn, the manifold gaskets from the Bogdan company that are often found on sale have an affordable price, but are designed for only 20,000 km.
That is why they are not the best option - it is better to purchase more expensive gaskets, but they require replacement much less often.
Dismantling of collectors
Now comes the turn to remove the intake and exhaust manifolds. Having dismantled them, you can understand whether it is possible to get by with replacing the gasket, or whether the collectors themselves will need to be completely replaced.
The gasket is a consumable item, the purchase of which will literally cost you 50-250 rubles, depending on the manufacturer and region. Services for replacing the gasket at a service station cost more than 1,500 rubles. Add to this the cost of a high-quality gasket and you will get quite a lot of money. Such costs can be avoided if you do everything yourself.
Dismantled unit
Intake manifold
By removing the air filter and carburetor, you will gain access to the intake manifold.
To dismantle it you will need a certain set of tools:
- Ratchet with 10mm head;
- Collar;
- Ratchet;
- Deep head 13;
- Regular head 13;
- Open-end wrench 13.
When everything is ready, you can start working.
- Unscrew a couple of mounting nuts to bend back the platform located under the carburetor.
- Disconnect the hoses that are connected to the intake manifold.
- Remove the six mounting nuts located on the intake manifold.
- Remove the manifold itself from the studs. To do this, simply rock the knot to the sides. It often sticks to the gasket, which causes problems with removal.
- Inspect the condition of the unit. If there is damage, the collector must be replaced.
- If the problem is only with the gasket, put the intake manifold aside for now and start removing the outlet.
An exhaust manifold
To dismantle a graduate you will need:
- Ratchet;
- Open-end wrench 13;
- Socket wrench 13;
- Deep head for 13.
All is ready? Then let's get started.
- Unscrew the four exhaust pipe mounting nuts from our exhaust manifold.
- Pull the so-called pants off the heels and take them to the side. Now you can unscrew three more fastening nuts securing the VK.
- Carefully, without sudden movements or jerks, pull the graduate off the stiletto heels.
- It is not uncommon that during the process of dismantling this unit, the manifold or its mounting nuts become stuck to the seats. To prevent this, treat the assembly with WD40 in advance, let it react, after which there will be no problems with dismantling work.
- If the studs break off during removal, you will need to drill out the old element, make a new thread and install a fresh stud.
Pad
Well, the check showed that the burnt gasket was to blame. Therefore, only it will have to be changed.
Pad
Alas, to get to a simple gasket, it was necessary to remove the air filter, carburetor, exhaust, and intake manifolds. But there is no way without this.
To replace an old, used gasket, you will need:
- Remove the old gasket. Here you may face certain difficulties, since most likely the gasket has become properly stuck and burned to the cylinder head;
- Arm yourself with a thin screwdriver, sharp knives, aerosol solvents;
- Spray the surfaces first, then let it react. It’s better to take your time in order to make your work easier;
- When the product takes effect, begin to gradually remove the old gasket from the surface of the block;
- Do not forget to remove carbon deposits from the mating surface of the cylinder block. Here you will no longer need an aerosol, but full-fledged sandpaper. Do not use coarse-grain sheets;
- Install a new gasket for the exhaust and intake manifolds of your VAZ 2109;
- Assembly of the unit is performed in reverse order. That is, first, both manifolds are installed in place, then the carburetor and air filter are returned to their homeland, the fastenings are tightened properly and the result of the work done is checked in practice;
- Of course, don’t forget about the coolant that was drained in the first stages. By the way, this is a great reason to change it to a fresh one.
Installing a new gasket
It is up to you to ensure that the new gasket has a long service life. To do this, before installation, treat the gaskets on both sides with graphite lubricant. This way you will increase the product’s resistance to temperature changes that it regularly encounters. Similarly, coat the cylinder head studs with graphite lubricant for the same purpose.
Exhaust system design
All parts of the gas exhaust system of the VAZ-2115 car can be easily disassembled, which allows you to replace them yourself, without the involvement of specialists.
Main parts of the gas outlet unit:
- Bracket mounting of the exhaust pipe.
- A gasket located between the pipe and the intake manifold.
- The clamping part of the bracket (represents a plate).
- Pipe for receiving gases from the engine.
- Metalgraphite gasket in the form of a ring.
- Catalyst.
- Rubber mounting pad.
- First (additional) muffler.
- Main muffler.
- Rear mounting cushion.
- Fastening clamp (often called brackets).
The location of most of the listed spare parts is under the bottom of the car, which makes them vulnerable to mechanical damage.
The cause may be not only external damage (most often caused by falling into holes or difficult to navigate places), but also exposure to chemical reagents or the influence of climatic conditions.
How to notice a node malfunction
It is not difficult to determine that it is time to change parts of the exhaust system on a VAZ-2115 with an 8-valve engine. Even a novice car enthusiast can cope with this, since the main signs are the appearance of a strong smell of exhaust gases in the cabin and an increased noise level. Most often, faults are hidden in the additional or main muffler, as well as in the gaskets between the connections, which can burn out over time.
The classification of the most frequently occurring faults is as follows:
- mechanical damage to the muffler;
- burnout of gaskets;
- corrugation burnout;
- loosening of connections at joints;
- cracks in the system pipes.
Problems can be spotted by visual inspection. Experienced specialists recommend removing gas exhaust units for these purposes. This way you can examine them from all sides and notice the slightest damage. After you conduct a visual inspection of the system, you need to buy spare parts and begin repairs. It's easy to do it yourself.
Muffler replacement
Using the example of replacing this component, we will show that it is not difficult to repair the exhaust system and dismantle its components. To work, you will need to install the car in the garage above a pit or drive it onto an overpass. Disassembling this node is not so difficult:
- disconnect the main and additional muffler;
- bend the hooks of the hanging straps;
- remove the brackets;
- remove the main muffler, which is mounted on the cushions.
After this, you will need to reassemble in the reverse order, only instead of the old spare part, hang the new one on the cushions. If the fastenings of the clamp connecting the resonator and the muffler pipe are dirty, clean them with a metal brush.
Before assembling the system, clean the gasket ring thoroughly. You can coat it with heat-resistant sealant to reliably seal the exhaust gases inside the system. The above method of replacing a muffler can also be used in cases where you want to tune your car.
Many car enthusiasts install sports mufflers on their VAZ-2115, which have a qualitatively different sound. In this case, you don’t have to wait for a malfunction to appear. Also, the new muffler can improve the environmental characteristics of the car, that is, after replacing this component, it will release less exhaust gases into the atmosphere. Remember that sport or upgraded mufflers will cost more than the stock replacement part.
If you want to tune your car, get ready to spend a lot of money. Buy only new imported spare parts. You should not try to turn an ordinary spare part into a sports modification using welding. This homemade product will not last long. For the same reason, we recommend replacing entire parts of the exhaust system rather than trying to repair them if malfunctions occur.
Self-replacement
- the car must be driven into the garage;
- hang a lamp with a safety light under the hood;
- Before repairs are carried out, antifreeze must be drained from the tank;
- disconnect the battery terminals;
- pull it out;
- put on a rack;
- disconnect the vacuum booster hose from the receiver;
- also disconnect the hoses of the electric pneumatic valve cover and the ramp pressure regulator;
- disconnect the chips of the throttle sensor, idle air control;
- disconnect the throttle valve cable;
- loosen the clamp on the air supply hose to the air flow sensor housing;
- disconnect it;
- loosen the clamps for attaching the hoses to the throttle pipe and ventilation of crankcase gases on the cylinder head cover;
- remove the hoses in pairs;
- loosen the crankcase ventilation hose clamp;
- remove it from the throttle assembly;
- carry out subsequent work with the cooling water inlet and outlet hoses in the same way.
Note.
Use a 13mm socket to make the work easier, unscrew the 2 nuts from the throttle assembly from the studs. The throttle assembly is attached to the receiver. Note: these nuts must be unscrewed using wrench 3.
The receiver must be removed together with the throttle assembly. In addition, you need to disconnect all inlet and outlet hoses and idle speed sensor chips from the unit. Carefully check to make sure that all fastenings are completely loosened.
Note: it is recommended to understand all the fastening points; you can use threads of different colors. To prevent incorrect connections during assembly.
Note: place the parts in a container so that during assembly you do not find missing spare parts.
Direct exhaust system
Almost all the elements of the exhaust system were purchased by me in the first year after the start of the car modification project. The very first of them was purchased an exhaust manifold ( spider 4-2-1
) in the online store stinger-shop in April 2013. I was originally looking for a stainless steel manifold in the budget price range but couldn't find anything. Although, probably, I didn’t really bother, that’s why I stopped at the stinger store website. Moreover, this particular brand was especially widespread among exhaust systems at that time; I had never even heard of STT at that time, and sites like tuningsport, clubturbo, meta-s acted only as speculators. At least that's how it was in my mind. At the time of ordering, I did not find a section for manifolds made of stainless steel, so I put in the cart “Exhaust manifold / spider 4-2-1 (SPORT) 16 V “Stinger” for cars VAZ 2108, VAZ 2109, VAZ 2199, VAZ 2113, VAZ 2114, VAZ 2115” made according to the description from steel 08 ps. It cost 1800 rubles. Before paying for the order, I asked the store manager about the possibility of making the selected manifold from stainless steel. The answer was yes. After which I paid for the order in the amount of 2800 rubles.
Next, I would like to touch on the issue of the quality of workmanship of the purchased product. Here, as always, I was dissatisfied. Although, if judged objectively, the collector is more likely to correspond to the price-quality ratio.
I had to build a device to install the collector on the grinding machine, which was later used when milling on a milling machine.
Replacement of intake pipe and exhaust manifold gaskets
You will need: a screwdriver, keys “8”, “10”, “13”, “17”, socket heads “17”, “19”, pliers.
1. Remove the wire from the “-” terminal of the battery.
2. Remove the safety bracket...
3. ...turn the throttle valve all the way. Remove the end of the accelerator drive cable from the throttle valve drive sector.
4. Loosen the adjusting nuts of the accelerator cable sheath.
5. Remove the safety cap from the cable end, unscrew the locking nut...
6. ...and disconnect the accelerator drive cable from the bracket.
7. Remove the screw securing the pressure plate of the fuel pipes to the bracket...
8. ...and remove the plate.
9. Unscrew the two nuts securing the fuel pipe bracket to the receiver...
10. ...and remove the bracket.
11. Disconnect the wiring harness connectors from the throttle position sensor and idle air control.
12. Unscrew the nut securing the bracket to the receiver.
13. Loosen the clamp and disconnect the crankcase ventilation hose from the fitting on the throttle assembly.
14. Loosen the clamp and disconnect the vacuum hoses of the brake booster and fuel pressure regulator from the fittings on the receiver.
15. Unscrew the nuts securing the receiver to the intake manifold...
16. ...and remove the receiver from the studs.
17. Remove the receiver gasket.
Note. When installing the receiver, replace the sealing gasket.
18. Disconnect the engine wiring harness block from the injector wiring harness and remove the fuel rail (see “Checking and replacing injectors”).
19. Unscrew the nuts securing the bracket to the intake manifold and the manifold thermal shield...
20. ... remove the bracket,
21. Remove the two screws securing the thermal shield to the intake manifold and remove the thermal shield.
22. Unscrew the two nuts and remove the eye.
23. Disconnect the exhaust pipe from the exhaust manifold (see “Replacing the exhaust pipe”).
24. Unscrew the nuts and remove the intake and exhaust manifolds (see “Cylinder head (repair)”).
25. Install new sealing gaskets for the intake and exhaust manifolds, the exhaust pipe of the muffler, and the receiver.
26. Install the removed parts in the reverse order of removal.
Removing the intake manifold VAZ-2112 16 valves photo, video
Sooner or later, any car enthusiast may be faced with the need to remove the intake manifold on a 16-valve VAZ-2112 engine. This may be needed to carry out incidental repair operations or other work.
The video will tell you how to remove the intake manifold, and also tell you about all the subtleties and nuances
Intake manifold removal process
General view of the intake manifold
Dismantling the intake manifold is carried out with the car cooled down for safety reasons. So, this operation can take about an hour and will require some knowledge of the car’s design, namely the injection system. So, let's consider the sequence of actions for dismantling the unit:
- We dismantle the throttle.
To do this, it is not necessary to disconnect all the pipes and pipes; it is enough to disconnect the unit from the manifold and move it to the side. Of course, at the same time, it is still recommended to remove the throttle valve completely for cleaning. Location of the throttle valve on a VAZ-2112 - photo of an editorial car - Disconnect the throttle cable from the intake manifold.
- Disconnect the wires from the ignition coils.
This is easy to do; you just need to disconnect the connectors. Removed the wires and coil - Disconnect the camshaft position sensor wires.
- Disconnect the wiring harness from the absorber purge valve.
- Disconnect the brake booster hose from the intake manifold.
Unscrew the clamp and disconnect the vacuum brake booster tube - Unscrew the clamp and disconnect the crankcase ventilation pipe.
Unscrew the crankcase ventilation tube clampUnscrew the clamp and pull the tube out of its seat.
- Unscrew the self-tapping screw securing the guide tube of the oil level indicator.
Using a Phillips screwdriver, unscrew the oil level indicator guide tube - We take out the dipstick along with the guide tube.
Dismantling the dipstick - Using a socket or a 10mm wrench, unscrew the nuts securing the intake module and the ignition coils of cylinders 1, 2 and 3.
Unscrew the ignition coils and receiver - We dismantle the ignition coils of cylinders 1, 2 and 3.
- Now, you can unscrew the direct fastenings of the intake manifold to the cylinder head.
Unscrew the bolts securing the manifold to the block head - Move forward and remove the manifold.
Pull the collector towards you and dismantle it
It is worth noting that installation of the intake manifold is carried out in the reverse order and does not require any additions or changes.
Video
Dismantling the intake manifold of a 16-valve VAZ-2112 is quite easy and simple. Of course, it’s worth understanding at least a little about the design of the main power unit, but if desired, any car enthusiast can remove this unit.
Tips for replacing the intake manifold
Huge temperature changes are the main problem faced by the exhaust manifold and the gasket, for which it is removed. The collector itself is made of a special grade of cast iron; it can withstand high temperatures (up to 800-900 degrees), however, these are critical values, after which the collector may warp or crack.
Exhaust manifold VAZ-2114
Replacing or dismantling the VAZ-2114 exhaust manifold is necessary in the following cases:
- Mechanical damage to the collector.
- Warping and loss of tightness at the junction with the cylinder head.
- Burnout of the gasket between the head and the manifold.
- The appearance of cracks as a result of engine overheating.
- Replacing the collector with a device of a different configuration, adapted to a more severe operating mode.
In the event that we are not going to participate in high-speed races for the prize of the head of the regional traffic police, replacing or dismantling the collector may be necessary in a number of cases.
There are a number of symptoms that will indicate that you need to prepare to remove the exhaust manifold:
- increased noise level in the engine compartment, the engine produces a characteristic, loud sound in any operating mode;
- breakthrough of exhaust gases into the engine compartment and sometimes into the cabin;
- reduction in engine power due to a mismatch between the exhaust gas outlets in the cylinder head and in the manifold.
Many people decide to replace the standard manifold with a “tuning” one, made of stainless steel and having a different configuration, thereby wanting to increase engine power and reduce the resistance that the standard manifold provides to exhaust gases. As a rule, the most common reason for dismantling a unit is gasket burnout.
Exhaust manifold gasket
Repair of the exhaust manifold on a VAZ 2109 carburetor
Stages of preparation: Dismantling of collectors
The exhaust manifold is a component of the exhaust system that carries out the process of removing exhaust gases from the cylinders of the power unit into the exhaust pipe.
If the collector malfunctions, the culprit may be either the element itself or its gasket. Replacing the exhaust manifold (exhaust manifold) gasket is a common procedure when repairing a VAZ 2109.
Appearance of the unit
Preparation stages
To replace the manifold or its gasket, in any case you will have to dismantle the VK. But before you get to the element you are looking for, you will first need to go through some preparatory steps. Namely, tighten the fasteners, and then remove the air filter and carburetor if the first stage does not help.
Replacing the VAZ 2114 manifold
The collector (resonator, “pants”) is an engine attachment; it is a closed reservoir of complex shape with a common chamber (receiver) and outlet pipes. Depending on the nature of the functions performed in a car, there are two types of manifolds - exhaust and intake.
The main task of the intake manifold is to supply air from the distribution system, mix it with fuel and transform it into an air-fuel mixture of the desired consistency, followed by a uniform supply to the combustion chamber of the cylinders. Therefore, the main task of the exhaust manifold is to collect exhaust gases from the engine cylinders into a single pipe.
Self-tuning of the VAZ-2109 exhaust manifold
By definition, the exhaust manifold of the “nine” (VAZ2109) is one of the structural elements of the exhaust system, the main purpose of which is to remove exhaust gases through the exhaust pipe from the engine cylinders.
It should be remembered that the peculiarity of tuning such an element lies in the complexity and specificity of the process, but if you carefully understand the nuances, it is possible to do it yourself. A new manifold can be installed, but it must meet certain requirements.
Before installation, special attention needs to be paid to such characteristics of the “spider” as: shape and length, unlike the factory ones that appeared not so long ago. In fact, the presence of sharp corners with various curvatures is unacceptable in the design of the pipes. If they are present, this is fraught with increased fuel consumption and the power of the car decreases.
It is useful to know that all modern engines are modified in such a way that, regardless of the distance, the length of all channels in the exhaust manifold is the same.
If such principles are strictly followed, the result results in a lot of advantages, namely: power increases significantly due to the ability to control the direction of the flow of the air-fuel mixture. The “Helmholtz” resonance is also eliminated, and the spider functions much better thanks to the countercurrent formed in the channel (with the condition of a closing valve).
Moreover, due to the use of this latest technology, many tuners that have adopted it (by changing the geometry of the manifold) provide the ability to turn off certain engine cylinders. However, before you start tuning, it is first advisable to understand the design of the spider and make sure of the need to improve the spider of the “nine” (VAZ 2109), after which you can begin tuning.
In general, tuning consists of polishing the outer and inner surfaces of the collector, as a result of which not only the parameters are improved, but the element itself acquires a beautiful appearance. In the case of ideally smooth channels, the movement of gases is characterized by directionality and efficiency. In addition, due to accelerated purging, the cylinders of the engine as a whole are cooled much more efficiently.
The main signs and causes of failure of the VAZ 2114 intake manifold
- The main symptom of a failed intake manifold is a sudden loss of car engine power.
- at the same time, there is an increase in fuel consumption , with a deterioration in traction and a drop in engine performance.
- Often a problem is indicated by a missing stud in one of the manifold flanges. It simply comes off when the collector goes “screw”, that is, due to temperature changes, for example in winter, or over time (average service life is 7 years), the collector begins to bend along the plane, and the pin simply “spits out”, pulls out .
- Due to the fact that the manifold has “leaded”, a crack may form and, as a result, exhaust gases from the engine escape, and the manifold must be replaced.
Tips for replacing the intake manifold
Also, do not neglect the procedures for repairing and cleaning the intake manifold. The stability of the VK is very important for the normal functioning of the car. A certain vacuum is formed in the intake manifold, which is the source of drive force for many systems: cruise control, windshield wipers, vacuum brake booster. In the event of a collector malfunction, this threatens the failure of one or more of the above systems.
To avoid the appearance of cracks and distortions, you must use a torque wrench to tighten the nuts on the manifold and follow the tightening order of 20.9-25.8 (2.13-2.63) N_m (kgf_m). As a rule, it is recommended to start tightening the nuts from the center and gradually move towards the periphery, alternately tightening the nut on one side or the other.
To work on removing and replacing the VAZ 2114 intake manifold on an 8-valve engine, we will need:
- keys “for 8”, “for 10”, “for 13”, “for 17”;
- “cardan” type nozzle and socket heads “17”, “19”;
- magnetic screwdriver;
- screwdrivers, pliers;
- new intake manifold.
By the way, the price for an intake manifold from a VAZ (article 21110100801420) will be 1,350 rubles.
The cost is indicated for spring 2022 in Moscow and the region.
Loosen the clamp and disconnect the crankcase ventilation hose.
Drain the coolant. Remove the hose from the cylinder head cover pipe.
We remove the air filter housing from the car by disconnecting the mass air flow sensor.
Remove the supply hose to the vacuum fuel pressure regulator.
Unscrew the two nuts securing the fuel pipe bracket to the receiver and remove the bracket.
Disconnect the vacuum booster hose from the receiver.
In order not to confuse the connection of the fuel pipes, we mark one of the fuel lines with a marker.
Using two 17mm wrenches, unscrew the fuel line fittings.
We unscrew the six nuts securing the receiver to the intake manifold and the stud on the receiver, and then remove the receiver itself.
Disconnect the wiring harness connector from the crankshaft position sensor.
Unscrew the two bolts and remove the fuel rail.
We unscrew the seven nuts in front securing the manifold to the thermal shield...
Unscrew the two nuts securing the thrust rods, first on the left side...
...then on the right side.
To avoid losing the washers from the manifold studs, remove them using a magnetic screwdriver.
Let's remove the intake manifold and replace it with a new one. We assemble everything in reverse order.
Removing and installing the intake manifold
Van046 Blog Refinement of the cylinder head of the VAZ classic
The intake manifold of the VAZ 2109-2108 has to be changed in exceptional cases, but it needs to be removed more often, for example, when completely disassembling the engine, or, for example, when replacing the gasket between two manifolds and the cylinder head.
First of all, you need to do the following:
After all the work described above has been done, we can proceed further and for further actions we will need:
- open-end wrench 13
- the head is deep and regular at 13
- ratchet handle and crank
- extension
- head 10 with ratchet
The first step is to unscrew the platform that is located under the carburetor by unscrewing the two nuts securing it, as shown below:
Then you can bend it back:
We also disconnect all the hoses that fit to the intake manifold and then you can begin to unscrew the fastening nuts, of which there are 6 in total, shown in more detail below in the photo:
All that remains is to remove the collector from the studs, slightly shaking it from side to side, as it sometimes sticks tightly to the gasket:
Usually, both manifolds have to be removed at once, after which the gasket between them and the cylinder head at their junction must be changed, but this procedure will be discussed in the following articles. Before installation, be sure to thoroughly clean the surface, removing traces of the old gasket. For this I used a special bodyaholic from Ombra “Spray for removing gaskets”, which removes all slag from the surface in 15 minutes:
And finally you can sand it with the finest sandpaper - zero sandpaper:
Installation of the intake manifold occurs in the reverse order. If anyone is interested in the price of this part, it is about 1,500 rubles, but the same thing, only used, can be easily found for 500 rubles at any disassembly site!
