Print this article Font size 16
Carburetor engines have been obsolete for quite some time. But today on our roads it is not difficult to find cars equipped with this type of engine. The VAZ 2109 model is no exception.
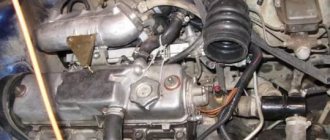
Nine engine
Having a nine carburetor at your disposal, you can even convert it into an injection car on your own.
Before you decide to take such a step, be sure to study the strengths and weaknesses of each engine type, and also determine in which mode you use your car most actively. Your final decision largely depends on this.
Pros and cons of the injector
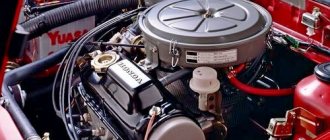
The injector provides fuel injection either into the air stream or into the combustion chamber. Numerous sensors monitor air flow, engine speed, knock and crankshaft position. The control unit processes data from sensors and controls the injectors, ensuring the right amount of fuel is supplied at the right time. The injector provides better mixing of air and fuel compared to a carburetor. Therefore, the power increases slightly.
Important
Injection engines are more complex, but the composition of the air-fuel mixture better suits any operating mode.
Let's sum it up
Modern cars all have fuel injection. Carburetor cars, which were too voracious and very undynamic, have not been produced for a long time. Today, the injector has become the main type of fuel injection in gasoline engines. Until automotive technology comes up with anything more interesting, it is worth using this particular equipment option. When choosing an injector for your car, you can select equipment removed from a high-quality foreign car. This will provide even more interesting opportunities for operating transport and will actively change the attitude towards technology.
It is important to use high-quality equipment, otherwise installing an injector will turn out to be another problem for your car. If you want to operate your vehicle without problems, you need to get rid of the carburetor as a relic of the past. This unit will not be the most reliable and far from the most successful for every motorist. So buy injection equipment and modernize your vehicle. However, it is worth following innovations in laws and checking whether such conversion options are included in the list of prohibited ones. What do you think about installing an injector instead of a carburetor?
What is the difference between an injector and a carburetor?
The fuel system in a car is designed to ensure an uninterrupted supply of the fuel mixture under any operating conditions of the car, and its engine must work equally well at idle speed, and at increased loads, also during sharp acceleration. What is the difference between an injector and a carburetor? On a carburetor car, the supply of fuel (gasoline) and its mixing with air is carried out using mechanics, while an injection vehicle is controlled electronically.
The carburetor system (CS) includes the following elements:
- gas tank;
- mechanical fuel pump;
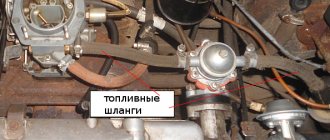
- fuel lines (pipes and hoses);
- carburetor;
- air filter with housing;
- fuel filters.
Due to the operation of the gas pump, fuel from the tank through the main line, passing through the filters, enters the carburetor unit (CU), where it is mixed with air in the required proportion, and then enters the cylinders and burns under pressure. Often, to prevent excess pressure, systems of this type are equipped with a check valve with an additional line for draining gasoline into the gas tank, also called “return”.
An injector or distributed injection system (MIS), unlike a CS, does not have a mechanical unit for mixing fuel with air, but more precise control and dosing is provided by an electronic control unit (ECU or controller). Depending on the modification, the SRV circuit may differ slightly, but the principle is the same for all such systems; it usually includes:
- gasoline tank;
- fuel filters;
- electric fuel pump (submersible or remote);
- a line consisting of tubes and hoses;
- injectors (one for each cylinder);
- throttle assembly;
- fuel rail;
- check valve;
- ECU;
- wiring;
- air filter with housing;
- idle air control (or IAC);
- various sensors - air flow (flow meter, mass air flow sensor), temperature (DTOZh), ambient air (DTOV), detonation (DD), throttle valve position (DPDZ), camshaft (DPRV) and crankshaft (DPKV) shafts.
Also, the SRV is often supplemented with an absorber, an idle speed solenoid valve (EMV), and lambda probes (oxygen sensors). Over time, the injector circuit only becomes more complex, it is “overgrown” with an increasing number of sensors and control systems. Having figured out what the difference is between these two fuel systems, now let’s look at how you can install a different type of vehicle on a car.
Carburetor. Advantages and disadvantages
Let's start with the negative points. These include:
- Such engines have not been installed on production cars for a long time. In Europe, due to environmental requirements, carburetors are blacklisted. That is, they are prohibited because they heavily pollute the atmosphere;
- At high speeds, the engine's capabilities drop significantly. Torque does not reach the desired levels. But at low speeds it is effective and allows you to accelerate well from zero to hundreds;
- When overtaking, the carburetor is a pain. It is problematic to overtake cars normally and confidently. Especially considering the power of the carburetor nines;
- High fuel consumption when compared with injection engines. On average, a nine with a carburetor in normal mode consumes about 8.5-9 liters of fuel per 100 kilometers;
- The air damper is controlled manually. The exception is some versions of the latest samples, where automatic devices have been installed. Some motorists claim that manually controlling the throttle in winter has its advantages, as it allows you to feel the engine. But only experienced drivers can understand this.
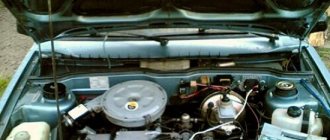
Nine carburetor
But let's not just talk about the bad. The VAZ 2109 with a carburetor also has positive qualities:
- The cost of a carburetor is much cheaper than an injection engine;
- Engine maintenance costs less, and the work itself is easier to perform if you repair it yourself;
- Fans of carburetors claim that the absence of control units and microcontrollers is an undeniable advantage. Although one can argue with him;
- If the engine fails even 100 kilometers from the nearest settlement or service station, it is not a problem for experienced drivers, since repairs can be carried out even in the field. But this will require the availability of appropriate tools and passenger assistance.
Swapping a couple of armored pipes and doing a purge is a simple option for quickly repairing a carburetor yourself. The injection engine does not understand such tricks.
Article on the topic: Adjusting the steering rack on a VAZ 2109
Injector. Advantages and disadvantages
In short, all the advantages of the injector are the disadvantages of the carburetor, and all the disadvantages are the advantages of the carburetor.
Injection nine
The key features of injection engines include:
- Injectors are more environmentally friendly and meet the requirements for emissions of harmful substances;
- Although the torque is insufficient at low speeds, it makes overtaking easier at high speeds. The engine seems to get a second wind;
- Injector maintenance costs are higher;
- For normal operation of such an engine, clean fuel is needed. The carburetor “feeds” on everything;
- To check faults, it is necessary to perform diagnostics, which is time-consuming and expensive;
- The injector consumes less fuel. The average is 6-7 liters per 100 kilometers;
- Almost all systems function through computer control, therefore, when working correctly, the engine operates as efficiently and economically as possible;
- It is possible to install HBO on the injector. But with a carburetor, such a step is fraught with a number of difficulties.
First start-up and testing of all systems of the new technical unit
After installing and configuring all the equipment, it is worth once again visually checking the correct installation of each module and checking whether any important parts are clogged. After this, you can start the car engine. During the first start, do not touch the gas pedal; the computer itself should increase the speed at the right moment. If the start-up has occurred, then you should make the following observations while the car is running:
- monitor the revolutions - if you have a tachometer, this will help determine the normal operation of the computer; until the car warms up, it holds 1100 revolutions, then 900-950;
- also monitor the smooth operation of the power unit; if the engine is running unevenly, you will have to inspect the system, clean and sort out each module;
- you should let the car warm up to operating temperature, and then listen to the engine, monitor the fan turning on and other vehicle functions;
- It would also be a good idea to perform a test drive, starting off very carefully and listening to the operating characteristics of the engine and other equipment; It’s not worth driving far during a test ride, but you’ll have to circle around a few kilometers to obtain the necessary information about the operation of all systems.
After installing the injector, you can also install a small on-board computer to determine fuel consumption, engine temperature, distance traveled and other important parameters. This will allow you to always be aware of what is happening with your car. It is important to use up-to-date data to always keep control of everything that happens to your car. We offer a short video about the advantages of installing an injector on a classic VAZ engine:
Why change the carburetor?
Let's start with the fact that no one has been installing carburetor engines throughout the civilized world for a long time. Entry into the countries of the European Union in such vehicles is prohibited for reasons of environmental safety. There are a number of other significant arguments:
- a significant drop in engine power at high speeds;
- problems arise when overtaking. Passing cars on the highway in a car with a carburetor engine is, in general, a complete nightmare (especially taking into account the modest capabilities of the VAZ-2109);
- significant fuel consumption compared to an injector;
- “minor” inconveniences, for example, manual control of the air damper, etc.
Of course, you can treat everything philosophically and find positive aspects even where there are none. For example, with the same manual damper control. Some drivers claim that in winter conditions this “function” is a plus, it allows you to “feel” the engine. But only an incorrigible optimist can agree with such a statement.
Chassis
The suspension allows you to soften shocks to the body that occur while driving. Not only the comfort of movement, but also safety depends on its operation. The car should feel confident on the road and also withstand potholes and bumps well. The suspension helps absorb impacts, therefore extending the life of the car body. Tuning the VAZ 2109 suspension allows you to improve its characteristics, therefore it is relevant and in demand.
You can improve the chassis as follows:
- replace shock absorbers with gas-oil ones. It is recommended to buy shock absorbers and springs as a set. Monroe and Plaza sports shock absorbers are suitable for standard springs. For aggressive highway driving, Koni Sport or Bilstein Sport shock absorbers are more suitable. To improve the car's handling, it is enough to install a Monroe Gaz-Matic or Plaza;
Improvement of the car brake system is as follows:
- replacing rear drums with disc brakes;
- installation of a larger disc-caliper pair;
- replacing the master brake cylinder. This must be done with the obligatory implementation of the two previous options, since the standard cylinder will not be able to cope with the task.
What to prepare to change
The whole process will take you about a week, provided you work 3-4 hours a day. Therefore, prepare your garage in advance and buy everything you need. You can assemble the injector on different ECU controllers, but in the case of the VAZ-2109, the January 5.1.1-71 model is better than others. Available domestic spare parts can be used for it, and it does not use an adsorber and an oxygen sensor.
Advice: It is better to buy all components in a good store with experienced staff, as you may need help in choosing the right spare parts. If you have experience in repairs and want to save money, then shop at a disassembly store.
List of components required for replacement
| 1 | Oil pump (with mounting for PCV sensor) |
| 2 | bracket |
| 3 | V-belt |
| 4 | Wiring |
| 5 | Thermostat |
| 6 | Ignition system module |
| 7 | Upper and lower air filter housing |
| 8 | Fuel and air cell |
| 9 | Intake manifold |
| 10 | Two air filter supports |
| 11 | Throttle pipe |
| 12 | Receiver |
| 13 | Gasket for throttle pipe |
| 14 | Fuel pressure control |
| 15 | 4 nozzles |
| 16 | Injector ramp |
| 17 | Intake manifold gasket |
| 18 | Mounting kit for receiver and air filter |
| 19 | Ramp tube set |
| 20 | Throttle cable bracket |
| 21 | Throttle cable |
| 22 | Hose |
| 23 | Air flow sensor |
| 24 | Fuel hose kit |
| 25 | Electric fuel pump |
| 26 | Controller January 5.1.1-71 |
| 27 | Knock sensor |
| 28 | Crankshaft pulley |
| 29 | Crankshaft position sensor |
| 30 | Gas tank |
| 31 | Plug with gasket |
| 32 | temperature sensor |
| 33 | Fuel pump pressure ring |
| 34 | Generator with mountings |
Also pick up bolts, nuts and clamps from the store that you will need for the job.
Tools
The repair will consist not only of dismantling some components and mechanisms. In some cases, it will be necessary to make changes to the design of cylinders and other parts.
From the tool you will need:
- Set of wrenches.
- Flathead and Phillips screwdrivers.
- Good drill.
- Hammer and chisel.
- Rust remover.
How to install an updated system
To install the plug to the block system head, based on the injection mechanism, install the positive wire. Install the manifold and injectors located on the in-line rack, the receiver and the throttle component. The throttle cable is taken as an elongated sample.
The fuel structure in the new model is placed at the bottom of the body, after which pipes and purifiers are installed. Next, install a new tank and connect the product to the system. To check the operation of the nozzles and their condition in relation to leakage and damage to the integrity of the material, blow out the internal plane with a pump. Then install the ramp, sensors and all the equipment based on electrical and high-voltage activity, the starting module, to the collector.
When the installation of the air filter is completed and all operations go perfectly, the car is started. The modernization can be considered successful if the VAZ-2109 starts immediately, on the first try.
Last preparation.
We begin the work by washing the gas tank, drying it and installing the gas pump into it.
After this, you need to align the arrows on the tank and the fuel pump. After this, check how the fuel level sensor float moves. It should be very easy to move. Cover the tank with mastic or a special anti-corrosion compound.
How to remake: step-by-step instructions
Before starting work, wash the car thoroughly and remove dust and dirt from around the engine.
- In the rear of the car we remove the old carburetor fuel system.
- Pull out the gas tank and fuel pipes.
- We screw on the new bracket and use it to secure the new injection lines.
We install the bracket in its original place and secure the lines
- We install the fuel filter along with hoses.
We fix the fuel filter with hoses
- We attach the fuel pump to the injection gas tank.
- We go into the engine compartment and remove the ignition.
- We disconnect the wires that go from the sensors to the ignition braid.
- We pull out the old ignition tee and install an injection tee in its place. Before doing this, completely drain the antifreeze from the system.
We install the injection ignition tee in place of the carburetor
- In place of the distributor, we make a plug with a seal and treat it with sealant.
- Remove the carburetor along with the intake manifold.
We dismantle the old carburetor along with the manifold
- We replace the gasket and install a new injection manifold.
We install the injection manifold in place of the carburetor
- We install the injectors on the ramp and secure it to the manifold.
- We connect the hoses and install the receiver.
We install the injection receiver and connect the hoses to it
- If your model has an oil pump without a casting, then it also needs to be replaced.
- The generator on the nine must be replaced, but the pulley itself is suitable for the new system and can be left.
- Instead of a carburetor ignition cable, we install an ECU wiring cable.
- We connect the wiring to the controller and the motor.
- In our case, the fuel sensor will remain the same; you just need to connect it to the new pump.
- Turn on the ignition and check the operation of the fuel pump. The entire fuel system must be sealed and leak-free.
- We replace the carburetor module with an injection one.
We remove the carburetor ignition module and install the injection module in its place
- We install a new ignition system (spark plugs and module).
- We install the air filter.
- Drill a hole for the knock sensor (depth 16 mm).
- We start the engine and check its operation.
This is interesting: The engine does not develop power: what to do?
How to replace the generator on a VAZ 2108-VAZ 21099?
Removal: You will need to remove the generator from the bottom of the car, but there is usually a crankcase protection at the bottom, so you will definitely need to remove it, as soon as the bolts securing the protection are unscrewed and it is removed, remove the minus terminal from the battery (How to do this, read “here in this article”, in paragraph 1) and first of all, disconnect the wiring from the generator (two terminals are attached to it and a block of wires is connected in addition, to disconnect the terminals, you will need to unscrew the nut that secures them, see the large photo, but you are near the block you will find it, you just need to pull it out by hand), immediately after which loosen the upper nut of the adjusting bar, and then the lower one a little (see small photo) and as soon as this is done, move the generator by hand closer to the engine and remove it from it the belt that is put on it, but that’s not all, and until the generator is removed, all that remains is to completely unscrew only three bolts, one is the one that secures the adjustment bar (Indicated by a blue arrow, you will have to completely unscrew it), and the other two are located at the bottom ( More on them a little later, namely in paragraph 2).
Note! When the belt is removed, take it out and inspect it, under no circumstances should there be traces of oil or other types of liquids on it, and it should not be cracked or have any obvious defects, otherwise the belt will need to be replaced with new!
2) At the very bottom of the generator (You will have to crawl under the car), you will find two bolts, but remember, one of them is long and the other is short, remember where each one is wrapped, so that later you do not match them with each other, but immediately wrap them on those places where needed, well, both bolts must be unscrewed, and when they are completely unscrewed, carefully remove the generator and place it on the ground or wherever you need it.
Installation: The new generator is installed in place of the old one in exactly the same way, but just don’t forget to unscrew the nut that secures the adjusting bar on the generator and move this bar to another one, and that’s all in essence, the replacement of the generator on the car has been completed successfully.
Additional video clip: To see in more detail the process of how the generator is checked for serviceability using a device such as a multi-meter, you can watch the video clip located just below:
Perhaps you shouldn’t install a carburetor on a fuel-injected car
If your car has a fuel injection system, then you own a more modern vehicle, and installing a carburetor will take you one step back in the evolution of cars. Of course, the carburetor system also has its advantages, but they are rather fragile. Moreover, the quality of current gasoline is designed specifically for fuel injection. Let's look at certain disadvantages of replacing an injector with a carburetor:
- if you decide to carry out such a process, your car may begin to consume more gasoline;
- the carburetor risks reducing the car’s power by 5-7 percent of its original potential;
- the unit can be configured exclusively for direct injection, some of the fuel can fly out into the pipe;
- you will have to abandon the use of normal fuel filters, placing cheap barrels under the hood;
- You will also have to spend a lot - buying a carburetor, as well as other spare parts for the implementation of the process, will cost a lot of money.
In terms of maintenance, carburetors are no cheaper or easier than injectors. Today, cleaning the injector system nozzles is inexpensive, since every service station has special equipment to perform these tasks. You may think of an injector as an inefficient, delicate, and over-designed component in your car, but the global auto industry doesn't think so. This unit saves fuel and allows you to slightly increase the engine potential
Carburetor instead of injector, and vice versa: pros and cons of exchange
Let's start with the good:
- Ecology. The installation of the injector complies with at least the Euro-2 standard, that is, your car will pollute the atmosphere less;
- The owner of an engine with an injector forgets about the painful (and, sadly, regular) procedures for adjusting the idle speed screws, flushing, and other “delights” of the carburetor;
- Fuel consumption is reduced;
- You are no longer dependent on the ambient temperature;
- The re-equipment improves the throttle response of the power plant, especially at the bottom;
- The risk of vibration and detonation is reduced, which has a positive effect on the service life of the motor.
- The first and most important problem is finances. Installing an injector (even with your own hands) is a costly undertaking. A lot of additional components and parts are required;
- The upgrade will take several days (again, if you work alone). All this time you are left without a car;
- You may have to switch to higher octane fuel (at a higher cost). Although this problem is offset by reduced gas mileage;
- Converting a carburetor to an injector is a change in the design of the vehicle. That is, either you ride at your own peril and risk, until the first technical control post, or you spend time and money on legitimizing the procedure.
Converting a carburetor to an injector
VAZ 21093 injection engines
It is possible to do this. As promised, we provide instructions. The alteration can be carried out in your own garage, preferably with an assistant.
An object
The object of modification can be not only the VAZ 2109, but also the G8, as well as the VAZ 21099 (cars with carburetor engines). The goal and objective of the operation: to convert the unit into a 16-valve injector by installing a cylinder head from a VAZ 2112. Already at the stage of completing the conversion, without even adjusting the ECU, a big difference is felt. The dynamics of the car increases, the car behaves differently on the highway, and gas consumption decreases. On the other hand, the car's performance deteriorates at low speeds, but they are compensated by improved traction at high speeds (after 2000 rpm).
Note. Any owner of a “nine” will be glad that now his car will show the same acceleration in 4th speed as in the past in 3rd. If only the road is straight, then the “injector” will show itself and easily reach the level of 5000 rpm.
Preparation
The operation, of course, requires proper preparation. The following components should be, as they say, at hand:
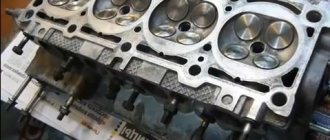
- A cylinder head from a “two-piece”, equipped with a receiver and manifolds;
cylinder head VAZ 2112
- Special knock regulator (sensor);
- Throttle pipe with throttle position regulator;
- Mass air flow sensor and much more (a detailed list can be read or downloaded from other articles on our website).
Rework
To replace a carburetor with an injector yourself, be sure to arm yourself with the following components:
- Cylinder head from VAZ 2112 with receiver and manifolds;
- Knock sensor;
- Throttle pipe with throttle position sensor;
- Mass air flow sensor and a number of other elements.
Replacement kit
When everything is ready, you can start working.
- Remove the old cylinder head. Plus, remove all attachments in the fuel assembly, gas tank and ignition system.
- Remove the alternator, thermostat, pulleys and belts.
- Install a new gas tank with a pump, borrowed from a donor - an injection VAZ.
- Remove the carburetor and ignition system components that need to be replaced.
- Disconnect the cooling system pipes and hoses. Here, install a completely new kit from the injector.
- Remove the pan.
- Install new pistons from an injection donor and connecting rods at 10. Standard carburetor components are not designed for an injection compression ratio. Plus there are special recesses for other valves.
- Install a new unit with an underflow on the cover for the DPKV, replacing the standard oil pump. If you can remove the cover, then only that will be replaced.
- After removing the old cooling system pipes, install new ones. The best solution is to replace the entire set. Buying it won't really impact your overall budget.
- Prepare everything necessary to mount the 16 valve head. The fasteners match, only the bolts from the old head are long and need to be shortened. Plus, don’t forget to make a size 12 hole in the new head.
- Install new fuel lines from the donor.
- Connect your new gas tank to the lines.
- Route the wiring from the control unit to the fuel pump. You can use old fuel level regulators from a carburetor car.
- Cut a hole in the wall of the engine compartment through which the wiring will be routed. This way you won't have to make the standard wires longer.
- Install the knock sensor by drilling a hole in the block and tapping a size 8 thread.
- Be sure to replace the water pump using a unit from donor 2112.
- Get a new crankcase breather and oil dipstick. Install them instead of the previous ones.
- Install a new cylinder head. Just don't forget to change the gasket, which corresponds to a different head.
- Install a thermostat borrowed from a VAZ 2112.
- Connect the coolant pipes.
- Remove the rear timing cover and rollers. The pulleys from 2112 are dismantled. The belt must be installed in accordance with the marks.
- Install the new generator along with the drive. For the new generator, the upper fasteners will remain intact, since they are not provided for by the design of the carburetor VAZ 2109. Therefore, fasten the pair of lower mounting bolts as securely as possible.
- Place all the sensors in their new places.
- Seal the valve covers with a good quality sealant.
- Assemble the ignition module, wires, spark plugs and other components.
- Install the air filter.
- Get your exhaust system back to normal. The muffler is often left stock, but the resonator and other components are taken from the donor.
- The wiring is connected to the dashboard and the lock.
- Fill in new oil, refuel the car with high-quality fuel.
- Start the engine and take it for a test drive.
What you can get
By converting the carburetor into an injection car, you can get improved technical and dynamic characteristics. We offer you a comparison of the parameters of the two motors.
| Characteristic | Carburetor | Injector |
| Cylinder diameter | 76 millimeters | 82 millimeters |
| Engine power | 64 kW | 78 kW |
| Fuel consumption in the city and on the highway | 9/8.7 liters per 100 km | 9.5/7 liters per 100 km |
| Acceleration from 0 to 100 km/h | 16 seconds | 13 seconds |
| Maximum speed | 148 km/h | 155 km/h |
Converting a carburetor to an injector is a serious step in modernizing your VAZ 2109. Despite the apparent complexity, the process can be done even with your own hands. But only if you have sufficient experience.
Loading …
Comparative characteristics for VAZ-2109
| Specifications | Injection engine | Carburetor engine |
| Cylinder diameter (mm) | 83 | 76 |
| Motor power (kW) | 78 | 64 |
| Average fuel consumption (l/100 km): | ||
| around town | 9 | 10 |
| along the highway | 7 | 9 |
| Acceleration to 100 km/h (sec.) | 13 | 16 |
| Maximum speed (km/h) | 160 | 145 |
Perhaps there are also personal reasons to convert your VAZ-2109? For example, there was a desire to rummage through the car for my own pleasure. One way or another, if you firmly decide to change the carburetor to an injector, move on.