Domestic cars do not have an ideal design, but they provide a lot of opportunities for successful modification of many components and endless tuning. That's why the VAZ-2109 is considered a good option for those who like to repair, modernize and make their dream car come true.
In skillful hands, the good old “nine” will sparkle with new colors, and all this can be done with your own hands in your own garage.
Carburetor. Advantages and disadvantages
Let's start with the negative points. These include:
- Such engines have not been installed on production cars for a long time. In Europe, due to environmental requirements, carburetors are blacklisted. That is, they are prohibited because they heavily pollute the atmosphere;
- At high speeds, the engine's capabilities drop significantly. Torque does not reach the desired levels. But at low speeds it is effective and allows you to accelerate well from zero to hundreds;
- When overtaking, the carburetor is a pain. It is problematic to overtake cars normally and confidently. Especially considering the power of the carburetor nines;
- High fuel consumption when compared with injection engines. On average, a nine with a carburetor in normal mode consumes about 8.5-9 liters of fuel per 100 kilometers;
- The air damper is controlled manually. The exception is some versions of the latest samples, where automatic devices have been installed. Some motorists claim that manually controlling the throttle in winter has its advantages, as it allows you to feel the engine. But only experienced drivers can understand this.
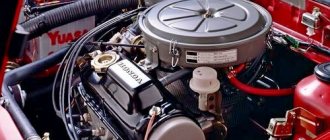
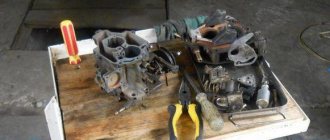
Nine carburetor
But let's not just talk about the bad. The VAZ 2109 with a carburetor also has positive qualities:
- The cost of a carburetor is much cheaper than an injection engine;
- Engine maintenance costs less, and the work itself is easier to perform if you repair it yourself;
- Fans of carburetors claim that the absence of control units and microcontrollers is an undeniable advantage. Although one can argue with him;
- If the engine fails even 100 kilometers from the nearest settlement or service station, it is not a problem for experienced drivers, since repairs can be carried out even in the field. But this will require the availability of appropriate tools and passenger assistance.
Swapping a couple of armored pipes and doing a purge is a simple option for quickly repairing a carburetor yourself. The injection engine does not understand such tricks.
Injector. Advantages and disadvantages
In short, all the advantages of the injector are the disadvantages of the carburetor, and all the disadvantages are the advantages of the carburetor.
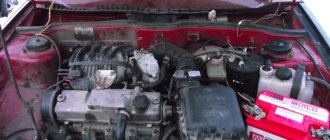
Injection nine
The key features of injection engines include:
- Injectors are more environmentally friendly and meet the requirements for emissions of harmful substances;
- Although the torque is insufficient at low speeds, it makes overtaking easier at high speeds. The engine seems to get a second wind;
- Injector maintenance costs are higher;
- For normal operation of such an engine, clean fuel is needed. The carburetor “feeds” on everything;
- To check faults, it is necessary to perform diagnostics, which is time-consuming and expensive;
- The injector consumes less fuel. The average is 6-7 liters per 100 kilometers;
- Almost all systems function through computer control, therefore, when working correctly, the engine operates as efficiently and economically as possible;
- It is possible to install HBO on the injector. But with a carburetor, such a step is fraught with a number of difficulties.
Using a unit from a foreign car
- Japanese injection engines from Mitsubishi Lancer with a volume of 1.5 liters and a power of approximately 100 horsepower, quite economical and with excellent dynamics;
- Korean engines from Hyundai Accent are very repairable, but due to incompatibility you have to change the engine along with the gearbox;
- German engines from Audi A80, made in the 90s.
It is important that the Honda Civic was very close to the VAZ 2109 in terms of weight and dimensions. Honda had a total curb weight of 965 kg, and VAZ 2109 - 940 kg. The engine provided the Honda Civic with acceleration to hundreds in 9.6 seconds and a maximum power of 91 hp. s., and the torque was 119 Nm. The maximum speed of the car is 179 km/h. Fuel consumption in the combined cycle is 6.8 l/100 km.
The replacement of coolant on a VAZ 2109 car is carried out according to the technical inspection card after a certain mileage, or when the climatic zone of operation of the car changes, or rather when it is planned to operate it at lower temperatures. The coolant has a nominal operating temperature, below which it begins to crystallize, that is, freeze. Repair work on replacing antifreeze is carried out at the inspection […]
Rework
To replace a carburetor with an injector yourself, be sure to arm yourself with the following components:
- Cylinder head from VAZ 2112 with receiver and manifolds;
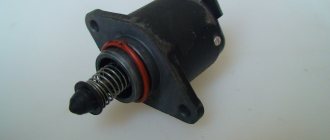
- Knock sensor;
- Throttle pipe with throttle position sensor;
- Mass air flow sensor and a number of other elements.
Replacement kit
When everything is ready, you can start working.
- Remove the old cylinder head. Plus, remove all attachments in the fuel assembly, gas tank and ignition system.
- Remove the alternator, thermostat, pulleys and belts.
- Install a new gas tank with a pump, borrowed from a donor - an injection VAZ.
- Remove the carburetor and ignition system components that need to be replaced.
- Disconnect the cooling system pipes and hoses. Here, install a completely new kit from the injector.
- Remove the pan.
- Install new pistons from an injection donor and connecting rods at 10. Standard carburetor components are not designed for an injection compression ratio. Plus there are special recesses for other valves.
- Install a new unit with an underflow on the cover for the DPKV, replacing the standard oil pump. If you can remove the cover, then only that will be replaced.
- After removing the old cooling system pipes, install new ones. The best solution is to replace the entire set. Buying it won't really impact your overall budget.
- Prepare everything necessary to mount the 16 valve head. The fasteners match, only the bolts from the old head are long and need to be shortened. Plus, don’t forget to make a size 12 hole in the new head.
- Install new fuel lines from the donor.
- Connect your new gas tank to the lines.
- Route the wiring from the control unit to the fuel pump. You can use old fuel level regulators from a carburetor car.
- Cut a hole in the wall of the engine compartment through which the wiring will be routed. This way you won't have to make the standard wires longer.
- Install the knock sensor by drilling a hole in the block and tapping a size 8 thread.
- Be sure to replace the water pump using a unit from donor 2112.
- Get a new crankcase breather and oil dipstick. Install them instead of the previous ones.
- Install a new cylinder head. Just don't forget to change the gasket, which corresponds to a different head.
- Install a thermostat borrowed from a VAZ 2112.
- Connect the coolant pipes.
- Remove the rear timing cover and rollers. The pulleys from 2112 are dismantled. The belt must be installed in accordance with the marks.
- Install the new generator along with the drive. For the new generator, the upper fasteners will remain intact, since they are not provided for by the design of the carburetor VAZ 2109. Therefore, fasten the pair of lower mounting bolts as securely as possible.
- Place all the sensors in their new places.
- Seal the valve covers with a good quality sealant.
- Assemble the ignition module, wires, spark plugs and other components.
- Install the air filter.
- Get your exhaust system back to normal. The muffler is often left stock, but the resonator and other components are taken from the donor.
- The wiring is connected to the dashboard and the lock.
- Fill in new oil, refuel the car with high-quality fuel.
- Start the engine and take it for a test drive.
What you can get
By converting the carburetor into an injection car, you can get improved technical and dynamic characteristics. We offer you a comparison of the parameters of the two motors.
| Characteristic | Carburetor | Injector |
| Cylinder diameter | 76 millimeters | 82 millimeters |
| Engine power | 64 kW | 78 kW |
| Fuel consumption in the city and on the highway | 9/8.7 liters per 100 km | 9.5/7 liters per 100 km |
| Acceleration from 0 to 100 km/h | 16 seconds | 13 seconds |
| Maximum speed | 148 km/h | 155 km/h |
IMPORTANT! Converting a carburetor to an injector is a serious step in modernizing your VAZ 2109. Despite the apparent complexity, the process can be done even with your own hands. But only if you have sufficient experience.
Converting a carburetor to an injector on a VAZ 2109
Carburetor engines have been obsolete for quite some time. But today on our roads it is not difficult to find cars equipped with this type of engine. The VAZ 2109 model is no exception.
Having a nine carburetor at your disposal, you can even convert it into an injection car on your own.
Before you decide to take such a step, be sure to study the strengths and weaknesses of each engine type, and also determine in which mode you use your car most actively. Your final decision largely depends on this.
Snowball scope of work
The situation is even more complicated if you install a non-native engine. It is necessary to take into account all the design differences between carburetor and injection engines, between the composition of sensors and reading indication systems, and between the ratings of electrical current consumed by devices. Purchased used engines often do not have documentation, and understanding them can be difficult.
When installing a more powerful engine without modifying the brake system, it will not only be a matter of changing the technical characteristics of the car. In any accident on the road, you will most likely be found guilty. You have violated safety requirements: your engine is more powerful than it should be, and the brakes are the same as they were.
Carburetor. Advantages and disadvantages
Let's start with the negative points. These include:
- Such engines have not been installed on production cars for a long time. In Europe, due to environmental requirements, carburetors are blacklisted. That is, they are prohibited because they heavily pollute the atmosphere;
- At high speeds, the engine's capabilities drop significantly. Torque does not reach the desired levels. But at low speeds it is effective and allows you to accelerate well from zero to hundreds;
- When overtaking, the carburetor is a pain. It is problematic to overtake cars normally and confidently. Especially considering the power of the carburetor nines;
- High fuel consumption when compared with injection engines. On average, a nine with a carburetor in normal mode consumes about 8.5-9 liters of fuel per 100 kilometers;
- The air damper is controlled manually. The exception is some versions of the latest samples, where automatic devices have been installed. Some motorists claim that manually controlling the throttle in winter has its advantages, as it allows you to feel the engine. But only experienced drivers can understand this.
But let's not just talk about the bad. The VAZ 2109 with a carburetor also has positive qualities:
- The cost of a carburetor is much cheaper than an injection engine;
- Engine maintenance costs less, and the work itself is easier to perform if you repair it yourself;
- Fans of carburetors claim that the absence of control units and microcontrollers is an undeniable advantage. Although one can argue with him;
- If the engine fails even 100 kilometers from the nearest settlement or service station, it is not a problem for experienced drivers, since repairs can be carried out even in the field. But this will require the availability of appropriate tools and passenger assistance.
Injector. Advantages and disadvantages
In short, all the advantages of the injector are the disadvantages of the carburetor, and all the disadvantages are the advantages of the carburetor.
The key features of injection engines include:
- Injectors are more environmentally friendly and meet the requirements for emissions of harmful substances;
- Although the torque is insufficient at low speeds, it makes overtaking easier at high speeds. The engine seems to get a second wind;
- Injector maintenance costs are higher;
- For normal operation of such an engine, clean fuel is needed. The carburetor “feeds” on everything;
- To check faults, it is necessary to perform diagnostics, which is time-consuming and expensive;
- The injector consumes less fuel. The average is 6-7 liters per 100 kilometers;
- Almost all systems function through computer control, therefore, when working correctly, the engine operates as efficiently and economically as possible;
- It is possible to install HBO on the injector. But with a carburetor, such a step is fraught with a number of difficulties.
When does it make sense to change the Nine engine?
A typical case when owners of “nines” change the engine is its fatal failure. Sometimes the engine can knock so much that it is cheaper to buy another one than to repair the existing one. The question arises - what to change to and which engine is suitable? There are three typical answers:
If you are lucky and have the opportunity to get the same unit as the one that failed, that's just great. Is it worth changing the engine that is familiar to it in its third decade? If you are ready for serious changes, take a closer look at the imported motor market. However, installing a non-original internal combustion engine is fraught with a considerable number of problems.
Rework
To replace a carburetor with an injector yourself, be sure to arm yourself with the following components:
- Cylinder head from VAZ 2112 with receiver and manifolds;
- Knock sensor;
- Throttle pipe with throttle position sensor;
- Mass air flow sensor and a number of other elements.
When everything is ready, you can start working.
- Remove the old cylinder head. Plus, remove all attachments in the fuel assembly, gas tank and ignition system.
- Remove the alternator, thermostat, pulleys and belts.
- Install a new gas tank with a pump, borrowed from a donor - an injection VAZ.
- Remove the carburetor and ignition system components that need to be replaced.
- Disconnect the cooling system pipes and hoses. Here, install a completely new kit from the injector.
- Remove the pan.
- Install new pistons from an injection donor and connecting rods at 10. Standard carburetor components are not designed for an injection compression ratio. Plus there are special recesses for other valves.
- Install a new unit with an underflow on the cover for the DPKV, replacing the standard oil pump. If you can remove the cover, then only that will be replaced.
- After removing the old cooling system pipes, install new ones. The best solution is to replace the entire set. Buying it won't really impact your overall budget.
- Prepare everything necessary to mount the 16 valve head. The fasteners match, only the bolts from the old head are long and need to be shortened. Plus, don’t forget to make a size 12 hole in the new head.
- Install new fuel lines from the donor.
- Connect your new gas tank to the lines.
- Route the wiring from the control unit to the fuel pump. You can use old fuel level regulators from a carburetor car.
- Cut a hole in the wall of the engine compartment through which the wiring will be routed. This way you won't have to make the standard wires longer.
- Install the knock sensor by drilling a hole in the block and tapping a size 8 thread.
- Be sure to replace the water pump using a unit from donor 2112.
- Get a new crankcase breather and oil dipstick. Install them instead of the previous ones.
- Install a new cylinder head. Just don't forget to change the gasket, which corresponds to a different head.
- Install a thermostat borrowed from a VAZ 2112.
- Connect the coolant pipes.
- Remove the rear timing cover and rollers. The pulleys from 2112 are dismantled. The belt must be installed in accordance with the marks.
- Install the new generator along with the drive. For the new generator, the upper fasteners will remain intact, since they are not provided for by the design of the carburetor VAZ 2109. Therefore, fasten the pair of lower mounting bolts as securely as possible.
- Place all the sensors in their new places.
- Seal the valve covers with a good quality sealant.
- Assemble the ignition module, wires, spark plugs and other components.
- Install the air filter.
- Get your exhaust system back to normal. The muffler is often left stock, but the resonator and other components are taken from the donor.
- The wiring is connected to the dashboard and the lock.
- Fill in new oil, refuel the car with high-quality fuel.
- Start the engine and take it for a test drive.
What you can get
By converting the carburetor into an injection car, you can get improved technical and dynamic characteristics. We offer you a comparison of the parameters of the two motors.
Conversion of VAZ 2108 and 2109 from carburetor to injector
Converting a carburetor VAZ to an injection one is not as scary as it seems at first glance. Provided that you have at least a basic understanding of your car. Here we will describe the independent modification of the power supply system and the list of required components.
Many car owners are dissatisfied with the power system of their favorite car. Someone, having suffered with an injector, dreams of a carburetor. And someone, on the contrary, is tired of cleaning the carburetor and selecting jets, and sees in a dream an almost trouble-free injector.
Initial data: - regular VAZ 21083, date of birth - December 1999.
Let's start with choosing an injection system and selecting the necessary spare parts. Having estimated their approximate cost (the most painful issue!), we decided to settle on an injection system based on the “Bosch” M 1.5.4 controller without an oxygen sensor and neutralizer, which meets Russian requirements for toxicity standards R-83. Moreover, there are many versions of the “Sport” PROM for this controller floating around Russia, so there will be enough scope for experiments.
I will say right away that the power system was assembled from factory spare parts, without making any changes to the design. For example, it was possible not to change the gas tank and fuel line, but to install an external electric fuel pump, for example from the Volga, and make all fuel connections using clamps, like on most foreign cars. Accordingly, the funds were spent to the maximum. Although, on the other hand, spare parts from General Motors (GM), famous not only for their reliability, but also for their price, were not used.
First of all, we purchase spare parts that practically do not fail on production cars: receiver, intake manifold, fuel line, gas tank, air filter housing, etc. The rest of the little things are “consumables”; all shops and markets without exception are filled with them.
Successful, in my opinion, was the purchase in Tolyatti of a kit consisting of mounted cylinder head units (receiver, manifold, throttle pipe, fuel rail with injectors, gaskets, fasteners, etc.), especially at a very low cost.
Next, we carry out some work before disassembling the old system. For example, we wash a new gas tank, dry it and install an electric fuel pump in it. Do not forget to align the arrows on the tank and the fuel pump housing, and also check the ease of movement of the fuel level sensor float. In addition, I recommend covering the gas tank with anti-corrosion mastic such as “Cordon”.
We begin the work by drilling two holes in the cylinder block: the first for the knock sensor, the second for mounting the ignition module bracket, and cutting the internal thread. Carefully inspect the cylinder block; these holes may have already been drilled at the factory; otherwise, special castings have been made for them. Drill carefully, otherwise you will sew through the block. The depth of the hole for the knock sensor is 16 mm, for the bolt securing the upper point of the ignition module bracket is 20 mm. Naturally, for this operation you need to drain the antifreeze and remove the radiator, bumper and queen. I didn’t dare drill holes myself; I entrusted this operation to a master from a body shop. The knock sensor has a tapered thread, so we tighten it until it stops...
In the meantime, we change the coolant outlet pipe (the temperature sensor is screwed into it). You can also replace the temperature sensor in the radiator with a plug, or you can leave it (just in case). It’s even better to replace the original thermostat with thermostat 21082. It is more reliable, especially since it combines both a pipe and a thermostat. I chose the second option... but in addition to the 21082 thermostat, I needed a tee from the VAZ 2110 cooling system... usually it is sold with two hoses pressed onto it. We cut off one hose and clean the outlet of the tee; in addition, we shorten the stove hose. A tee is required to connect the expansion tank. In addition, a gasket will be required (the old one becomes unusable when the outlet pipe is dismantled.
The next step is to drain the oil, remove the pan, timing belt, toothed pulley and change the oil pump (it differs from the usual one in the casting for attaching the HF position sensor) and immediately change the regular generator pulley to a damping one with a ring gear. This replacement requires switching to a V-belt and replacing the generator, especially since the injection electronics consume more energy than a conventional ignition system. A new generator requires new fasteners, but nothing else needs to be drilled.
I don’t recommend saving on a generator; simply replacing the pulley on the generator will not solve the problem, it will only ruin the generator.
If the car is new, then it is better to leave the original gaskets for the oil pump and pan; it is difficult to purchase new ones and, most importantly, of high quality.
These operations did not take much time, so I performed them in the evenings and rode during the day as if nothing had happened.
Now we roll out the gasoline (to make the tank lighter...) and disassemble the original power supply and ignition system.
We remove the battery (first of all!), distributor, fuel pump with housing of auxiliary units, air filter with housing, carburetor with manifold, throttle cable (longer on the injection version!), choke control cable, underhood wiring of the ignition system, coil, switch, EPHH control unit, fuel pipes, gas tank, vacuum booster hose (replaced with a longer one from classic VAZ models). In addition, we disassemble the dashboard. It is necessary to make a harness consisting of two wires: +12V (switchable) from terminal 15 of the ignition switch, tachometer input. We draw a separate wire for the “CHECK ENGINE” lamp. If you plan to install a trip computer, add two more: a fuel consumption signal and a speedometer signal.
We use an eight-pin “MALE” connector on one side and a four-pin “MALE” connector on the other. We push the ignition harness from the engine compartment into the passenger compartment, secure it with standard fasteners, and connect it to the manufactured harness. We connect two separate wires of the injection harness (blue and blue with a black stripe) to the mounting block. In place of the fan relay, we place a jumper or connect the wires that go to the fan switch sensor in the carburetor version. We attach the controller, relays and fuses in the designated places. If desired, we install the immobilizer block and connect it to the harness, placing the peephole on the front side of the panel. Oh, I almost forgot, you still need to add a couple of wires connecting the instrument panel (fuel gauge) to the fuel pump harness.
We remove the original harness going to the fuel level sensor and lay a new one with a connector for the fuel pump (located on the floor of the body under the sound insulation.
A plug is installed on the right side of the block head, and the ground wires of the injection harness are attached to it. Installs the manifold, fuel rail with injectors, receiver, throttle pipe. We change the throttle cable.
The most labor-intensive operation (in my opinion) was laying the fuel line along the bottom of the body. The difficulty was in pushing the return line under the steering mechanism. I did this: I took a pry bar and asked my neighbor to press the steering rack away from the body, having first unscrewed the mechanism fastening on one side. We lay a fuel line along the bottom of the body and secure it with clamps. We screw on the fuel hoses and attach the fuel filter. The latter is mounted on a bracket to the bottom of the body (welded bolts are provided).
We install a new gas tank, secure it with clamps and connect the fuel line. Before lowering the injectors into the sockets, I advise you to create pressure in the system and check the injectors for leaks. If everything is normal, we attach the ramp to the manifold, install the remaining sensors, the ignition module, and high-voltage wires. Check the reliability of fastening of the “GROUND” points, using clamps, secure the wiring and hoses. This will save you a lot of money in the future. We install the air filter, pipe hose, connect the crankcase ventilation and throttle pipe heating hoses. Well, to great joy, almost everything.
The car, with an injector assembled from serviceable spare parts, starts immediately.
We connect the DST-2 and the gas analyzer (if there is one, of course), reset the errors, and adjust the mixture composition at idle.
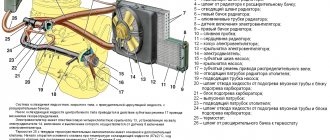
Part name | Catalog number
1 Oil pump (with mounting for PCV jack) 2112-1011052(01) 2 Ignition module bracket 2111-3705410 3 Plug with gasket (installed instead of distributor) 2111-1003288 4 Crankshaft damping pulley 2110-1005058 5 Thermostat + tee 21082 6 Upper generator mount 21082-3701635 7 Lower generator mount 21082-3701720 8 Generator 2112-3701010 9 Generator belt (V-belt) 21082-3701720 10 Upper air filter semi-housing “Bosch” 2112-11 09016 11 Lower air filter housing "Bosch" » 21082-1109013 12 Air filter element 2112-1109080 13 Fuel filter element 2112-1117010 14 Throttle pipe gasket 21082-1148015 15 Air filter support (2 pcs) 2112-1109249 16 Branch pipe throttle assembly 2112-1148010-31 17 Receiver “Bosch” 2111-1008027-10 18 Intake manifold 2111-1008081 19 Fuel pressure regulator 2112-1160010 20 Bosch injector (4 pcs) 2111-1132010 21 Intake manifold gasket 2110-1008055 22 Injector rail 2 111-1144020 23 Receiver and air mount kit. filter 24 Supply hose 2112-1104218 25 Drain hose 2112-1104218 26 Gas tank fuel supply hose 21082-1104226 27 Rear drain hose 2112-1104208 28 Fuel filter hose 2112-1104222 29 Frame drain pipe py 21082-1104054 30 Tube supply ramp 21082-1104013 31 Tube supply 21082-1104054 32 Drain tube 21082-1104013 33 Throttle cable 21082-1108054 34 Fuel filter mount 21082-1117020 35 Branch hose 2111-1148035-10 36 Gas tank 21082-11 01007-10 37 Pressing ring 21082-1101178 38 Electric fuel pump assembly “Bosch” » 21082-1139009 39 Controller “Bosch” M 1.5.4 2111-1411020 40 High-voltage harness 2111-3707080-01 41 Fuel pump wiring harness 21082-3724037 42 Ignition system wiring harness 2112-372402 6-50 43 Injector wiring harness 2111-3724036 44 Sensor detonation 2112-3855010 45 KV position sensor 2112-3847010 46 Bosch air flow sensor 21083-1130010-01 47 Ignition module 2112-3705010 48 CO potentiometer 2112-1431120 49 Speed sensor 2110- 3843010 50 Temperature sensor 2112-3851010
What to prepare to change
The whole process will take you about a week, provided you work 3-4 hours a day. Therefore, prepare your garage in advance and buy everything you need. You can assemble the injector on different ECU controllers, but in the case of the VAZ-2109, the January 5.1.1-71 model is better than others. Available domestic spare parts can be used for it, and it does not use an adsorber and an oxygen sensor.
Advice: It is better to buy all components in a good store with experienced staff, as you may need help in choosing the right spare parts. If you have experience in repairs and want to save money, then shop at a disassembly store.
List of components required for replacement
| 1 | Oil pump (with mounting for PCV sensor) |
| 2 | bracket |
| 3 | V-belt |
| 4 | Wiring |
| 5 | Thermostat |
| 6 | Ignition system module |
| 7 | Upper and lower air filter housing |
| 8 | Fuel and air cell |
| 9 | Intake manifold |
| 10 | Two air filter supports |
| 11 | Throttle pipe |
| 12 | Receiver |
| 13 | Gasket for throttle pipe |
| 14 | Fuel pressure control |
| 15 | 4 nozzles |
| 16 | Injector ramp |
| 17 | Intake manifold gasket |
| 18 | Mounting kit for receiver and air filter |
| 19 | Ramp tube set |
| 20 | Throttle cable bracket |
| 21 | Throttle cable |
| 22 | Hose |
| 23 | Air flow sensor |
| 24 | Fuel hose kit |
| 25 | Electric fuel pump |
| 26 | Controller January 5.1.1-71 |
| 27 | Knock sensor |
| 28 | Crankshaft pulley |
| 29 | Crankshaft position sensor |
| 30 | Gas tank |
| 31 | Plug with gasket |
| 32 | temperature sensor |
| 33 | Fuel pump pressure ring |
| 34 | Generator with mountings |
Also pick up bolts, nuts and clamps from the store that you will need for the job.
Tools
The repair will consist not only of dismantling some components and mechanisms. In some cases, it will be necessary to make changes to the design of cylinders and other parts.
From the tool you will need:
- Set of wrenches.
- Flathead and Phillips screwdrivers.
- Good drill.
- Hammer and chisel.
- Rust remover.
How to remake: step-by-step instructions
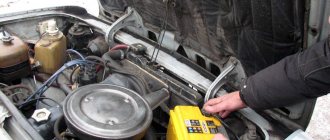
Before starting work, wash the car thoroughly and remove dust and dirt from around the engine.
- In the rear of the car we remove the old carburetor fuel system.
- Pull out the gas tank and fuel pipes.
- We screw on the new bracket and use it to secure the new injection lines.
We install the bracket in its original place and secure the lines - We install the fuel filter along with hoses.
We fix the fuel filter with hoses - We attach the fuel pump to the injection gas tank.
- We go into the engine compartment and remove the ignition.
- We disconnect the wires that go from the sensors to the ignition braid.
- We pull out the old ignition tee and install an injection tee in its place. Before doing this, completely drain the antifreeze from the system.
We install the injection ignition tee in place of the carburetor - In place of the distributor, we make a plug with a seal and treat it with sealant.
- Remove the carburetor along with the intake manifold.
We dismantle the old carburetor along with the manifold - We replace the gasket and install a new injection manifold.
We install the injection manifold in place of the carburetor - We install the injectors on the ramp and secure it to the manifold.
- We connect the hoses and install the receiver.
We install the injection receiver and connect the hoses to it - If your model has an oil pump without a casting, then it also needs to be replaced.
- The generator on the nine must be replaced, but the pulley itself is suitable for the new system and can be left.
- Instead of a carburetor ignition cable, we install an ECU wiring cable.
- We connect the wiring to the controller and the motor.
- In our case, the fuel sensor will remain the same; you just need to connect it to the new pump.
- Turn on the ignition and check the operation of the fuel pump. The entire fuel system must be sealed and leak-free.
- We replace the carburetor module with an injection one.
We remove the carburetor ignition module and install the injection module in its place - We install a new ignition system (spark plugs and module).
- We install the air filter.
- Drill a hole for the knock sensor (depth 16 mm).
- We start the engine and check its operation.