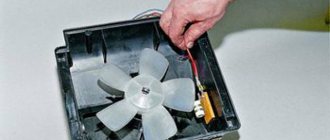
Lada 4x4 (VAZ-21214): Replacing the rear suspension shock absorber
We replace the shock absorber if it loses its working properties, destruction or severe wear of the silent blocks of the shock absorber lugs. To ensure that the performance characteristics of the left and right shock absorbers do not differ, both shock absorbers should be replaced. We carry out the work on an inspection ditch or overpass.
To remove the lower shock absorber mounting bracket.
. Using a 17-mm open-end wrench, unscrew the three nuts of the bracket mounting bolts (they also secure the axle bearing plate) to the rear axle beam flange.
. and remove the bracket.
Similarly, remove the shock absorber and its bracket on the other side of the car.
We install the brackets and shock absorbers in the reverse order. If, when installing the bracket, the mounting bolts move inside the brake mechanism and it is impossible to tighten the nuts, it is necessary to remove the brake drum and keep the bolts from turning. Tighten the shock absorber mounting bolts in the “car on wheels” position.
Usually the rear shock absorbers on a Niva last quite a long time. Based on the example of many of my friends, up to 100,000 km is considered a completely normal service life. Of course, everything largely depends on the quality of the roads where you operate your car and on your driving style. Removing and installing at home is not difficult, and to perform this repair you will need the following list of devices:
- Two 19mm wrenches, one of which is required - a head with a long powerful wrench
- Ratchet handle for easier dismantling
- Hammer and wooden block
How to Change the Rear Shock Absorber on Niva ~ SIS26.RU
Front and rear springs of Niva Chevrolet
The movement of the car is determined by the appearance of body vibrations, which are caused by road irregularities. To smooth out and eliminate as much as possible the oscillatory movements of the body, devices such as springs were invented. To a greater extent, they are installed on the rear and front suspension and function to smooth out body vibrations. A car like the Chevrolet Niva also has springs that perform a similar function, and they are installed on both the rear and front wheels. Thus, the springs of the Niva Chevrolet jeep must certainly have the highest structural strength and wear resistance
In fact, now we will pay attention to the shock absorbers of the Chevrolet Niva jeep
Shock absorber design
Springs for cars are:
- Hydraulic;
- Hydraulic with gas;
- Gas.
So, any shock absorber consists of main parts: a piston and a cylinder. It is these two elements that have a fundamental purpose - smoothing out body vibrations while the car is moving. Shock absorber for the field shock absorbers for the field, what wears out quickly and how to change it? Thus, the product softens all shocks, vibrations, deformations and makes the movement of the car softer and more balanced. The cylinder must necessarily have a working medium, through which shocks are absorbed. Such an environment can be:
- Oil with air;
- Oil and gas;
- Gas.
Structurally, the shock absorber is attached on one side using a rod to the body of a Chevrolet Niva car, and on the other - to the suspension. Special supports act as fastening parts. Rear light on a Mitsubishi Lancer 9. As in the rear block, the headlight must be removed. To protect the internal parts of the device, on its upper part there are: a boot and a protective casing. Before removing the bolt, use a 19mm spanner to unscrew the rear shock absorber. The slightest particles of dust, moisture or dirt will lead to rapid failure of this product, so it is necessary to monitor their condition.
To prevent the filling in the form of oil from splashing out during operation of the shock absorber, its design has a special cuff with a bushing located in the upper part of the product.
Malfunctions: how to determine?
During operation, all car parts tend to wear out, so it is important in this case to determine the moment when it is necessary to replace today's devices on a Chevrolet Niva SUV. So, a malfunction of the device has quite dangerous consequences, especially for SUVs.
First of all, the malfunction leads to an increase in braking distance, body beating on the suspension, a decrease in safe cornering speed, increased tire wear, etc. In this case, the driver may also notice that the car’s controllability is impaired, so it is necessary to find the cause and eliminate it. To determine the malfunction of the shock absorbers, it is necessary to diagnose them. To do this, use the following methods:
- Visual inspection is the easiest way to detect a problem. To do this, you need to look under the bottom and if there are oil leaks on the device, then you need to replace it. How to change the rear shock absorber on Niva 21214. It is also necessary to check the condition of the boot; if there are cracks or deformations, it will need to be replaced. Visually, the wear of the rear shock absorbers can also be determined by the condition of the tires.
- "Wiggle." To do this, you need to rock the car in any corner and release it. How to remove the rear bumper on a Renault Logan: video. If the body continues to oscillate, this indicates a malfunction of the product.
- Controllability. A faulty shock absorber will certainly give itself away. To do this, you need to drive off-road and determine where the car is swaying strongly.
- Diagnostics on stands. The most difficult way to determine a malfunction, but at the same time effective.
Monotube models: pros and cons
You can try to find shock absorbers for the Niva from among the monotube ones, in which there is a piston in one flask, and this is also the body. In such options, gas is pumped under higher pressure (up to 30 atm), they are cooled better, hold the car more accurately, but are more vulnerable to external shocks and temperature changes (the higher the temperature, the greater the gas pressure, the stiffer the suspension). Parts can be placed upside down.
Another type of “one-tube” for the Niva car are shock absorbers with a spring attached and shock absorbers with a remote compensation chamber. The former allow, due to an additional elastic element, to adjust the Niva’s ground clearance (thanks to a screw nut). The remote chamber makes it possible to increase the volume of gas and oil and the working stroke without changing the dimensions, which allows you to fine-tune the operation of the car.
The front and rear shock absorbers on the Niva differ in the method of attaching the upper part, in size, performance characteristics and in the throttle discs at the recoil valve. The front shock absorber has two grooves in the throttle disc in its outer diameter, while the rear shock absorber has three.
When to change?
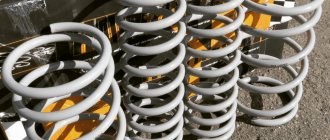
Let me refer to quotes from the forums: look at how your lower control arm is relative to the ground, measure the distance from the edge of the wheel to the arch, and the like. Of course, there is some truth in all this, BUT these are all consequences. We need to look at the reason, that is, at the spring itself. The next legitimate question is: where to look? The photo shows springs from the same car, one side before replacing the springs, the other after.
For some reason I remembered the magazine “Murzilka” with pictures on the topic, find 10 differences)). Red circles indicate where to look. Why do springs in this condition need to be changed and why is this criminal? Different alloys have different physical characteristics. In particular, spring steels do not withstand shock loads at all. When the coils of the springs close to full contact, an impact occurs. Stress tends to accumulate, and at some point the spring bursts. If this happens at low speed, the face of the car will simply fall down. The fuse will be the shock absorber, which will bend, and if the swing was stronger, then the body will lie on the wheel. It is much worse if this happens at speed or somewhere on the descent from a hill. I saw a short video from the Ladoga Trophy, when a short Niva drives down a hill, bounces a little and turns over. What can be seen in the slow motion replay: when flying up, the suspension dissolves. Then, the face of the car goes down, the spring bursts, the body falls on the wheel... and the car does a somersault through this wheel, since the kinetic energy has not gone away.
Signs of a faulty bump stop
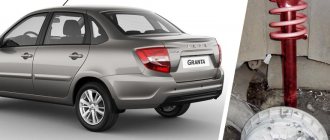
Diagnosis of a faulty bump stop occurs during an external inspection of the rear of the car. If it is lowered too much, or when driving the bumper begins to touch the surface of the road surface, this is a clear sign that the bump stop is in poor condition.
The reason for the failure of the bump stop, as with any part of the suspension, lies in poor-quality road surface. With prolonged use of the bump stop, it succumbs to natural wear and tear, after which the shock absorber begins to deform. To prevent this, replace the bump stop at the first sign of a faulty condition.
How to replace the rear suspension shock absorber of a VAZ-21213
You can verify the performance of the shock absorber without special equipment by vigorously shaking the car body down.
The body should return to its original position without oscillating
The fastening of shock absorbers should not have any play, and no leaks of working fluid are allowed on their bodies.
Rubber bushings for mounting shock absorbers must be free of damage and local bulging.
A more accurate characteristic of the performance of shock absorbers can be viewed on a dynamometer.
Removing the shock absorber
We carry out the work on an inspection ditch or a lift.
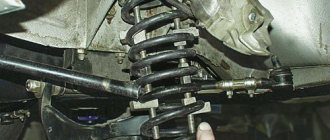
Using a 19mm spanner, unscrew the nut of the shock absorber lower mounting bolt, holding the bolt from turning with a wrench of the same size.
Before removing the bolt with the rear axle beam suspended (when working on a lift), it is necessary to place a support under the part of the beam where we remove the shock absorber so that the suspension spring is compressed.
Remove the spacer sleeve.
Remove the bolt and spacer washer.
Using a 19mm spanner, unscrew the pin nut of the upper shock absorber mounting
After removing the upper eye from the pin, remove the shock absorber.
The lower eye of the shock absorber has two rubber bushings and a metal spacer bushing.
There are two rubber bushings in the upper eyelet
Install the shock absorber in reverse order.
We finally tighten the shock absorber mounting nuts in the “car on wheels” position.
The tightening torque of the shock absorber mounting bolt nut is 38.2 – 61.7 Nm (3.9 – 6.3 kgf m).
Niva suspension maintenance
The content of the article :
- Niva suspension: diagonal hanging
- Suspension assembly option for NIVA
- Maintenance and updating of suspension for NIVA
Niva suspension: diagonal hanging
Today I was selecting the length of the short rods, tried them with my own short ones and the longer ones, depending on the one I wanted, just the right length. I left them long and checked them by simulating diagonal hanging, all the photos had long arms. With short ones, the rear wheel did not rest evenly on the arch. In my opinion, they were clinging to the front edge, but everything was even. I drove over with both the right side and the left side in turn, I didn’t use the rear wheels, I was tired of dragging the channel. Left side first:
Which shock absorbers are better to install on Niva 2121, 21213 and 21214
From the variety presented on the spare parts market, it can be very difficult to choose the most suitable copy. The above parts are practically the same in terms of technical parameters, but the quality can vary significantly. Original spare parts, unfortunately, are not examples of reliability, so many motorists prefer foreign-made analogues.
Choice of type: gas, gas-oil, oil
First of all, when choosing new products, you should decide on the type of shock absorber struts. The significant difference between the models of such parts lies in the substance with which the inner chamber is filled. There are three main types of shock absorbers: gas, gas-oil and oil.
Gas struts are ideal for a sporty driving style, but are more expensive and cannot be repaired. Oil products are cheaper and softer, which makes the ride more comfortable at relatively low speeds. An alternative option is gas-oil struts, which are essentially gas vibration damping devices. Products of this type also contain a container with oil, but to give the product greater rigidity, the device also has a chamber filled with atmospheric air. Which shock absorbers are best installed on the Niva 2121, 21213 and 21214 depends, first of all, on the driving style of the car.
Best manufacturers: Sax, Kayaba, Trialli, SS-20
When installing new shock absorbers, in addition to the type of product, you must pay attention to the manufacturer of spare parts. The following companies are most popular among VAZ 2121 car owners:
- Kayaba are relatively inexpensive shock absorber struts for the VAZ 2123. You can purchase both gas and oil products. All dimensions and characteristics of such suspension elements fully correspond to factory parameters.
- Sachs are high quality German shock absorbers that are cheaper than original products. If desired, you can choose gas-oil or oil products for installation on a Niva 2121 car of any model.
- Trialli is the most popular manufacturer of shock absorber struts installed on Niva cars instead of original products.
- SS-20 - shock absorbers are ideal for use in Russian off-road conditions. The racks from this manufacturer can withstand low temperatures well in the winter.
The products of the listed manufacturers enjoy the well-deserved trust of domestic car enthusiasts.
Is it possible to install shock absorbers from a Chevrolet Niva?
Many owners of domestic Niva 2121 cars try to install racks from the VAZ 2131 on them. It is strictly not recommended to carry out such a replacement. On Chevrolet Niva, shock absorbers have a larger stroke. While it is quite possible to physically install the product in its standard place, during operation the fastening may break due to a breakdown of the suspension.
What are the best shock absorbers to install?
Since native hydraulic (oil) ones are not comfortable - they are prone to swinging, breakdowns, rolls - Niva 21214 owners try to purchase products from foreign manufacturers: 1) Koni Special (gas) - unlike the original, they have a 10 mm longer maximum length in front and on the 70 mm - rear. They also have adjustable stiffness depending on the preferred driving style. They are characterized by increased rigidity and reduce the vehicle’s reaction time to steering movements. 2) Bilstein Sport (gas) - suitable for those who are not used to feeling sorry for their car. Extremely resistant to breakdown, forgives serious piloting errors. 3) Sachs Superturing (oil) – provide a balance between comfort and controllability, which allows you to feel the car well on the asphalt and not get tired when overcoming a grader. 4) KYB Excel-G (gas) – popular among lovers of comfortable driving on all types of surfaces. Resistant to frost and heat, reduces acoustic load. 5) BOGE Turbo24 (gas) - eliminate longitudinal rocking, allows you to receive 100% information about the road and just as accurately set the direction of movement. 6) Monroe Adventure (gas) – similar in characteristics to Sachs, but allow above average rolls, while willingly “swallowing” large potholes. It is worth considering that opinions about which rear and front shock absorbers are better are in most cases subjective. You can make an approximate conclusion by driving a car with the corresponding model of struts.
Replacing rear shock absorbers Niva 21213
This simple operation takes about half an hour on one side. The photographs were taken when replacing springs on a VAZ-2131. The jack eyes on this example were used for attaching the hinged thresholds, which made the process somewhat more complicated. Usually a standard jack is sufficient for replacement.
Secure the car by placing stops at the front and rear under the front wheel on the side where the spring is being changed, and the other rear wheel:
Clean the nut of the lower shock absorber mounting bolt with a steel brush and pour it with “liquid wrench”:
Push out the bolt (you can use a hammer through a soft metal spacer), remove the spacer sleeve and spacer washer (shown by arrows in the right photo):
Jack up the car, place it on a stand and remove the wheel:
Usually the rear axle sags so much that the spring simply comes off. Remove the spring from the bottom cup, then lower it to remove it from the top support:
For the right wheel, it is convenient to remove the spring forward as the car moves (photo on the left), for the left wheel - backwards (right photo):
If the spring does not release, you need to press the brake drum with your body weight.
Use a screwdriver to stir up the dried dirt in the bottom cup and sweep it away with a brush:
Use a screwdriver to pry and remove the upper rubber gasket of the spring:
Insert the upper rubber gasket into the new spring, aligning the step in the gasket with the beginning of the first turn of the spring. Lubricate the inner surface of the gasket and its seat with engine oil:
Place the upper end of the spring onto the seat, then insert the lower end into the lower cup:
Turn the spring together with the upper gasket (it is more convenient to do this counterclockwise) so that the lower end falls into the recess under the lower coil in the cup:
Jack up the side of the axle so that the lower end of the shock absorber is against the eye (if you are using a standard jack, you can place a wooden block under the brake drum and lower the car):
Lubricate the bolt with graphite grease along its entire length and insert it into the shock absorber ear:
The surfaces of the spacer washer are different - flat (left) and convex (right):
Place the spacer washer on the bolt so that the convex side is directed towards the shock absorber ear, and the flat side is directed towards the bridge eye:
Insert the spacer into the bridge eye, insert the bolt all the way, screw on the nut and tighten it:
Jack up the car and put the wheel in place:
Alex835 warns: “When “hanging” the axle with the shock absorber removed, you must constantly monitor the flexible hose of the brake system running from the body to the axle. If you work carelessly, it can easily be torn.”
Update dated September 14, 2006, by Ivgeniy:
When I was changing the rear springs, I noticed the fact that when the axle was suspended on the left, the sorcerer's rod was bent. Therefore, before jacking up the car, I recommend first unscrewing the brake force regulator rod from the axle so as not to bend it
Niva suspension maintenance
The content of the article :
- Niva suspension: diagonal hanging
- Suspension assembly option for NIVA
- Maintenance and updating of suspension for NIVA
Niva suspension: diagonal hanging
Today I was selecting the length of the short rods, tried them with my own short ones and the longer ones, depending on the one I wanted, just the right length.
I left them long and checked them by simulating diagonal hanging, all the photos had long arms. With short ones, the rear wheel did not rest evenly on the arch. In my opinion, they were clinging to the front edge, but everything was even. I drove over with both the right side and the left side in turn, I didn’t use the rear wheels, I was tired of dragging the channel. Left side first: measurements from the other side
Now on the right side:
I came to the conclusion that almost everything is good, but the front springs definitely need to be replaced, and this despite the fact that the front stabilizer bar is from a Chevrolet Niva, it is more powerful than the standard one and is 2 mm thicker. In the BRONTO LYNX three-door, the diagonal hanging is 50 cm, and this despite the fact that there are shock absorbers with increased travel, arches cut out and the wheels cost, in my opinion, 235 75 15.
I’ve been planning to install Iveco wheel bearings for a long time, definitely install seals from Nissan, and so that I don’t have to think about replacing the brake discs, hubs and outer CV joints with 24 splines, and at the same time tuning the suspension. I would like a suspension like the M-ki. On the Internet I found some interesting information on modifying the suspension: - steering knuckle 2123 - upper ball joint 21214m. - lower ball 2123 - lower arm 2123, because the m-ki has a lower axle shaft of 18 mm, and a shnivy 16 mm, and their lever angle is the same - springs 21214m - shock absorbers 2123 - steering tips 2123, because they are longer. - steering bipod on the fist from 2123. - upper bump stop 2123 or 21214m. - place the outer CV joint and hub on 24 splines at once, because You can’t buy an original CV joint with 22 splines anywhere because AvtoVAZ no longer produces them, and other companies make them from who knows what, I’m tired of changing the outer CV joints, it’s not enough for a year. Result: the suspension is almost like an M-ki, not counting the diameter of the lower axles. A smaller turning radius, a softer ride and an increase in the front track width by 1 cm. Regarding the elevator, I still don’t know for sure whether the face will rise or not, will it be necessary to install spacers under the upper ball joints or not? The second option is more budget-friendly, which seems to be enough to replace the steering knuckle with a shnivo one and install the lower ball joint from the shnivo, the rest is all original.
The idea of updating the suspension arose two years ago, when there was almost no compression travel and even in small holes the lower arms rested against the bump stops, and last year the springs “sat down” completely and almost all the time I had to ride on so-called buffers compression. I don’t advise anyone to reach this state, because the ride is very hard and unpleasant, all the energy of the impacts goes into the side members. There was no time to work out, the car had to be used every week, and only in the early spring of this year, thanks to the warm weather, was it possible to accomplish our plan.
The goal was the following: to return the height of the stock suspension, also to add about 2 cm “on top” to compensate for the future sag of the springs and, most importantly, to use springs that would not sag so quickly. And in addition: eliminate the “sweating” of the front and rear gearboxes, get rid of the metal squeak on the front right side, reduce the turning radius.
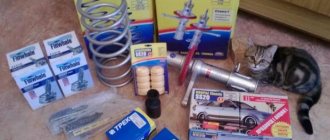
As a result, the following was purchased:
At the very beginning I wanted to buy springs 21214 with an orange mark, but after visiting and calling a dozen stores I couldn’t find them, they were all only with a blue mark. I’m not yet ready for cut Shnivy springs (although I think for 2131 this is almost an ideal option in terms of maintaining ground clearance), so I bought the front springs Kilen (code Exist 15010) - they have a length of 284 mm. and the standard rod thickness is 15.2 mm. Because Since they are twisted from a cold-rolled rod, they do not “sit” as quickly as “ours”.
I decided on shock absorbers right away - these are 21214, which differ from 2121 in increased travel by 10 mm and the diameter of the reservoir, which should have a good effect on the ride of the car. As I wrote above, in order to lower the springs, at first I wanted to install a rubber spacer of increased length 27 mm, but this seemed too much to me, so I used a new standard spacer + the cut off base of the old one:
So, here is the height of the car before the update:
The lower arms touch the bump stops
A difficulty immediately arose - it was necessary to remove the steering rods with something, so an appropriate puller was purchased:
There was already a set of keys
There is also such a problem as rotting of the spar behind the rebound buffer bracket. It was decided to unscrew them and treat them with anti-corrosion agent. After 4 years of use, the paint on the left side at the very bottom has already peeled off. Looking ahead, I’ll say: on the right side everything was like new. I scraped off the paint, removed the rust (there wasn't much), generously coated it with Movil and then with mastic. At the same time, I trimmed the rebound buffers and sanded them down:
I outlined the area of corrosion in red. At the same time I compared the stroke of shock absorbers 2121 and 21214
For about three years now, a grinding noise has been heard from the front right after long trips. The silent blocks were tightened, the spring was at fault. And since I took everything apart, I decided to check the lubrication in the balls, and, as you can see, it was not in vain that there was none:
Bottom left, by the way, she hardly moved
In general, I cleaned out these scraps, deflected the finger as much as possible and lubricated it, then stuffed it on top:
The upper left ball had the most grease of the four, and I also added blue Mobil to it. On the right side, as it turned out, the lower ball joint was grinding:
Then I moved on to the fist and added grease to the bearings and hub:
The next planned step is to replace the drive seals (gearbox sweating). By removing the left drive.
I saw a torn inner boot, and there were 3 bursts, located symmetrically at 120 degrees.
Two gusts are visible
The seals were replaced with Corteco ones.
The gasket was sealed with sealant
Before going to the market, I read the information on the anthers, deciding to put the external one in place of the internal one. Yes, and the internal ones often tear (quality of rubber?), on the right side they changed it under warranty.
I bought a Trialli outer CV joint repair kit and CV joint-4 lubricant
Assembled the left drive
Removed the right drive to replace the oil seal
I cleaned the bearing cap a little and replaced the seal.
For the bipod from Shniva I had to buy long tie rod ends, so I took TRACK:
Purpose:
The remote control is designed for remote control of locking and unlocking of car doors, turning on and off super-locking doors, turning on and off the alarm system, raising the windows, controlling the locking of the tailgate (trunk lid), and also as a coded electronic key for the APS-6 immobilizer
The remote control is mounted on the blade of the ignition switch key type 1118-3704010 and is designed to operate:
1)via radio channel:
- with electrical package control unit 1118-6512010
- with driver's door module 1118-3763080, 2170-3763080-00/10
- with immobilizer control unit APS-6 2123-3840010-ХХ;
- with immobilizer control unit APS-6.1 1118-3840010-ХХ;
- with electrical package controller-2170-3763040.
For the remote control to work as part of a car, it must be activated (trained) using the training (red) code key from the immobilizer. After training, the remote control is also a working code key for the immobilizer and is used to remove the engine start ban. The system can be trained and operated simultaneously with two remote controls.
Advertisements on NN.RU – Auto
Manufacturing of a broken-type platform with retractable ramps on the GAZ-33023 Gazelle-farmer chassis. Technical characteristics of the tow truck.
Lengthen Kamaz under a body 7.5 m Lengthen Maz Zubrenok, Maz under a body 9 m Re-equipment of the chassis of an extended truck.
Wide selection of hydraulic pumps and hydraulic motors of all series. Axial piston hydraulic motor. Splined shaft, reverse rotation. Analogs - (many. Price: 1,000 rub.
A wide selection of hydraulic pumps and hydraulic motors of all series: spline hydraulic pump of right rotation. It is used in road construction and... Price: 1,000 rub.
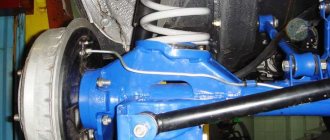
Replacement of Niva 4x4 shock absorbers and their mounting brackets
It is recommended to carry out work on replacing Niva 4x4 Urban shock absorbers strictly in a certain sequence.
Front suspension instructions
The work of replacing the front shock absorber is performed in the following sequence:
- Loosen the wheel nuts.
- Raise the car on a jack.
- Remove the wheel.
- Unscrew the strut nut from the engine compartment side, while holding the rod from turning with a 6 mm wrench.
- Remove the washer and damper.
- Unscrew the lower rack mounting.
- Remove the shock absorber from its seat.
Install the new strut assembly in the reverse order of removal.
How to check the status
To diagnose shock absorber struts, 3 methods are used: 1. Place the car on a level surface. Grasp the rear and front bumpers alternately and swing them forcefully. Serviceable shock absorbers will dampen vibrations in no more than the third time. 2. Using a vibration table, test and analyze the vibration graph according to the standard. Additionally, this method will allow you to identify problems with springs, silent blocks and other suspension elements. 3. Remove the lower mount of the rack, then manually bleed it. The compression of the rod should occur without jerking or excessive force.
Preparation for repair
Regardless of who will carry out the repairs, the car’s suspension elements must be thoroughly washed and freed from pieces of adhering dirt. Especially if the SUV has seen more than just asphalt.
If you decide to make the replacement yourself, you need to prepare all the tools necessary for this:
- Jack. Hydraulic is best. Even better - two jacks. But, if there is no second one, you can get by with one, albeit with a little more fiddling.
- A block of wood, a stump or a tripod - something that can be placed under a raised car. This releases the jack, and for safety reasons it is necessary for the car to stand on something stable.
- Keys - two each for 17 and 13. For convenience, it is good if there is a ratchet, wrenches, and socket heads.
- Hammer and pry bar.
- Clamps (spring ties). It is quite possible that they will not be needed at all. However, it is better to let them be.
- Rye Corrosive Liquid WD-40
You can work both in a box and in the open air.
Replacing the front springs of a Niva does not require special lifting mechanisms; all suspension elements can be approached from the outside of the car.
By the way, you can at the same time change the lower ball joints, shock absorber silent blocks and stabilizer rubber bands - all these elements will be dismantled during operation.
How to replace rear shock absorbers on a VAZ 2101-VAZ 2107?
Note! The rear shock absorbers on the right and left sides are replaced in the same way, so the entire replacement process will be shown on only one shock absorber!
Removal: 1) Before you start, be sure to read the “Important!” section. at the very bottom of the article, maybe it will be useful to you. 2) After reading, proceed to replacement
First, drive the car into the inspection hole or lift it using a lift
2) After reading, we move on to replacement. First, drive the car into the inspection hole or lift it using a lift.
Note! If you will be doing work on a lift, then it is recommended to install some kind of support under the rear axle beam, and then lower the car slightly so that it rests on it. And all this is done so that the rear suspension is slightly loaded, otherwise removing the shock absorber will be very problematic!
3) Next, holding the bolt with one wrench, use the second to unscrew the nut that secures the lower hinge bolt.
4) Then slightly remove the bolt from the hinge and thereby remove the spacer sleeve from it, which is indicated by the arrow.
5) Next, holding the lower part of the shock absorber with your hand, slightly move it away from the bracket and, as a result, remove the spacer sleeve from the bolt.
Note! After these operations, completely remove the bolt from the lower hinge together with the washer!
6) Now get to the top of the shock absorber, and then unscrew the nut that secures the upper hinge.
7) After unscrewing, remove the washer and the outer rubber bushing of the hinge, which is indicated by the red arrow, from the stud.
Note! If the outer sleeve is very difficult to remove, then you can not touch it at all and move on to replacement!
Next, pull the shock absorber with your hand, thereby removing its upper hinge from the stud and the outer bushing will be removed along with it.
9) Then remove the inner joint bushing from the stud.
10) Then, holding the shock absorber in your hands, remove the spacer sleeve indicated by the arrow from the lower hinge.
11) When the bushing is removed, remove in addition two rubber bushings that sit in the hinge eyes.
Note! Replace all deformed and heavily worn bushings with new ones!
Installation: 1) Install the new shock absorber in the reverse order of removal.
Note! Tighten both nuts that secure the upper and lower shock absorber joints only at the moment when the suspension is loaded with the entire weight of the car!
Important! Shock absorbers, as a rule, can be repaired, but if you do not have sufficient experience and tools, then it is best to repair shock absorbers in specialized auto repair shops - so to speak, give it to those people who have been doing this for a long time!
There is also a small nuance in replacing rear shock absorbers, and it lies in the fact that they need to be changed in pairs, that is, two at once. Why do this you ask? The thing is that the characteristics of one new shock absorber may differ significantly from the second, even if the second shock absorber is fully operational!
Additional video: To help you understand in more detail the entire process of replacing rear shock absorbers, watch the video below:
Let's sum it up
Using the Niva in an aggressive environment often leads to rupture of the vehicle's chassis components. To use an all-wheel drive SUV in severe off-road conditions, reinforcement of the vehicle drives is required. To carry out the necessary work, you can turn to specialists for help, however, not everyone can afford it.
To improve your car yourself, it is important to have repair skills and the necessary tools, as well as an equipped garage. Keep in mind that changes to the design features of the car can also have a negative result. Start work only if you are completely confident in your abilities.
Expensive and cheap options
An exact answer to the question: “Which shock absorbers are better to install?” - does not exist, since each Niva owner has his own driving style and conditions, and the selection of these parts is not always large in Russian stores. The best products are considered to be from KONI, which in Germany have a lifetime warranty for one car under one owner. They need to be tuned frequently (30-40 thousand km). Red part numbers significantly improve ride quality without any loss in handling. The cost of one shock absorber can exceed a hundred dollars.
Popular products for Niva
Parts from American are known for being produced in a single-pipe version, very rigid and of high quality. The cost goes up to $140 each. On Niva you can find a budget option around 30-40 dollars. Shock absorbers from BOGE and SACHS cost about $30-50 (manufactured in Germany) and are considered to be of lesser quality. Two-pipe hydraulic samples from Rancho (USA) with a reinforced chrome-plated rod, a special boot and an all-weather corrugated cover are considered approximately equal in quality to SACHS. Considered less comfortable than SACHS.
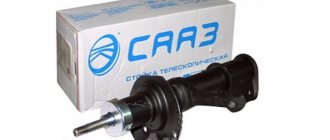
For lovers of measured driving on asphalt roads, very inexpensive products from SAAZ may be suitable. The plant produces oil-based twin-pipe shock absorbers with the following standard characteristics:
Rear shock absorbers:
- length when retracted - 31.5 cm;
- stroke 18.15 cm;
- casing diameter - 5 cm;
- upper end - eyelet, 2.55 cm;
- lower end - eyelet, 2.55 cm;
- rebound force 114-146 kg;
- compression force - from 22 to 36 kg.
Front shock absorbers:
- length when retracted - 22 cm;
- stroke 8.35 cm;
- casing diameter - 5 cm;
- upper end - pin, 1.4 cm;
- lower end - eyelet, 2.8 cm;
- rebound force 129-154 kg;
- compression force - from 17 to 31 kg.
Options
Characteristics based on the example of factory-installed products from SAAZ: 1) Front pillar size: • initial length (compressed) – 220 mm; • total length (when hanging) – 303.5 mm; • rod – 11 mm; • casing – 50 mm.
2) Rear shock absorber size: • initial length (compressed) – 310.5 mm; • total length (when hanging) – 429 mm; • the diameters of the rod and casing are similar to the front ones. You can clearly see the location of the racks in the drawings presented below.
Replacing rear shock absorbers yourself
Usually the rear shock absorbers on a Niva last quite a long time. Based on the example of many of my friends, up to 100,000 km is considered a completely normal service life. Of course, everything largely depends on the quality of the roads where you operate your car and on your driving style. Removing and installing at home is not difficult, and to perform this repair you will need the following list of devices:
- Two 19mm wrenches, one of which is required - a head with a long powerful wrench
- Ratchet handle for easier dismantling
- Hammer and wooden block
The procedure for performing work when replacing shock absorbers on a Niva VAZ 2121
The first step is to drive the car into the garage onto a pit or overpass, if any. If this is not possible, then you can do everything without it, just crawl under the car. When performing this work, you should not lift the car with a jack, as it may then become difficult to remove the shock absorber.
- Before starting work, be sure to spray the mounting bolts with WD-40 type lubricant, as in most cases they rust very badly.
- After that, take two 19mm wrenches and try to unscrew the lower fastening nut. This is roughly what it should look like as shown in the photo below:
Next, you can use a ratchet when the threads have already loosened. Since it will be much more convenient to work with it than turning it with a regular wrench or spanner.
When the nut is unscrewed, you can try to push the bolt in the opposite direction with your hands from that side. If it doesn’t work, then through a wooden block with weak blows of a hammer. In the photo below I showed without a wooden spacer:
The result of the work done can be seen in the photo below; when the rod is completely knocked out, the rear shock absorber of the Niva becomes free and there is nothing holding it from below:
Next, you can begin to free the upper part, for which you will again need a 19mm head with a knob, and then with a ratchet:
After you have dealt with this, you can try to remove the shock absorber. You need to grab it with your hand and slightly shake it to the side, pressing in the direction of removal, as is clearly shown below:
In my case, everything came off without any problems. Replace the second Niva rear shock absorber in exactly the same way as the first. And this is what everything looks like after dismantling:
Installation is carried out in the reverse order of removal and will not take much time if you have the right tools.
Subtleties of lifting
In this type of car suspension tuning, such as lifting, you always need to maintain common sense and be able to stop in time. It is important to know that during modification, the bend angle of the drives changes, which automatically leads to a reduction in their service life. In most cases, such car tuning is done to order, since everything depends on the wishes of each car owner; an individual suspension modernization project is drawn up for each car. The center of gravity also shifts and, as a result, the overall behavior of the car on the road changes. It is believed that the maximum wheel size should not exceed 235/75 r15. It is necessary to increase the ground clearance only with minimal load on the chassis, otherwise serious problems may arise.
Tuning the suspension of such a car is very popular among hunters and fishermen. The cross-country ability of this vehicle has already proven itself at a high level, and the suspension upgrades made increase them even more. This makes it even more popular and functional.
Modified all-terrain vehicle
You should only use a lift for a Chevrolet Niva if you spend time off-road, because a lifted car reduces the life of the suspension, transmission and the life of chassis parts. If you know that you will spend time hunting and fishing, then it is worth carrying out such an upgrade. Remember that choosing wheels for your car is an important aspect of tuning. Lifting is also suitable for people who love wild nature and are not afraid of difficulties while riding. But be prepared that parts will wear out faster during such extreme driving.
Shock absorbers for VAZ 2121/2131 Niva and LADA 4×4
The SS20 company offers front and rear reinforced shock absorbers for the classic NIVU 2121, 2131 and their modifications, NIVU 21214M, LADA 4×4 (3 and 5 doors) and Urban versions.
Advantages of using SS20 shock absorbers in cars of the NIVA and LADA 4×4 family
- the problem of body swaying is eliminated and “bouncing” is significantly reduced when the car bounces on uneven roads, driving becomes more comfortable;
- “breakdowns” of the suspension are prevented when driving at high speed on a road with large irregularities;
- there is a choice of characteristics: “Standard”, “Comfort-Optima”, “Highway” or “Sport”;
- stability of operation in difficult conditions (due to larger fluid volume and improved cooling) without reducing damping characteristics;
- increased resource;
- extended operating temperature range from -42 ˚С to +50 ˚С;
- unlimited mileage warranty;
- silent operation and stability of shock absorber characteristics throughout the entire service life.
Guarantee
- Description
- Buy
The Niva car (VAZ 2121) has been produced since 1977 and during this time has undergone several modifications. Now the name of the car is Lada 4x4, but its essence, as the most affordable of SUVs, has not changed. Over the years of production, the Niva car (VAZ 2121) has proven itself from the best side, and according to plans, it will live on the assembly line for several more years. However, it has a number of disadvantages. For example, insufficient stability of movement at high speed, bouncing and swaying of the body. These shortcomings are partly explained by the short wheelbase, but the main reason is the standard shock absorbers.
Front suspension shock absorbers for VAZ 2121, LADA 4×4
Rear suspension shock absorbers for VAZ 2121, LADA 4×4
The use of reinforced SS20 shock absorbers on the Niva with the “Standard”, “Comfort-Optima”, “Highway” or “Sport” settings will allow you to make your car suitable specifically for your operating conditions, and at the same time improve reliability.
The SS20 company offers front and rear reinforced shock absorbers for the Niva, which, unlike the standard shock absorbers of the VAZ 2121, have increased resistance during the rebound stroke, an increased diameter of the body and rod. The increased oil volume in the SS20 shock absorbers for the Niva allows you to move for a long time on rough roads without overheating the shock absorbers and without reducing their performance.
Standard - shock absorbers with the softest settings, an excellent solution for those who prefer a soft suspension, a smooth ride, and quiet movement. This shock absorber setting is suitable for everyday use, mainly in city conditions.
The “Comfort-Optima” modification has increased rebound valve settings, which solves the problem of body sway and significantly reduces “bumping” when the car bounces on uneven roads. SS20 shock absorbers for Niva and LADA 4x4 with “Comfort-Optima” settings are suitable primarily for urban use.
Shock absorbers “Highway” have an even greater rebound force compared to the “Comfort-Optima” series, and in addition, they have increased compression forces, which prevents suspension breakdowns when driving at speed on large bumps. Such settings are suitable primarily for suburban use on roads and moderate off-road conditions.
The highest rebound and compression forces and, accordingly, energy intensity are found in shock absorbers with “Sport” settings. These shock absorbers are suitable for fans of off-road racing, for the most severe operating conditions.
SS20 shock absorbers for Niva VAZ 2121 and LADA 4×4 have no internal knocks. Also, one of the features of SS20 shock absorbers is their high stability of parameters at low and high temperatures. The body of the SS20 shock absorbers is enlarged compared to standard shock absorbers, which not only allows for an increase in oil volume, but also the use of larger diameter pistons. This significantly reduces the specific loads on the elements of the valve system and increases their service life. The skirted pistons used in SS20 shock absorbers provide excellent sealing and stability of shock absorber performance with extended service life. The lower silent block of the front shock absorber has an original design that surpasses the factory one in reliability and damping capacity.
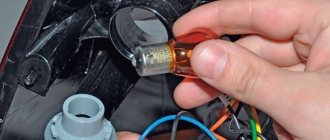
Old and new silent blocks for Niva Chevrolet
Rubber-metal articulated bushings (silent blocks) on all Nivas until 2008 had a different design from the modern one, and the design and dimensions changed only for the lower front ones.
The upper ones remained interchangeable with the lower silent blocks of classic VAZs.
The service life of silent blocks of the old design ranged from two to three years, depending on the intensity of use and climatic conditions.
After 2008
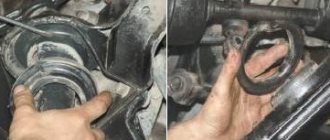
After 2008, the lower silent blocks received a different design, which made it possible to almost double their service life, but problems with the quality of parts from different manufacturers remained the same.
On the new parts, the diameter of the inner sleeve increased by 2 mm , and the outer diameter by 7 mm, which could not but affect the service life. Old bushings turned out well from Balakovo and Dimitrovgrad silent blocks, they were packed in branded VAZ packaging. The quality of other manufacturers is poor.
New bushings are supplied to the conveyor. And about the new articles: the upper silent blocks, interchangeable with the old ones, received the number 2101-2904040 , the new lower, reinforced ones - 2121 2904040 .
Why are polyurethane silent blocks better?
Not so long ago, polyurethane bushings, dampers and silent blocks became popular. The thing is good and useful, but you shouldn’t take polyurethane unconditionally enthusiastically and here’s the thing.
Polyurethane works well as a compression damping material.
For example, shock absorber bushings made from it are quite durable. But the silent block mainly works to twist, and the articulation of the SUV’s suspension implies large angles of rotation of the levers. And rubber parts cope better with this; on off-road they work smoother and longer.
Why are they worse?
In addition, polyurethane is afraid of high temperatures, and on the upper arms on the right side the conditions are just such that they can render silent blocks made of polyurethane unusable a thousand kilometers away.
We conclude: for the city, asphalt roads, perhaps installing polyurethane makes sense. If the Chevrolet Niva is used mainly off-road, you should definitely give preference to rubber parts.