| How to tune Kalina's headlights? If you think about it, there are not so many options, for example, installing eyelashes, painting a mask or tinting it. This time we’ll look at how to install angel eyes on Kalina with our own hands. |
Due to their design, Kalina's headlights do not allow the use of universal LED rings:
Therefore, you have to think in only two directions: make angel eyes from textolite of any shape, or replace Kalina’s headlights with tuning ones with already installed LED rings. First, let's disassemble the headlights, then consider the first method of making eyes:Making angel eyes from LEDs on PCB
First of all, we create approximate layouts from thick cardboard, which we transfer to the PC.
We draw printed circuit boards exactly according to the dimensions of our reflector. We manufacture boards on double-sided PCB using the Laser Iron (LIT) method. The principle of this method is shown in a series of videos:
As a result we get the following:
Then the resulting boards are etched and ground to the desired shape using an engraver. The main thing is to make a perfectly even shape; there is no need to rush. In the process of this work, we periodically try on the circuit boards on the headlights. (how to remove the headlight on Kalina, as well as disassemble it).
When the shape of the future eyes is ready, we tin the boards on both sides, and then solder the resistors on the second side (in our case, 51 Ohm).
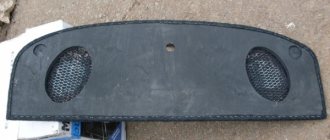
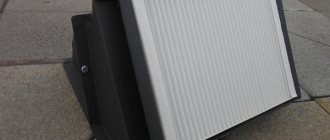
You will also need chrome trim, which can be cut from chrome panels (used on ceilings, price 300 rubles) from a hardware store. The last stage of making the rings is gluing the rings, diffuser and chrome trim. Glue - instant gel. The joint fits tightly with its ends facing each other, but not one on top of the other.
Which is better to use, LED or CCFL
We do not have a clear answer to this question. Therefore, we provide lists of the advantages and disadvantages of each of them.
The luminous element in Angel Eyes CCFL is a luminous neon tube, which is covered with a protective plastic casing. Their advantages:
- The light is distributed evenly throughout the entire ring.
- Does not respond to vibrations and shakes.
- The emitted light is softer than that of diode counterparts.
- Relatively cheap.
- Electricity consumption is very low.
Negative nuances:
- Starting is carried out through inverters (ignition units), which fail before the service life of the backlight ring itself ends (20,000 hours).
- To achieve maximum brightness, it takes about 2-3 minutes after connection.
- The brightness is significantly lower than that of LEDs.
- The service life is two times less than that of diodes.
Angel eyes LED consists of LEDs that are soldered onto a solid base.
The main advantages of this version of “angel eyes” include the following:
- The brightness of the glow is so high that they are clearly visible during the day and can be used as navigation lights.
- Service life exceeds 50,000 hours.
- Not susceptible to vibration and shock.
- Low energy consumption.
- The light is distributed evenly.
- Works stably both at -40°C and at +100°C.
The negative aspects of LED are the spotty glow and high price. In addition, if one LED burns out, then the entire ring has to be replaced, since selective replacement is problematic.
Installing angel eyes in Kalina headlights
Installation of angel eyes in Kalina's headlight is done using two-component glue. Reassemble the headlight in reverse order.
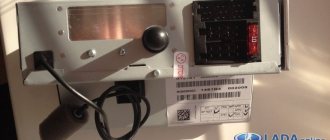
Connecting angel eyes. You will need connectors (for example, from xenon), wires, a five-pin relay, heat shrink, a casing for wires, and terminals. Don't forget about the current regulator.
see also
- How to check an electronic speedometer with your own hands
- DIY air compressor for car painting
- DIY spacers
DIY trunk for viburnum- DIY car thresholds
- DIY wheel arch covers
- DIY car suspension
- Do-it-yourself auto painting, coating of thresholds of VAZ 2110 video
- How to change the clutch on a viburnum with your own hands video
- Do-it-yourself modification of the VAZ 2110 interior
- Modification of VAZ 2110 headlights with your own hands Bosch
Third method
In theory, it is the simplest, since you are simply buying a ready-made device, which has a diffuser, an ignition unit and other necessary components
It’s just important to choose a quality product, since the Internet offers many options that are not of the best quality.
Eyes based on CCFL rings have proven themselves to be excellent. They have high reliability indicators and are in many ways superior to their LED counterparts.
If we talk about Aliexpress, then I would not advise you to buy ready-made angel eyes based on LEDs. Low-quality products are used here, which can quickly overheat when the head optics are turned on. As a result, in less than a year they will have to be removed due to the significantly reduced brightness level.
This is interesting: Replacing the fuel filter on a Priora (video)
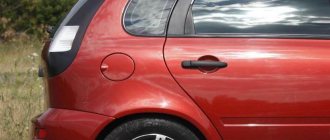
Cilia
Tuning Priora headlights, for many, ends precisely at the “eyelashes”. These are ordinary covers that follow the shape of the top of the headlight and are painted in body color. They are sold ready-made in auto parts stores, but eyelashes can be made. They can be made from a piece of vinyl film, the shape of which will have to be changed in order to be applied to the headlight - this is done with a soap solution (in the same way as with applying tint). The trims from the store are attached to the body either with sealant or double-sided tape. Remember that eyelashes limit the height of the illuminated space. In addition to them, there are other worthy ideas for tuning the Lada Priora.
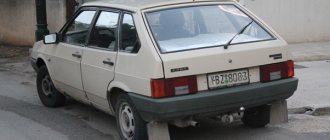
How to remove a taillight on a Priora and glue vinyl
Car enthusiasts often have a desire to highlight the uniqueness of the vehicle on the road in every possible way. To achieve the goal, the owners are upgrading the taillights on the Priora. They change the color of the vinyl film glued on top and install additional LEDs. Additional modifications to the design of the light signaling system must comply with safety standards.
It will be easier to work by removing the rear light. What is not difficult:
- You need to disconnect the wiring connector going to the light on the trunk side;
- unscrew the three plastic wing nuts;
- remove the lantern;
- pull out the wires along with the rubber seal through the mounting hole.
That's it, the lantern is removed, you can put the lantern in the reverse order. Before dismantling or installing the lamp, it is recommended to disconnect the wire from the terminal. Pasting vinyl is a procedure somewhat similar to the process of tinting car windows. You need to remove dirt, wash the glass of the lantern, remove greasy stains and stains using window cleaners. Cut a piece of vinyl of the required size (with a small margin), moisten the surface of the lantern with a soap solution (without fanaticism). Glue the prepared piece of vinyl, removing the protective layer, remove air bubbles, and remove excess moisture. The remaining vinyl around the edges of the tail light can be cut off with a sharp utility knife.