The cooling system thermostat accelerates engine warm-up and maintains the required thermal operating conditions of the engine. At optimal thermal conditions, the coolant temperature should be in the range of 85-95°C. The temperature values maintained by the thermostat are indicated on its bottom.
The thermostat consists of a body and a cover, which are rolled together with the main valve seat. The thermostat has three pipes: an inlet pipe for coolant intake from the radiator, a bypass hose pipe for bypassing fluid from the cylinder head to the thermostat, and a pipe for supplying coolant to the pump.
The main valve is installed on the thermoelement glass, in which a rubber insert is rolled. The rubber insert contains a polished steel piston mounted on a fixed holder. Between the walls and the rubber insert there is a heat-sensitive solid filler. The main valve is pressed against the seat by a spring. There are two posts attached to the valve, on which a bypass valve is installed, pressed by a spring. The thermostat, depending on the temperature of the coolant, automatically turns on or off the radiator of the cooling system and bypasses the fluid through the radiator or bypassing it.
On a cold engine, when the coolant temperature is below 80°C, the main valve is closed and the bypass valve is open. In this case, the liquid circulates through the bypass valve into the pump, bypassing the radiator (in a small circle). This ensures quick warm-up of the engine. When the fluid temperature rises above 94°C, the thermostat's solid fill expands, compresses the rubber insert and pushes out the piston, moving the main valve until it is fully open. The bypass valve closes completely. In this case, the liquid circulates in a large circle: from the cooling jackets to the radiator and then through the main thermostat valve it enters the pump, which is again sent to the engine cooling jackets. Within the temperature range of 80-94°C, the thermostat valves are in intermediate positions, and the coolant circulates in both small and large circles. The opening value of the main valve ensures gradual mixing of liquid cooled in the radiator, thereby achieving the best thermal operating conditions of the engine.
On 2101-2107 and Niva 21213 + all its modifications there is a thermostat 2101 (the opening temperature is 80-82 degrees, the angle of rotation of the pipes is 120 degrees). The VAZ-2121 was equipped with a thermostat 2121, which differs in the angle of rotation of the pipes (180 degrees, that is, the upper one is opposite the lower one) and its own set of pipes. It is possible to install a 2101 thermostat on a 2121, but you also need to buy 21213 pipes along with it. The opposite option (installing a 21st thermostat on a 21213) is more difficult to implement due to the lack of 2121 pipe kits on sale. There are no other obstacles to technical creativity. Note: IMHO, if you are going to change it, either look for the “twenty-first” pipes and install a Hungarian thermostat (cheap and good), or invest in an “Italian” 2101 - 450 rubles at the Za Rulem TD, but the quality is guaranteed and the opening temperature is maintained. The “budget” option - thermostat 2101 produced by the Vladimir plant (together with the Poles) - costs 100-150 rubles, and there is much less risk of running into defects. Stavrovsky thermostats (the plant is a supplier of the VAZ conveyor) are a very dangerous lottery, more than half of them “raise” the temperature regime by opening later. In winter this is nothing, but in summer in a traffic jam the consequences are obvious Leo2131, 02/16/01. Original.
Thermostat. Symptoms of a problem
The thermostat may have two malfunctions: 1. incomplete opening of the small circle (the engine does not heat up); 2. incomplete closing of the small circle (the engine overheats).
If the small circle is not fully opened, it will be possible to get to the repair site (in the worst case, the engine temperature in the summer will not be below 70 degrees). The sign is a temperature below operating temperature.
The second case may lead to engine repair. If the small circle is not completely closed, an additional fan may not help. The sign is a temperature above operating temperature. On 21213, the operating temperature is considered to be 90 degrees + one or two arrows on the temperature indicator. If the thermostat is faulty, then when the engine reaches operating temperature, the lower part of the thermostat remains cold.
First, anamnesis. 1. Niva 21213 with sound insulation (and under the hood) 2. Mileage 22000 3. Standard fan Now the medical history 1. Before July 2, the temperature was (according to the index) 2 arrow thicknesses to the right of 90. When driving at high speed (4000-4500 rpm ) along the Moscow Ring Road rose to the right by one thickness. When the speed was reduced, it returned. It was the same in traffic jams. 2. On July 2, after the ACCOIL slalom, the temperature became 3 arrows to the right of 90. 3. On July 3-4, the temperature became 4 arrows to the right of 90. 4. On July 5, the temperature became 5 arrows to the right of 90. 5. On July 6, the temperature became 6 arrow to the right 90. 6. On July 7-8, the temperature became near the beginning of the red zone. In cases 2-6, the temperature rose and did NOT RISE, but did not fall when the stove was turned on. 7. Changed the temperature sensor and radiator cap. Zero emotions. 8. I changed the thermostat - the arrow moved one arrow to the right of 90 and has been like that for a week. Regardless of traffic jams, traffic speed, etc. Conclusion - the thermostat is to blame. At the same time, it wasn’t that it didn’t open, but it didn’t open all the way. Therefore, the car overheated, but did not boil. Now it’s been hot for a week, but not once has the needle deviated from its normal position (pah-pah-pah). So, as I said a few days ago - ext. NO fan needed. It only masks the problem, but does not cure it. PIPE, 07/16/00. Original.
Thermostat. Removal and installation
Drain the antifreeze. Remove the clamps on the thermostat pipes and remove the thermostat. Install in reverse order. If you previously had tape clamps (the tape is screwed onto a “cotter pin”) or screw clamps with a flat tape, then you need to change them to screw “Norma” clamps; their edges of the tape are bent upward and do not cut the hose. Don't forget to add antifreeze and remove the plugs.
Sometimes the thermostat is changed without draining the antifreeze by pinching the hoses: It is best to clamp the hoses with medical clamps, the so-called forceps, of the largest size. You can also use various clamps or hand vices. The rest is dexterity and quickness of hand. Of course, you will lose a little antifreeze, but it is better to add it later than to drain it all, etc. MaxF, 02/03/00. Original.
Thermostats from different manufacturers
IMHO, if you are going to change it, either look for the “twenty-first” pipes and install a Hungarian thermostat (cheap and good), or invest in an “Italian” 2101 - 450 rubles at the Za Rulem TD, but the quality is guaranteed and the opening temperature is maintained. The “budget” option - thermostat 2101 produced by the Vladimir plant (together with the Poles) - costs 100-150 rubles. and the risk of running into marriage is much less. Stavrovsky thermostats (the plant is a supplier of the VAZ conveyor) are a very dangerous lottery, more than half of them “raise” the temperature regime by opening later. In winter this is nothing, but in summer in a traffic jam the consequences are obvious Leo2131, 02/16/01. Original.
There are also so-called “winter” thermostats, designed to work in cold conditions (the Far North, for example). They have a higher opening temperature. For the middle zone (Moscow, for example) these are not required.
Q: I'm sitting at work. I'm reading Biltema's catalogue. Thermostats section. —- Summer - Winter Lada 83С 90С Niva 82С 91С What is this? Is it now customary to install a summer thermostat along with summer oil and summer tires? Or are the dates mocking us? Barrymore, 06/05/00. Original. A: They are not mocking. It’s just that “cold” and “hot” thermostats are provided for different operating conditions. Do not forget that about half of the Finnish territory is located beyond the Arctic Circle. Hence this choice. Leo2131, 05.06.00. Original.
Once again I replaced the thermostat. I installed a French Vernet thermostat. Previously, when the stove was turned off, the needle went to the middle between 90 and the red zone. The sensor was boiling, so I am confident in the readings. I installed the French Vernet for 207 rubles. Externally, it looks like Avtopriborovsky - a plastic case. The top valve plate is very thin. The display meter needle immediately returned to 90+one pointer. The thermostat is packaged in a plastic bag with yellow-orange inscriptions. Alexey73, 04/24/01. Original.
I installed a French thermostat from Vernet (+) I bought it at ZR on Bakuninskaya. Costs 205 rubles. The case is black polymer, by the way, someone wrote in the conference recently that they also installed it. There was also a Stavrovsky one for 130 rubles. There was no other choice. Now, when moving, the arrow is 1-2 mm to the right. When standing in traffic jams, it moves to the middle between o and the beginning of the red zone. The electric fans turn on and off normally. ALK214, 04/25/01. Original.
2121st thermostat for 21213
Last winter I installed such a thermostat, changing the configuration of the tubes (I simply selected them from existing ones, cut some, and turned something differently) - it’s brilliant. And it stood up like normal, and the lower radiator pipe stopped rubbing against the axis of the upper arm. Vlad219i, 11.10.00. Original.
Expand the pipes a little and everything works. I have this Alexey73, 06.06.00. Original.
Manufacturers and types
Standard sizes of thermostats, which by their design are suitable for installation in the engine of a Chevrolet Niva car, are produced by a number of global companies. The table below presents a list of products.
| Model | Product serial number | Opening temperature |
| Thomson | 21230-1306010-05-0 | 80° |
| Zommer | 2123-1306010 | 80° |
| Metal Inkar | 2123-1306010-01 | 80° |
| Pramo | 2123-1306010-02 | 80° |
| WEEL | 182-0114 | 80° |
| Luzar | LT0123 | 80° |
| Herzog | HL36010 | 80° |
| Vkt | VT29003 | 80° |
| Fenox | TS009E7 | 80° |
| Finord | 21231306010 | 80° |
| Baker | 21231306010 | 80° |
| Finwhale | FinwhaleT123 | 80° |
| Gallant | GLTH14 | 80° |
| Hofer | HF 445 730 | 80° |
There is an opinion among car owners that the highest quality, reliable and durable thermostats are products produced by Russian factories. There are currently three such enterprises:
- City of Stavrovo, Vladimir region, ATO plant;
- City of Rzhev, Tver region, PRAMO plant;
- City of Vladimir, Thomson LLC.
Among foreign models, car owners have good reviews of the Metal Inkar model from the Polish manufacturer.
These products work great in the Chevrolet Niva cooling system, the engine warms up quickly, there are no complaints.
The only negative is that the body is made in two versions - plastic and brass. The second option is not very popular among drivers, although it also works well in a circuit.
Zommer, Luzar, WEEL thermostats should only be selected from approved manufacturers. There are a lot of fakes on the market and on the Internet. Retailers seek to sell their dubious products under the guise of original ones to newcomers in the automotive business. To avoid getting burned, when purchasing, you must require licenses, certificates and supporting documents from sellers.
About choice
Which thermostat is better for the VAZ-2110
AvtoVAZ catalog number: 2123-1307011-75.
It is equipped with a water pump produced by Tolyatti Automotive Units Plant CJSC (TZA).
On the shelves you can also find products from domestic SOATE, Fenox, Pekar. Of the imported ones, they are famous for the quality of products from Hepu (Germany), Graf (Italy), SKF (Germany - Spain).
The cost of a domestic unit starts from 880-900 rubles, imported ones can be found for 1900.
Counterfeit products from various shady manufacturers are very common on the market; outwardly they are practically no different from the original.
Important information:
- A high-quality pump is packaged in a plastic bag and a bright cardboard box. The packaging must include the catalog number, specifications, Russian and ISO certificate numbers.
- The product kit includes a gasket made of a special material similar to cardboard. A paronite gasket is a sign of a fake!
- It is advisable to choose a pump with a cast iron or steel impeller.
Also interesting: The principle of operation of the air conditioner of a Niva Chevrolet car
High-quality thermostat for Niva 21213, 21214, 21214-M
VAZ 21214 Niva heater tap which is better
There is no great point in talking about the importance of this detail. Once the engine overheats and we remove the cylinder head to polish the driven plane
For a long time I did not pay enough attention to this spare part, but ever since sales of silicone pipes began, people wanted some kind of branded thermostat for the Niva. To be honest, I found it several years ago, I just didn’t want to deal with such a small thing, but if people want it, then oh)))
Thermostat for the Niva, problem
Our thermostats have a very simple problem - stability of operation. The standard provides for a deviation from the stated figures, plus or minus two degrees. On Russian thermostats this error is within 10 degrees. The question is actually not about temperature deviations, but about engine operation
If on a carb engine, when the thermostat opens is generally not so important, then for an injection engine, this is the setting parameter. I'll try to explain it simpler
The operating temperature of the coolant is set in the firmware, which is monitored by a temperature sensor. For example: 90 degrees is specified. Let's assume that our buggy thermostat opens not at 87 degrees, but at 77. The temperature sensor tells the brain that the engine is not warmed up, and they add more fuel. Because for the brain, 77 degrees is an unheated engine. The result: black spark plugs, higher fuel consumption and a permanent loss of traction.
Gates thermostat
The situation is in the best traditions of large manufacturers. We pick up the Gates branded box, it has a beautiful holographic seal on it, and inside.....we find a product from the French manufacturer Calorstat. The situation is one-on-one reminiscent of the passage with ATE brake pads. The leading German manufacturer of brake components produces cheap pads outsourced. It's a shame, though)) But not everything is as bad as it seems. The manufacturer Calorstat makes thermostats for half of European manufacturers, who put them in their own branded boxes or put them on a conveyor belt. Therefore, we can confidently trust this manufacturer. The quality is a solid four. The price is comparable to the cost of domestic thermostats. Thermostat at 80 degrees. Let me remind you that on Nivas with 1.7 carburetor engines, with 1.7 injection engines, and Nivah-M, the same thermostat is installed, which I described in this article.
Comment
A point I want to draw special attention to. Cars of the Niva family have TWO temperature sensors
The first one since Fiat, stands on the block, about 4 candles. The second one is installed on the tee, at the beginning of the cylinder head. The first one gives readings only on the dashboard. The second is on the brains of the injector. Therefore, the question very often arises about the difference between the readings of the tidy and the BC. You need to trust the on-board computer, because it takes readings from a sensor that works with the ECU (electronic control unit).
Operating principle
The Niva's cooling circuit operates under pressure, since in normal mode it does not communicate with the atmosphere. The coolant is antifreeze with a freezing point of -40 °C. It is a solution of water with ethylene glycol, the amount to fill the system is 10.7 liters. It also boils at an elevated temperature, +110 °C.
The key element in the operation of the system is the thermostatic valve, which distributes fluid flows depending on the heating of the engine. Inside the thermostat there is a damper controlled by a temperature-sensitive element. When heated, it moves the damper, opening another path for the flow. In general, the scheme works according to the following algorithm:
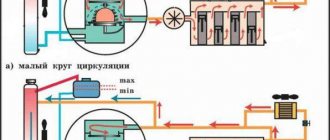
- When the engine is not warmed up to operating temperature (90 ° C), antifreeze, stimulated by the pump, circulates through a small cooling circuit: engine, thermostat, interior heater radiator.
- When the power unit heats up, the thermostat damper begins to open slightly, allowing part of the liquid to flow into the large circuit into which the main radiator enters. The movement of the damper begins at a temperature of about 80 °C, and when it reaches 92-94 °C it is completely open. Almost all the antifreeze now moves in a large circle, cooling in the main radiator.
- The small circulation ring does not close, because the stove must also function. But much less liquid flows there due to the small diameters of the pipes. The carburetor or throttle valve heating is connected to the same line.
- On the Niva VAZ-2121, the fan is installed on the axis of the water pump and constantly drives air onto the cylinder block. In the VAZ-21214 and 2131 models, 2 electric fans are turned on alternately or together, obeying the command of the controller, which is guided by the readings of the temperature sensor. The switching threshold is approximately 100 °C.
- The excess volume of antifreeze that occurs during heating goes through the hose into the expansion tank. At the same time, the pressure in the system increases, which makes it even more difficult for the liquid to boil. When cooling, the reverse process occurs: antifreeze returns to the system.
In the summer and transition period in VAZ-21213 and 21214 cars, the passage of coolant through the heater radiator is limited by a tap. There is no such tap on the Chevrolet Niva; the heating is turned off by redirecting the air flow past the heat exchanger.
Replacing the thermal switch
Coolant temperature sensor VAZ 21214 injector
The thermostat is replaced if the engine's thermal conditions are violated. This usually happens after 60 thousand km. The replacement process is not difficult. It is not necessary to completely drain antifreeze or antifreeze from the system.
Required materials and tools:
- screwdriver;
- new clamps;
- sealant;
- Coolant for topping up.
1.Loosen the screws on the five clamps, using a screwdriver, tightening the pipes.
2.Pull off the rubber pipes from the thermostat housing.
3.Remove the old thermostat.
4.Install the new device in reverse order. Before installation, lubricate the joint with sealant. Tighten the new clamp screws securely with a screwdriver.
Design Features
The cooling principle for the VAZ 21214 itself is liquid (which means circulation will occur in the reverse order). Filling is carried out using an expansion tank.
The reagent here is water with ethylene glycol. It will freeze only at the lowest possible temperatures, and with the help of various additives it can also increase the service life of the oil seal, as well as slow down the corrosion process of all other parts of the car
The cooling system for this brand of car will include the following components:
This also includes both the numerous inlets and outlet channels that the system has.
Replacing the thermostat
An internal combustion engine is designed to operate at a certain temperature. Only within a certain range of heating of the coolant are the correct temperature gaps of the rubbing parts and the factory-set characteristics observed. To speed up warm-up, the coolant first passes through a small circuit (bypassing the radiator). Then, as it heats up, the flow is redirected along a large circuit through the radiator. If necessary, the cooling fan is also forced to turn on. Thanks to this three-stage system, heating occurs more evenly and operating temperature is reached faster.
To switch antifreeze between cooling circuits, a special valve is provided - a thermostat. It opens under the influence of a certain temperature and is a regulator of engine cooling.
This item is actually a consumable. If it breaks down, the thermostat needs to be replaced, since it cannot be repaired. Correct operation of the thermostat is especially important on vehicles operated in difficult conditions: for example, SUVs. NIVA 2121 falls into this category. When driving off-road, the engine works under heavy load and gets very hot. And external cooling by air flow is not effective due to the low speed. It is in such a situation that a broken thermostat can lead to overheating of the internal combustion engine and deformation of the cylinder block.
The malfunction can be determined independently, without special diagnostics. During normal operation of the thermostat, the internal circuit pipe heats up first. As the temperature rises, after the valve is activated, the outer pipe also becomes hot. The engine overheats even though the cooling fan is working and the antifreeze level is normal. External signs: after warming up the engine, the internal circuit pipe is hot, the external circuit pipe is cold. Malfunction - the valve is constantly closed.
If such malfunctions are detected, it is necessary to dismantle the thermostat and check its functionality in a container with hot water. A thermostat is placed in the pan, the water is heated (constant stirring is required).
When the valve opening temperature is reached (checked with a thermometer), a working thermostat should work.
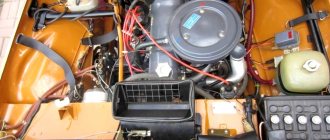
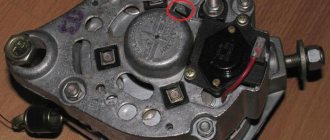
In the NIVA 21214 car, the valve is conveniently located; there is no need to dismantle adjacent elements. No special tools are required - just a Phillips screwdriver is enough. You may also need a flat blade screwdriver to pry up stuck hoses. Drain some coolant to a level below the connection between the pipes and the valve. Cover the generator with plastic wrap. If antifreeze gets inside the generator, this will entail a labor-intensive operation to clean and dry it. It is even possible that electrical equipment may fail, and the generator will have to be replaced.
Next, you need to loosen the clamps on the inlet pipes and check their free movement. When replacing, do not pull off the hoses with a sharp movement, as this may damage the pipe or cause injury.
After making sure that the joints are not stuck, unscrew the clamps until they sag and separate the pipes. Be prepared to catch any leaking antifreeze; you can use a rag to cover it. Inspect the supply pipes. If there are cracks or large creases, replace them. After removing the part from under the hood, inspect it for fallen springs or other metal parts.
If there is a foreign object left in the pipe, you will have to change the water pump as well. Before installing a new thermostat, thoroughly wipe the internal surfaces of the pipes to remove any deposits. Be careful not to allow debris to get inside the cooling system. Attach the new valve in reverse order. First, tighten the screws fully and check the connections for rubber kinks. Then crimp the clamps all the way. Add antifreeze to the standard level and start the engine. Check the joints for leaks. Check the functionality of the thermostat by touching the hoses of the circuits.
https://youtube.com/watch?v=1RFbpW3S6Tw
Troubleshooting
The main reason for water pump failure is severe wear of the bearings. Oil seal leakage is also a consequence of worn bearings. Cases when the oil seal began to leak coolant on its own are very rare.
The symptoms of these malfunctions are as follows.
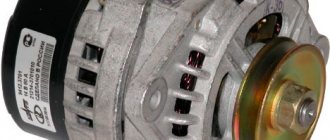
- A suspicious noise is heard in the belt drive area, the intensity of which depends on the degree of wear of the bearings. In the early stages it manifests itself in the form of a hum, and then turns into knocking and grinding. The generator shaft can also make similar sounds - therefore, in this case, additional checking is required.
- There is play on the water pump shaft. You can determine it by shaking the shaft with your hand.
The shaft play is felt when the pulley is rocked by hand.
- The belt and the area around the pulley are splashed with antifreeze. This also needs to be further checked - a similar effect is observed when the crankshaft front main oil seal loses its tightness. In the latter case, the front of the engine becomes covered with a layer of oil and dirt.
- With a high degree of wear, the pump shaft moves to the side along with the pulley. As a result, the impeller breaks the housing, the shaft jams and breaks into two parts, and the generator belt jumps off.
If the bearings are severely worn, the shaft may break into two parts.
If pump problems are not detected in time and the consequences described in paragraph 4 occur, the engine instantly overheats and the coolant quickly leaves the system. In such a case, immediately turn off the engine.
Diagnosing a faulty water pump is quite simple. It is necessary to open the hood and inspect the space around the pulley. If traces of liquid are found, you need to make sure that it is antifreeze and not oil. Then, in order to detect play, you should rock the pump pulley by hand. It should be taken into account that play can occur without coolant leakage through the oil seal. With a small (1–2 mm) play you can drive from 1 to 3 thousand km. After this, repair or replacement of the pump is necessary.
The impeller broke the housing wall and antifreeze leaked out
Replacing the device
First, you need to disconnect the battery terminal.
1. Remove the side panel and glove box
2. Unscrew the cabin filter, remove the wiring harness
3. Unscrew the screw and remove the engine control system
4. Using a screwdriver, remove the evaporator screws
5. Remove the radiator pipes or cut them
6. Remove the device and replace it with a new one
Dismantle the side panel, as well as the glove box, by unscrewing all the necessary screws. Next, unscrew the bolt and remove the air duct located in the passenger’s feet. Unscrew the electronic engine management system, it will be easier. Dismantle the airbag plug, which is secured with four bolts on the inside. Next, cut out the plastic and remove the air duct. Now you need to remove the cabin filter element. Dismantle the so-called volute along with the damper body; the structure should be moved to the side. After this, disconnect the supply wires and dismantle the electric motor along with the snail. Next, you will need to unscrew the evaporator, which is secured with two bolts on the inside. In addition, disconnect the pipes along with their fastening device. The lower plates should be bent. The evaporator itself should be moved slightly to the side (to the right). Be extremely careful here; under no circumstances should you use a lot of force so as not to damage the element. Press the evaporator onto the floor of the vehicle and then simply pull it out. The radiator hoses should be removed. If you see that they are in poor condition, then it is advisable to replace them immediately, then the pipes can be cut off. In addition, it will be much easier. The bolts securing the device must also be removed. Then all you have to do is dismantle the element and replace it with a new one. All further assembly is done in reverse order. You need to wait a while for the Shumka to dry
Pay attention to the condition of all hoses and pipes; if you notice any shortcomings, we recommend replacing them immediately.
Also interesting: Niva generator transfer bracket drawing || Niva generator waterproof
Functionality check
Let's figure out how to determine whether the thermostat is working or not. It is necessary to warm up the engine, but in such a way that the arrow does not reach the red line. Then turn off the engine, open the hood and find the upper and lower radiator hoses. They are black, approximately 5 cm in diameter and have metal clamps at the ends.
Touch the hoses carefully (they may be hot). If the engine sensors show a high temperature, but one hose is hot and the other is still cold, then most likely the fluid is not entering the engine and the thermostat is faulty.
There is also a “popular” performance test. Remove the device from your car, place it in a container of water and heat it on the stove. When the temperature reaches 87-90 degrees, the car thermostat valve should open about 2 cm. If this does not happen, then the device is unsuitable for operation, you can safely change it. When purchasing a new appliance, be sure to check with the seller at what temperature the thermostat opens, as it may vary. The engine will not cool if you install a device with a high indicator.
Which thermostat is better to install on a Chevrolet Niva: photos and videos
The primary and most basic task of the Niva Chevrolet cooling system is to maintain optimal temperature conditions. Since a low temperature has a negative effect on the operation of the motor as a whole, and a high temperature is accompanied by burnout of the lubricant, an increase in gaps in parts, which can lead to their seizing and jamming.
The video below will tell you about replacing the thermostat on a Niva Chevrolet:
https://youtube.com/watch?v=g7ADSj3iKcc
More information about the thermostat on a Chevrolet Niva
To ensure that the engine temperature is optimal, a thermostat is included in the system design. It is installed in the path of coolant movement. There are two types of thermostats, and on the Niva Chevrolet it is of the liquid type.
New thermostat installed.
The body is made of a brass cylinder, inside there is a rod and a double valve, and until the liquid reaches operating temperatures, it circulates in a “small circle”. But as soon as the temperature reaches a limit of 90 degrees, the rod unclenches, opening the way for movement in a “big circle”.
Reasons for replacing the thermostat
Most often, the reason to replace the thermostat is its failure.
It is very easy to diagnose it; to do this, on a warm engine, touch the upper pipe going to the cooling radiator and if it is cold, this will mean that the thermostat is not working properly, because it does not send coolant to a large circle.
Replacing the thermostat is very easy, you just need to minimize the amount of coolant in the system and unscrew all the fixing pipes. But it’s quite difficult to approach the choice of a truly high-quality thermostat, because the choice is very large and among them there are obvious outsiders and leaders.
TOP 5 thermostat manufacturers
Below we will present to you the five best thermostats that have proven themselves not only among real car owners, but also among experts.
- Thermostat "PRAMO" 2123-1306010-02.
- Thermostat "Luzar".
- Thermostat "WEEN".
- Kraft thermostat.
- Thermostat "AvtoVAZ" 2123-21230-1306010-82.
Please note that the design of these elements is completely identical, only the workmanship and appearance differ. But it is from this list that all devices are similar, have almost the same price of 400–450 rubles
When choosing a thermostat in a store, you should not be fooled by low prices from unknown manufacturers, since a difference of 50–100 rubles does not bring much savings, and can add to engine malfunctions.
Reasons for failure
There are two main thermostat failures:
- The car does not warm up normally and quickly;
- The engine overheats quickly.
The malfunction can be identified by a characteristic sign - the needle of the instrument indicating the engine temperature drops sharply down when the car accelerates and jumps up if the car slows down.
A sensitive valve is installed inside the thermostat. It can become clogged with dirt, oil, and foreign bodies. Then it gets stuck in the open or closed state.
Lada 4×4 3D VYATSKAYA GUN › Logbook › Installing a thermostat according to the principle of the NIVA-Chevrolet scheme.
For a long time I was planning on switching to a thermostat from a Chevrolet Niva on the Niva, before that it was installed on the 2106... Unlike the native one, a more thought-out scheme ensures: - supply of coolant/oil directly to the cylinder block. - Air pockets are quickly expelled. - Faster warm-up motor and, as a result, the heater heats up faster in winter.
For the remodel you will need:
-2 pipes (in the picture No. 1 and No. 16) -Hose of 18 mm in inner diameter to the stove. -Hose from the expansion tank to the radiator (now this will be the return (in the picture No. 13) -Expansion tank (I took from 21214) - Chevrolet Niva thermostat. - Plug for the coolant/oil supply channel to the heater from the pump. (I made it myself) - Clamps (it is advisable to take NORMA GM, very high quality.
And in detail:
We remove all the old parts of the coolant/oil system and attach the thermostat to the pump with the purchased hose.
From the old hose we cut out a new pipe from the thermostat to the head.
We adjust the purchased hose from the thermostat to the radiator in place...
After that
Take a purchased hose with an internal diameter of 18mm
And pull it onto the upper pipe of the stove.
We connect the carburetor heating to the smallest fitting of the thermostat. I recommend using a very strong oxygen hose…
We install a pump plug made from a former pipe.
The radiator fitting, which previously served to supply coolant/fuel from the expansion tank, has a double cross-section; we attach a hose to the smaller one.
And we pull it into the new expansion tank.
Now coolant/fluid will circulate through it, expelling air pockets and constantly maintaining the required level of coolant/fluid in the radiator.
We slightly modify the radiator cap. We saw off the rod with a grinder and cut out 2 gaskets from the inner tube to seal the connection as much as possible.
General form.
And assembled.
In addition to everything, I installed a thermocouple and an emergency coolant temperature sensor in the upper radiator pipe.
The sensors are oriented downward to avoid contact with steam and incorrect readings.
In the afterword, I will say that an electric fan with forced shutdown will be installed, and the emergency sensor will be displayed on a warning lamp. Do not switch