For almost thirty years, the Volzhsky Automobile Plant produced the “Seven” - one of the most common cars in our country. VAZ 2107 is a luxury sedan version of the previous fifth model. By the standards of the end of the last century, the car is quite reliable, comfortable and, most importantly, inexpensive. The technical characteristics of this car were at a fairly high level for its time.
The car was equipped with a one and a half liter gasoline engine, and its tank volume of 39 liters allowed it to travel over 534 km with a minimum consumption of 7.3 liters per 100 km. When driving around the city, this distance decreased to 379 km. The power unit was filled with motor oil, and the crankcases of other mechanisms were filled with special transmission oil. The filling tanks of the VAZ 2107 car had a sufficient volume to ensure trouble-free operation of the engine and other systems.
Filling volumes and brands of oils and liquids LADA (VAZ-2107 Zhiguli)
| Filling/lubrication point | Filling volume, liters | Name of oil/liquid |
| Fuel tank | 39 (42) | Motor gasoline with octane number 92 - 95 |
| Engine cooling system including interior heating system | 8,65 | Coolant with a freezing point not higher than -40 C |
| Engine lubrication system, including oil filter, at ambient temperature: from -20 to +45 °С from -25 to +35 °С from -25 to +25 °С from -30 to +35 °C from -30 to +25 °C from -35 to +30 °C | 3,75 | Motor oils (with API quality level: SG, SH, SJ) SAE 15W-40 SAE 10W-40 SAE 10W-30 SAE 5W-40 SAE 5W-30 SAE 0W-40 |
| Gearbox housing | 1,6 | Gear oils with quality level according to API GL-4 or universal GL4/GL5 and viscosity 75W-90, 80W-90 |
| Rear axle housing | 1,3 | Gear oils with quality level according to API GL-5 and viscosity 75W90, 80W-90 |
| Steering gear housing | 0,215 | Gear oil 75W-90 |
| Hydraulic brake system | 0,382 | DOT-4 brake fluid |
| Hydraulic clutch release system | 0,18 | DOT-4 brake fluid |
| Windshield and tailgate washer reservoirs | 2.0 or 5.0 | A mixture of water with a special liquid REVIEW, GLASSOL or windshield washer fluid ASPECT |
| Starter drive drive ring | — | Lubricant Litol-24, AGIP GREASE 30, ESSO UNIREX No. 2 |
| Front wheel bearings | — | Litol-24 lubricant |
| Cardan joint cross bearings | — | Lubricant FIOL-2U, No. 158 |
| Front propeller shaft spline | — | Lubricant FIOL-1, CV joints-4 |
| Door limiters | — | CV joint grease-4 |
| Seat moving slides | — | Lubricant FIOL-1 |
| Tie rod joints and front suspension ball joints | — | ShRB-4 grease |
| Battery leads and terminals, trunk lid torsion bars, door and trunk lid keyholes | — | Automatic lubricant VTV-1 in aerosol packaging, CIATIM-201, -221, Litol-24 |
| Door, hood, trunk lid locks | — | Lubricant FIOL-1 |
| Pressure regulator | — | Grease DT-1 |
How much and what to fill in VAZ 2107
Fuel system
Fuel tank volume – 39 l. The manufacturer recommended using gasoline with an octane rating of 92 or 95.
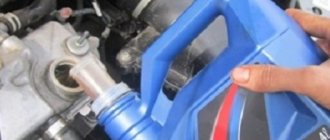
Engine lubrication system
The quality of operation of components and assemblies depends on the regularity of replacing lubricants. Engine oil lasts no more than 10 thousand km. After which it is necessary to change it to a new one. Lubricant fluid (with API quality level: SG, SH, SJ) is suitable for the VAZ 2107. During the procedure, a new oil filter must be installed. The same oil is used for the engine crankcase as for the power plant.
Engine cooling system
The service life of antifreeze is 60 thousand km. Even if the car is not used, the fluid loses its properties after two years, so it needs to be replaced.
Transmission
The transmission oil is changed every 60 thousand km. At the same time, its level is periodically monitored. After 20 thousand km it may decrease, which will negatively affect the operation of the unit. The defect must be eliminated and oil must be added to the edge of the filler hole. This also applies to the rear axle housing. The gearbox filling volume is 1.6 liters.
Brake system
Brake fluid should be replaced once every two years regardless of the vehicle's mileage. Domestic DOT-4 or a foreign equivalent is recommended.
Loading…
7 804
Best synthetic oil
Mobil 1 FS 0W40
The most famous synthetic motor oil, Mobil 1 FS 0W40, has improved performance characteristics; previously this product was called Mobil 1 0W40. He passed many different tests successfully. The most indicative is the test project conducted by ExxonMobil in the Russian capital in 2014. This project lasted a year and a half and consisted of testing oil on taxi engines operating in extreme conditions. The tests involved Mobil 1 0W40 and Mobil 1 ESP Formula 5W-30 lubricants. Both products performed great. After inspecting the engines, experts noted the excellent condition of the internal combustion engine parts. For evaluation, a scale from 0 to 10 was used, where 0 is a new motor, and 10 is the most slagged unit. Motors filled with Mobil synthetics received 0.5 points. After disassembling the internal combustion engine, experts noted the high cleanliness of the parts.
Advantages of Mobil synthetics:
- reliable protection of engine parts from wear;
- excellent cleaning characteristics prevent the formation of deposits as a result of oxidation and corrosion;
- the oil retains its characteristics even over long distances up to 25,000 km;
- increasing the power and efficiency of the power unit;
- reduction of fuel consumption;
- stable performance characteristics under overloads and temperature changes;
- reduction of emissions into the environment.
Like other well-known brand motor oils, Mobil 1 is often subject to counterfeiting. To protect yourself from purchasing counterfeit products, you should buy products only from official dealers who have all the necessary certificates.
Shell Helix Ultra 5W40
The popular synthetic motor oil from the well-known manufacturer Shell constantly ranks first in various ratings. In 2018, the synthetics of this brand received the status of a revolutionary product. The test results confirm the opinion of car enthusiasts that Shell oil is one of the best products. This is the only synthetic that is officially recommended by the Ferrari concern, which confirms its highest level. We did not give Shell Helix Ultra synthetics the first line of the rating only because of the high price, but we note that the excellent characteristics of this lubricant allow us to turn a blind eye to the price tag.
Advantages:
- reliable protection of engine parts from wear even with an extended oil change interval;
- high degree of stability of performance indicators;
- increased engine performance, smooth operation;
- increasing the service life of the motor;
- ensuring the cleanliness of the piston group at the factory level;
- easy engine starting in cold weather (up to -40 °C);
- stable structure of components even under high loads and temperature changes;
- low waste consumption;
- economical fuel consumption.
The disadvantages of Shell motor oil include its high cost, but this is compensated by the corresponding quality. In addition, it is worth noting that Shell products are often counterfeited.
Motul 8100 X-cess 5W40
Universal synthetics from the French brand Motul are always at the top of the motor oil ratings. Motul 8100 X-cess 5W40 can be used in lubrication systems of various types of internal combustion engines (gasoline, diesel, equipped with gas equipment, etc.). This engine oil is especially suitable for powerful power units with direct fuel injection, turbocharging and exhaust gas aftertreatment systems (catalysts and particulate filters).
Advantages:
- reliable protection of engine parts from wear;
- high degree of stability of performance indicators;
- high pumping speed through the lubrication system and complete coverage of engine parts;
- protection against oxidation;
- stability of performance characteristics during temperature fluctuations;
- increase in engine life;
- economical fuel consumption;
- gentle care of exhaust gas neutralization systems;
- environmental friendliness;
- admissibility of mixing with different types of motor oils.
It may seem that Motul synthetics are very expensive. In addition, counterfeits of this product are quite common.
Filling volumes, in liters
- Fuel tank (including reserve 4-6.5 l) - 39
- Engine cooling system (including interior heating system) - 9.85
- Engine lubrication system (including oil filter) - 3.75
- Gearbox housing - 1.35
- Rear axle housing - 1.3
- Steering gear housing - 0.215
- Hydraulic clutch release system - 0.2
- Hydraulic brake system - 0.66
- Front shock absorber - 0.11
- Rear shock absorber - 0.18
- Windshield and headlight washer reservoir - 5.0
Possibilities for upgrading the machine
In the nineties of the last century, many owners of VAZ 2107 cars, not particularly counting on gas stations, installed an additional tank in the car. This is much more convenient than pouring fuel from cans. Typically, such a container was located behind the rear seat in the trunk. It could have different sizes, and accordingly they had the appropriate capacity.
The driver in those days often encountered empty gas stations, and the additional volume of the fuel tank greatly expanded the capabilities of the car. Knowing the required amount of technical fluids is necessary for routine maintenance of the engine and other systems.
Operating standards for technical fluids
Already at the development stage, the manufacturer determines the parameters of the machine, which are refined during the testing process. So, in the described car, model VAZ 2107, the volume of the fuel tank corresponds to the size of the niche in the trunk behind the right wheel arch. Crankcases of other mechanisms contain the following quantities of operating fluids:
- engine – 3.75 liters of engine oil;
- cooling jackets, radiator and expansion tank - 9.85 liters of antifreeze;
- manual gearbox housing – 1.35 liters of TAD-17 oil;
- rear axle - 1.3 liters of the same oil;
- hydraulic clutch – 0.2 l of brake fluid;
- steering gear housing – 0.215 l of hypoid oil;
- closed container for windshield washer - 2 liters of water or special liquid.
Operating standards for the VAZ 2107 car were developed by the manufacturer for organizations and enterprises. Knowing the volume of fuel that the tank or crankcases of other mechanisms hold, it is easy to calculate the amount required for travel.
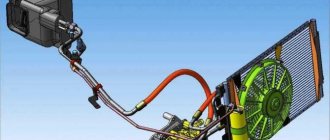
For injection system
Forced fuel supply in the "seven" for the Russian market began to be used in 2006. In these car models, the fan operation and other functions are performed by the ECU. On the VAZ 2107 injector, the signal about the antifreeze temperature comes from the coolant temperature sensor, which is located on the right side of the engine cylinder block.
The data is processed by the ECU, which outputs a signal to the control relay to turn on the cooling - circuit diagram. The fan switching sensor is not needed on VAZ 2107 injection systems; it is replaced by a thermistor sensor, and control functions are assigned to the controller.
In any “seven”, to protect the fan from short circuit, there is a fuse F7 located in the mounting block.
Operation of the coolant temperature sensor for the injection system
Usually, turning on the fan on a VAZ 2107 is accompanied by a noise that the driver hears while sitting behind the wheel. A prolonged absence of sound from the device when driving around the city in the summer may indicate a malfunction in the cooling system, which can lead to antifreeze boiling and damage to engine components. The driver must react quickly to such defects so as not to spoil the “heart” of his car.
One of the possible malfunctions in the engine cooling cycle may be a breakdown of the coolant temperature sensor. In addition to the cooling system, it is responsible for the correct supply of the air-fuel mixture to the engine and its inclusion in idle mode.
The sensor that affects the operation of the VAZ 2107 injector fan consists of a semiconductor thermistor with two terminals, soldered into a housing with a thread that is screwed into the wall of the cylinder block. A constant voltage of 5 V is supplied to the device. As the temperature of the antifreeze increases, the resistance of the thermistor decreases and vice versa. At the input to the computer, passing through a resistor, the voltage drops as the coolant temperature increases to a certain level, after which the controller gives a signal to turn on the cooling.
How to check and install a new one
Checking the sensor responsible for turning on the fan does not require much effort. The following signs may serve as grounds for verification:
- The “Check Engine” light on the instrument panel is on.
- The fan operates continuously or is turned off.
- Low idle torque.
- Coolant overheating.
The cause of the malfunction may be outdated wiring. To find out for sure, you need to check it, and then move on to the sensor.
For this:
- The negative cable of the battery is disconnected.
- On a cold engine, the antifreeze drains to a level below the temperature sensor socket.
- The protective layer is shifted and the wiring from the temperature sensor is disconnected.
- Use a key to unscrew the sensor from its socket.
Next, check using a multimeter and boiled water. The multimeter is connected to the outputs of the temperature sensor and set to resistance measurement mode. The threaded side is placed in boiling water. If the resistance tends to zero, then the sensor is working. Otherwise, if increased resistance readings appear, the sensor requires replacement.
To replace it, it is better to purchase the same model that was installed when purchasing the car. Installation of a new sensor occurs similarly in the opposite direction.
Antifreeze volume in the car
The first thing you need to know is how much antifreeze can be poured into a VAZ 2107 so that it works stably. For cars of brands such as VAZ 2101, 2105, 2106 and VAZ 2107, the volume of fluid is the same - 9.85 liters, it must be replaced every two years.
Replacing antifreeze on a VAZ 2107 occurs in the following way:
- The first thing you need to pay attention to is the cooling system; if it is clogged, it needs to be washed with special products or water.
- Next, you need to take a spanner wrench and a container of at least ten liters to drain the old car fluid. It is very important that the radiator is cold when replacing, since antifreeze is a harmful substance, and when heated it also becomes very toxic.
The volume of coolant in a VAZ 2107 can reach up to ten liters. Antifreeze is suitable for the engine cooling system, as it prevents heat from entering the engine and cools the radiator. The cooled antifreeze is moved to the car engine using a pump. This process continues until engine operation stops. During operation, antifreeze heats up and loses its positive properties, so it must be changed periodically. The process of heating the antifreeze occurs when the car travels a distance of about 60 thousand kilometers.
Reasons for the glowing indicator. Remedies
There are several reasons why the indicator light is on. Let's look at each one separately and how to eliminate them.
Insufficient level
It is quite possible that the engine oil level is insufficient. Every VAZ car owner knows how to check. It is necessary to top up to the permissible level and re-check with starting the internal combustion engine.
Checking the level is carried out on a cold engine or 10 minutes after it has been running.
Internal fault
To check the sensor, you must perform the following steps:
- Turn on the ignition.
- Make sure the indicator lights up.
- Disconnect the wire from the sensor. The indicator should go out.
- “Lock” it with the engine housing. If the indicator on the dashboard lights up, then the wire is working and the cause of the malfunction is in the sensor. It cannot be repaired and should be replaced.
Wiring fault
During vehicle operation, electrical wiring is often exposed to high temperatures, friction with metal parts, drying out, and loss of integrity.
The check is carried out according to the electrical diagram of the VAZ 2107 car using a multimeter for conductivity and resistance of the wire.
Wear of engine parts
During operation of the internal combustion engine, oil circulates through its piston system and gas distribution mechanism through special channels. If the rubbing parts wear out, the tightness and alignment of these channels is disrupted. Due to this, the pressure drops.
The solution to this problem is to overhaul the engine.
Pump fault
In this case, the oil pressure in the line is checked using a pressure gauge.
A pressure gauge must be screwed into the technical hole in the internal combustion engine cylinder block for the sensor and the internal combustion engine must be started. At idle speed the value should be about 1.5 kg/cm2. As the engine speed increases, the pressure should increase, reaching 5–6 kg/cm2.
When do you need to change antifreeze in a VAZ 2107 car and how much will it be needed?
The standard antifreeze, which most VAZ 2107 car owners use, has a short service life - 2 years or 60,000 kilometers. When using other coolants, these figures may vary, so you must follow the recommendations of the manufacturers of such materials.
Answering the question of how much antifreeze is in a VAZ 2107, it should be said that the given figure will be the same for the entire model range of classic Zhiguli cars - 9.85 liters.
The following fluids can be used for replacement:
- In models produced before 1998, you can use regular antifreeze or G11 class antifreeze
- In “sevens” produced from 1998 to 2002, you can use regular antifreeze or G12 class antifreeze
- For “sevens” produced from 2003 to 2012, it is best to use G12+ or G12++ class coolants
Elimination of illiteracy
If you are interested in what kind of oil the engineers of the Volzhsky Automobile Plant recommend to fill into the power units of classic Lada cars - mineral, semi-synthetic or synthetic, then you are formulating the question incorrectly. The manufacturer's recommendations relate only to the quality standards that the engine oil being poured must meet.
Many people notice that product canisters usually have markings like API SH or API SJ/CF
You should pay attention to it first of all, since it is this marking that informs about the quality of the product
API is an acronym for the American Petroleum Institute. This institute checks whether motor oil meets certain quality standards based on a large number of indicators, including:
- the amount of deposits remaining on engine parts after a standard period of operation;
- washing ability;
- temperature characteristics;
- toxicity;
- corrosivity;
- effectiveness of protecting engine parts from friction.
The abbreviations SJ or CF are deciphered as follows.
- S and C are the categories of engines for which the oil is intended. Lubricants for gasoline power units are designated by the letter S, and lubricants for diesel engines by the letter C.
- J and F – quality of oil performance characteristics. The farther the letter is from A in alphabetical order, the higher the product characteristics.
Engineers at the Volzhsky Automobile Plant require that the engine of the VAZ 21074 injector be filled with lubricant that at least meets the API SG/CD standard. Moreover, if you come across a product that meets the API SH, SJ or SL standard, then it is better to fill it.
Recommended VAZ 2107 oils according to SAE classification:
- Lukoil Lux – 5W40, 10W40, 15W40.
- Lukoil Super - 5W30, 5W40, 10W40, 15W40.
- Novoil-Sint – 5W30.
- Omskoil Lux – 5W30, 5W40, 10W30, 10W40, 15W40, 20W40.
- Norsi Extra – 5W30, 10W30, 5W40, 10W40, 15W40.
- Esso Ultra – 10W40.
- Esso Uniflo – 10W40, 15W40.
- Shell Helix Super – 10W40.
How much liquid and what oils are filled in LADA (VAZ-2107)
Lada VAZ 2107 is a domestic car with a long history.
Despite the great competition, it does not give up its position and occupies a leading position in sales in the secondary market. Today, almost two million Russians own a S7. The car is presented in a sedan body. Rear-wheel drive. The gearbox is mechanical. There are ten modifications. Their main differences are in power plants and restyling.
Preparatory work
Anti-corrosion treatment of the bottom, as well as the inner sides of the wings, begins with the removal of used damaged coating, pockets of rust and corrosion, dirt and grease deposits. Proper adhesion of anti-corrosion mastic to body elements is only possible on a well-cleaned and degreased surface.
Old peeling treatment can be removed with a metal brush and scraper. They also remove loose layers of rust. After this rough treatment, the body elements should be cleaned with sandpaper and degreased with white spirit.
Next, the cleaned and degreased surface is processed...
a rust converter that turns the top layer of metal into a chemically inactive compound. It is advisable to use a high-speed converter.
Now you can treat with anti-corrosion mastic or paste; the possibility of using one or another tool - a brush or just a mitten worn on the hand - depends on its viscosity. The treatment should be carried out so that the anticorrosion layer has approximately the same thickness, without large sagging or missing areas of treatment.
For do-it-yourself anti-corrosion treatment, bitumen-based mastics are best suited. They have proven themselves to withstand the effects of water and salts, but are not very resistant to sand and road gravel.
Most susceptible to corrosion...
Hidden cavities, which are almost impossible to clean well, are treated with a liquid anti-corrosion preparation such as Movil or Resistin. The use of these materials is allowed even on surfaces damaged by corrosion or previously coated with oil.
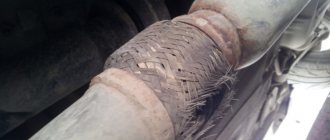
Repair with improvised means
If you are away from a garage or home where you have the necessary tools to remove the tank, you can carry out emergency repair work. For this you will need to have on hand; “Moment” glue or any other composition for rubber or plastic; a piece of tire, thin rubber or plastic bottle.
Look for a leak on the fuel tank; most often it is located at the bottom, since the tank is corroded by moisture or holes. Glue the patch to this place, hold it for a few minutes and leave for 2-3 hours until the composition has completely set. After such repairs, you will easily get to the nearest service station. There have been cases where motorists used a tank patched on the road for up to several weeks, but you should hurry up with major repairs, as sometimes patches do not help.
For the second emergency repair option, you will need to have a self-tapping screw on hand. If the diameter of the hole in the tank is small, then it is advisable to screw a simple self-tapping screw into it with a rubber or neoprene washer put on it. You can make your own washer from a piece of rubber bladder. In this case, screw the screw directly through the small rubber flap.
Remember that any of the described repair methods is a temporary measure. Stop at the nearest car service center so as not to encounter a more global problem while traveling or away from populated areas if you often go on intercity trips.
Where is the sensor located
The most common places where it is found are near the oil filter, in the upper part of the engine near the camshaft block, or pump.
Let's look at specific models:
- VAZ 2108/09/099. Located on the top right side of the engine (when viewed in the direction of travel) next to the timing belt cover. There is only one wire coming from it. This arrangement is also typical for 8-valve engines on the VAZ 2110/11.
- VAZ 2110/11 16 valve engine. Located on the left side of the engine (when viewed in the direction of travel) on the driver's side on the camshaft block between the air filter, ignition module and oil filler neck.
- VAZ 2112, 16-valve engine. It is located on the top left side (look along the way). To find it you need to remove the air filter.
- VAZ 2114. Located on the right inner side of the engine on the cylinder head next to the timing belt. It is clearly visible from above. To dismantle it, remove the protective cap, the terminal and turn it out with a 21 key.
- Lada Kalina. Located on the right rear of the engine near the timing belt, one wire comes from it. To get to it you need to remove the plastic cover of the cylinder block.
- Lada Priora. Located on the left (when viewed along the way) on top of the cylinder block under the intake air manifold. To dismantle it, you must first remove the protective plastic cover of the engine, move the air manifold and unscrew it with a 21 mm socket wrench. It sits very tight.
- Lada Granta 8 and 16 valve engine. Located on the top right side of the engine near the timing belt cover. To remove it, you can use a spark plug wrench or a 21 open-end wrench.
- GAZ "Gazelle" (engine ZMZ-405). Located on the BC, top right. There is only one wire coming from it.
The most common wrench size for removing the sensor is 21. You can use a spark plug wrench. But it all depends on the specific brand of car.
After the pressure sensor has been removed, the seat is tightly covered with a clean rag so that dirt does not get there and oil does not leak out during possible engine operation.
It would be a good idea to measure the oil pressure in the system at idle, medium and high speeds. To do this, use a pressure gauge, which is screwed in instead of the DDM
To take accurate readings, it is important to ensure a tight connection
For each car model, the values may differ. These can be found in the instruction manual.
For example, for a VAZ 2112 there are 16 valves, the standard engine oil pressure is:
- at idle speed 2 BAR.
- at 5 thousand revolutions from 4.5 to 6.5 BAR.
If all the readings are normal and the light is constantly on, then the information does not reach the ECU or gets distorted. This may be due to the sensor, which needs to be checked.
Lack of fluid and consequences
The disadvantage of antifreeze is rapid evaporation; you also have to solve the problem of leakage. It happens that liquid can be seen leaking under the car. There are also cases when it goes into the car interior, this indicates a breakdown of the heater taps, they need to be replaced.
In addition, smoke may be emitted from the exhaust pipe. This occurs due to a faulty cylinder head gasket. When antifreeze boils, you need to fix the problem in time ; you need to drain it and change it.
If you do not give significance to the signs that appear and continue to move on, then the consequences can be very sad. If the fluid disappears from the tank, the motor may overheat when the mark reaches the minimum value.
Types of DDM
Oil pressure sensors are divided into two types:
- Mechanical. They are used on cars that have become legends in the automotive industry, in particular, VAZ 2101, UAZ, Moskvich 401/407/412/, 2141 and others.
- Electronic. Installed on all modern cars, for example, domestic VAZ 2114, Kalina and other Lada models, as well as foreign cars.
Mechanical sensors
Mechanical sensors by design are divided into:
- Devices with two rods and a capillary tube.
- Devices with a rheostat.
The first ones consist of a body, a membrane, two rods, and a sealed tube.
As the pressure in the lubrication system increases, the membrane bends, putting pressure on the first rod, thereby increasing the pressure in the tube. The second rod takes this pressure and transmits it to the differential pressure gauge (located on the instrument panel).
The pressure increases - the arrow of the device deviates in a larger direction, falls - the arrow goes down to the left. The principle of operation is the same as that of a pressure gauge.
The mechanical oil pressure sensor with rheostat consists of:
- Cases.
- Membranes.
- Slider.
- Nichrome winding (resistor).
The device operates on the principle of a voltmeter. The rheostat and slider play a key role here.
The rheostat changes its resistance depending on where the slider is moved. The latter, in turn, shifts in one direction or another as the membrane bends or straightens.
When there is no pressure, the membrane is not deformed and the slider does not move, the current passes freely without encountering any resistance along its path.
As the pressure increases and the membrane deforms, the slider moves along the rheostat, thereby increasing the resistance in the circuit; accordingly, the current readings change, which is displayed on the device in the driver’s cabin.
All this is recorded by the ECU, to which the sensor is connected. It is programmed in such a way that only one period of current values is equal to the standard oil pressure. Exceeding this interval is equivalent to an incorrect value.
This is clearly visible on dial analog pressure gauges, which, in fact, are ordinary voltmeters.
Electronic sensors
Electronic DDM is much simpler than its mechanical counterpart, so it is considered more reliable.
Essentially, this is an emergency sensor that does not show the pressure in the system, but only notifies the driver when it is within normal limits and when it is not.
Principle of operation. When pressure is not applied to the sensor membrane, it is not deformed. The rod is in a position in which the circuit contacts are closed and current flows through them. At this moment, a lamp is lit in the cabin, which is monitored by the driver.
When the engine starts, the oil pressure in the system increases, the membrane bends, the rod moves, opening the circuit. The light goes out.
If after starting the engine the lamp does not go out within 1-2 seconds, you must immediately turn off the engine and do not start it until the cause of the malfunction is determined.
Read more here - what to do if the oil pressure lamp is on https://autotopik.ru/remont/1062-gorit-lampa-davleniya-masla.html.
Based on the above, we can conclude that the basis for checking the oil pressure sensor on modern cars is measuring the resistor resistance with a multimeter and checking the DDM for opening and closing the circuit.
To do this, the multimeter is switched to resistance or continuity measurement mode. It depends on what type of sensor is being tested with or without a resistor.
But there are other verification methods, which we will discuss below.
Why does it flow
There are many options for why coolant may leak. It is very difficult to determine this location of the leak. The main ones are:
- View all pipes; perhaps one of the clamps is not clamped properly.
- The pipe itself has cracked from time to time.
- The cause of mechanical damage is in the radiator. This can be corrected by welding or gluing. You can determine the location of the leak in the radiator using dismantling or gel sealant.
- Water pump. Over time, the pump, like any other part, can wear out and leak. In this case, the pump will have to be replaced.
- The element leaks out from under the head. It is better to correct such a leak at a service center, since this will require disassembling the engine.
- When the element leaks directly into the vehicle's cabin. This can be determined by lifting the floor mat on the driver or passenger side.
Logbook VAZ 21074 (2006)
Hi all! So, let’s finish with the bottom; before all the work, I jacked up the car and washed it with a mini pressure washer with chemicals. In general, the factory plastisol coating is still in place, but is already cracked in places and there are small chips with rust.
In the back, where there are niches for the spare tire and the gas tank, not everything is so rosy; under the previous owner, the rear was involved in an accident. At the very least, the wing and tailgate were replaced, although, judging by the tacks from welding, it seems even both. On the right, where the gas tank is basically intact, there are only a couple of “extra” holes.
On the left, where the spare tire is, corrosion has noticeably taken its toll, you can see the wheel through the gap, and the “skirt” is well caught (more on that next time). I had already processed the inside of the niche for the spare tire a year earlier.
Since there was no time left for repairs, I decided to leave these places for next year; I may have to weld another patch or even completely cut out and change the wheel well.
First of all, I decided to paint over the burn marks by welding - there are four of them: two in front and two in the back near the jacks, one more in the rear left wheel arch.
I cleaned everything with a grinder with a petal wheel,
I degreased it and, since the metal was clean, painted it according to the scheme: epoxy primer - insulating primer - rust paint, although ordinary enamel would have been suitable, but I had a can of green paint lying around.
After complete drying, instead of anti-gravel and plastisol, I coated these places with a hybrid sealant, which was used in the anti-corrosion test: it resembles a thick paste, has good adhesion, let’s see how it behaves on the bottom.
Well, in addition I went over it with bitumen mastic from a spray can.
At the rear left, the threshold had rotted outward at the place where the jack was welded, so it was only possible to weld it from the inside of the cabin, but there was no way to get through from the outside unless you cut off the jack itself. Therefore, I decided not to touch it for now, and also paint it, maybe I can cover it with something later so that the dirt doesn’t get into the threshold.
Since touching up every chip on the bottom is a futile exercise, and everything is covered in microcracks, I decided to treat it with fully heated gun lard, in theory it should soak the whole thing.
I’ll say right away that it’s a rather dirty task, and since the lard hardens quickly, it’s better to warm the bottom with a hairdryer or heat gun, but they weren’t available. I think it’s normal, it should spread.
Then I removed the rear fender liner and also processed the arch. Oddly enough, the butyl tape with aluminum tape that was glued two years earlier to the hole in the threshold did not come off, so I did not remove them.
Here, too, the rust began to take its toll; I didn’t paint it, I just removed the loose rust and also coated it with pushsal.
A wheel rubbed a hole in the fender liner - I degreased it and sealed it with the remaining piece of vibra from the gluing.
Well, to prevent dirt from getting clogged again in the cavities of the bottom reinforcements, I inserted rubber plugs from the “8” with a diameter of 3 cm into the holes, they fit perfectly.
I moved the spars last year, so I didn’t process them.
I will write separately about the “skirt” and body work.
So, let's do the math:
- Pushsalo 1kg - 50rub
- Brush - 40 rub.
- Paint, sealant - 200 rub.
- Bottom plugs 2108-5112090 2 pcs. — 30r
Total: 320r
Subscribe! Good luck on the roads!
Possibilities for upgrading the machine
In the nineties of the last century, many owners of VAZ 2107 cars, not particularly counting on gas stations, installed an additional tank in the car. This is much more convenient than pouring fuel from cans. Typically, such a container was located behind the rear seat in the trunk. It could have different sizes, and accordingly they had the appropriate capacity.
The driver in those days often encountered empty gas stations, and the additional volume of the fuel tank greatly expanded the capabilities of the car. Knowing the required amount of technical fluids is necessary for routine maintenance of the engine and other systems.
Sources:
https://car-exotic.com/vaz-cars/vaz-lada-2107-car-supplement-3.html https://7vaz.ru/ustrojstvo/zapravochnye-emkosti.html https://bumper.guru/ klassicheskie-modeli-vaz/poleznoe/vaz-21074-inzhektor.html https://alians-avto96.ru/raznoe/zapravochnye-obemy-vaz-2107-inzhektor.html https://o-ladagranta.ru/zapravochnye- emkosti-vaz-21074-inzhektor/