What to do if the idle speed of a VAZ 2107 jumps, is there any panacea for this? The fuel system causes a lot of trouble for owners, but one thing needs to be taken into account - it is not always to blame. For example, in carburetor engines with a classic ignition system, there is a high probability of contact group failure if there is instability in the idle speed. But with injection engines everything is somewhat simpler. And now about everything in more detail.
Why is the engine speed unstable?
When it comes to the carburetor, there are several reasons:
- The carburetor is clogged, the movement of air and gasoline becomes impossible.
- The operation of the solenoid valve is disrupted - the winding is burned out or the nozzle is clogged.
- Fuel or air filters are clogged.
- Incorrect carburetor adjustments on VAZ 2107.
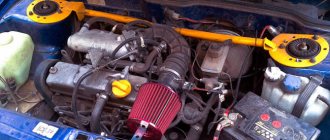
In most cases, the culprit is the solenoid valve. Its appearance is shown in the photo. It is necessary in the power system for the following purpose - it opens the fuel supply when the ignition is turned on and closes it when it is turned off. Consequently, the engine stops immediately after turning off the ignition.
The VAZ 2107 carburetor solenoid valve is a small device consisting of the following elements:
- Frame.
- Winding (one end connected to a metal body).
- A rod that acts as a valve that opens and closes the fuel supply at idle.
- Copper jet with holes. Please note that the jets are marked; there are several sizes.
The solenoid valve operates only when the ignition is on. If suddenly there is a break in the power circuit, you can temporarily connect the central wire of the device to the positive terminal of the battery. Just try to carry out repairs as soon as possible.
Checking the Solex carburetor adjustment
After completing all the settings above, you should check the accelerator pump.
With the engine off and the air cleaner removed, manually sharply press the throttle valve open. Streams of gasoline should appear. They should appear immediately, without delay. Otherwise, when accelerating, the car will seem to fall into a short-term hole, and then shoot out.
You also need to check the economizer, or rather, its diaphragm for integrity. This is done by unscrewing the economizer cap.
A malfunction of the economizer diaphragm can be determined by the following signs:
- when the ignition is turned off, the engine runs for some time;
- noticeable unstable engine operation;
- increased fuel consumption;
- the engine does not stall when the mixture quality screw is tightened.
After checking, it is advisable to thoroughly clean the carburetor and blow it with compressed air. In general, it is better to clean the Solex carburetor and blow out the jets with compressed air. This is both effective and safe for jets.
It’s not at all difficult to adjust the Solex, try it and enjoy!
The Solex carburetor (DAAZ) is one of the most popular devices in the list of carburetor metering systems, since with the right approach it is possible to flexibly configure carburetors of this type. For this reason, car enthusiasts install Solex carburetors on different engines, after which they are further adjusted, achieving the required fuel efficiency indicators, quality of mixture formation at power and other operating modes of the internal combustion engine.
After installing Solex on the engine, it is often necessary to configure this device. To solve the problem, you can contact a service center, where a specialist in setting up the carburetor will perform all the necessary operations. You can also adjust the carburetor yourself. In this article we will talk about how to adjust the quality of the mixture on a Solex carburetor, how to adjust the fuel level and adjust the float chamber of the Solex carburetor, adjust the idle speed, etc.
Read in this article
Preparing to adjust the idle speed
If you do not plan to clean and disassemble the VAZ 2107 carburetor, then one of the tools you will need is a screwdriver. A device for measuring the speed (tachometer) is installed in the dashboard. But it’s worth getting a mixture quality indicator. With its help you can create an air-fuel mixture in ideal proportions. This article will talk about adjustment using this device.
Before starting work, you need to warm up the engine to operating temperature. Let us remember that this is a temperature of about 90 degrees. You also need to put the air purification filter in place to simulate normal engine operation. Make sure the float is adjusted correctly. The fuel level in the chamber must always be stable.
There are also many requirements for ignition and gas distribution. Be sure that all clearances must be correct, and the ignition timing must be adjusted for the gasoline used. And most importantly, open the air damper completely while making the adjustment. That's all, the preparation work is briefly summarized, now you can begin the idle adjustment procedure.
Reasons for instability of the VAZ 2109 (21099) carburetor
A clear indication of the relevance of the problem, characterized by instability of engine speed in idle mode, is the frequent mention of it in special printed publications and Internet forums. There is a particularly wide discussion of this issue among owners of domestic VAZ 2109 and VAZ 21099. In the article brought to your attention, we propose to consider the reasons that contribute to the situation in which the VAZ 21099 (carburetor) has floating speed, as well as ways and means of eliminating them (the causes).
The main reasons that cause failures in the operation of the power unit in the VAZ 2109 (carburetor) are:
- Incorrect carburetor adjustment . As a rule, the position of the screws that regulate the “quality” of the mixture ensures that a “lean” combustible mixture is supplied to the system. The solution is to adjust the carburetor, the detailed technology for which will be discussed below.
- Malfunction of the solenoid valve with the control unit, which stops the fuel supply when the crankshaft reaches 2100 rpm and resumes it (supply) when the speed drops to 1900. The functionality is checked by quickly removing and putting the wire on the valve while the engine is running. A click made by the valve indicates that it is in good condition.
- Contamination of the jets and channels of the idle system . It can be eliminated using a special cleaner followed by blowing with compressed air.
- Excess air entering the fuel mixture as a result of leakage of connections. First of all, this concerns the integrity of the pipe connecting the vacuum brake booster to the intake manifold.
- Malfunction of the needle valve , causing an increase (decrease) in the fuel level in the float chamber. In some cases, the problem can be solved by cleaning the valve, but the vast majority of experts recommend replacing a sticky needle valve with a new one.
Setting the idle speed of the VAZ 2107
Carefully inspect the carburetor, there are several screws on it - the quality of the air-fuel mixture and quantity. It is with their help that we will now try to adjust the carburetor. Of course, not every driver has such a device as a gas analyzer. However, not everyone cares about the level of CO in the exhaust. For convenience, it is advisable to have a digital or dial tachometer. You can find how to connect it correctly in the corresponding article on our website.
So, start the engine and turn the quality screw. Listen to the engine, you need to stop at the moment when the crankshaft speed is at its maximum. After this, you begin to rotate the quantity screw and achieve a frequency of 1100. And the last step is to set the frequency to 800-900 using the quality screw. Please note that if necessary, the idle speed adjustment must be repeated.
Instead of a candle, screw in a mixture quality indicator and achieve the optimal color - violet-blue or blue. Adjusting the quality of the mixture using this device is simplified. True, you will need to turn the quality and quantity screw a few more times.
Setting up Solex
Many drivers strive to install a Solex-type carburetor on their car, since at the moment this carburetor is considered one of the best. It works great in any conditions, even with severe overflow. Many people mistakenly believe that the most difficult thing in this situation is installing a carburetor, but in fact, setting it up and adjusting it is also often difficult.
Some people prefer to delegate the work of installing or adjusting carburetors to specially trained people, however, most motorists strive to do all possible work themselves and have a great interest in this.
The procedure for setting up the carburetor is as follows:
We set the level in the float chambers. As a rule, in the manual the level is set using special floats using a special template. This is not an easy method unless there is a special factory setting. If there is no factory setting, you need to do it yourself. To do this, you need to start the engine and give it a few minutes to warm up. Then turn off the engine and remove the fuel hose
This must be done carefully, as a lot of gasoline will pour out of the hose. If gasoline flows into the chamber under pressure, the readings will be blurred
Now unscrew the carburetor cap and remove the choke cable. Carefully, horizontally, lift the carburetor cover. Otherwise the floats will be damaged. It is necessary to measure the distance from the surface of the gasoline to the lid of the Solex itself. You need to measure in each chamber, since the level in them is not the same, which means the distance will be different. The norm is 25-35 mm. For calculations, you should take the average value of the two cameras. If the level is lower or higher than normal, you need to bend the float in the right direction and drain some of the gasoline. An important point is that you cannot adjust the gasoline level without starting the engine, since if it is running, you will end up with an overflow of gasoline. The second stage of tuning is setting the engine idle speed. To do this, it is recommended to warm up the engine to normal temperature. After this, the engine is turned off and tuning begins. Now, using a screwdriver, you need to find the mixture quality screw in the hole in the carburetor sole; this screw should be turned to the right until it stops, but without using force. After this, you should carefully start the engine and remove the choke. Using a screw, the permissible minimum number of revolutions is set. It must ensure constant, stable operation of the engine and at the same time its discharge must be minimal. The normal number of revolutions is 500 - 1200, in this case we can say for sure that the carburetor is in order. We tighten the quality screw until the engine starts to run unstably. Then we return it to normal operation by turning it 1-2 turns back. Now you need to set the speed, the optimal value is 800-900 revolutions, but this number should be adjusted individually. The screw is turned until the optimal ratio is reached. Some difficulties may arise when adjusting the idle speed. It often happens that when the quality screw is rotated, the engine does not respond to it. Normally it should work unstable, you can adjust it with a screw. If this does not happen, it means gasoline is getting into the idle channel and the screw cannot close it. The reason for this situation may be that the jet is too large, if the plug is not screwed in properly, or if the jet itself is deformed. Diagnosis of the problem can be carried out as follows: remove the valve with the engine idling. In this case, the engine should stall. If the engine turns off, the problem is in the large jet. If not, it means the gasoline is flowing past the nozzle. In this case, you need to check the locking screw of the second chamber, which ensures smooth opening of the throttle valve.
What about the injector?
Everything is a little simpler here, since no adjustments are needed. The reason is that a smart on-board control system is responsible for everything. And specifically for idling - the regulator (IAC). Some may call it an idle speed sensor, but this concept is completely wrong. The fact is that there are two types of devices on injection cars - sensors (reading) and actuators. The idle air control is a stepper motor; it does not measure anything, but on the contrary, it opens and closes the air supply through a special channel.
A breakdown of the IAC can only be determined by external signs, and then only relatively. The fact is that the control lamp on the dashboard will not light up if the regulator suddenly fails. But if you feel unstable revolutions, or they have disappeared completely, and the engine jerks and stalls, then first of all, of course, it is worth checking the performance of the IAC. It is worth noting that sometimes the “Check” can light up when the IAC is faulty. This happens if the engine detonates. The knock sensor signals a malfunction to the electronic control unit.
IAC breakdowns
If you have a VAZ 2107 with an injection engine, then pay due attention to the condition of the vehicle systems. If the speed on an injection engine fluctuates, then you need to look first at the idle speed control. The fact is that the breakdown of such a mechanism as the IAC can lead to very sad consequences, including a traffic accident. Here are the main signs by which you can independently determine whether the regulator is broken:
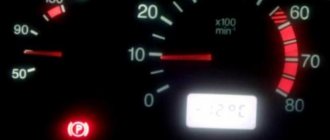
- The engine begins to “live its own life” - the crankshaft rotation speed is constantly changing, sometimes decreasing, sometimes increasing. Consequently, the tachometer needle constantly floats.
- When you start a cold engine, the crankshaft speed does not increase, it fluctuates within a certain range.
- If you turn on powerful electrical appliances (for example, a car radio, low or high beam), the speed decreases and does not return to the set level.
- When you engage the neutral gear, the engine begins to stall if you do not apply the gas pedal from time to time.
These are the main signs that the regulator is faulty. In fact, any interruptions in the idle level are the first sign of a breakdown or minor defect in the IAC. But the time has come to diagnose it. It won't be difficult to do this.
Setup and adjustment
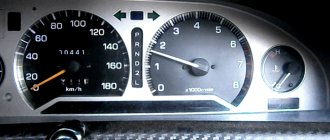
First of all, the engine warms up until the fan turns on. Next, adjust the speed by ear using the quantity screws. The operation should be smooth, with a sharp press on the gas pedal there should be no dips, and the speed should increase quickly and smoothly. The quality screw regulates the amount of exhaust gases. Ideally, no escaping gases should be visible from the exhaust pipe in the dry season (they will be, but not visible to the eye, if everything works correctly). Everything can also be done by looking at the tachometer readings. Unfortunately, many models of Soviet cars do not have it at all, so most often the adjustment will have to be done by ear.
For complete adjustment, cleaning and tuning, the carburetor is removed from the car. Procedure for removing the device from the car:
the air filter and its housing are removed;
all tubes and cables are disconnected;
If you are not sure that you will be able to put everything back, you can photograph all fastenings before disconnecting, for example, with a mobile phone camera.
Take care of the place where the work will be performed. It should be ventilated, free from various suspensions, the table should be wiped and covered with a cloth or old newspapers. It is better to have a carburetor diagram before your eyes. It is advisable to place small parts in various jars and boxes strictly in order. Prepare a container for solvent brand “646”. Buy a repair kit for your carburetor, it costs mere pennies.
look at the floats. They must be parallel to each other. If there is any mechanical damage, replace it with new ones without hesitation. The needle valve should move freely in the seat, and the ball should not linger anywhere;
We wipe the lid from the inevitable dirt and oil, for this we use a bath of solvent. You can leave it to “settle” for a while;
- the starting device is simply wiped, otherwise the correct operation of all kinds of bushings and levers can be disrupted;
- The jets and tubes are cleaned with a solvent and then blown out with compressed air. When flushing the jets, remember that it is highly not recommended to use rags, rags, etc., since the holes become clogged very easily;
The body is cleaned in a similar way: throw it in a solvent and let it soak, then blow it out. If you notice any damage in the contact areas, you will have to replace it entirely;
The next step is to inspect the accelerator pump. Likewise, jamming and subsidence are unacceptable, the ball must move without difficulty;
The economizer should move easily and the diaphragm should not be damaged. If there are suspicions, we replace it with a new one from the repair kit;
- reassemble in reverse order. At the same time, we use new gaskets, rings, studs, and change the fuel filter. It is better to leave new jets until better times, if there were no questions about the previous ones, since there is a high probability of making a mistake, and defects in repair kits are common;
- We install the carburetor on the car, connect all the pipes and try to start. The first time it may not work, although this is a rare occurrence, it usually starts right away, however, it will work unstable. If the assembly order was followed, it does not matter;
- In order not to get lost, we tighten the quality and speed screws to the end.
In conclusion, we can say that the Solex carburetor is one of the best, if not the best, among all domestic products. With proper setup and timely maintenance, it will show excellent results throughout its entire service life.
Solex 21083 carburetor jet table
Also watch the video on setting up the Solex 21083 carburetor
Carrying out diagnostics
The simplest method is to measure the voltage at the block to which the regulator is connected. These are terminals D and A. When the ignition is turned on, a voltage of 12 V should be present on them. If the voltage is less than this value, it is worth looking at the battery and generator. It is quite possible that the battery is undercharged. In the same case, if there is no voltage at all, it is necessary to check the entire power circuit of the device and diagnose the ECU.
Set the multimeter to resistance measurement mode. Between pairs of terminals A and B, C and D, there should be a resistance of approximately 53 ohms. Remove the IAC and connect (with the ignition off) to the block. Then turn on the ignition and look at the behavior of the needle - it should extend completely when voltage is applied. If this does not happen, we can judge that the IAC is broken.
Sometimes simply cleaning the regulator helps. To do this, you can use sprays, of which there are sufficient quantities in stores. But in some cases, only replacing the device will help. Of course, this is not a DAAZ carburetor, the cost of the IAC will be many times lower, and there will be no problems with replacement. If, even after the replacement, the engine does not idle, it is necessary to fully diagnose the injector.
Welcome, friends, to the DIY car repair website. One of the very common problems found on almost all cars is floating idle speed.
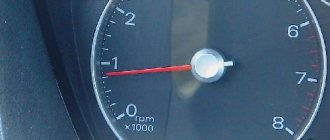
RPM fluctuates at idle
Such a minor (at first glance) malfunction is very annoying and can cause a lot of inconvenience on the road. For example, at an intersection, a car can stall at any time when the speed decreases.
The driver, in turn, has to constantly apply pressure to the gas to keep the engine in good shape.
Setup and adjustment
First of all, the engine warms up until the fan turns on. Next, adjust the speed by ear using the quantity screws. The operation should be smooth, with a sharp press on the gas pedal there should be no dips, and the speed should increase quickly and smoothly. The quality screw regulates the amount of exhaust gases. Ideally, no escaping gases should be visible from the exhaust pipe in the dry season (they will be, but not visible to the eye, if everything works correctly). Everything can also be done by looking at the tachometer readings. Unfortunately, many models of Soviet cars do not have it at all, so most often the adjustment will have to be done by ear.
For complete adjustment, cleaning and tuning, the carburetor is removed from the car. Procedure for removing the device from the car:
the air filter and its housing are removed;
all tubes and cables are disconnected;
the EPHH wiring is removed;
the nuts are unscrewed.
If you are not sure that you will be able to put everything back, you can photograph all fastenings before disconnecting, for example, with a mobile phone camera.
Take care of the place where the work will be performed. It should be ventilated, free from various suspensions, the table should be wiped and covered with a cloth or old newspapers. It is better to have a carburetor diagram before your eyes. It is advisable to place small parts in various jars and boxes strictly in order. Prepare a container for solvent brand “646”. Buy a repair kit for your carburetor, it costs mere pennies.
Operating procedure:
look at the floats. They must be parallel to each other. If there is any mechanical damage, replace it with new ones without hesitation. The needle valve should move freely in the seat, and the ball should not linger anywhere;
We wipe the lid from the inevitable dirt and oil, for this we use a bath of solvent. You can leave it to “settle” for a while;
- the starting device is simply wiped, otherwise the correct operation of all kinds of bushings and levers can be disrupted;
- The jets and tubes are cleaned with a solvent and then blown out with compressed air. When flushing the jets, remember that it is highly not recommended to use rags, rags, etc., since the holes become clogged very easily;
The body is cleaned in a similar way: throw it in a solvent and let it soak, then blow it out. If you notice any damage in the contact areas, you will have to replace it entirely;
The next step is to inspect the accelerator pump. Likewise, jamming and subsidence are unacceptable, the ball must move without difficulty;
The economizer should move easily and the diaphragm should not be damaged. If there are suspicions, we replace it with a new one from the repair kit;
- reassemble in reverse order. At the same time, we use new gaskets, rings, studs, and change the fuel filter. It is better to leave new jets until better times, if there were no questions about the previous ones, since there is a high probability of making a mistake, and defects in repair kits are common;
- We install the carburetor on the car, connect all the pipes and try to start. The first time it may not work, although this is a rare occurrence, it usually starts right away, however, it will work unstable. If the assembly order was followed, it does not matter;
- In order not to get lost, we tighten the quality and speed screws to the end.
The further adjustment procedure is similar to the actions taken before removing the carburetor and washing and replacing faulty parts. Normal speed of a fully warmed up car: 800-900 in winter, 900-1000 in summer.
In conclusion, we can say that the Solex carburetor is one of the best, if not the best, among all domestic products. With proper setup and timely maintenance, it will show excellent results throughout its entire service life.
Solex 21083 carburetor jet table
Also watch the video on setting up the Solex 21083
Solex 21083 is a basic carburetor model for engines with a contactless ignition system. It has two dosing systems, an idle system, a diaphragm-type accelerator pump, and a starting device.
Among owners of the VAZ 2108-2109 family, this carburetor is very popular because of its versatility. Having made basic modifications, it can be adapted to an engine of any modification with a volume not exceeding 1.5 cm 3 .
How is everything going?
When everything is fine, you start the car and wait for the engine to warm up. In this case, the tachometer needle is at the level of 2-2.5 thousand revolutions and gradually drops during warming up to 800-900 revolutions per minute.
But it also happens differently. Immediately after starting the engine or after some time, you notice that the engine speed is fluctuating. In this case, you can do nothing - the machine seems to live its own life.
The range of oscillations can be large - from 500 to 1,500 rpm. As a rule, after 5-10 minutes this problem goes away, but the next time everything repeats again and again.
In such a situation, you cannot remain idle - you must find out why the idle speed is floating. This is the only way to eliminate the problem and forget about it like a bad dream.
What is a Solex 21083 carburetor?
Solex 21083 is one of the most popular domestic carburetors. It is mainly installed on 1.5-liter Russian and Soviet-made engines, although they can often be seen, for example, on old carburetor Japanese cars, since they are much simpler in design than their analogues. This carburetor will work normally only with a contactless ignition system, due to a number of technical features. There are many options for the Solex carburetor, however, 21083 is the basic option. It is this type that is most popular, as it can be easily modified by installing different jets, or even boring diffusers. It is not recommended to install Solex 21083 on cars with a displacement of more than 1.5 liters. The car, of course, will drive, but the failure in dynamics will be obvious; installing jets with greater cross-country ability will no longer help.