- Anticorrosive treatment stages
- Anti-corrosion treatment
- Video instruction
If you decide to carry out anti-corrosion treatment of the VAZ 2110 body yourself, then many questions arise: how to apply the composition, how to do a high-quality treatment yourself, etc.
Preparatory process before applying corrosion protection to the VAZ 2110
Many owners of VAZ 2110 cars are familiar with the concept of metal corrosion. Unfortunately, the factory treatment of the VAZ 2110 does not protect the body 100% from corrosion and rust. Rust does not immediately begin to appear throughout the body of the VAZ 2110 car. Some areas of the body are covered with a film of water, and as soon as alkali and acids enter this area, the formation of an electrolyte begins, which has the ability to corrode the metal.
There are several ways to protect the body:
- Galvanic coating type.
- Anti-corrosion treatment.
Galvanic type is galvanizing of the body, which should be carried out at the factory, but it does not last forever.
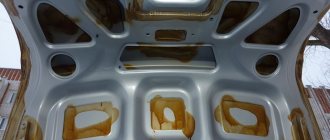
At the factory, when assembling a car, work is carried out to protect the body in the form of applying various protective compounds. The bottom of the car is treated with mastic, and closed areas and cavities are treated with a protective compound.
Factory body protection is not enough and therefore it is necessary to carry out work to protect the metal once a year. Do-it-yourself treatment is not so simple - you need full and free access to all elements of the bottom in order to apply a thick layer of protective composition.
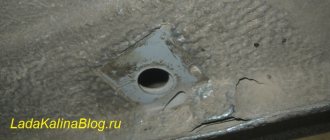
Peeled off factory anticorrosive VAZ 2110
Causes of corrosion
The manufacturer does not pay enough attention to the anti-corrosion treatment of these machines (as well as sound insulation). This is evidenced by numerous reviews from owners. But if you can still put up with the noise in the cabin, then you can’t put up with the holes in the floor.
It's uncomfortable and unsafe. Accordingly, the question arises about repairing or replacing the bottom of a VAZ-2110. Experts identify several factors that significantly accelerate its wear:
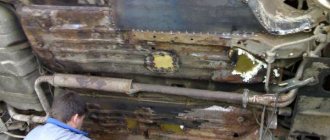
- Weather. Metal rusts upon any contact with water, even if it was painted and treated at the factory. But rain is not the most destructive factor. More aggressive towards metal are the salt reagents that our road services use to sprinkle the asphalt in winter. If you don't frequently wash the underside of your car with high pressure, the salt will remain in the most hidden places. Further, rust will form in these areas, and after a year - through holes.
- Road accident. Even with a minor accident, the base layer of enamel and primer separates from the metal. If the painting was done by unqualified craftsmen, after 1-1.5 years rusty marks will form in the same place. The same problems occur if the surface was not properly prepared for painting and was poorly cleaned.
- Clogged drainage. Often, repairs to the underbody of a VAZ-2110 are required due to clogged drainage holes. Water eventually gets into the cabin and trunk. It has nowhere to go - it is absorbed into the factory carpet and soft soundproofing material. In addition to corrosion, it can cause a characteristic smell of mold and rot. Water also forms when using unsealed mats. Textile products are very popular now. But not every model retains moisture, which is why it is absorbed into the carpet and then onto the metal.
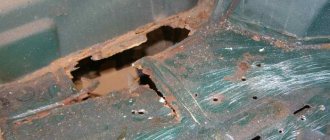
Thus, the bottom of the VAZ-2110 is exposed to negative effects from both sides. Plus, it is very difficult to find the source of the problem. Not everyone has a hole in their garage, and no one will disassemble the interior in order to identify “bugs.” They ride until the floor is soft like jelly.
When repairs are required
For all VAZ models, a mandatory condition is periodic inspection of the body for corrosion. Already from the factory, automotive hardware must be additionally protected from rust. The first VAZ 2110 began to become covered with corrosion from the area of the windshield frame. The paintwork peeled off quickly; after 6 months the first rusty plaques could be seen under the paint layer.
Cooking a rotten car body if the degree of metal destruction exceeds 70% is expensive and impractical. To protect the car from corrosion, once every 6 months it is necessary to carry out preventive maintenance and replace the old used metal.
The main reasons for rapid wear:
- The car is over 7 years old. The bottom is checked in the inspection hole: if there is minor corrosion, metal patches can be used.
- Accidents and driving on bad roads. Any deformation of the metal after an accident leads to the fact that the protective layer of anti-corrosion in places where it is broken is destroyed, and the metal begins to wear out faster. The same applies to frequent trips on bad roads.
- Car parking on the street. VAZ cars need a warm and dry garage. Considering that the car body is not treated with zinc, just one winter outside can cause corrosion of the sills and bottom. Moisture penetrates through the protective layer and destroys the metal of the seal, the outer part of the bottom.
- Water in the cabin. The liquid that has accumulated under the rubber mat quickly penetrates the bottom skin and contributes to the rapid rotting of the metal unprotected by anticorrosive.
A complete bottom repair will be required in the following cases:
- It is impossible to put the car on a jack; the jack falls through.
- It is clearly visible that the floor in the cabin has become uneven - the bottom is 60% rotten.
- It is impossible to adjust the driver's seat due to the skew of the bottom.
- Under the threshold, under a layer of putty, rust appeared. It is checked with an awl if the anticorrosive layer has peeled off.
- The appearance of rust on the inner surfaces of the sills in the interior and arches.
Tools
To successfully repair the underbody of a VAZ-2110 with your own hands, we will need a welding machine and a mask. Electrodes will not work: the metal is very thin and there is a risk of burning it. Therefore, only a semi-automatic machine and welding wire are used. We will also need a grinder (preferably small) and a circle for cutting metal. Among other materials, you should prepare sheets of sandpaper (or an appropriate drill attachment), primer, paint, anti-corrosive agent, and rust converter. At the end of the repair process, the bottom of the VAZ-2110 will need to be “noisy”. But it is useless to use old material. Therefore, we buy new sheets of vibroplast (preferably 3 mm) and glue it onto the restored surface.
Why does rust appear? Preventive measures
The first line of VAZ-2110 sedans was released in 1995. The problem with these cars was the paint peeling off near the windshield. At the next stage, the rust spread to other body elements. Given the scale of the problem, AvtoVAZ changed its paint application technology. Despite the innovative approach to painting, the problem of rust could not be eliminated. The table shows the main causes of corrosion, as well as current preventive measures.
When applying anti-corrosion substances to the surface of the body, the sills and cavities of the side members must be treated especially carefully.
Let's get to work. Preparation
So first we need to prepare the car. We drive it into the garage and dismantle the interior. It is advisable that the room has an inspection hole. Depending on the scale of the work, we will need to remove one or more seats, as well as part of the carpeting, which comes standard from the factory.
At the next stage, we cut out the rotten sections of the floor with a grinder. We also cut out the metal whose thickness is less than the factory thickness - after repair it can rust again.
Please note that fuel and brake pipes, as well as the exhaust system, run under the bottom.
And the tank is hidden under the rear sofa. If a major overhaul is being carried out, all these elements should be dismantled.
Next, carefully clean all the seams with sandpaper. You can use a special drill attachment. The remaining traces of rust are treated with a zinc converter. Be careful: he is very aggressive. Therefore, we work exclusively in protective gloves.
If the scale of the work is very large and almost the entire element had to be cut off to restore the bottom of the VAZ-2110, it is important to ensure the rigidity of the body. We install wood spacers in the doorways.
Replacement of car underbody elements
Most often, when replacing individual parts of the bottom or installing patches, welding is used; a semi-automatic welding machine is best suited for such repairs. If an entire separate part is being changed, for example a cross member, you can drill out the rivets and dismantle the element without welding.
When the bottom and sills are changed at the same time, the latter are removed from the car first, and when replacing sills it is important to control the geometry of the body. When replacing floor panels, the bottom parts are always mounted from below, then welded or riveted. When there are many holes and pockets of corrosion in the floor of the body, it is better to replace the entire bottom, especially since it is relatively inexpensive when assembled for the “Ten”.
Welding work
Overcooking the bottom of the VAZ-2110 begins with de-energizing the on-board network. You need to disconnect both terminals from the battery, otherwise you can burn the ECU and other important units. Next, we connect the ground of the welding machine to the body and get to work.
You can use patches of the appropriate size or purchase ready-made floor parts (especially when it comes to thresholds). Welding the bottom of a VAZ-2110 involves restoring:
- Floor panels.
- Crossbar.
- Support platforms.
- Extensions of side members and sills.
- Connectors.
Preparation for repair
When choosing to repair the bottom yourself, you need to prepare tools and materials. For experienced craftsmen, a complete replacement of a part takes at least 3-4 days; the cost of work at a service station averages 45–50 thousand rubles. To work you will need:
- Bulgarian. Using an angle grinder, the corrosion plaque is removed from the bottom, parts of the patches are adjusted, cut off, and welding seams are aligned.
- Welding machine. It is recommended to boil the iron body and bottom, in particular. Semi-automatic welding with wire and carbon dioxide is suitable. You can use gas welding and 3 mm electrodes, provided you are skilled in such work.
- Electric drill for drilling spot welds.
- It is not recommended to carry out underbody repairs in a pit - it is inconvenient; it is better to use stands, a lift or skids; in some cases, the car is turned over on its side.
- Sound insulation sheets.
- Anti-corrosion set: mastic, R-80 sandpaper, primer, auto enamel.
Preparatory work step by step:
- Disconnect the negative terminal from the battery or remove the battery.
- Drain the fuel from the tank.
- Disconnect the electrical wiring from the door power windows.
- Remove the doors, marking the fastener locations on the body.
Before dismantling the doors, it is necessary to insert iron spacers into the openings or weld a channel, this will ensure that the geometry of the body is preserved if the center pillar reinforcement is rotten and there is a possibility that the roof will fall or bend in half.
Dismantling the interior
Replacing the underbody involves work inside the cabin and under the car. Dismantling the interior is carried out in steps:
- Pull out the seats.
- Remove the interior trim by unscrewing the moldings.
- Pull out floor coverings and carpets.
- Remove air vents.
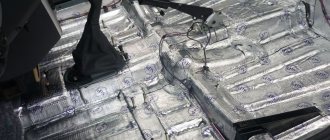
- Remove the sound insulation layer and additional anti-vibration pads.
- Disconnect all internal wiring, twist the cables into a bundle, and remove the fasteners.
- Remove the dashboard to open access to the engine compartment if you plan to completely replace the bottom.
If you are an inexperienced tinsmith and electrician, it is better to distribute all fasteners into separate packages and sign them. When installing the interior, this will help you avoid getting confused with the parts.
What's next?
Then we apply primer and paint. We treat the metal on both sides with bitumen mastic or gun lard. Due to their greasy consistency, these compounds will repel water and prevent it from penetrating inside the metal.
Additionally, you can apply an anti-gravel coating (if the metal is treated with mastic and not lard). After the composition has dried, we soundproof the interior. Sheets with vibroplast must be laid on a clean surface. It doesn't stick to dirt. But it will adhere fully to sticky mastic. Additionally, we roll the sheet with a special roller or with our hands through a rag. Then you can safely assemble the interior and install the seats.
Prevention measures
As you know, why repair a very rotten bottom if something like this can be postponed. To do this, it is necessary to follow preventive measures. Of course, if the cause of corrosion is age, then no amount of prevention will help. However, there are factors that should be taken into account in order to minimize the risk of damage to the bottom:
- avoid accidents and drive a car following all traffic rules;
- give your car for repair only to a trusted specialist who is able to do the job efficiently;
- wash away accumulated snow in winter;
- avoid rooms with high levels of humidity in the air;
- try to drive on good roads;
- Eliminate the possibility of moisture getting into the interior, because otherwise it will not be possible to avoid rotting of the bottom right from the inside of the cabin.
It is equally important to treat the bottom with special anti-corrosion agents - they will also help your body serve for several more years without repair. When preventive measures have not been taken and rust has already appeared on the bottom, it’s time to start repairs.
How to extend the life of the bottom?
These tips are suitable for those who have already repaired the floor on the “ten”, and those who still have a living copy. So, the first rule is frequent washing. Typically, car owners pay attention to the upper part of the body. But you also need to wash its hidden cavities. This is especially true for those who live in large cities and operate their cars in winter. The stuck salt will not go away until it is removed with a powerful stream of water.
The next rule is regular treatment of the bottom. Over time, the old anticorrosive agent is washed out and peels off. Once a year you need to check its condition and, if necessary, renew the layer. If pockets of corrosion have already appeared on the surface (but not through), we treat them with a converter, and then with a thick layer of mastic. As for the thresholds, they have drainage holes. There is no point in treating them externally with anti-corrosion agent - the water is inside. Therefore, in dry and warm weather, we take a can of Movil and pour it through a thin tube (it usually comes included) inside. After a year, this procedure should be repeated. This is the only way to ensure complete protection against rust for the bottom and sills. If the problem occurs in winter, you can apply a temporary measure - clean the rusty surface and apply anti-corrosive agent locally to the area. And with warming, treat the entire perimeter.
Replacing the entire bottom
In case of significant damage, the bottom is often replaced entirely; replacement in this case is more profitable than repair:
- purchasing one large integral part ends up being cheaper than purchasing all the spare parts separately;
- the overall amount of work involved in replacing the bottom is less than repairing it;
- no need to waste time thoroughly cleaning the metal from rust or removing old sound insulation;
- You can completely replace the bottom quite simply, without welding, by drilling out the rivets and then installing new fasteners.
If you are going to use an automatic welding machine, when replacing the body floor, you must remove the fuel tank; failure to comply with safety precautions can lead to a fire or even an explosion. And although the work of replacing a one-piece body element at first glance seems quite simple, there are some nuances here - on the new factory bottom there are no studs, a bracket for the handbrake cable, or other fasteners that will need to be rearranged from the old floor.
The underbody of a VAZ 2110 needs repairs! Who can help?
Good day everyone)) I wanted to know about replacing (repairing) the underbody of a VAZ 2110, from those who are directly involved in this, or are well informed in this area of repair. Approximate asking price. Mainly the front part (driver's and passenger's seats) was badly damaged. Jacks. The thresholds also need to be replaced, I tried to find out in other sources, but there were many contradictions there. I may not have asked the question correctly, but still)) I’m interested in the approximate price.
Location: St. Petersburg, Dybenko street
It’s not easier to buy something “new” with such price tags
It's easier if you have money for it! And this car is needed as a workhorse.
Something very expensive! In other sources it was up to 30 thousand rubles. for everything, but here FROM 30 thousand rubles. Not a foreign car after all.
What's the difference? They evaluate by time. But Mercedes or VAZ makes no difference.
A fun activity. Especially in St. Petersburg. From 30 t.r. This will only be work, without taking into account the hardware. It’s easier to drain it as is, add money from repairs and buy a less rotten version.
PS If it is very important, then you can do it yourself, provided that the spars are not in ruins. We buy (cut) galvanized steel and self-tapping screws. Let's sort it all out. We break off what is completely rotten. We attach the galvanization on both sides and tighten it with self-tapping screws (you can use rivets with drilling - but this takes a long time). If desired, coat with sealant, cover with putty, prime and paint from a can. We fill it with Moville and ride it some more, saving up for something fresher along the way. We hammer a bolt onto the jacks, jack it under the beam at the back, and under the spar at the front through the board. I did the same thing myself in St. Petersburg and rode it for another 2.5 years after such “repairs”. Nothing fell off, surprisingly :D.
Some tips for underbody repair
- When preparing iron for patches, it is necessary to take into account its thickness - metal that is too thin will be fragile, and a thick sheet is poorly welded and is more difficult to process.
- Although electric welding is cheaper to use, it is better to weld metal using a semi-automatic machine - it is easier to use, and the weld is smoother and more accurate.
- When cutting pieces of metal and installing patches, the part being installed must fit exactly in size.
- When replacing the bottom, the weld seam cannot be continuous, since it has high rigidity, and insufficient elasticity negatively affects the strength of the body.
And if you undertake to repair the body with your own hands, you should be patient, carefully, slowly, carry out all the necessary operations, sparing no time and effort on processing the metal and cleaning it from rust. Poor quality preparation and weak anti-corrosion treatment leads to the rapid appearance of corrosion, which negatively affects the service life of body parts.
Related articles:
- Technical characteristics and maintenance of Volvo Penta engines Currently, the concern produces motors for boats and industrial marine power plants using diesel fuel. In this article we will look at what Volvo Penta engines are produced, […]
- A car in Russia for 300 thousand rubles Recently, taking into account the change in the ruble exchange rate, prices for all goods in Russia have increased noticeably, and cars have also become more expensive. For little money you can buy a new car [...]
- Features of replacing the VAZ-2114 oxygen sensor, signs and causes of malfunction In connection with tightened environmental standards, all cars began to be equipped with additional systems that reduce the toxicity of exhaust gases, and on almost every car with […]
Vehicle interior
The owner will need to repair the underbody not only under the vehicle, but also inside. Therefore, it is necessary to decant the interior. The work will take quite a lot of time, since it involves dismantling chairs, floor coverings, and tunnel lining. In addition, you will need to remove sound insulation and air ducts.
It is recommended to collect all wires running throughout the cabin into bundles. Since a huge number of fasteners will appear during the dismantling process, it is recommended to prepare special containers for them, for example, small boxes. Don't rely on your memory. Otherwise, additional problems may arise related to the assembly of the interior.
In addition, before carrying out work, it is advisable for motorists to watch the video of repairing the underbody of a VAZ 2110 with their own hands , and use different sources. This will allow you to form a general picture of the repair work, avoid common mistakes and save time.
In some cases, for example, when completely replacing the bottom, dismantling the dashboard and center console is required.
Welding work
After disassembling a VAZ-2110 car, you can fully assess the condition of the body and draw up an action plan. Sometimes work requires a minimum of time. We are talking about situations where replacement of certain elements is not required. The owner of a dozen simply needs to remove the corrosion with brushes and sandpaper, and then install patches.
Most often, through holes are formed in the bottom of the car. In such a situation, it is advisable to completely change the body elements.
Repair work without replacing elements will lead to a violation of the geometry and loss of rigidity. The top ten uses several body elements, in particular, spar and sill extensions, cross members, support platforms, panels and connectors. Next, consider the sequence of welding work:
- To dismantle the damaged element, you must use a drill or angle grinder. That is, the part is drilled or cut off;
- During the process of cutting out damaged elements, you need to monitor the pipelines. In a VAZ car, elements of the fuel and brake systems pass directly under the bottom. Dismantling pipelines takes a long time and requires considerable effort. Therefore, most often they are cut off, and then, after dozens of bottom repairs, new elements are installed;
- If there are through holes in the floor panels, it is recommended to purchase an assembled structure. If such a situation occurs, complete dismantling of the exhaust system is required;
- if the thresholds are being replaced, then the procedure must be performed one by one, observing the geometry of the body;
- if you need to remove both the floor and the thresholds, then the thresholds are dealt with first;
- When replacing individual elements, it is necessary to make markings. All interchangeable parts must be the same size.
Basic welding does not involve applying a continuous seam. The step should be about 4.5 cm. Please note that it will not be possible to complete the work without the involvement of an assistant. After completing the welding work, the surface of the body must be treated with a special compound.
When performing welding work, several nuances should be taken into account. Firstly, the metal must be of appropriate thickness. Thickened sheets are poorly welded. Welding seams should not be continuous, as they are highly rigid. The car body must be strong, and therefore elastic.
Processing the bottom of the VAZ-2110
After updating the car body, it must be treated, thereby providing protection from rust, salts, acids, gravel and other elements present on the road surface. To do this you need:
- clean the metal surface. The challenge is to achieve shine;
- welding seams are treated with a special mastic;
- all metal elements must be primed;
- then paint is applied to the surface;
- the outer surface of the bottom is lubricated with mastic and a special substance to protect it from gravel.
Before performing the above work, the metal surface must be washed and dried. It is also recommended to apply acetone, White Spirit and other substances designed to remove grease to metal surfaces.
At the final stage, it is necessary to prepare sheet sound insulation. If bitumen noise is used, then heating is carried out using an industrial hair dryer. After completing the repair work on the underbody of the VAZ-2110, the work is nearing completion. But there is a rather difficult stage ahead of the installation of interior elements. It should be noted that with a competent approach during the dismantling process, assembly is carried out without problems. To save time and effort, it is advisable to label all boxes with fasteners. You can also record the sequence of work.
You can carry out repairs to the bottom yourself. But for this, dozens of owners will need the appropriate experience and equipment. Therefore, without having the skills, it is better to contact a car service.
Preparatory work
It will take a lot of time to repair the underbody of a VAZ-2110 car. Also, a car owner cannot do without experience, appropriate premises and a whole set of tools. If you wish, you need to prepare the following tools:
- semi-automatic welding. If we are talking about a car body, then it is preferable to use wire and carbon dioxide. An alternative option for connecting parts of the supporting frame can be electrodes and gas. But most car owners prefer the first option;
- A grinding machine will be needed to remove rust from the metal surface, clean seams and prepare individual elements. You can use a grinder with a battery;
- stands. For these purposes, it is necessary to use any available means;
- electric drill;
- Consumables. These should be understood as elements for welding, sandpaper, anti-corrosion substances, soundproofing sheets, paints and varnishes, etc...
After preparing the tools and equipment, the car needs to be driven into a special room.
When performing work, we must not forget about safety. The vehicle must be positioned in such a way as to ensure safety and comfort during underbody repairs.
