Body replacement
In Russia, several companies are engaged in the sale of metal bodies for domestic cars, either assembled or in separate parts. Having familiarized yourself with the assortment of these products, you can see that such stores offer a wide range of colors, which allows the car owner to quickly choose the appropriate option.
You may be interested in: Design, diagnostics and repair of the rear suspension of the VAZ-2106
As a rule, bodies intended for Niva cars, equipped with three doors, were painted at the factory in several standard colors. All of them are listed below:
- Snow white (factory code 202).
- Nessie (factory code 368).
- Jasper (factory code 140).
- Baltika (factory code 420).
- Glacial (factory code 221).
- Nice (paint serial number - 328).
- Snow Queen (paint serial number – 690).
- Quartz (paint serial number – 630).
- White cloud (paint serial number – 240).
You may be interested in: Hyundai Porter: body dimensions, technical specifications, engine, photo
The VAZ-2121 car with five doors was painted at the factory in three color options:
Getting to know the VAZ 2121
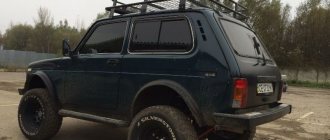
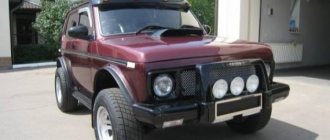
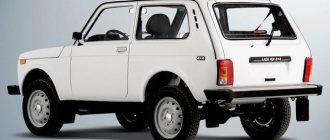
One of the best creations of AvtoVAZ, the 2121 autocar, with virtually no design changes, will soon pass the 40-year mark on the assembly line. All over the world there are only two such record holders. In a word, the Niva today is the most popular SUV on the used market, and this is not without reason.
The 77th year of the last century was marked by the appearance of a new machine at the Volzhsky plant, which almost caused a revolution. There were practically no similar models all over the world, since the Niva was equipped with an advanced spring suspension, all-wheel drive and a monocoque body instead of the supposed frame one, which was rare at that time.
Surprisingly, the SUV turned out to be cheap and very practical. Not a single model produced at the factory, and in general, if we add comfort and convenience, then not a single vehicle in the world with a 4x4 formula could boast of such a set of qualities. Most of the all-terrain vehicles of those years were outdated vehicles with a military past. The only real competitor to the Niva was the Range Rover, which came out 6 years earlier.
Getting rid of scratches
Minor rust and blistered paint that appears on a car is not a reason to completely replace the body. In this case, the operation to restore the Niva can be easily carried out independently, while saving a decent amount of your own funds.
For example, scratches can be removed by polishing the paintwork. To carry out this operation, various grinding compounds and special materials are usually used. With their help, you can easily and quickly remove the top layer of paint, thereby smoothing out shabby areas on the body. Complete elimination of scratches is only possible if the outer layer of paintwork is not severely damaged. It is also not recommended to remove too much paint when restoring the Niva -2121 with your own hands.
Description of the design of Niva 2121 and 21213
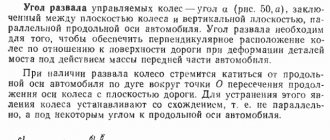
Both cars have high cross-country ability. This is inherent in their design. Niva 2121 and Niva 21213 belong to the class of light SUVs:
- body type - station wagon;
- number of doors – 3 pcs.;
- drive - four-wheel drive;
- gearbox – 4 or 5-speed;
- ground clearance size – 220 mm;
- wheelbase - 2.2 m.
Thanks to these parameters, the car can be used in off-road conditions. Niva 21213 has similar parameters. The appearance of the car has only improved. The power unit was also replaced.
Geometry restoration
You may be interested in: Air-cooled engine: operating principle, advantages and disadvantages
If the body is severely damaged as a result of a vehicle collision, craftsmen have to restore the car to its former geometry. Metal deformation also occurs as a result of sudden temperature changes or obsolescence of the structure.
Active operation, as well as the use of a car in harsh natural conditions, will inevitably lead to rapid wear and tear of the body of personal transport. Poor quality road surfaces often lead to excessive tearing of bolted and welded joints, reducing the life of the vehicle.
If it is necessary to restore an old Niva and eliminate severe damage to its body, it will be necessary to diagnose and restore the geometry of the car using high-tech equipment in a car service center. It is impossible to perform such an operation correctly on your own in a garage.
Born again! (report on the restoration of VAZ-21213 NIVA)
- Go to page:
Born again! (report on the restoration of VAZ-21213 NIVA)
Post by fast » Mar 30, 2006 03:12
It is no longer a secret to many that for a whole year I have been restoring the VAZ-21213 NIVA, which came to me in an extremely “killed” condition! This car, manufactured in 1995, has seen a lot during its existence... Despite its rather good appearance, the car has hardly been driven lately, because... there were serious problems with the engine. The fact is that one day, in one of the car repair shops, her engine was bored out. But they did it in a “clumsy” way. As a result, after several thousand kilometers traveled, the engine suddenly and very noticeably lost traction... In addition, the build quality of the car at the factory was not very good. But it was the intervention of some “specialists” from the car service over the past couple of years that became the decisive moment on the way to the end of life for this car.
In this topic, I would like to briefly talk about the restoration work carried out on this machine at the moment. I want to immediately note that I do not pursue the goal of making this car a “SUPER-SUV ROAD”. However, after a preliminary assessment, even at the beginning of the work, it was clear that a simple repair would not suit her... The fact is that she was no longer drivable, and repairs would have been so expensive that she could have simply bought a newer used Niva (albeit in not very good condition, but she would drive). It was decided not only to restore some parts, but also to make a lot of changes, including to the design of the car. The goal is to create a good, RELIABLE, durable and, most importantly, QUALITY car for going out into nature (fishing, hunting and just walking...)
Types of body repair
If after diagnostics it turns out that only some parts of the body have been deformed, the Niva is restored by tapping or squeezing out the damaged parts of the car. This work is carried out in several ways:
Personality of garage repair
Hobbies in crisis
Sooner or later (better late), corrosion begins to take over on the car, and you have to switch from cosmetic methods (primer + paint) to surgical ones (cutting and welding). I hope this little {instruction} will help you figure out what needs to be changed and in what sequence, what needs to be taken and, of course, how everything looks on the inside.
So. There is a need to replace the thresholds on your car.
Before starting work, you need to conduct an inspection and find out what the extent of the damage is. To do this, we lift the machine, put it on the stops (ATTENTION! OBSERVE SAFETY) and, armed with a narrow screwdriver, begin to study.
I will allow myself a small digression into the punishment system in order to decide where to “explore” with the screwdriver given to us.
Specifically, the threshold consists of 3 parts. Outer part (part of the side frame, but supplied as a separate repair part), inner part (consists of connector and bottom element) and reinforcement. In cross section it looks something like this:
The amplifier, in turn, consists of 3 parts. If everything is simple with the middle part, it is supplied as a separate element, then the front and rear parts of the amplifier are elements of the inner part of the sidewall and the front panel, which is connected to the engine shield.
In addition, a front bracket (jack), a front connector (the thing on which the mudguard hangs), a rear connector (the reaction rod is screwed to it) and a rear jack are welded on the inside of the connector.
All these elements need to be checked. Use a screwdriver to strike with medium force. Those elements that can be pierced must be replaced absolutely. In addition, it is necessary to study the condition of the side members in those places where connectors are attached to them, and the bottom in the same areas.
Let's get to work.
We study the state of the amplifier and internal connector:
Because part of the threshold goes under the front wing, you need to cut off the lower part of it (the wing) or (if the condition of the wing is unsatisfactory) remove it completely. The best way to do this is to use a spot welding drill:
In this case, the wing had mechanical damage and was subsequently completely replaced.
We remove the amplifier and everything that is in unsatisfactory condition:
We remove the connector and, if necessary, the jacks. We clean the weld spots, remove formation rust and install the newest connector:
After welding, I recommend treating the joint space with seam sealant and covering it with primer. In my own work, I use Standox Rotbraun for additional anti-corrosion protection:
Installing the middle part of the amplifier:
First, a “spare” amplifier was purchased, from which the missing parts were restored. All seams were turned and covered with primer:
We adjust and weld the outer part of the threshold:
It must be emphasized that you CANNOT COOK WITH A CONTINUOUS SEAM. Powerful heating will “lead away” the alloy, and before painting you will have to use a huge amount of putty, which will not be a high-quality repair.
Welding is carried out according to the 6-point principle. In other words, we make a point, move away to a distance of about 6 points and make the next one. The area around the first one has time to cool down and we return to the first one, etc.:
We grind the seams and install the wing (or part of it):
We treat the seams with glass putty and send them for painting:
Source: gar-remont.livejournal.com
Body care
You may be interested in: Replacing the cabin filter of Lada-Kalina
To extend the life of the car body and avoid costly repairs, a responsible vehicle owner carries out a number of preventative measures. Such do-it-yourself Niva restoration measures include:
NIVA, replacement of putrefactive parts
There is a field of fluffy years. The right half is overcooked, the sill on the left is disassembled by hand, there is a hole in the floor, there is simply no spar in the area of the jack. Empty. Absolutely not, not an exaggeration, a hole through and through. How long will it take to restore this miracle? Does this make sense? Or maybe just weld a piece of rails instead of a spar and use the car only for shit-climbing and tourist purposes?
Its engine is 2121 - 1600. How does it differ from the “modern” 21213?
- Special department
- Group: Users
- Posts: 1,427
Post edited by Svarog-Perm: 04/11/2007 – 15:30
- Markovod
- Group: Users
- Posts: 6,588
| QUOTE (Svarog-Perm @ Apr 11 2007, 15:29) |
| It makes sense if straight hands cook. |
| QUOTE (Svarog-Perm @ Apr 11 2007, 15:29) |
| Buy a contactless ignition kit (distributor, coil, switch |
- Special department
- Group: Users
- Posts: 1,427
| QUOTE (Yuri @ Apr 11 2007, 17:07) |
| Are the cylinders larger or the piston stroke increased? |
I can't tell you from memory.
The rest is in PM or ICQ. At the same time, you'll see what you can create from almost nothing.
Post edited by Svarog-Perm: 04/11/2007 – 17:54
- ordinary user
- Group: Users
- Posts: 771
- Special department
- Group: Users
- Posts: 1,427
| QUOTE (BlackSabbat @ Apr 11 2007, 19:41) |
| Mother-in-law's door is an unsolvable problem. |
- Master of Toys
- Group: Disabled
- Messages: 2,955
Everything is done quite quickly with four snouts, eight hands. - a lot of funds. didn't specify :)))
If she's so fluffy, there's probably something else sweet in there? :)
I once wrote to a transport company - a neighbor is selling a cornfield, for like 20. The iron is literally not bad there.
It's great where we are not. And where we are, it’s absolutely awesome!))
Admiring vodka, freebies, revolutions and being an asshole is not enough to be called Russian.
- ordinary user
- Group: Users
- Posts: 771
| QUOTE (Svarog-Perm @ Apr 11 2007, 22:06) |
| I mean, unsolvable. She doesn't break down voluntarily. Practically does not rot. |
- Special department
- Group: Users
- Posts: 1,427
| QUOTE (noname1 @ Apr 12 2007, 06:18) |
| jump in funds. didn't specify :))) |
| QUOTE (BlackSabbat @ Apr 12 2007, 09:20) |
| Her lower vents. the holes are not enough who inspects |
Post edited by Svarog-Perm: 04/12/2007 – 08:24
Source: teron.online
Why should the body be strengthened?
The procedure for restoring a Niva-Chevrolet, like other car models, is not an easy task for a beginner in this matter. Such work takes a lot of time and effort, but the result will extend the life of the car for several years, keeping your personal vehicle in good condition.
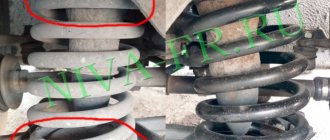
First of all, to restore the Niva’s body, as well as to modernize it, the side members on an old car are strengthened. To do this, steel sheets up to 5 mm thick are welded onto them. At the same time as this work, the suspension elements are being strengthened. It is especially important to strengthen the front side members in the following cases:
How to choose a part: average prices
When choosing spare parts for Niva, look at the article number. The part must fit exactly your car model. Don't take the bottom from a Chevrolet Niva. It has different dimensions, which means the part will have to be trimmed.
When buying a new spare part, remember that the factory bottom does not have a number of elements:
- hairpins;
- fastening elements;
- bracket for the hand brake cable.
They will have to be moved from the old flooring. If you are not sure of their safety, it is better to immediately order all the related parts. The average price of the bottom in the capital is 5,000 rubles. If you want to buy a spare part cheaper, contact a VAZ car dismantling center.
Repairing the bottom yourself requires patience and time. Spare no effort in processing the metal and cleaning it from rust. Poor preparation and careless attitude towards post-repair work will negatively affect the service life of the new body element.
How to strengthen the spars
First of all, to restore the Niva-2121, the side members are strengthened. To carry out such an operation? you should prepare, namely:
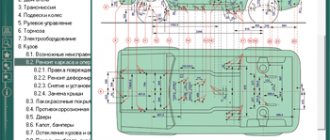
Body 2121 with its parts
| 1 hood | 14 floor and side panel connector | 27 floor mat holder | 40 lower sliding window seal |
| 2 upper bulkhead reinforcement | 15 front wing | 28 door sill trim | 41 seal frame |
| 3 right side | 16 front fender mudguard | 29 rear floor mat | 42 door seal |
| 4 wind window frame | 17 front panel | 30 front floor mat | 43 door sliding glass seal |
| 5 roof panel | 18 radiator trim panel | 31 front side panel upholstery | 44 tailgate seal |
| 6 rear floor panel | 19 upholstery holder | 32 side trim | 45 tailgate glass seal |
| 7 side rear stand | 20 upper door trim holder | 33 connector | 46 side glass seal |
| 8 roof reinforcement | 21 door trim | 34 fastening bolt | 47 rubber plug |
| 9 outer door panel | 22 arch and side trims | 35 bracket | 48 wind window frame seal |
| 10 inner tailgate panel | 23 roof lining | 36 bumper beam | 49 windshield seal |
| 11 outer side door panel | 24 roof liner | 37 pad holder | 50 hood seal |
| 12 inner side door panel | 25 anti-squeak bushing | 38 rubber pad | 51 air supply box seal |
| 13 left side | 26 upholstery fastening nut | 39 rotary window seal | 52 front bumper connector seal |
Manufacturing of the spar amplifier
In order to correctly carry out the restoration process of the Niva 21213, an amplifier for the spar should be made. To do this, you first need to cut out a pattern from thick cardboard. Next, you need to mark the points on the paper where the bolts and clamps will be screwed in. After this, you need to cut a three-millimeter sheet of steel according to the layout using a grinder.
Next, you need to drill holes to attach the new part to the car body. During fastening, you should make sure that the piece of metal fits tightly to the spar; only after that can it be secured with bolted connections and welding around the entire perimeter of the part.
After completely assembling the car, it is necessary to coat all cleaned metal parts of your VAZ-2121 with anticorrosive. As a rule, such a coating dries within 24 hours. After this operation, the machine is ready for further operation.
Do-it-yourself replacement of car underbody elements
The bottom of the Niva 21213 can be partially repaired. To do this, individual places are changed or patches are installed. In this case, you will definitely need a welding machine. Semi-automatic is best. If you are replacing a separate part of the floor, you will additionally have to take a drill. She drills the rivets. No welding required.
If the bottom and thresholds change at the same time, then the latter are removed first. Be sure to control the body geometry. It should not move or float.
Scheme of sequential actions:
- Raise the car on a lift or turn it over.
- Remove the rusty, holey area.
- Install the repair panel.
- Tack the panel by welding or attaching it with rivets.
Underbody repair panels for a VAZ 2131 car are always installed from below.
Strengthening other areas of the car
The metal body of the Niva car has several more places that need strengthening over time, since they can no longer withstand increased loads during operation of this vehicle. All of them are listed below:
What problems may arise
Like many brands of cars, the body deteriorates the most during use. Main “sore spots”:
- rust under the headlights;
- lower parts of wings;
- thresholds;
- arches;
- the bottom under the driver's feet.
I would like to talk about the last problem in more detail. The bottom under the driver's seat of the Niva deteriorates due to constant contact with water. In winter it is melted snow, in other seasons it is rainwater. The liquid impregnates the sound insulation and the metal is rubbed to holes. It is also worth paying attention to the place where the transfer case is attached to the bottom. Cracks form there.
Is it worth changing the body to a new one?
The body of the VAZ-2121 is the most expensive part of this domestic car. You should take good care of it and carry out cosmetic repairs. You should also cover the thresholds with anti-gravel protection, promptly remove rust from the metal, and wash the car as often as possible, especially in the winter, because that is when reagents are actively used on the roads, corroding car body parts and rubber seals.
If the body has fallen into disrepair, is heavily rusted, or has large holes formed on it that cannot be repaired, the easiest way is to replace it with a new one. However, remember that a radical replacement of the body can result in problems when meeting with traffic police officers. You should come to the registration point in advance and register the changes made to your car.
If the body of the VAZ-2121 has undergone minor corrosion, the best option for the owner would be local cosmetic repairs of metal parts, as well as strengthening of some components of the car.
Bottom treatment
After the bottom of the VAZ 2121 has been replaced, it is necessary to carry out a number of final works. This is necessary to consolidate the effect, otherwise the new floor may sag or fail.
How to treat the updated bottom:
- Wash and dry the metal thoroughly.
- Degrease the flooring with acetone or white spirit.
- Prime the iron.
- Apply anti-corrosion compound.
Do not forget to treat the welding seams separately; they must be coated with mastic.
Description of the Niva construction process (84 photos)
I had an amazing car, a brand new Kia Sorento New, I drove it for only one year, and suddenly I decided to sell it in order to invest a certain amount in my own small business. I thought for a long time about which car to spend the remaining 100,000 rubles on, and decided, as it seemed, for just one winter (gullible, ha-ha-ha) to buy a Niva, fortunately I understand the car, it will go everywhere, but if it breaks, we’ll fix it, hands are in place like))).
And so it was bought, old, rusty, with a mileage of 150 thousand km, a gentle rusty blue color.
year 2000. Brand new tires, front seats from a foreign car, alarm system, some good faith. limited edition in general)
I arrived home, drove the first 100 km, and with all my heart, having tasted the roar, howling, knocking, vibration and smell of gasoline, I drove it into the garage for bloodthirsty diagnostics, and here it began: 1. Replacement of brake discs 2. Replacement of chain and shoes 3. Adjusting the valves 4. Replacing the valve cover gasket 5. Replacing the torque rods 6. Replacing the exhaust manifold gasket 7. Repairing the fuel tank drainage system. 8. Adjustment of front wheel bearings. A small amount of money (really small) was extracted from the wide trousers and was happily spent on spare parts. After 3 evenings, the Niva left the garage without actually rattling, knocking, vibrating, and without any unnecessary odors or sounds. I registered it, and off I went. But how (this is after almost all the years of owning new and slightly used ones), the steering wheel does not turn at low speeds, the interior rattles, there are a lot of saffron milk caps outside, and a lot of other ahtungs))))). I drove the Niva back into the garage, bought a bottle of vodka, a snack, invited a friend, took the Internet with me to read, and by the morning of the 2nd day and by the end of the 4th bottle of vodka, it was decided from Niva to create a car for both quite comfortable driving around the town and and for “shit” without horror and reproach, but so as not to fuck*?:*?:, but to overcome. And here information rushed to my head, a lot, from specialized “Nivov” forums, from online stores, theory, practice (I caught Nivovodov on huge wheels on the street in order to ask what and how. As a result, the fight against the toad, Wishlist, and residents of the forums a decision was made with Niv to create the following: 1. Complete disassembly 2. Installation of power steering 3. Purchase and transfer to the spare space of a 115A generator 4. Replacement of the main pairs of both gearboxes with 4.3 ones, including the latest shafts with 24-spline hubs 5. Installation of CV joint drives 6 Light lift 7. Newest springs (original) 8. Newest springs (Kayaba gas and just) 9. Reinforced bumpers with a T-Max 8500 winch on the front bumper 10. Towbar 11. Wheels 235/75 R15 BF Goodrich A/T on rims with 40th offset 12. Cutting arches, installing flares 13. Power sills 14. Clean the body from rust, patch holes, clean it, prime it, prepare it for painting 15. Paint it dark, with camouflage spots on top, snow-white and grayish, on top 3 layer of varnish 16. We treat the body with mastic 17. We glue 100% of the surfaces from the inside with noise and vibration insulation 18. We cover the seats (the front ones were foreign-made) with artificial leather 19. We install a hard ceiling with a visor 20. We put carpet on the floor 21. We install original Hella headlights on the outside 22. We install snorkel 23. To unload the original wiring, we drag a 16-square cable into the cabin, from it we power the music, signaling, walkie-talkie, all cigarette lighters, power windows 24. We install a simple (Pioneer) radio, a 16-square speaker in the front doors, a small active Subic under the seat 25 We install a simple alarm with auto start. Phew, that's a long list.
Source: fishki.net
The device of the VAZ Niva transfer case
The transfer case is not present in all VAZ passenger cars, but only on cars with two drive axles. In the transmission, the transfer case (TC) is installed at the rear of the gearbox; a rear driveshaft is attached to its shank, which connects the transfer case to the rear axle. The front axle is also driven by the steering wheel; it is connected to the transfer case by a front driveshaft.
The reduction gear in the Republic of Kazakhstan is designed to obtain high torque, it is used to overcome difficult sections of the road, and helps to cope with off-road conditions. The VAZ Niva transfer case contains the following main parts:
- the body itself;
- front axle drive shaft;
- intermediate shaft;
- drive shaft;
- gears;
- bearings;
- differential housing;
- satellites;
- differential lock clutch;
- gear shift clutch;
- flanges (for connection to cardan shafts);
- oil seals;
- control levers.