electric windows are used...
Page 9
- Image
- Text
electric windows are used, which can be controlled from the switches of the driver’s door module (Fig. 6, pos. 4...7), from switches in the passenger doors and from buttons
And
remote control
nogo management. To raise the glass you require, pull the edge of the corresponding power window switch upward.
To lower the glass you need,
Press the edge of the corresponding power window switch downwards. It should be remembered that there is an automatic mode for moving the glass of the left front door. If the power window switch is held down for 1.5 seconds or more, the window will continue to move
10
in the specified direction until it stops. To stop automatic window movement, press or pull any switch on the driver's door module again. For the remaining glasses, after you stop pressing, the key is automatically set to the middle position and the glass stops in any position you choose. In order to disable the control of the electric windows from the switches located in the rear doors, press button 9 of the driver's door module; the symbol in the button will be illuminated in orange. To restore the ability to control the electric windows
from the switches located in the rear doors, press button 9 of the driver's door module again. The orange illumination of the symbol in the button will go out.
It is possible to simultaneously control
the presence of two electric windows located on different sides of the car.
Electric windows control
come from the switches in the driver's door module and in the passenger doors only when the ignition is turned on, and also for 30 seconds after the ignition is turned off if none of the vehicle doors were opened.
Electric windows control
from the buttons
And
remote control
remote control when the ignition is off. The windows are raised while the button is held down
in the pressed position-
for more than 3 seconds when the security mode is on. First the front windows go up, then the rear windows (
in a variant version
) pass-
sazhir doors. The windows are lowered while holding the button
pressed
more than 3 seconds when the security mode is off. The front windows roll down first, then the rear windows (
in a variant version
) pass-
sazhir doors.
Rice. 5. Front right door
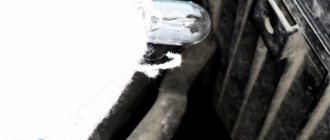
Rice. 4. Front left door
Repair manual for VAZ 2170 Priora
- Repair manuals
- Repair manual for VAZ 2170 (Priora) 2004+.
General information about the car.
The small class car VAZ-2170 Lada Priora with a four-door sedan body (class C according to the international classification) is designed for operation at ambient temperatures from –40 to +50 °C on public roads with hard surfaces. The Lada Priora is equipped with an injection 16-valve engine mod. located across the engine compartment. VAZ-21126-00 with a working volume of 1.6 liters. The engine is equipped with a distributed fuel injection system and an exhaust gas catalytic converter, structurally made in a single block with the exhaust manifold (catcollector). The body is load-bearing, all-metal, of welded construction, with hinged doors, front fenders, hood and trunk lid. The driver's seat of the Lada Priora is equipped as standard with an airbag, and in an optional version - with a front passenger airbag, as well as front seat belts with pretensioners and load limiters, which significantly reduces the likelihood and severity of head and chest injuries in a traffic accident. The transmission is made according to a front-wheel drive design with drive wheels of different lengths. The front suspension is independent, spring, with anti-roll bar, with hydraulic shock absorber struts. The rear suspension is semi-independent, lever-spring, with hydraulic shock absorbers. The front wheel brakes are disc brakes with a floating caliper, the rear wheels are drum brakes. In a variant version, Lada Priora cars are equipped with an anti-lock brake system, which prevents wheel locking during braking and maintains controllability and directional stability. The steering is safety-resistant, with a rack-and-pinion steering mechanism, with an electromechanical booster that changes the transmitted torque depending on the speed of the vehicle. Lada Priora cars are equipped with a remote control system for locking or unlocking door locks (in an optional version and locking the trunk lid lock) with simultaneous activation or deactivation of the vehicle security mode. In addition, remote activation of the alarm system in case of violation of vehicle security zones and blocking of all doors by pressing a button from inside the vehicle are provided. This system also includes an electronic engine locking system (immobilizer), which provides additional protection against unauthorized engine starting.
↓ Comments ↓
1. Car structure
1.0 Car structure 1.1 General information about the car 1.2 Passport data 1.3 Car keys 1.4. Controls 1.5. Heating and ventilation of the cabin 1.6 Ensuring a comfortable air temperature in the cabin 1.7. Doors 1.8. Passive safety equipment on the car 1.9. Seats
2. Recommendations for use
2.0 Recommendations for use 2.1. Safety rules and recommendations 2.2 Running in the car 2.3 Operating the car during the warranty period 2.4. Preparing the car for departure
3. Problems along the way
3.0 Malfunctions along the way 3.1. The engine does not start 3.2 Malfunctions of the fuel injection system 3.3 Idle speed has disappeared 3.4. Interruptions in the operation of the 3.5 engine. The car moves jerkily 3.6 The car accelerates poorly 3.7 The engine stalled while driving 3.8. Oil pressure dropped to 3.9. Engine overheating 3.10. The battery does not recharge 3.13. Knocks in the engine 3.16. Wheel puncture
4. Maintenance
4.0 Maintenance 4.1. General provisions 4.2. Inspection work 4.3. Lubrication and filling works 4.4. Diagnostic work 4.5. Repair and adjustment work
5. Engine
5.0 Engine 5.1 Design features 5.2 Possible engine malfunctions, their causes and solutions 5.3 Useful tips 5.4 Checking compression in the cylinders 5.5 Removing and installing the decorative engine casing 5.6 Removing and installing the engine splash guard 5.7 Installing the piston of the first cylinder to the TDC position of the compression stroke 5.8 Replacing the drive belt gas distribution mechanism and tension roller 5.9 Replacing the power unit supports 5.11. Replacing engine seals 5.13. Engine cylinder head 5.15. Engine repair 5.16. Lubrication system 5.17. Cooling system 5.18. Power supply system 5.19. Design Features
6. Transmission
6.0 Transmission 6.1. Clutch 6.2. Gearbox 6.3. Front wheel drives
7. Chassis
7.0 Chassis 7.1. Front suspension 7.2. Rear suspension
8. Steering
8.0 Steering 8.1 Design features 8.2 Possible steering malfunctions, their causes and solutions 8.3. Steering column 8.4. Steering linkage 8.5. Steering gear
9. Brake system
9.0 Brake system 9.1 Design features 9.2 Possible malfunctions of the brake system, their causes and solutions 9.3 Bleeding the brake system hydraulic drive 9.4 Removing and installing the vacuum brake booster 9.5 Replacing the brake pedal axle bushings 9.6. Main brake cylinder 9.7. Front wheel brakes 9.8. Braking mechanisms of the rear wheels 9.9. Pressure regulator 9.10. Brake hoses and tubes 9.11. Parking brake
10. Electrical equipment
10.0 Electrical equipment 10.1 Design features 10.2. Battery 10.3. Mounting block (relays and fuses) 10.4. Generator 10.5. Starter 10.6. Ignition switch (lock) 10.7. Electronic engine control system (ECM) 10.8. Ignition system 10.9. Lighting, light and sound signaling 10.10. Windshield cleaner 10.11. Washer reservoir 10.12. Electric fan of the engine cooling system 10.13. Electric motor of the heating and ventilation system fan 10.15. Cigarette lighter 10.16. Instrument cluster 10.18. Electronic anti-theft remote control system 10.19. Immobilizer 10.21. Replacing sensors and switches
11. Body
11.0 Body 11.1 Design features 11.2 Possible body malfunctions, their causes and solutions 11.3 Removing and installing windshield frame lining 11.4 Removing and installing soundproofing upholstery in the engine compartment 11.5. Removing and installing bumpers 11.6 Removing and installing the fender liner and protective wing cover 11.7 Removing and installing the front fender 11.8 Removing and installing decorative sill trims 11.9. Hood 11.10. Trunk lid 11.11. Doors 11.12. Seats 11.13. Seat belts 11.14. Rear view mirrors 11.15. Interior fittings 11.16. Instrument panel 11.17. Heater 11.20. Body care
12. Applications
12.0 Appendix 12.1 Appendix 1. Tightening torques of threaded connections, Nm 12.2 Appendix 2. Fuels, lubricants and operating fluids 12.3 Appendix 3. Nominal filling volumes 12.4 Appendix 4. Basic data for adjustments and monitoring 12.5 Appendix 5. Spark plugs used on vehicles 12.6 Appendix 6. Lamps used on a car 12.7 Appendix 7. What you need to have in a car 12.8 Appendix 8. Tools used when repairing a car
13. Electrical diagrams
13.0 Electrical Diagrams 13.1 Diagram 1. Instrument Panel Harness Connections 13.2 Diagram 2. Vehicle Front Wire Harness Connections 13.3 Diagram 3. Engine Electronic Control System (ECM) Harness Connections 13.4 Diagram 4. Vehicle Rear Wire Harness Connections 13.5 Diagram 5. Light Harness Connections license plate light 13.6 Diagram 6. Left front door wiring harness connections 13.7 Diagram 7. Right front door wiring harness connections 13.8 Diagram 8. Rear door wiring harness connections
Types of parts
Based on the form, you can take the following constructive part:
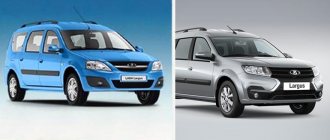
- Station wagon.
- Hatchback.
- Sedan.
You can purchase the entire body or take a separate part of it (fenders, hood, bottom, roof, etc.).
According to the level of equipment, the following types of auto parts are distinguished:
- Bare (metal structure without additional elements).
- Assembled (a metal product with mirrors and an equipped car showroom).
Bare body
According to the condition, you can take the structural part:
- New one.
- Used.
A used car part can be like this:
- In great condition.
- In good shape.
- In need of repair.
You can buy the original body or from another car model. Suitable for Priora housing from the following VAZ brands:
- 2170.
- 2110.
- 2112.
You can take the spare part with or without documents.
Depending on the presence of the paint layer, there are designs:
- Unpainted.
- Painted.
At the place of purchase, a car part can be:
- Ordered from the online store.
- Picked up at a vehicle dismantling point.
- Purchased from a car owner.
- Purchased from the manufacturer.
Characteristics of auto parts
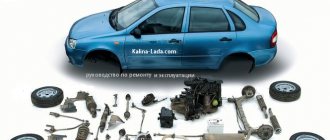
The body of the Lada Priora is the body of the car. It is a metal structure with or without glass and parts. Serves to accommodate passengers and the driver in the car. Performs decorative and protective functions.
You may need to purchase a structural part in the following cases:
- The presence of a large number of damages (dents, scratches, corrosion, holes), which are very expensive to repair.
- I would like to update the appearance without changing my original car. If you choose a good spare part, the vehicle will look like new.
- There is a desire to modify the appearance of the car by installing a body from another brand of car.
Body on Priora sedan