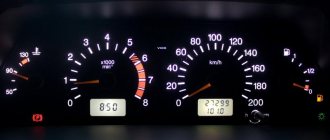
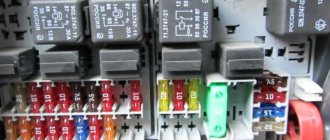
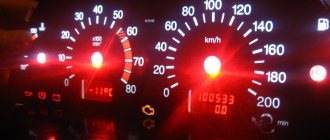
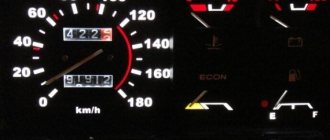
If the instrument panel on a VAZ 2107 does not light up, then this does not have a negative impact on the operation of the car during daylight hours. However, very strong inconveniences arise at dusk. It is very difficult to drive a car at night if the dashboard lights are not working. We will consider in detail what could be the reasons for the malfunction of the instrument lighting on a VAZ 2107 car, as well as ways to eliminate them.
Why do you need additional lighting?
Today, car tuning is carried out not only outside, but also inside its interior, and there is no better place than the dashboard. Diodes built into the panel will allow you to achieve the following positive aspects:
- give the dashboard a new unusual look;
- High-quality illumination of important elements of the dashboard;
- make additional lighting for the vehicle interior;
- make your car ride more comfortable;
- improve road safety. When the instrument panel is well lit, all the indicators are clearly visible on it, which allows you to correctly assess the position of the car on the road and not violate the rules of the road with your driving.
The easiest way to illuminate such an element of a car as the dashboard is to install diodes in it. The following types of LED products can be used here:
separate diodes. Using them as backlight, you can create full or decorative lighting for the dashboard. It is worth noting that LEDs can glow in different colors. Therefore, such LED lighting can beautifully complement external tuning, glowing with it in the same color scheme;
LED Strip Light. This tape is very often used as decorative lighting not only for a car, but also for home premises or street elements. It can be easily replaced with another, which will allow you to change the boring color scheme to a new one. The LED strip has a self-adhesive base, with the help of which its installation by hand is quite easy and quite quick.
Interior lighting
- Use a screwdriver to pry up the lampshade on one side and remove it. It is detached entirely, complete with button and lamp.
- Loosen the clamps holding the bulb base and pull it out. We replace it and collect everything.
The main thing is not to use too much force when installing the lampshade in place. All fasteners are plastic, you can damage them and end up having to buy a new part.
Instrument panel - removing and replacing lamps
Location of lamps on the instrument panel: 1 — fuel reserve indicator lamp (A 12-1.2 (W1.2W); 2 — instrument illumination lamps (AMN 12-3-1 (T3W); 3 — turn indicator indicator lamp (A 12-1.2 (W1.2); 4 — warning lamp for malfunction of the engine management system (A 121.2 (W1.2); 5 — warning lamp for turning on the external lighting (A 12-1.2 (W1.2); 6 - indicator lamp for insufficient oil pressure (A 12-1.2 (W1.2); 7 - indicator lamp for turning on the parking brake (A 12-1.2 (W1.2); 8 - indicator lamp for turning on the high beam headlights (A 12-1.2 (W1.2); 9 - battery charge indicator lamp (A 12-1.2 (W1.2)
1. We prepare the car for operations (see “Preparing the car for maintenance and repair”).
2. Disconnect the wire from the negative terminal of the battery (see “Battery - removal and installation”).
3. Using a slotted screwdriver, remove the handles from the heater control levers.
4. Unscrew the nut securing the trip odometer reset handle. Remove the nut and washer and push the handle into the space behind the panel.
5. Using a thin slotted screwdriver, pry up and remove the screw plug for fastening the shield, located on the right edge of the block of control levers for the interior ventilation and heating system.
6. Use a Phillips screwdriver to unscrew the self-tapping screw.
7. Remove the shield from the panel.
8. Unscrew the knurled nut of the speedometer drive cable and disconnect the cable.
9. Remove the vacuum supply hose from the econometer fitting.
10. Disconnect the three colored connectors of the wiring harnesses.
11. Remove the instrument panel.
Replacing the instrument backlight lamp
1. Having turned the lamp socket 90° until its protrusion coincides with the slot in the board, remove the lamp socket.
2. By pressing and turning 90°, remove the lamp.
Replacing warning lamps
1. Having turned the lamp socket 90° until its protrusion coincides with the slot in the board, remove the lamp socket.
2. Replace the lamp together with the socket.
Installation of all removed parts is carried out in reverse order.
What kind of lamps are needed?
Before disassembling your VAZ, it makes sense to drive it to the nearest auto store and stock up on new light bulbs. But which ones to buy? Judging by the first photo, the backlight and indication lamps have different sizes. The choice is simple: if the backlight bulbs have burned out (position 2 in the same photo), then you will need AMN 12-3-1 (T3W) bulbs. If they are indicator ones, then A 12-1.2 (Wl.2).
Dashboard illumination lamp VAZ 2107 with and without socket included
LED light bulbs
If you are tired of changing light bulbs in the power supply of your VAZ or are just a fan of modern tuning, then you can install LED light bulbs instead of incandescent ones, since the industry also produces those that have the same standard size, base, socket and operating voltage.
LED lights for the dashboard illumination (left) and indication for the VAZ 2107 car
Important! The battery charge indicator lamp cannot be changed to an LED one - the battery will not be charged properly.
Replacing the backlight
To improve the quality of your dashboard lighting, it is advisable to install new LEDs in place of the old ones. They provide excellent illumination, consume minimal energy, and guarantee a high level of data reading.
- Buy a set of LED lamps, having previously calculated the number of devices needed for each sensor.
- After removing the block, install the resistors and lamps in specially designated places on the VAZ 2114 - in the sockets. To dismantle the cartridges, they are carefully unscrewed counterclockwise. New sockets are installed in their place and light bulbs are inserted. Respect the polarity and position the LED heads. They will have to be carefully ground off.
- Connect the power and check how the new backlight works.
- Reassemble step by step. Be sure to route the wiring to the board and carefully secure it to it. This way, the backlight components will not interfere with the reassembly process.
- Make sure the instrument panel arrows are positioned correctly. When trying to quickly complete a job, they often become deformed and bent.
- The backlight structure is fixed with screws.
- The power for the LEDs is connected to the power supply for the light bulbs, the arrows are put on and set to zero.
- Using the on-board computer, check the operation of each sensor and device. If the IDs are functioning correctly, return the instrument panel to its original condition. That is, assemble the entire assembly.
Turn signal
The housing of the side turn signals is fixed in the car fenders with plastic clips. They work on the principle of inserting and clicking. There are two options for replacing the lamp in repeaters: through the wing arch or by removing the plastic housing. In the latter case, there is a chance that this body will no longer be securely fixed in the wing due to breakage of the plastic clips.
Let's consider the second option
We pry up the repeater housing with a plastic flat object, you can use a screwdriver, but use a rag or other lining so as not to damage the paintwork of the wing. The body is surrounded by a rubber “skirt”, so you can lightly press on it with a hard tool and pry it, it should pop out of the metal of the car body.
We remove the rubberized cartridge from the turn signal housing. It uses, depending on the modification, T4W or W1.2W lamps. The last type is removed from the cartridge by turning 90 degrees so that the contacts come out of the latches, the second type is removed from the socket by hand, since it does not have a base.
The first option is through the arch
We do the same thing, just don’t pull the repeater housing out of the wing. It remains in place, which ensures the integrity of its latches. In this case, there are also nuances:
To get to it, you need to remove the fender liner. In some cases, when no one has climbed there for many years, unscrewing the screws will be problematic.
If there is no protection, then there is so much dirt that it will be even more difficult to get there.
We climb under the wing, find the cartridge and pull it out along with the lamp. And we do everything as in the second case. Assembly is carried out in reverse order.
Important! When you “push” the cartridge into the repeater body, you need to hold it from the outside, rest your finger against it so as not to squeeze it out. If this happens, the plastic clips may break and you will have to buy a new one.
Replacing dashboard lamps yourself
When the panel lamps stop lighting, you should immediately replace them with new ones. For this job we will need the following arsenal:
Let's get started
First of all, we remove the decorative trim of the radio (since the dashboard and radio are connected to each other, you will have to disturb the music system too), which is held on by fasteners; here it is better to use a screwdriver, threading it under the trim.
The main condition of work is caution. You need to start detaching the cover from the bottom edge
When the bottom edge comes off, you need to pull it towards you a little. Now detach the top edge. Further:
- Disconnect the wire directed to the cigarette lighter.
- In the same way as we removed the cover from the radio, we remove it from the dashboard. Above the left and right edges we find two self-tapping screws. They need to be unscrewed. We unscrew the screws located at the top and bottom.
- We remove the trim with a little effort (since it is also held on by fasteners, so the decorative plate will have to be rocked a little).
- We disconnect all the wires: from the alarm system, from the clock, from the headlights and other things.
- We remove the control panel itself, for which we unscrew the four screws on which it is held. In order not to damage the wires, it would be better to disconnect them on the one hand.
- Now the most important thing. We remove the sockets of the light bulbs that have stopped burning. To remove the cartridges, you need to turn them counterclockwise with a gentle movement. We replace the defective lamps with new ones, wrap them and install the entire structure in the reverse order of disassembly.
Removing the instrument panel and preparing for replacement
As mentioned above, when performing any work on electrical equipment, it is necessary to disconnect the power supply from the battery. Including when removing the dashboard and performing manipulations with it.
To remove the panel you will need a minimum of tools:
- Phillips screwdriver;
- flat screwdriver;
- pliers.
First, remove the plastic tips from the interior heater control levers using a flat-end screwdriver.
Using pliers, unscrew the nut from the trip odometer reset handle.
On the front part of the panel near the interior heater control levers, open the plug using a flat-head screwdriver.
Using a Phillips screwdriver, unscrew the screw that secures the decorative panel to the car frame.
We move the right side of the panel to the side and towards ourselves. Inside you can see the flexible speedometer drive.
Unscrew the nut by hand and remove the end of the drive cable. Remove the pipe connected to the econometer. Disconnect the electrical wires going to the instrument panel and the three wires going to the interior heater electrical switch.
We turn the panel over together with the decorative trim, turn it over, and unscrew the four screws that secure it to the trim. After this, the panel can be removed and the bulbs that have burned out can be replaced.
Replacing instrument panel backlight lamps on a VAZ 2107 car - removing/installing the dashboard
Removing the instrument panel from a VAZ 2107 car
1. We prepare the VAZ 2107 car for operations (see “Preparation of the VAZ 2107 car for maintenance and repair”). 2. On a VAZ 2107 car, disconnect the wire from the negative terminal of the battery (see “Battery for a VAZ 2107 car - removal and installation”). 3. Using a slotted screwdriver, remove the handles from the heater control levers.
4. Unscrew the nut securing the handle for resetting the daily mileage meter of the VAZ 2107. Remove the nut and washer and push the handle into the space behind the instrument panel.
5. Using a thin slotted screwdriver, pry up and remove the self-tapping plug for securing the instrument panel, located on the right edge of the block of control levers for the interior ventilation and heating system.
6. Use a Phillips screwdriver to remove the self-tapping screw securing the instrument panel.
7. Take out the dashboard of the VAZ 2107.
8. Unscrew the knurled nut of the speedometer drive cable and disconnect the cable.
9. Remove the vacuum supply hose from the econometer fitting.
10. Disconnect the three colored connectors of the wiring harnesses.
11. Remove the instrument panel from the VAZ 2107 car.
Replacing the backlight lamp in the instrument panel of a VAZ 2107
1. Having turned the lamp socket 90° until its protrusion coincides with the slot in the board, remove the lamp socket.
2. By pressing and turning 90°, remove the lamp from the socket.
Replacing warning lamps in the instrument panel of a VAZ 2107
1. Having turned the lamp socket 90° until its protrusion coincides with the slot in the board, remove the lamp socket.
2. Replace the lamp together with the socket.
Installing the instrument panel on a VAZ 2107 car
Installation of the dashboard and all removed parts on a VAZ 2107 car is performed in the reverse order.
Dashboard of a VAZ 2107 car (location of lamps)
How many light bulbs are there in the 2107 dash for illumination?
To illuminate a standard seven panel, only five light bulbs are used. Some drivers add light bulbs to enhance the effect, but this is unnecessary if you replace the standard elements with more efficient diodes.
What kind of light bulbs are suitable for the 2107 instrument lighting?
The machine is equipped with standard AMN 12-3-1 (T3W) type illuminators, which are responsible for illuminating the board and main instruments. Light bulbs of type A12-1.2 (W1.2.) are responsible for illuminating the indicators.
Such elements usually shine dimly, producing diffused and faded light.
LED lamps in the VAZ 2107 panel
For standard tidy, it is recommended to use inserts with the type of base described above. Based on the specified rating, you can select diode and more modern analogues with increased performance.
Additional Description
Designation - 621.3710 Name - instrument scale lighting switch
Applicability
— cars: VAZ-2104. 2107 and modifications, IZH.
Specifications:
— turning on and adjusting the lighting of the instrument scale; — number of positions: 2; — nominal voltage: 12 V; — rated load current: 1.5 A; — weight: 0.049 kg.
The main manufacturer is JSC LETZ
Information used: Avtokomplektatsiya LLC
The parts data presented on this page is for informational purposes only.
Download price lists
To download price lists, you need to log in. If this is your first time on the site, please fill out the registration form.
Remove the instrument panel and change the light bulbs
The control devices stopped working or they began to “confuse” the readings, the control lamps and lights do not light up - in this case the panel will have to be removed.
Preparing for work
Before starting work, you need to buy replacement light bulbs. You can choose standard ones with or without sockets, as well as LED ones. If it is necessary to replace the incandescent lighting elements responsible for the backlight, then you will need light bulbs of the AMN 12-3-1 (T3W) type. These are ordinary filament bulbs that are installed in the dashboard of VAZs from the factory. If it is necessary to replace indicator lights, then type A 12-1.2 elements are used. Are you choosing LED?
You don't need a lot of tools:
- flat screwdriver;
- Phillips screwdriver;
- pliers.
If you are going to disassemble the panel and repair it, you will additionally need:
- multimeter or probe;
- soldering iron from 40 Watt;
- solder and rosin;
- side cutters;
- small screwdrivers.
Removing the panel from the car
Using a slotted screwdriver, remove the plastic plug on which the heating sign is depicted. This plug is on the right, and under it there is a Phillips screw that needs to be unscrewed. (There are 2 screws under the plug, but only one needs to be unscrewed - the top one, which secures the right side of the dashboard).
Next to the hazard warning button, there is an odometer reset button, which is secured with a plastic nut. The nut must be unscrewed and removed with the washer located behind it. The button is recessed inside the panel.
The right side of the tidy is weakened at this stage, and it remains to perform several additional manipulations in order to completely dismantle the device. To do this, pull out the right side of the device, thereby freeing access to its rear part. Here you need to disconnect all the chips and wires to perform dismantling.
Initially, the power chips for the stove button are disconnected. Be sure to remember the location of the wires. It is recommended to take photos so as not to be confused when assembly is carried out. Next you need to disconnect the speedometer cable. It is secured with a special nut, which can be unscrewed by hand.
All chips connected to the dashboard are disconnected. It is almost impossible to confuse their locations, since they have different fastenings and differ in size.
The supply hose is removed from the economizer fitting. This cable is located on the left side of the device. After all the chips, cables and wires are disconnected from the device, you can dismantle it.
Determining what doesn't work
If the backlight of the VAZ 2107 dashboard does not light up, this may be due to the following factors:
Faulty incandescent lamps
This rarely happens, however, due to the fact that from the factory the lighting of the panel is realized through the use of incandescent lamps, their burnout periodically occurs. The problem can be fixed by replacing the lighting elements, or better yet, installing LEDs. To make a replacement, you will need to dismantle the instrument panel. This is not difficult to do, but it will take a lot of time to disassemble the shield. The panel contains lighting elements, which must be replaced in order to restore the functionality of the VAZ 2107 instrument panel lighting. Before replacing, you should first check the serviceability of each lamp. The design of the shield uses 4 main lighting elements, which are responsible for lighting, as well as additional ones that act as an indication. If you had to disassemble the panel, it is recommended to immediately change them to LED ones.
Brightness control
The malfunction may be hidden in the part that is responsible for adjusting the backlight intensity. Although this part fails extremely rarely, its malfunction cannot be ruled out, especially if it has been established that the incandescent lamps are in good working order and do not need to be replaced. The light brightness control is located directly on the right side of the steering wheel near the headlight range control. If diagnostics have shown that this particular part is the reason that the backlight does not light, then it should be replaced.
Circuit breakers
The search for the reason why there is no instrument lighting on the seven should begin directly with the fuses. These elements protect the circuit from voltage surges, and as soon as a large current flows in the circuit or a short circuit occurs, the fuse link blows. If such a malfunction occurs, replace the fuse and check the power circuit.
Absence or poor contact at the point where the chip connects to the power wire
The reason for the lack of contact may be that the chip is not tightly pressed to the terminal block of the instrument panel. Poor contact occurs when contacts become oxidized. You can fix such breakdowns yourself by cleaning the contacts from oxides.
In addition to the main faults, there are additional ones, for example, damage to the power cable. If you have a multimeter in your arsenal, then identifying such a malfunction will not be difficult. Even if you don’t have a multimeter, it’s not at all necessary to contact a car service to fix the problem; you can use a probe with a light bulb.
Block lights
Here are the turn signal bulbs, dimensions, low and high beams. To get to the side lights and low and high beam lamps, you need to:
Remove the protective cap. We turn it counterclockwise, the indicators are marked on it. It has no thread, but can be removed by turning it 180 degrees. In its inner part there are “antennae” with which it is fixed in the body of the headlight unit.
Remove the wire retainer. It secures the low beam lamps in the reflector housing. This clamp is made of elastic metal, so you need to remove it carefully. We take its upper ends out of the grooves and lower them down, freeing the socket of the high and low beam bulbs.
We take the lamp out of the reflector, holding it by the base, and remove the plug.
Changing the headlight bulb
We take it out of the reflector housing along with the socket. If you haven't done this for a long time, then getting it out will be problematic. To do this, remove the low and high beam unit. We insert a finger into the reflector hole, feel for the size bulb and push it out with a little force.
To replace, you need to lightly press the light bulb and turn it half a turn. It will come out of the plinth retainers and can be easily removed. We insert the new one in reverse order.
Video, instructions for replacing light bulbs in the headlights and dimensions of the VAZ “Seven”:
https://vk.com/video_ext.php
Direction indicators
We turn the turn signal socket counterclockwise half a turn in the headlight unit housing.
Let's take it out. The lamp, similar to its dimensions, is fixed in the socket with two “antennae”. Therefore, they pressed lightly on it, turned it and took it out. The cartridge is made in the form of a single plate with a slot on one side. Therefore, the light bulb must be pulled out of it with little effort, because its contacts will cling to the socket.
Video about modifying the direction indicator in the headlight unit of a VAZ 2105-07, removing and replacing the lamp in it:
https://vk.com/video_ext.php
Do-it-yourself relighting of the VAZ 2107 tidy
The most effective and simplest way is to replace stock light bulbs with diode analogues. The driver can choose the color of the diodes at his discretion. The remodeling procedure usually looks like this.
- First you need to buy the necessary light bulbs.
- The device is disassembled, and the old illuminators are removed from their seats along with the cartridges.
- Now you need to replace the old lamps with new ones.
- The assembly of the structure is performed in the reverse order.
Tidy illumination circuit 2107
- Fuel level.
- Instrument lighting.
- Speed meter.
- Choke light.
- Direction indicators.
- Battery charge.
- Standard tachometer.
- Economizer (if available).
- Coolant temperature indicator.
- Checking the oil pressure in the power unit.
- Handbrake light.
- Turning on the main beam of the headlights.
- Outdoor lighting indicator.
- Standard voltmeter (if available).
If a description of the connection of indicators in the form of a diagram is required, the form can be seen below.
Replacing light bulbs with LEDs
To install LEDs, follow these steps.
- Select diode light bulbs of the appropriate size and color in the store.
- Disassemble the device and remove the standard light bulbs.
- Next, you need to install diode illuminators in their place and assemble the structure in the reverse order.
LED strip in panel
A special feature is the overexposure method, when the driver uses a diode strip.
Here the principle of action is similar to installing simple elements, but with its own nuances. The essence of the procedure is to place the tape in a solder between the main illuminators (diodes). It's done like this.
- Find the plus and minus of the diodes/strip and connect them into a single circuit, observing the polarity.
- Next you need to prepare the place where the tapes will be attached. This can be done by drilling through the panel board from the inside.
- After this, the light bulbs are pulled into pre-drilled holes and fixed there.
- Now you should find a plus and a minus on the lighting tracks, where the piece of tape will be soldered through a splice.
- For successful soldering, you need to clean the tracks and treat them with solder.
Glowing arrows on the tidy 2107
The design of devices with luminous indicators is presented below. Ready-made options can be found in the store, but this is not our method.
How to fix the dashboard backlight on a VAZ 2107?
One of the breakdowns that does not directly affect the operation of the car, but causes a lot of trouble for the driver - the backlight of the VAZ 2107 instrument panel does not work. During the day the problem is invisible, but at night the missing backlight significantly complicates driving your VAZ 2107. Because of this malfunction It becomes impossible to see the readings of the main instruments: tachometer, speedometer, econometer, fuel level indicators, charge level, coolant temperature.
The reason that the backlight of the VAZ 2107 dashboard does not light up is most likely the failure of incandescent lamps. Therefore, to eliminate it, you will need to replace the damaged light bulbs with new ones. The task is simple and requires a minimum of tools and skills. However, in order to access the bulbs, you will have to remove the entire dashboard. Armed with a flathead and Phillips screwdriver, you can get to work by first removing the positive terminal from the battery.
First, you need to remove the plastic handles from the heater valve and air damper control levers and unscrew the nut securing the daily counter reset handle so that they do not interfere with removing the VAZ 2107 dashboard.
Next, you need to use a Phillips screwdriver to unscrew the self-tapping screw hidden behind the plug next to the above-mentioned levers. The instrument panel is freed, it remains to perform a few simple manipulations to remove it completely and begin the repair:
- Unscrew the speedometer cable nut;
- Disconnect the hose from the econometer;
- Disconnect the three electrical connectors.
After this, we remove the instrument panel of the VAZ 2107 and begin replacing the failed light bulbs. Everything here is completely simple, we take out the burnt out ones and install new ones in their place.
Thus, on the VAZ 2107, both the backlight and control lamps are replaced. Their location diagram is shown in the following figure.
Here the number 2 indicates the instrument panel backlight lamps. The remaining lamps are control lamps:
- Fuel level;
- Direction indicators;
- Engine control systems;
- Turning on the side lights;
- Engine oil pressure;
- Activation of the handbrake;
- Turning on the high beam;
- Battery charge.
It should be noted that many car enthusiasts, having reached the instrument panel of the VAZ 2107, do not bother with trivial repairs and perform backlight tuning. To do this, instead of conventional light bulbs, LEDs of the appropriate size are installed. Thanks to this modernization, lighting works more efficiently. You just need to choose the right resistance (resistor) connected in the circuit in series with the LEDs. In addition, you can stick stylish scales on the instruments instead of dull standard ones. Another option for implementing LED backlighting is to install lighting elements not in standard places, but along the perimeter of the panel. This method requires large material costs, but the result is more effective.
Reassembling the dashboard is performed in the reverse order:
- The electrical connectors, the econometer hose, and the speedometer cable are connected in series;
- Install the panel in its regular place;
- Fix it with a self-tapping screw and put the plug in place.
- Put the handles in place and secure the daily counter reset handle with a nut.
As a result, the instrument lighting works, the task can be considered completely completed.
How to install a ready-made tuned device on a seven
Car owners who do not want to redo the dashboard on a VAZ 2107 themselves choose the modernization method by purchasing ready-made kits. This kit contains everything you need to tune the instrument panel on a VAZ 2107. Moreover, such kits are suitable not only for carburetor sevens, but also injection ones.
Even a beginner can cope with installing a tuned device on a VAZ 2107. The kit comes with instructions so you can carry out the work without contacting specialists. To carry out work on upgrading the tidy on the seven, you will need a minimum set of tools, in particular a screwdriver.
The principle of tuning the tidy is to perform the following manipulations:
- Dismantling with disconnecting connectors. When disconnecting connectors, it is recommended to make appropriate marks so as not to make a mistake when connecting.
- Install new hands and scales from the purchased set.
- Reinstall the tidy.
This option is simple, but it is not always popular. This is due to the fact that only the sticker is installed, that is, the design changes, but the backlight remains the same. This simple upgrade can be complemented by installing LED lighting. We will consider in detail how to do this in the material.
Self-production of arrows and instrument stickers
Buying ready-made arrows and stickers for the dashboard of a VAZ 2107 is the easiest way of tuning. A more difficult option is to develop your own custom sticker design. The result will be a truly unique tidy on the seven. Making stickers yourself is a more labor-intensive method, and if you decide to use it, then you will need to make templates for implementation. Using these templates, cut out and draw stickers. As practice shows, it is much easier to buy ready-made stickers and, if necessary, upgrade them.
If you have difficulty making scales yourself, there are many options for ready-made templates on the Internet. They can not only be downloaded to your computer, but also, if necessary, modified in graphic editors. After the scales are ready for printing, all that remains is to print them in a professional photo center. Install printed stickers on the dashboard yourself.
The development of the original design of the dashboard can be entrusted to the designer, which will ultimately result in a truly unique design of the tidy. Arrows can also be purchased from foreign cars, but for this it is important to take into account the fastening, which must be suitable in diameter. Knowing how to make overlays for a VAZ 2107 panel, you should get down to business.
It is important! When removing the indicator arrows from the instrument panel, you must first make marks on the back side. This will eliminate the possibility that they will show incorrect values after assembly.
Installation of LED lighting for VAZ 2107 devices
The seven's instrument panel can be upgraded by replacing the backlight. You can also do this yourself by replacing the standard light bulbs with LEDs. Moreover, you can not only replace the standard lamps with LEDs in the design of the shield, but also install additional LEDs. It is important not to overdo it here, otherwise the tidy will look like a Christmas tree. The backlight should not be bright, otherwise it will dazzle the driver, which will lead to decreased attentiveness and rapid eye fatigue.
Light bulbs - indicators
The electronic part includes seven light bulbs located in the center of the dashboard, in one column. To the left of them, the shield has dial indicators: tachometer, econometer and coolant temperature sensor, and to the right, symmetrically to the left side: speedometer, fuel level and battery charge sensor. Let's start with the light bulbs:
- Direction indicators - located at the very top of the column, blink when the turn signal is turned on;
- The malfunction sensor of the system responsible for engine operation is the second indicator from the top. Used only on VAZ 2107, with an injector engine. The carburetor engine shield includes this light, but it does not carry any symbols.
During normal operation of the system, this indicator lights up for a few seconds when the injector starts, and soon goes out. If there is a malfunction in the system, the light will flash, provided that the engine is running. Also, flashing means that a breakdown in the system allows you to get to the service station under your own power. I changed the bulbs in the foglights with the language of what kind of bulbs are in a Nissan, maybe MTF. If the light is constantly on, then the engine must be turned off immediately. Driving this vehicle is strictly prohibited;
- The indicator showing the battery charge level is the third light from the top. When the battery is charged normally, it lights up when the key is in the “ignition on” position. Once the engine starts, the light should go out. If this does not happen, then your battery has a critical charge level. What kind of light bulbs are there in - cr-v.su. But, do not rush to go charge it, because if it is discharged during the operation of the car, it means that it did not receive a charge from the generator. The reason may be: a loose alternator belt, a malfunction of the mechanism, or a breakdown of the control lamp indicating the charge level. In any case, driving on such a battery is prohibited, since the charge may be lost at any moment and the car will not start;
- The side lights light is the fourth from the top, lights up when the low/high beams are off, but when the side lights are on;
- The high beam lamp is the fifth from the top, activated when the high beam lights on the car are turned on;
- The low oil level sensor is the second light from the bottom. During normal operation, it lights up when the ignition is turned on, and goes out when the engine starts. If, after the engine has started, the light continues to light, this indicates one of two reasons: a malfunction of the engine lubrication system, or insufficient oil level. In the first case, the reasons may be: oil pump, highly liquid state of the oil, clogged cooling system. In the second case, the malfunction can be eliminated by simply adding oil to the cylinder block.
How to change light bulbs on a VAZ 2107
Good afternoon dear friends. Today we will deal with light in our favorite classic - “seven”. In this instruction I will try to change the VAZ 2107 light bulb in all possible places : headlights, interior, dashboard, taillights and glove compartment.
Detailed videos will help prevent plastic parts from breaking and make the replacement process easier. First of all, let's look at what kind of lamps are used in the seventh model Zhiguli car?
Other problems that cause the backlight to not light up
Bulb burnout is the most common, but not the only reason why the dashboard backlight fails. Therefore, we are ready to offer several options for solving this problem:
- failure of the dashboard backlight brightness control. This part breaks quite rarely and requires quite complex work to dismantle and replace. Therefore, if you are sure that this is the problem, you can at least temporarily transfer the positive wire from the side lights to the backlight bus. The regulator is located on the right side of the steering wheel next to the hydraulic optical correctors;
- combustion of fuses responsible for protecting the backlight system from voltage surges and sudden increases. They will need to be replaced, since these parts cannot be restored;
- break of resistance in the panel, which is usually caused by overheating;
- poor contact where the lighting system is connected to the on-board network.
Almost all of the problems listed above can be fixed on your own. If you have all the necessary tools and experience in removing the dashboard, the repair will take little time and will not create any serious problems.
https://youtube.com/watch?v=zjHQj2c1M-w
Illumination of the glove box (glove compartment)
- Open the lid and use a screwdriver to unscrew the screws, shown in the photo
- We take out the inner casing of the glove compartment and gain access to the backlight
- We take out the socket with the light bulb from the limit switch housing
- We press on it and turn it 90 degrees so that the “antennae” come out of the fastenings, take it out and change it.
Assembly occurs in reverse order.
Location of lamps on the instrument panel of VAZ 2107
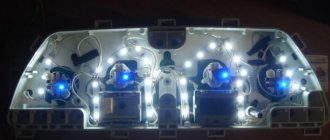
The photo shows the reverse side of the vehicle's instrument panel. Light bulbs are marked with numbers. Four of them under No. 2 are backlight lamps, the others are control lamps.
They are placed on the board and are created for visual information to the driver. Any of them shows the operation of certain systems, components and assemblies of the car:
- Alarm for low amount of gasoline in the tank.
- Device lighting.
- Monitoring the operation of direction indicators.
- Signal about lack of battery charging.
- Indicator of included side lights.
- Low oil pressure alarm.
- Indicator of the applied handbrake.
- High beam indicator.
- Alarm about malfunction of the forced injection system on engines.
Circuit breakers
First, check the fuses, they are located in the mounting block under the hood on the right side (pictured under No. 5).
Fuse F10 is responsible for the device panel.
If the fuse link has melted, it means there is a short circuit. It makes sense to examine the part of the electronic circuit for which this fuse is responsible. Perhaps it worked due to the burnout of one of the lamps or the influence of external causes on a section of the circuit. If the fuse is intact, you should investigate further.
Faulty incandescent lamps
If everything you did above did not produce any results, you need to remove the panel and check all the light bulbs.
Failure of incandescent lamps involves burnout of the tungsten filament. In another case, there may be a physical impact on the lighting device, after which it will not be able to work.
You can check it visually, alternately removing it from the sockets of the electrical board and inspecting the integrity of the tungsten filament. Or using a multimeter.
To eliminate all the reasons why lighting and signaling devices may not work, it is worth checking the integrity of the conductive paths marked on the electrical board.
Due to exposure to the environment, they oxidize and destroy. Easy to remove. It needs to be found, cleaned and soldered. It is also worth checking the terminals connecting the wires.
Incandescent lamps
AMN 12-3-1 lamps are installed to illuminate the device panel.
Lamps of brand A 12-1.2 are installed as signal lamps.
What to do if the instrument panel on a VAZ 2109 does not light up
Home › Cars › VAZ ›
When the instrument panel on a VAZ 2109 does not light up, this is one of the common malfunctions of this unit. To fix a problem, you first have to find the cause of its occurrence.
Types of panels
Instrument panels on the VAZ 2109 are of at least three types:
- Low panel;
- High panel;
- Electronic panel on nines with Europanel.
On versions with a low panel, failure of the entire panel is extremely rare. This is due to the fact that here the speedometer and econometer are equipped with mechanical drives. Therefore, it is unlikely that they will fail along with the electrical component.
Why doesn't it light up?
- First, remove the cover of the mounting block and make sure that the fuse is intact. The fuse markings are located on the inner surface of the cover. You should look for fuse F16 or F5, depending on the year of manufacture of your VAZ 2109.
- If the fuse is intact, be sure to check whether the contacts of the fuse you are looking for have not oxidized. It is not uncommon for shields to fail due to broken contact.
- Check if there is power to the dashboard. To do this, you will need a warning light and the ignition on. Disconnect connector X4 in the mounting block and check for voltage at pin 3. The disadvantage of the VAZ 2109 design is that when it rains, the mounting block immediately becomes wet. This causes oxidation of the contacts in the pads, which causes the electrics to stop working. Sometimes not only the contact is oxidized, but also the board of the Nine mounting block.
If none of the above actions yielded results, you will have to be disappointed. After all, now you need to remove the dashboard and check the condition of the wiring, contacts, and negative connections. Here it is better to trust a professional electrician or set aside a whole day to troubleshoot problems yourself. There is no need to rush here.
Popular faults
If we talk about the dashboard of VAZ 2109 cars, then they are characterized by certain problems. We will tell you about them, and also tell you how to act correctly in a given situation.
| Fault type | Your actions |
| Gasoline level and temperature indicator does not work | In most percent of cases, this situation occurs due to breakdown of devices, sensors of these devices, or an open circuit of the power supply. Therefore, first check the circuit for continuity, make sure that the fuses have not blown. If this is not the case, check whether the gas level and temperature sensors are working. Only if none of the actions allowed you to get rid of the breakdown, you can begin to replace the devices themselves. No options, the problem lies in them |
| When the fuel tank is full, the arrow points to zero | If you have worked on the fuel level sensor, the fault most likely lies with you. When manipulating this device, the float limiter is often knocked down. Either the limiter is installed incorrectly or adjusted, causing the resistor winding to end. To resolve the problem, remove the sensor and then adjust the limiter again |
| The fuel gauge needle regularly jumps and ends up at zero | Here, most likely, the resistor has weak contact with the current collector. Another possible option is that there is a break in the resistor. To resolve this situation, we recommend replacing the hot level sensor with a new measuring device |
| The fuel level lamp is constantly on | If this lamp is constantly on, there is probably a short circuit in the fuel level sensor supply wiring to ground. Another option is that the sensor’s flexible bus is shorted to the fuel intake pipe. You will have to disassemble the device to align the bus and get rid of the resulting short circuit |
| Indicator lamps do not work on the dashboard | There is a high probability that the light bulbs have simply burned out, or they are poorly held in their seats due to loose contact. Replace the bulbs, but first try tightening the contacts. Traces of oxidation may be detected. When cleaned, the light bulbs can work normally again. Also, do not exclude the possibility of wiring breakage or oxidation of the tips of the supply wiring. Try going over the wires with a tester, cleaning the contacts if necessary. |
| The speedometer does not work, the flexible shaft is noisy | In such a situation, you will have to change the speedometer drive cable or replace the entire speedometer assembly. But before you bother so much, check that the fastening nuts of the tips are tightened correctly and properly. The flexible shaft may make noise during operation due to deformation or violation of the permissible bending of the shell of less than 10 centimeters during installation |
The instrument panel of the VAZ 2109 is not so complicated that you cannot figure it out on your own. But in the absence of experience, it is better to entrust the repair to specialists, or to enlist the support of a partner who understands this matter.
Source: https://www.vazzz.ru/pochemu-ne-gorit-podsvetka-na-paneli-priborov-vaz-2109/
VAZ-2107 instrument panel diagram
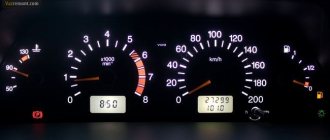
The instrument panel is an important part of every car, and the 2107 is no exception. For visual perception, it is better to look at what the VAZ 2107 “tidy” diagram looks like.
1 — automobile voltmeter;
2 - speed indicator or, more simply put, speedometer;
3—machine trip meter—odometer;
4 - tachometer. It shows the frequency at which the crankshaft rotates. The yellow zone on the scale indicates that the engine is running at high speeds; the red zone indicates unacceptable modes. 6000 rpm is the maximum permissible speed.
5 - coolant temperature indicator. The green zone is the normal coolant temperature. The red zone indicates engine overheating. The vehicle must not be operated at a coolant temperature exceeding 118 °C;
6—econometer. This indicator helps you select the most economical mode for engine operation from all modes (the instrument needle should be in the green zone of its scale).
7 - block (CL) of warning lamps of the VAZ 2107 car:
— turning on the turn indicators (when turning on a left or right turn, it lights up with a flashing green light);
— malfunction of the engine control mechanism (used on a car with an injection power unit. The lamp glows orange if the ignition is on. When the engine starts, it goes out). If there is a malfunction in the system, the lamp flashes or is constantly on. In such a situation, using the car is not prohibited, the system will simply switch to backup mode;
— battery charge lamp. When the ignition is turned on, the lamp on the instrument panel turns red and goes out when the engine starts. If the lamp continues to light, the battery is not charged. There may be several reasons: the generator drive belt is insufficiently tensioned, the control lamp or generator circuit is faulty. If you continue to use the car, this may lead to the battery being completely discharged and the engine stopping. A fire may also occur;
— side light indicator (lights up green if the side lights are on);
— indicator for turning on the high beam of the car’s lighting devices (the lamp lights up blue if you turn on the high beam of the headlights);
— insufficient oil pressure. When the ignition is turned on, the oil pressure lamp begins to glow red and immediately goes out when the engine starts. If the light remains on, there is low oil pressure. To avoid failure of the power unit, you need to turn it off and try to eliminate the cause of the malfunction;
— the parking brake is on (the lamp lights up bright red if the ignition is turned on and the parking brake lever is raised).
8—indicator of the path traveled per day;
9 — (CL) fuel reserve. The yellow light comes on if there is less than 6-4 liters of fuel left in the fuel tank;
10 — fuel level indicator;
VAZ 2107 fuses and relays, electrical diagrams
Often when operating a VAZ 2107 we encounter electrical problems. At one point, one of the electrical appliances, such as a stove or low beam headlights, refuses to work. Dimensions, cigarette lighter, turn signals and other components of the vehicle's electrical circuit may also stop working without warning.
To find the cause of the malfunction, you first need to understand whether voltage is supplied to a particular device and check the fuses and relays of the VAZ 2107. The most important thing in the circuit is the fuse. It protects the device from overloads and failure. If there is any short circuit or if the current in the circuit increases significantly, the fuse will blow. Therefore, first of all, let's open the hood of the car and check the fuses.
Lada 2107 PHOENIX › Logbook › Replacing lamps in the dashboard
Perhaps one of the most noticeable tuning steps for the driver is dashboard tuning. There are a lot of recordings of this type on the drive, and it is quite possible that mine will be just another one... However, I will tell you about what I have not seen in other articles.
First you need to buy all the necessary components, in particular: Look at photo No. 3. On the left is what it was. On the right is what was installed.• LED lamps: 4 pcs. (bottom right) white light + 7 pcs. (top right) of which 3 pcs. red light, 2 pcs. green, 1 pc. blue, 1 pc. white.• Base (holder) for a small lamp. (top left)• 25 Volt electrolytic capacitor, 2000 - 4000 Microfarads
Next, you need to completely remove the dashboard and take it to a place convenient for work. In general, this is not difficult, but you will have to get dirty. You can search for how to do this on the internet, for example here: 2107club.ru.
After we have washed the panel from dirt, we proceed to modernization. For work you will need image No. 1. It shows the polarity for the LEDs using red and blue dots, which you need to know, otherwise the lamps will not work. You can check the polarity on the lamp itself “at random” using a 12-volt DC power supply or at least a 9-volt “crown”
(!ATTENTION: LEDs do not like polarity changes and may fail.). Personally, I used colored LEDs, however this is not necessary and you can use all white
We change everything except one - the low battery indicator, in image No. 9. This lamp cannot be replaced.
And now about the nuances. In several articles I came across the opinion that the green translucent caps in which the backlight lamps are located are not needed, supposedly because of them the light is dimmer. This may be so, but these caps are necessary for sealing so that dust does not get under the “glass” of the panel. I strongly do not recommend touching them. Moreover, the brightness with them is quite normal. True, they give an emerald tint of glow (seen in photo No. 2). Personally, in my case there were problems. The turn indicator lights up for a while after turning off the turn, after which it flickers a little. What this is connected with is not clear. I solved this problem in the wrong way: I soldered and glued the old lamp onto the board, parallel to the LED. I haven’t been able to solve the following glitch yet: the “dimensions/low beam” indicator glows faintly when the switch is in the off position. I tried to connect in parallel a fragment of the LED strip glued to the right side, but the problem remained. But now, when I turn on the headlights/low beam, the space behind the ventilation control levers lights up.
What is the capacitor for? And in order to eliminate the twitching of the fuel level needle. Connection diagram in image No. 1. If you need it, of course. It is worth noting that after this upgrade, when the ignition is turned on, the needle will rise smoothly until the capacitor is fully charged, and when turned off, it will beat to maximum. The severity of these effects depends on the capacity. The larger the capacitance, the better the smoothing, but the stronger the side effect. I do not recommend using a capacity less than 2000 and above 10000 uF.
Also, I soldered a 25 V 10000 uF capacitor in parallel with the dashboard backlight lamps. True, I already doubt its usefulness...
In image No. 2 you can see the areas outlined with a green marker, this is for those whose panel creaks. I applied two layers of adhesive tape to the plastic pins. I taped other contact points with black electrical tape. For example, along the edges of the “glass”, before returning the panel to its black body. And also the body itself, as well as the rim. So that the points of contact with the dashboard are “isolated”. No photos, sorry.
In conclusion, I will say that all the modifications are worth it. The panel looks livelier, newer, more modern.
Tail lights
We move to the rear of the car. There are screws on the trunk side that secure the protective cover.
- Unscrew them and remove the plastic cover of the lights
- Remove the power plug and loosen the plastic board holders with your fingers. To replace it, just loosen the board latches to remove it from the flashlight body
- We remove it from the taillight unit
All lamps are located on the printed circuit board. To replace them, you need to turn them a quarter turn and pull them out of the socket. We replace burned out ones. We assemble the lantern in reverse order.
Video, replacing rear light bulbs on a Zhiguli 2105-07:
Location of lamps on the instrument panel of VAZ 2107
The photograph shows the reverse side of the car's instrument panel. Light bulbs are marked with numbers. Four of them under No. 2 are backlight lamps, the rest are control lamps.
They are located on the board and are intended for visual information to the driver. Each of them indicates the operation of certain systems, components and assemblies of the car:
- Alarm for low amount of gasoline in the tank.
- Instrument lighting.
- Monitoring the operation of direction indicators.
- Signal about lack of battery charging.
- Indicator of included side lights.
- Low oil pressure alarm.
- Indicator of the applied handbrake.
- High beam indicator.
- Alarm about malfunction of the forced injection system on engines.
What kind of light bulbs are on the VAZ 2106-07
Headlight unit:
Low and high beam. Type H4, 60 and 55 W respectively
Dimensions. Type T4W, power 4 W
Direction indicators. Type P21W, 21 W.
Tail lights:
Side light. T4W, 4 W,
Turn signal. P21W, 21 W,
Reverse indicator. P21W, 21 W,
Brakes. P21W, 21 W,
Rear fog light. P21W, 21 W.
Other installed lamps:
Fender-mounted turn signal, glove compartment light: Type T4W, power 4 W.
Room and interior lighting bulbs: C5W, 5 W.
Cigarette lighter, tachometer and speedometer (instrument panel), clock: T3W, 3 W.
Lamps for side lights, turn signals, high beams, low battery voltage, oil pressure: T3W, 3 W. On some modifications there is a type W1.2W, with a power of 1.2 W.
Parking brake indicator, low brake fluid level, rear fog lights on, heated rear window, throttle opening in carburetor models (suction), low fuel level alarm: W1.2W, power 1.2 W. In some modifications, a T3W, 3 W lamp is used for the level in the gas tank.
Engine block control errors (Check Engine) for injection models: W1.2W, power 1.2 W.
Knowing what is installed on our Zhiguli and where, we will move on to replacement. Let's start with the front of the car.
The light went out in the interior of the VAZ 2107, help
Because You are not logged in. To come in.
Because you are not a trust user. How to become a trustee.
Because The topic is archived.
Because You are not logged in. To come in.
Because you are not a trusted user (phone number is not verified). Enter and confirm your phone number. Read more about trusts.
Because The topic is archived.
Because You are not logged in. To come in.
Because you are not a trusted user (phone number is not verified). Enter and confirm your phone number. Read more about trusts.
Because The topic is archived.
Because You are not logged in. To come in.
Because you are not a trusted user (phone number is not verified). Enter and confirm your phone number. Read more about trusts.
Because The topic is archived.
Because You are not logged in. To come in.
Because you are not a trusted user (phone number is not verified). Enter and confirm your phone number. Read more about trusts.
Because The topic is archived.
Because You are not logged in. To come in.
Because you are not a trusted user (phone number is not verified). Enter and confirm your phone number. Read more about trusts.
Because The topic is archived.
Because You are not logged in. To come in.
Because you are not a trusted user (phone number is not verified). Enter and confirm your phone number. Read more about trusts.
Because The topic is archived.
Replacing scales
The standard dials on the instrument panel are black, and the numbers on them are faded. This design, in principle, looked good twenty years ago. But the instrument panel clearly does not correspond to modern trends. There are quite a lot of photographs on the Internet of options that car enthusiasts made with their own hands. In most cases, owners prefer white circles with black numbers. This option looks more “sporty”. In addition, it is easier to highlight.
The only thing to remember is that when working with dashboard parts, you must be extremely careful. All spare parts are quite fragile and very easy to break. Recovery will take a lot of time.
Good afternoon dear friends. Many Classic car owners do not like the backlighting of the instrument panel. The question arises whether you need to either change the lamps to brighter ones, or carry out tuning - upgrading the lighting of the VAZ 2107 dashboard. And it happens that you need to change the light bulbs for a completely banal reason - one of them has burned out. Today we will look at the process of replacing the backlight and alarm lamps of the VAZ 2105-07 panel . It is these two Zhiguli models, because their devices are similar.
Replacing burnt-out lamps on the dashboard of a VAZ Semerka
First of all, before you start replacing, you need to find out what kind of light bulbs are used on classic VAZ models . Because it will be a shame to buy the wrong one, or with a different base. And find out after the device is completely disassembled.
Dimensions and instrument lights do not light up
#1 Kyivfan
- Users
- 372 messages
- Registration 11-April 13
- Top
- Complaint
Guys, tell me where to look for the problem.
The situation is this: a VAZ 2103 car, the dashboard from 2107 installed mirrors with dimensions and turn signals. connected the whole thing. worked without problems. but today an opportunity happened:
I went to work in the morning, turned on the headlights and low beams, everything was fine for 25-30 minutes, and then suddenly the instrument lighting went off. scales and sensors work, there is no backlight, and the low beam light does not light up. The lights on the mirrors and the front lower right hand light also stopped lighting up. At the same time, the remaining dimensions are on and the low beam is on. When you turn on the high beam, it lights up and the light on the panel also lights up.
I suspect there is a short to ground somewhere. tell me where and what to look for.
There is also a problem with the heated rear window. connected according to the circuit through a relay, power is supplied to the glass heating, checked with a tester. but - in 20-25 minutes of driving, only thin strips thaw from fogging (the thickness of the heating threads themselves is slightly thicker).
thanks for the help
#2 vitaliy_kiev
- Top
- Complaint
#3 Kyivfan
Thank you. figured it out - it's a fuse))
there is still a problem with the heated glass
- Top
- Complaint
#4 vitaliy_kiev
- Top
- Complaint
#5 Kyivfan
I believed .. the contact - both negative and positive - are the same in cross-section.
and as for the dimensions - there are a hundred LEDs... I don’t think they take on much)
- Top
- Complaint
#6 vitaliy_kiev
- Top
- Complaint
#7 Kyivfan
Message modified: Kyivfan, September 21, 2013 - 21:31.
- Top
- Complaint
#8 vitaliy_kiev
- Top
- Complaint
The backlight of the Lada 2107 tidy does not work: the reason
- Fuse. The fuse link often fails or burns out due to moisture or condensation.
- Contact groups and wire blocks. Here the terminals often break off and the pads oxidize.
- Damage to the dashboard itself. Voltage surges can damage sensitive tracks, causing lighting failure.
On versions of the injector and carburetor type, the tidy is identical. The only difference here is the connection to the check engine lamp.
How to make illuminated arrows with your own hands
If you want to make the backlighting of the PP more interesting, then you can experiment a little. I offer one of the lighting options for the VAZ 2107, in my opinion, the most effective. To implement the idea you will need:
- Conventional indicator LEDs of the desired glow color.
- Resistors (according to the number of LEDs) with a nominal value of 550 Ohms.
First you need to disassemble the dashboard to get to the front side of the circuit board. We solder a resistor to the anodes of each LED and fix each pair along the inner perimeter of the instrument panel using a hot glue gun or sealant.
Using short pieces of wire, we connect all the cathodes of the LEDs and separately all the free terminals of the resistors. After this, we remove the standard backlight bulbs and solder wires to the current-carrying contacts of any of them - from the resistors to the “+” power supply, from the resistors to the “-”. The backlight connection diagram will look something like this:
Electrical diagram for connecting homemade illumination of pointer instruments for VAZ 2107
The more LEDs are used, the brighter and more uniform the illumination of the instrument scales will be.
Now you know how to replace the backlight and display bulbs in the dashboard of a VAZ 2107 car and, I hope, you can easily cope with this problem yourself.
Pointer indicators
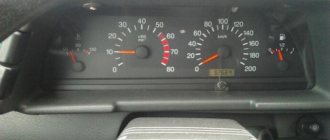
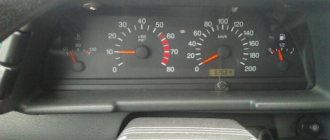
Pointer indicators are divided into two types: large (speedometer, tachometer) and small, depending on the diameter of the dial. They are located symmetrically on both sides of the indicator lights. Let's look at their purpose:
- The speedometer is the main indicator located on the right side of the dashboard. Shows the current speed at which the vehicle is moving. Has 10 divisions, from 0 to 180 km/h. Each division is equal to 20 km/h;
- Fuel level sensor - located to the right of the speedometer, on top. Indicates the amount of gasoline in the gas tank. Has yellow and green divisions. Removing the instrument panel and replacing the light bulb in it on a VAZ 2115 (2113, 2114). I installed the light bulbs without a base, without soldering them. If the arrow points to the yellow division, then there are less than five liters of fuel in the tank;
- Voltmeter - located under the fuel level sensor, and is used to determine the current strength in the vehicle system. It has 4 divisions, arranged in this order (from left to right) - red, yellow, green, red. If the arrow is on the left red division, then the charge level is low, if on yellow it is normal, on green it is excellent, and on the far right, also red, the current is too high;
- Tachometer – located to the left of the indicator lights. The problem of failure of the clutch fork in a VAZ 2107 car can be considered a disease of these car models. Indicates the number of revolutions of the crankshaft in 1 minute. Has 9 divisions, from 0 to 80 X 100 rpm. Each division is 1000 revolutions;
- Econometer - located to the left of the tachometer, on top. Indicates the most economical driving mode, depending on the current fuel consumption. There’s nothing on Tiida, just light bulbs on the feet and at least 1.5 times brighter. Which ones go where. It has 3 divisions, designated by colors: red, yellow, green, where red is increased consumption, yellow is moderate, and green, respectively, is minimum consumption;
- Coolant temperature sensor – located under the econometer. It indicates the temperature of antifreeze or antifreeze, and has 3 divisions. If the arrow points to a white line, it means the fluid temperature is low and the engine is not warmed up; if the arrow points to green, the temperature is normal, and the red line means the engine is overheating.
