Replacing the VAZ 2106 clutch
The main function of a car clutch is to ensure smooth gearing by briefly disconnecting the engine from the transmission. The consequence of this is a smooth start of the car without overloading the engine. This helps prevent premature wear of the gearbox and engine parts. In the case of a poorly functioning clutch, the cause of overload is the inertial moment, which is a consequence of the operation of engine parts during a sudden strong deceleration of the crankshaft speed.
, the VAZ 2106 clutch disc is usually immediately replaced , as well as the clutch basket is replaced. It is worth noting that in order to do this, certain skills are required. Therefore, if you don’t have confidence in your abilities, and you only know how to replace spark plugs yourself, you should entrust the installation of a new clutch to specialists.
There are two ways to replace the clutch : the first requires removing the box, the second you can do without it.
The second method is less labor-intensive, so it will be discussed in more detail below. First you need to prepare a lift or inspection hole.
Repair work
If you decide to do everything yourself, follow the following sequence of actions.
- Drive onto an overpass or pit. This will make it more convenient for you to work.
- Raise the front of the car using a reliable jack and securely fix the nine.
- Remove the wheels.
- Disconnect the clutch housing ground and clutch cable. Next you will have to remove the transmission.
- To do this, remove the starter by disconnecting the wires, terminals and unscrewing the three mounting nuts.
- Disconnect the speedometer cable and reverse cable.
- Remove the brace fastenings to the suspension arms and move them to the sides.
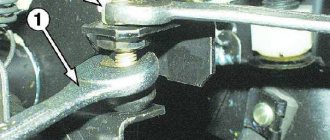
- Disconnect the ball joints from the swing arms. To do this, you need to remove the cotter pin, unscrew the nut, and knock out the support pin. Then the two nuts are unscrewed and the hinge is disconnected.
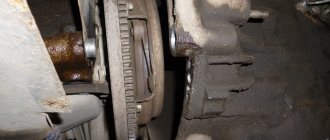
- Using a pry bar, press out the tip of the inner CV joint. Be sure to plug the hole formed in the gearbox using improvised means, otherwise oil will begin to pour out of the gearbox.
- Remove the lower clutch housing protection. There are only 3 bolts holding it in place.
- Make supports from bars, bricks for the box and engine.
- Remove the rear supports.
- Unscrew the remaining fasteners and pull the gearbox horizontally. Be careful not to deform the pressure spring lobes with the input shaft.
Removal and inspection
- When unscrewing the mounting bolts, it is better to secure the driven disk with something. A regular large screwdriver will do.
- Be careful not to give out the driven disc and remove the clutch assembly.
- Examine the current condition of the parts. If mechanical damage is noticed on them, we recommend replacing them immediately.
The next step is to check the condition of the parts.
| Object to be checked | Peculiarities |
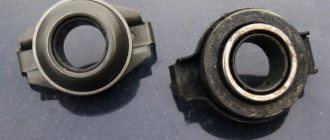
| Release bearing | Try to crank it up. If crunching or extraneous sounds occur, the part must be replaced. |
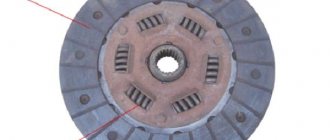
| Driven disk | Check it for signs of wear and damage on rubbing surfaces. Also, the rivets should be located at a depth of at least 0.2 millimeters, and the springs in the sockets should only be solid and tightly installed. Otherwise replacement |
| This is the pressure plate. Check it for damage or cracks on the working surface. Plus the condition of the flywheel is checked | |
| Diaphragm spring | If there are cracks here, the petals dangle or are located in different planes, the part goes to scrap, and a new one is installed in its place |
It is quite rare that individual components of the clutch change independently of the others. Mostly repairs involve replacing the assembly, which includes the pressure plate, release bearing and clutch driven disc.
Assembly of the unit is performed in reverse order. Just make sure that you choose really high-quality parts for replacement. For example, a normal quality clutch disc will cost about 1,000 rubles today. We do not recommend taking cheaper options.
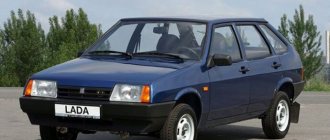
The clutch is a fairly important element in the design of a car’s transmission. With its help, the transmission is disconnected from the engine for a short period of time and smoothly connected to change gear. In addition to this main function, it is necessary to dampen gearbox vibrations and to protect transmission elements from overload. If for some reason the mechanism does not work on a VAZ 2109, replacing the clutch disc is inevitable. Replacing the clutch disc of a VAZ 2109 can be easily done on your own.
Clutch VAZ 2106
On modern cars, the clutch may have a design slightly different from older cars, but the essence of the application of this mechanism remains the same. Like any other vehicle component, the clutch consists of a number of parts that wear out and become unusable over time. Therefore, it is worthwhile to dwell in more detail on identifying the causes and eliminating malfunctions of the VAZ 2106 clutch.
What is the clutch used for?
Equipping a car with a clutch is necessary to separate the gearbox and power plant, their smooth connection at the start of movement, as well as when changing gears. The mechanism is located between the gearbox and the engine, with part of the clutch elements fixed on the engine flywheel, and the other part in the clutch housing.
What does it consist of?
The main structural elements of the node in question are:
- master cylinder;
- working cylinder;
- basket;
- driven disk;
- release bearing;
- fork.
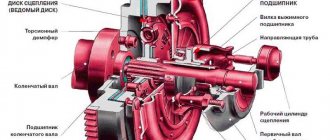
VAZ 2106 clutch device: 1 - adjusting nut; 2 - lock nut; 3 — tension spring; 4 — piston of the clutch working cylinder; 5 - working cylinder; 6 — bleeder fitting; 7 - flywheel; 8 — hydraulic clutch pipeline; 9 - crankshaft; 10 — master cylinder reservoir; 11 — piston of the main cylinder; 12 — pusher piston; 13 - main cylinder; 14 — pusher; 15 — servo spring of the clutch pedal; 16 — clutch pedal release spring; 17 — clutch pedal travel limit screw; 18 — clutch pedal; 19 — pressure disk; 20 — driven disk; 21 — clutch casing; 22 — pressure spring; 23 — clutch release bearing (release bearing) VAZ 2106; 24 — gearbox input shaft; 25 — ball support for clutch release fork; 26 — clutch release fork; 27 — clutch release fork pusher
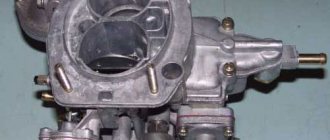
Master cylinder
The clutch master cylinder (MCC) ensures effective transmission of force from the pedal to the clutch fork through brake fluid and the working cylinder, interacting through the release bearing with the spring elements of the basket. The main circulation pump is located under the hood near the expansion tank and communicates with the working cylinder using a hose. The unit in question consists of a housing, two cylinders with seals and a spring.
The hydraulic clutch transmits force from the clutch pedal to the fork through the brake fluid and the working cylinder
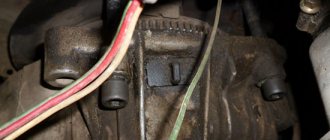
Working cylinder
The function of the clutch slave cylinder (CLC), although simple, is important - to receive the force transmitted from the master cylinder for subsequent movement of the clutch release fork. On the VAZ 2106 the RCS is installed on the clutch housing. Structurally, it is similar to the working cylinder, but has one piston.
The clutch slave cylinder receives force from the main clutch for subsequent movement of the fork
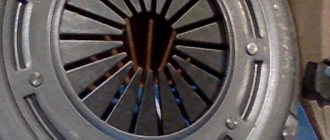
Basket
By means of a pressure disk (basket), the interaction of the driven disk with the flywheel is ensured. If problems occur with the shopping cart, the system stops working. The pressure plate (PD) is pressed against the driven one by means of special springs, which, at the moment the clutch is disengaged, act as return springs, i.e., they press out the PD. This method of operation ensures smooth gear shifting, which increases the service life of gearbox elements.
The basket is made of a diaphragm spring, a pressure disk and a casing. The spring presses on the LP and creates a compression force, transmitting rotation. The spring structure with its outer part acts on the edges of the pressure plate. The inner diameter of the spring is made in the form of petals, onto which the release bearing presses.
Through the basket, the driven disk interacts with the engine flywheel
Driven disk
The driven disk provides a soft connection of the box to the motor. It is located between the basket and the flywheel of the power plant. To ensure that the clutch engages without jerking, the disc design includes springs that help dampen vibrations. Both sides of the disc are equipped with linings made of friction material that can withstand high temperatures.
The driven disk allows for a soft connection of the gearbox to the power unit
Release
The purpose of the release bearing is to separate the basket from the driven disk by pressing the LP petals. The bearing is installed in the clutch housing and moves through the clutch fork.
The release bearing acts on the petals of the basket to separate it from the driven disk
Repair work
If you decide to do everything yourself, follow the following sequence of actions.
- Drive onto an overpass or pit. This will make it more convenient for you to work.
- Raise the front of the car using a reliable jack and securely fix the nine.
- Remove the wheels.
- Disconnect the clutch housing ground and clutch cable. Next you will have to remove the transmission.
- To do this, remove the starter by disconnecting the wires, terminals and unscrewing the three mounting nuts.
- Disconnect the speedometer cable and reverse cable.
- Remove the brace fastenings to the suspension arms and move them to the sides.
- Disconnect the ball joints from the swing arms. To do this, you need to remove the cotter pin, unscrew the nut, and knock out the support pin. Then the two nuts are unscrewed and the hinge is disconnected.
- Using a pry bar, press out the tip of the inner CV joint. Be sure to plug the hole formed in the gearbox using improvised means, otherwise oil will begin to pour out of the gearbox.
- Remove the lower clutch housing protection. There are only 3 bolts holding it in place.
- Make supports from bars, bricks for the box and engine.
- Remove the rear supports.
- Unscrew the remaining fasteners and pull the gearbox horizontally. Be careful not to deform the pressure spring lobes with the input shaft.
Removal and inspection
- When unscrewing the mounting bolts, it is better to secure the driven disk with something. A regular large screwdriver will do.
- Be careful not to give out the driven disc and remove the clutch assembly.
- Examine the current condition of the parts. If mechanical damage is noticed on them, we recommend replacing them immediately.
The next step is to check the condition of the parts.
| Object to be checked | Peculiarities |
| Release bearing | Try to crank it up. If crunching or extraneous sounds occur, the part must be replaced. |
| Driven disk | Check it for signs of wear and damage on rubbing surfaces. Also, the rivets should be located at a depth of at least 0.2 millimeters, and the springs in the sockets should only be solid and tightly installed. Otherwise replacement |
| Basket | This is the pressure plate. Check it for damage or cracks on the working surface. Plus the condition of the flywheel is checked |
| Diaphragm spring | If there are cracks here, the petals dangle or are located in different planes, the part goes to scrap, and a new one is installed in its place |
Dismantling work
It is quite rare that individual components of the coupling are changed independently of the others. Mostly repairs involve replacing the assembly, which includes the pressure plate, release bearing and clutch driven disc.
Assembly of the unit is performed in reverse order. Just make sure that you choose really high-quality parts for replacement. For example, a normal quality clutch disc will cost about 1,000 rubles today. We do not recommend taking cheaper options.
Loading …
When is it necessary to change the unit?
The mechanism requires servicing in the following situations:
- The clutch "drives". Motor power drops.
- The unit slips or incomplete activation occurs.
- Clicking noises are heard when changing gears.
- The clutch disengages automatically.
- Vibration is noticed when the clutch pedal is pressed.
In each of the above cases, it is recommended to carry out partial maintenance or replace the unit in question.
https://youtu.be/https://youtu.be/1858lZXHZ-g
_
Signs that a new clutch needs to be installed:
- reduction in engine power;
- incomplete engagement of the clutch;
- clicks, jerks, extraneous sounds when turned on;
- independent clutch release;
- vibration when pressing the pedal.
The following describes the process of self-installation of a new VAZ 2110 clutch without draining the oil and removing the box.
Required tools:
- jack;
- a viewing hole/lift is required;
- socket and open-end wrenches at “17” and “19”;
- mount/pipe amplifier.
Clutch problems
The VAZ 2106 clutch, although rare, still causes problems for the owners of this car. Malfunctions can be of various types and they also manifest themselves in different ways. Let's take a closer look at them.
Brake fluid leak
The working medium of the “six” clutch mechanism is brake fluid, which sometimes leads to some problems:
- Fluid leakage due to damage to the hose between the master and slave cylinders. The connecting element may become unusable when installing a low-quality product or as a result of rubber aging. To eliminate the problem, the hose will need to be replaced;
Liquid leakage is possible if the hose connecting the GCS and RCS is damaged - depressurization of the main circulation system. The tightness in the cylinder is ensured by lip seals, which wear out and become rough over time, as a result of which they begin to leak liquid. The way out of the situation is to replace the cuffs and then bleed the system.
Drives the clutch
The concept of “clutch drive” is used when the mechanism is not completely disengaged. This can happen for several reasons:
- The driven disk was damaged, causing axial runout. The most correct solution is to replace the part;
- Cracks have formed on the driven disk linings. The appearance of defects is reflected in the inability to engage the clutch in a timely manner. In this case, you should replace the entire disc or the pads themselves;
- The rivets of the friction linings have failed. When the rivets wear out, the fixation of the linings weakens, which leads to problems when the clutch is disengaged and increased wear of the linings themselves;
- Air has entered the hydraulic system. The problem is “treated” by pumping fluid;
- basket distortion. Although the malfunction is rare, if it occurs, you will have to purchase a new pressure plate.
The clutch is slipping
When clutch slip occurs, the mechanism does not engage completely, but this happens for the following reasons:
- oil got on the friction elements of the driven disk. You will have to remove the gearbox and disassemble the clutch mechanism to clean the linings with white spirit;
- The compensation hole in the main circulation system is clogged. To fix the problem, you will need to remove the cylinder, remove the blockage, and then rinse the product in kerosene;
- Friction linings are burnt. The malfunction is eliminated by replacing the driven disk.
Oil getting on the driven disc can cause the clutch to slip and operate jerkily.
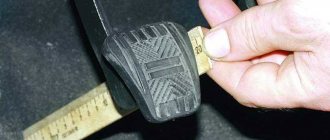
Clutch pedal squeaks
The pedal may squeak due to lack of lubrication in the bushings or when the bushings themselves are worn out. To fix the problem, the pedal will need to be removed, the bushings checked for wear, replaced if necessary, and lubricated.
If the clutch pedal bushings are worn or lack lubrication, the pedal may squeak.
Noise when depressing the clutch pedal
On a VAZ 2106, noise when releasing the clutch pedal may appear for the following reasons:
- bearing failure on the gearbox input shaft. The problem appears in the form of a characteristic cracking sound when the clutch pedal is released. In this case, the bearing will have to be replaced;
- release bearing wear. The part fails due to lack of lubricant, which is squeezed out over time. To eliminate the malfunction, the bearing must be replaced.
Noise when pressing the clutch pedal
The clutch may also make noise when you press the pedal. The reasons may be as follows:
- loss of rigidity or breakage of the springs of the driven disk. This leads to vibrations that cannot be extinguished in a timely manner. The solution to the problem is to replace the driven disk;
A broken spring in the driven disc may cause noise when the clutch pedal is pressed. - Damage to the release bearing or basket.
If, when noise occurs, the problem is not resolved within a short time, then the broken part may damage other elements of the mechanism.
The pedal falls
There are cases when on a VAZ “six”, after pressing the clutch pedal, it does not return to its initial position. There are few reasons for this phenomenon:
- air entering the hydraulic drive system. In this case, the pedal “falls” after several presses, so the system will have to be pumped;
- the spring responsible for the pedal return fell asleep. It is necessary to check the spring and, if necessary, replace it.
Video: clutch problems and solutions
Malfunctions
As a result of vehicle operation, the clutch disc, like any consumable material, can become unusable - the springs weaken, the friction linings wear out and become thinner. Manufacturers do not indicate a specific service life of the disk, because it depends only on the driver: one “clutch” can last only 5,000 km, while another can last 100,000. Increased clutch wear can result from:
- sudden starting at high speeds;
- slip;
- incorrect adjustment;
- participation in racing events;
- leakage of foreign liquids.
Important features of clutch assembly
Proper assembly of this spare part at home involves taking into account some important nuances:
When you are centering a disk, you need to use a mandrel specially designed for this or equip yourself with a primary shaft. This method will allow you to place the gearbox in place. Once the job of placing the shaft spline into the clutch splines is completed, the input shaft can be easily pulled out. The cable is attached to the fork and slightly loosened. Subsequent adjustments are carried out only when the clutch assembly has come to an end.
Don't forget to secure the control levers and traction lever to the panel. Tighten the fasteners well to prevent them from coming loose on the road. Be sure to connect the battery and, finally, connect the filter housing that cleans the air flow.
How it works and what it consists of
Device diagram The factory clutch system for the VAZ 2110 is called VIS. Many people complain about it because it doesn’t work very effectively, although others are sure that there is no more worthy alternative for the “ten”. So opinions differ on this matter.
The main components of the system include:
- casing;
- Crankcase with a cover and supporting planes with which the unit is attached to the frame;
- Driven and pressure plate;
- Release bearing. It disengages the clutch;
- Flywheel;
- Shutdown plug;
- The cable wire that goes to the pedal (far left in the car interior).
Preparing for repairs
Before putting the car in a pit and removing the box to replace the clutch, you need to visit the store and buy all the necessary spare parts:
- Clutch disc.
- Basket (drive disk).
- Release bearing.
- If necessary, clutch fork.
- If there is significant wear, the crown on the flywheel will also need to be replaced.
- Bolts securing the basket to the flywheel.
It is also important to have a good set of tools on hand, WD-40 penetrating lubricant, sometimes even a gas torch is necessary (if the bolts and nuts are very rusty).
It is advisable to carry out all the work in an inspection pit or overpass (it is unlikely that the average driver of a six will have a lift in the garage, so we do not mention it). If everything goes smoothly and the nuts unscrew well, you will complete all the work very quickly.
Which side to put the clutch disc on VAZ 2107-2101
A common problem that arises during the process of reassembling the VAZ 2107 clutch is the situation of incorrect installation of the disc housing itself into the system. This can lead to tragic consequences in the form of jamming of the system when starting the engine and changing gears, since the reverse side is the wrong side in its dimensions and is quite consistent with the seat. To avoid confusion, it is necessary to place the disc with the side corresponding to the inner petals on the basket. These paddles should face the inside towards the gearbox. Some manufacturers specially stamp guide arrows for this purpose, which sometimes makes the work of ordinary car owners much easier.
Useful tips and tricks
When replacing the entire clutch or just the clutch disc, it is recommended to apply small dots of “glue-moment” glue to the working surface of the basket. Then the disc must be placed on the basket (position with the springs facing away from you), and then carefully aligned along the edges. Applying glue allows you to fix the parts, which prevents their accidental displacement during installation.
We also recommend reading the article about why gears do not engage after replacing the clutch. From this article you will learn about the main reasons for difficulty engaging gears after replacing the clutch, as well as what to do if the owner has changed the clutch, but the gears do not engage or are difficult to engage.
Also, after final assembly and installation of the gearbox, you should engage the gear, depress the clutch and then crank the engine with the starter. If no vibrations or extraneous sounds are noticed, and the gear is engaged without difficulty, this indicates the correct assembly of all elements.
Bleeding the system
Draining fluid from the clutch drive system is very simple:
- Using a blower, pump out the liquid from the expansion tank.
- Unscrew the fitting on the working cylinder and wait until all the fluid is gone.
- Press the clutch pedal several times to remove any remaining brake fluid.
- Change tubes if necessary.
- Tighten the fitting.
- Fill the reservoir with fresh brake fluid.
- Place a transparent tube onto the fitting.
- Have an assistant press the clutch pedal several times. With the last press, you need to hold it in the extreme position.
- Unscrew the fitting half a turn, allowing fluid and air to escape.
- Repeat the procedure until liquid begins to flow without air bubbles. Don't forget to monitor the level in the expansion tank.
In fact, two or three passes are enough to get rid of air in the system. As you understand, pumping the clutch on a VAZ 2106 is not difficult. The procedure is very similar to bleeding the brakes, only it is much faster - the line is very short.
After replacing the clutch, it will need to be adjusted. Pay attention to the working cylinder rod - it has a thread along which you can move the nut. It is by moving it that the clutch is adjusted on VAZ 2106 cars and the rest of the classic series. It is also possible to adjust the free play of the clutch pedal; for this purpose, a special bolt is provided directly above it.
How to make a quality replacement
Carrying out minor repairs, replacing the clutch fork, including adjusting its pedal, will not require much time. If there are high-quality parts, for example, made by Sachs or Kraft, the replacement will only take about 2 hours.
The Gazelle clutch requires proper handling and timely replacement as a result of frequent repairs and adjustments. Replacing the entire assembly is not necessary in every case. The stages of replacement depend on the brand of Gazelle car, determined by the engine, for example, Cummins ZMZ 406 and 405, etc.
The clutch kit must include a fork, a disc, a hydraulic hose, a hydraulic clutch, a clutch basket, a release bearing, the price of which from the manufacturer is lower than the cost of parts offered by chain stores. After diagnostics, it may be necessary to replace only the clutch slave cylinder, which operates under fairly high loads. In some cases, it is necessary to solve the problem with changing the gearbox, discovered as a result of system diagnostics.
VAZ 2106 clutch replacement
- home
- About company
- Services Engine repair
- Suspension repair
- Repair, replacement of clutch
- Steering rack repair
- Brake system repair
- Cooling system repair
- Muffler repair
- Replacing timing belts
- Change of oil
- Manual transmission repair (DSG)
- Changing the gearbox oil
- Cleaning the injector and nozzles
- Computer diagnostics
- Refilling car air conditioners
- Auto electrician
- Installation of parking sensors
- Car alarm installation
- Car audio installation
- Xenon installation
- Tire service. Wheel repair and replacement
- Disc rolling
- Seasonal wheel storage
- Wheel alignment 3D
- Post-warranty maintenance
- Checking the car before purchasing
- Guarded parking lot
BRANDS
- Audi repair
KIA repairToyota repairBMW repairHyundai repairMercedes repairMazda repairChevrolet repairSkoda repairSuzuki repairNissan repairMitsubishi repairVolvo repairFord repairVolkswagen repairCitroen repairPeugeot repairRenault repairVAZ repairFord repairOpel repairHonda repairSubaru repairLexus repairLand Rover repairPorsche repairSsangYong Repair CheryPricesPromotionsTipsContacts
- Sign up
- Live chat
- home
- About company
- Services Engine repair
- Suspension repair
- Repair, replacement of clutch
- Steering rack repair
- Brake system repair
- Cooling system repair
- Muffler repair
- Replacing timing belts
- Change of oil
- Manual transmission repair (DSG)
- Changing the gearbox oil
- Cleaning the injector and nozzles
- Computer diagnostics
- Refilling car air conditioners
- Auto electrician
- Installation of parking sensors
- Car alarm installation
- Car audio installation
- Xenon installation
- Tire service. Wheel repair and replacement
- Disc rolling
- Seasonal wheel storage
- Wheel alignment 3D
- Post-warranty maintenance
- Checking the car before purchasing
- Guarded parking lot
BRANDS
- Audi repair
KIA repairToyota repairBMW repairHyundai repairMercedes repairMazda repairChevrolet repairSkoda repairSuzuki repairNissan repairMitsubishi repairVolvo repairFord repairVolkswagen repairCitroen repairPeugeot repairRenault repairVAZ repairFord repairOpel repairHonda repairSubaru repairLexus repairLand Rover repairPorsche repairSsangYong Repair CheryPricesPromotionsTipsContacts
How to understand that the clutch needs replacement
There are many symptoms that the clutch is not working correctly, and in order to independently determine the need for replacement, you do not need to have special knowledge.
- Poor gear shifting.
- When changing gears, extraneous noise of any kind appears.
- Spontaneous gear shutdown.
- Noise in the box when driving.
If you do all the work yourself, before replacing the clutch on a GAZelle, you need to do a little preparatory work. First of all, you need to find a room with a lift or a convenient pit. A set of tools is useful for the job - wrenches and screwdrivers.
Replacing the disk yourself
Clutch disc basket VAZ 2109
It should be noted right away that on front-wheel drive cars replacing the disc is a little more difficult than on classic models. In addition, different brands and models of cars have their own nuances for removing and installing the clutch. First you need to read the instructions and recommendations for changing the clutch yourself. It would be a good idea to consult with experts.
When replacing the clutch on a VAZ 2109, there is no need to completely dismantle the gearbox, drain the oil, completely remove the VAZ CV joints, etc.
How to change a clutch in a garage
So:
- First you need to hang the front of the car on tripods.
- Next, the front wheels are removed.
- The clutch cable is detached from the gearbox and removed from the bracket.
- You also need to disconnect the speedometer cable from the gearbox.
- After this, the mounting bolts that secure the ball joints and steering knuckles are unscrewed.
- Next, you need to loosen the rear left trailing arm fixation.
- Carefully remove the mounting bolts of the extension bracket on the left, after which the lever rotates 90 degrees.
- A “mass” can be attached to the gearbox, which is also dismantled.
- The lower flywheel protective cover is unscrewed.
- The engine mount on the left side is turned away.
- The engine mount located at the rear is removed from the body, this also applies to the gearbox drive clamp.
- The drive is removed from the gearbox.
- The gearbox mount is unscrewed from the engine.
- The gearbox is removed from the engine and will hang on the drives.
- The clutch is unscrewed, in some cases it is the clutch basket.
- The release bearing is replaced.
- Using a convenient mandrel designed for centering such disks, we replace the driven disk.
- Assembly is carried out in the reverse order of disassembly.
In practice, everything will not happen as quickly as in theory, especially for beginners. Today, thanks to videos and photos, you can replace almost any part with your own hands, and you don’t have to contact a car service center. Detailed instructions will help you easily dismantle and properly secure the clutch disc.
It is important not only to strictly follow the recommendations, but also to the quality of the purchased spare part. Among the wide variety, you must first of all understand that the price must correspond to the quality