Installation
Before installing new brake pads, remove dirt and wipe the rear brake parts. Assembly is carried out in reverse order. To install the pressure spring with the block, use the lower tension spring, hooking its end to the hook of the pressure spring. We tighten the spring with a screwdriver and insert the hook of the spring into the hole in the block.
Move the pistons to the center of the cylinder, bringing the pads together with two mounting blades. After completing the work, press the brake pedal 2-3 times to bring the pads to the drum. For clarity, the entire process is also shown in the video:
Let us remind you that periodically monitor the serviceability of the brake system and change the front brake discs on time.
Replacing rear brake pads (in drums) on Lada cars
The minimum permissible thickness of the friction linings of brake pads is 1.5 mm. Rear pads should only be replaced as a set on two rear wheels at once. Otherwise, the car may pull to the side. On all modern Lada cars (XRAY, Vesta, Largus, Granta, Priora, Kalina and Niva), replacing the rear pads is carried out in the same way without significant differences.
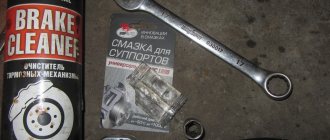
Required . new rear brake pads, a set of keys and remove the car from the handbrake.
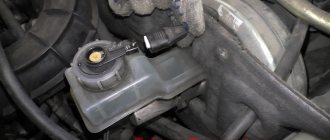
Check the brake fluid level, if it is around 0, then pump out some of the fluid. Jack up the car and remove the wheel. Further:
- Unscrew the guide pins.
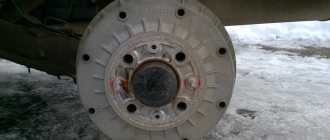
- remove the drum from the hub, knocking it with a hammer through a wooden spacer.
unscrew the drum guide pins
remove the drum from the wheel hub.
Next in order:
- disengage with the spring block.
- and remove the upper spring first.
- then the bottom one.
disengage the spring from the block, remove first the upper spring then the lower spring
- disengage the pressure spring from the block.
- remove the front pad.
- remove the spacer bar.
disengage the pressure spring from the block, remove the front block, remove the spacer bar
- Having disconnected the pressure spring from the rear block, lower the block.
- remove the rear shoe lever from the hole in the handbrake cable end.
Having disconnected the pressure spring from the rear block, lower the block
remove the rear shoe lever from the hole in the handbrake cable end
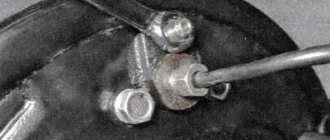
- pull the cotter pin out of the hole.
- remove the washer.
- pull out your finger.
pull out the cotter pin from the hole, remove the washer, pull out the pin
Before installing new brake pads, remove dirt and wipe the rear brake parts. Assembly is carried out in reverse order. To install the pressure spring with the block, use the lower tension spring, hooking its end to the hook of the pressure spring. We tighten the spring with a screwdriver and insert the hook of the spring into the hole in the block.
Pad life
The axles of the Lada Priora are equipped with mechanisms of different designs. The front brake is disc. This mechanism has good performance and provides better braking dynamics.
Front pads should be replaced much more frequently. According to the instructions, they travel 15 thousand kilometers. With an aggressive driving style, the life of the pads is reduced by 20-30%.
The rear brake on almost all VAZ models is drum. It does not provide such braking dynamics, but it needs to be changed much less frequently. When braking, the main force falls on the front axle, and the rear brake acts as an auxiliary one.
According to the regulations, replacement of rear brake pads is carried out after a mileage of 50,000 kilometers, provided that the mechanisms operate correctly. And on cars equipped with ABS (anti-lock braking system) - even longer. There are a number of situations when it is necessary to change the mechanism earlier.
- if the brake drum of the Lada Priora begins to knock or squeak, then you should inspect the mechanism and replace the pads;
- When driving aggressively, wear occurs faster, so it is necessary to monitor the part more carefully.
It is advisable to carry out the check on an overpass or lift. On the back of the device there is a special viewing window with a rubber plug. We remove it and analyze the condition of the friction part. The thickness of the lining must be at least 1.5 mm. Otherwise, unscheduled work is required:
- If chips or deep grooves are found on the pads, it is recommended to change them. Otherwise, the mechanism may jam at the most crucial moment;
- You can also identify brake fluid leaks on the rear pads. This indicates a faulty brake cylinder. The element should be repaired and new spare parts supplied. The old ones will not work well.
Replacing rear brake pads on a Priora - instructions
The service life of the rear brake pads of the Priora is quite long, but provided that the quality of the components is decent. Even factory ones can easily travel more than 50,000 km with careful operation without sudden braking or maneuvers using the handbrake. But there are also such instances that after the first 10,000 km they already begin to exhibit a terrible sound during operation, and efficiency sharply decreases.
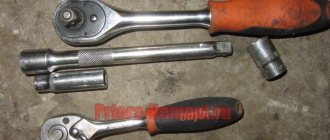
If you decide to replace it, then below I will try to provide detailed instructions for replacing the rear pads on a Priora with a detailed photo report of the work done. So, first of all, it’s worth talking about the tool that you will need for all this work:
- Screwdriver flat and Phillips
- Pliers and long-nose pliers
- 7 deep head and knob
- Head 30 (if the rear drum cannot be removed in the usual way)
Priora with ABS sensor
If you received a Priora with additional options, then before you begin dismantling the rear pads, you must remove the ABS sensor. If you don't do this, you will most likely damage it during repairs. The sensor installed on the brake mechanism is held on by just one screw. It can be unscrewed using an E-8 star socket.
Unscrew the sensor using the ABS coupling head
The procedure for replacing the rear pads of a Lada Priora
First you need to lift the rear of the car with a jack and place reliable supports in addition to the jack. Then try to remove the drum, for which you need to unscrew the two guide pins:
I repeat, if the drum cannot be removed in the usual way, then you can unscrew the hub securing nut and remove it together with it. As a result, it turns out even more convenient, since the hub will not interfere when removing the brake mechanisms:
Now we need a tool such as long-nose pliers. They need to remove the cotter pin of the handbrake lever, as clearly shown in the picture below:
Then you can begin to dismantle the right spring from below, prying it either with a screwdriver or pulling it a little with pliers until it comes off:
Next, on both sides you need to remove the small springs that fix the pads in a vertical position; they are located on the sides. This can be seen very clearly in the photo below:
When you have dealt with them, you can try to remove the pads. To do this, it is not even necessary to remove the upper spring; you can simply apply great force and move them apart at the top:
Thus, freed from the plate, they will spontaneously fall down:
When replacing the rear pads on a Priora, it is worth considering one important detail: after installing new ones, the drum may simply not fit. If this happens, then you need to slightly loosen the handbrake cable, which is located under the bottom of the car in the rear. It is necessary to loosen until the drum fits without unnecessary obstacles. We install all the removed parts in the reverse order and do not forget that for the first few hundred kilometers you should not resort to sharp braking, since the mechanisms are new and should get used to it.
Progress
Initially, you need to remove one or two wheels at once. Once you have completed this task, you need to twist the pins and remove the brake drum. This is done by churning. Use a spacer and a hammer to avoid bending the structure.
Next we perform the following steps:
- Two springs are attached to the brake pad. They must be removed one by one. First, the upper part is used, then the lower one.
- Next comes the turn of the pressure spring. Let's take it off.
- Now the front block is available in front of you, and it will not be difficult to dismantle it.
- Once the first block is removed, the spacer bar must be removed.
- Now comes the turn of the second pressure spring, which holds the rear pad. We disengage.
- We remove the lever of the part from the hole in the tip of the handbrake cable and remove the cotter pin.
- The last step is to remove the washer and pin. All. The rear block is accessible for dismantling.
Before installing new parts, it is necessary to clean the system of dirt and dust accumulated inside. Assembly is carried out in the reverse order, but with some nuances. Firstly, it is not so easy to return the compression spring back into engagement, so the lower compression spring will help us here. Hook it onto the end of the clamping rod and use a screwdriver to pull it towards the block. The pistons must move to the middle of the cylinder, this is done using special mounting blades.
How to change pads on a VAZ 2112
As soon as the work is completed, it is necessary to calibrate the pads. A few presses of the brake pedal are enough to do this. If any points remain unclear to you, you can watch the video instructions on our website. There is nothing complicated in the work, you just need to allocate a little time.
Replacement of rear brake pads on a Lada Priora car is carried out under the following conditions: the rivet connection of the friction linings with the base of the pad has become loose, the thickness of the friction linings has become less than the maximum permissible 1.5 mm, as well as when the working surface is damaged or oily. It is recommended to replace the pads on each side, regardless of the condition. Simultaneous replacement will prevent the occurrence of skidding when braking due to different technical conditions of the pads. To carry out repair work, prepare a standard set of tools and perform the following sequence of actions:
- Engage first gear and place chocks under the front wheels. Then remove the wheel from the side to be repaired.
- Check the brake fluid level in the reservoir. If it is at the maximum mark or higher, then the liquid must be pumped out. This step is necessary to counteract the leakage of fluid when squeezing the brake pistons when the drum is subsequently seated in place.
- Unscrew the two locking pins and remove the brake drum.
Next we proceed to dismantling the pads. The first step is to remove the upper and lower tension springs. To do this, using pliers, carefully remove the ends of the springs from engagement with the springs.
Next, remove the front pad guide spring, and then carefully remove the pad itself.
Remove the expansion bar. Next, remove the rear shoe guide spring and the shoe itself, disconnecting the parking brake drive rod end from it.
Brake pads whistle when braking
It is necessary to remove the drive lever from the rear block using the handbrake. To do this, use pliers to remove the locking pin, washer and bushing. Replace the lever with the new one.
At this point, the repair work on removing and replacing the rear brake pads on the Lada Priora has been completed. Replace them, and then perform the installation in the reverse order. Since the outer diameter of the friction linings has increased, problems with installing the brake drum are possible. For ease of installation, it is necessary to compress the pistons of the brake cylinders using two mounting blades. And also use a sharp knife to grind off the chamfer on the pads. Also check the condition of the drum; perhaps a chamfer from wear has formed on its working surface; if it is present, grind it off with a file, while working carefully so as not to damage the working surface.
Replacement of rear brake pads of Lada Priora (Lada Priora)
Details Parent category: Repair (manual for) Lada Priora cars
Operations performed when replacing brake pads of the rear wheel brake mechanism on a VAZ 2170 2171 2172 Lada Priora
Additionally, I would like to note that the rear brake mechanisms of the Priora and the tenth family are identical, and therefore the removal and installation of the pads can be performed according to the procedure for removing the rear pads on a VAZ 2110 2111 2112 car (instructions are given with color pictures). The minimum permissible thickness of the friction linings of brake pads is 1.5 mm. The pads are replaced in the following cases:
– the thickness of the friction linings is less than the permissible value; – the surface of the linings is oily; – the friction lining is not firmly connected to the base; – the linings have deep grooves and chips.
Difficulties in selecting parts
Before you begin replacement, you must select a suitable set of pads. There are many options for the Lada Priora on the market. Conventionally, they can be divided into two categories - parts equipped with ABS and those without this system. It is not difficult to understand what type your Lada Priora is - the diagram of cars with an anti-lock braking system includes an ABS sensor and a wire connected to it.
The basic principles of selection are common to the two categories. The product must be well packaged, have protective holograms and quality certificates. When purchasing a whole set with release springs, it is advisable to check them. We often came across sets from China where the spring brackets were turned in the wrong direction.
There is no need to look for how much the cheapest kit for a VAZ will cost. It is better to give preference to original parts or famous analogues. Even at a higher cost, the pads will provide excellent service life and excellent braking dynamics.
Selection for cars with ABS
Below is a list of pad sets with the best price-quality ratio.
| Part name and number | Minimum price, rub. |
| AT 2090-118BP | 400 |
| AutoReal AV18-350-2090 | 450 |
| Pilenga BSP1005N | 600 |
