Good day, colleagues. Everything ever happens for the first time. This week there was a surprise on the road with the stove (heater). The stove fan began to work only at 3rd speed. Having quickly read the options for solving the problem at work, I decided to buy a heater resistor in the evening. The AVTOVAZ designers, as always, did their best - they shoved this detail far away, so that the owner could practice the Kama Sutra on occasion and not get bored :)))
For those who encountered a similar problem for the first time, don’t guess - it’s a 100% resistor or a block connecting wires to it.
Downloading a book
After successfully completing the payment (by any method) and returning to the KrutilVertel store from the payment system website, you will be taken to the successful payment page:
The book you purchased will be in your personal account, from where you can always download it.
Please note that after making the payment, you need to return back from the payment system website to the KrutilVertel website. If for some reason you did not return back to the site and closed the payment system tab with a message about the successful completion of the payment, please let us know - we will send you a letter indicating access to download the book
If for some reason you did not return back to the site and closed the payment system tab with a message about the successful completion of the payment, please let us know - we will send you a letter indicating access to download the book.
Connection diagram for the VAZ 2108 stove resistor
Wiring diagram for the electric motor fan (“stove”) of VAZ 2108, 2109, 21099 cars with a “low” instrument panel and mounting block 17.3722
Wiring diagram for the electric motor fan (“stove”) of VAZ 2108, 2109, 21099 cars with a “high” instrument panel and mounting block 2114
Notes and additions
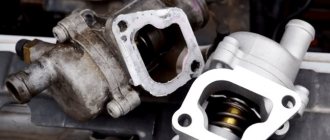
— The fan electric motor can be connected to the on-board network either directly (highest speed) or through an additional resistor having two resistance spirals (0.23 Ohm and 0.82 Ohm). If both spirals are included in the chain, the speed is low, if one is 0.23, the speed is average.
More articles on electrical equipment of VAZ 2108, 2109, 21099 cars
The stove on the VAZ 2121, 2131 has a number of advantages and disadvantages. One of them is associated with an electric fan, which not only blows weakly, but also makes a lot of noise and whistles during operation. Replacing it with a new type fan will solve only part of the problems. As practice shows, it is better to install an additional fan from the figure eight “snail” type.
The point of the modernization is to install on the Niva an additional electric fan from the VAZ 2108, which will be located in the engine compartment inside the air intake, where it is normally positioned at figure eight. Let us remind you that the standard Niva 4x4 fan is located inside a plastic box in the cabin.
You will need: a figure-eight stove fan with a casing (catalog number: 2108-8101091).
The fan control can be left as standard, then there will be the least amount of modifications. Or use additional parts from the VAZ 2108:
- an additional heater resistor (article: 2108-8101081), which will need to be placed in the air intake next to the fan;
- fan speed switch (2108-3709608), which is mounted on a panel in the SUV interior.
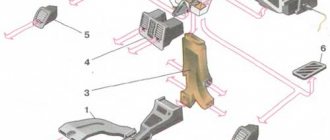
Stove design
The interior heater is made up of two plastic casings (left and right). They are connected by fastening brackets. A sealing strand is placed in the grooves of the structure. An electric fan forces forced air into the cabin. It is secured with two screws on top of the stove. It is easily accessible from the combustion engine side.
The stove fan is driven by the impeller of an electric motor. The VAZ 2109 stove motor has two resistor spirals, which provide three rotation speed options. The stove circuit includes an additional resistor to obtain the desired rotation speed. The radiator consists of cooling plates, two rows of tubes and two plastic tanks.
Heating and ventilation system components
An additional resistor is designed to reduce the fan rotation speed (intermediate rotation speeds).
The heater radiator is installed in the passenger compartment under the panel in a plastic case and serves to transfer heat to the interior.
Also interesting: Rear disc brakes on the Niva
The heater valve is installed at the inlet of the heater radiator and serves to regulate the flow of antifreeze that passes through it.
The damper control levers serve to distribute air flows that are directed into the cabin, as well as to control the heater tap.
Keywords: stove 4x4 | 4x4 air ducts
Found an error? Select it and press Ctrl Enter..
AvtoVAZ recalls Lada Vesta, XRAY and Largus due to problems with brakes
What is the fuel tank volume and range of the Lada XRAY?
Pros and cons of Lada Granta Cross
What accessories for Lada 4x4 are best to choose?
Principle of operation
The electrical circuit of the heater consists of:
- electric motor with fan (the fan blows hot air into the cabin, onto the windows and according to adjustments);
- power and speed selection buttons (on the classic VAZ 2101 - 2107, there are only two rotation speeds, on the VAZ 2108 - 2115 there are three speeds, on the VAZ 2110 - 2112 there are three speeds plus a ventilation mode);
- a set of additional resistances to ensure the required rotation speed of the heater fan (step-down, tungsten, turn coils);
- fuse and wiring;
How to connect an electric stove
Electric stoves consume a fairly large amount of energy, so they are connected to a specially dedicated power supply line, the current to which will flow from the panel itself.
The most reliable connection is connecting directly to the input terminals of the plate; reliability is explained by the fact that it creates the least number of points of contact.
The only disadvantage of this connection is that the power supply is turned off via a machine.
The most common and familiar connection method is through a plug and socket. But, since they are not strong enough to withstand a large load, like an electric stove, it is necessary to connect them using special amplifiers.
Parameters and ratings of the machine for protection
The connection must necessarily include an RCD and a circuit breaker through which the phase will be supplied to the socket. If you have a difavtomat, then in this case you can use it. The amount of current is selected according to the amount of maximum current consumed. All these indicators are available in the passport of your electric stove. The indicators are approximately 40-60A. If, say, your stove consumes 40A, then, just in case, to avoid problems, take an automatic machine with approximately 50A. Although, it all depends on what power you plan to use the oven and burners at. The strength of the RCD, in turn, depends on the number of machines.
If your machine has 50A, then the RCD should be selected at approximately 63A, with a leakage current of 30 mA.
Parameters of the wire used
Copper conductors differ significantly from aluminum conductors, so their price is quite high. They are of higher quality and safer. In the last few years, copper wiring has been used in almost all household appliances and electrical wiring.
The choice of conductor cross-section depends on:
- Network type “220 V or 380 V”.
- Wiring type. It can be open or closed.
- How much current does the stove consume?
Most often, conductors are used that have a core of 4 or 6 mm.
To help you select a conductor, use the table for selecting conductor cross-sections.
The safest and strongest conductors are single-core. They are usually used to connect the socket itself and the panel. And in cases with a stove, you can choose a stranded conductor, since in this case it will be more convenient and appropriate.
How to check the system
In any case, replacing the VAZ heater radiator becomes possible only after diagnostics have been carried out. It is imperative to make sure that it is the heater radiator that is to blame for the heater malfunction. How to carry out the necessary diagnostics?
- First you need to bend the central instrument console where the computer is installed. In this case, the shield should be disconnected from the delivery note, after which the housing of the heating equipment will be opened.
- Now you should take a flashlight, with which you can find a place where water is still oozing. It is mandatory to check the tap and pipe.
- The next stage is assessing the leaks. If the leak turns out to be small, it cannot always be noticed in the cabin. Only after a thorough examination can you understand what the essence of things is and how to proceed in the future.
If a problem persists with the radiator, it needs to be replaced. Most often, the task can be successfully completed in the shortest possible time.
How to make the stove work warmer?
If you notice that the heating system is no longer working as efficiently as before, then there are several options for solving this problem:
- First you need to check the functionality of the thermostat. As practice shows, it is often because of a failed thermostat that car owners are faced with the problem of a non-working heater.
- Check the functionality of the radiator unit. Dismantle it; if you have never washed the radiator before, then it also needs to be cleaned and washed. If the device leaks, then, as a rule, repairing it will not solve the problem, so it is better to immediately replace the unit.
- Check the lines, that is, hoses and pipes. They may be worn out, resulting in consumables leaking out through the nozzles through damage to the structure. And if there is no antifreeze in the system, as you understand, the heater will not work. In addition, the problem may be an air lock.
- Install an additional pump. We will tell you more about this below (the author of the video about replacing the radiator device on a Gazelle is Denis Legostaev).
Replacement
Changing the resistor is easy. But for this you will have to take several steps.
- Make sure that the problems with the heater on the VAZ-2114 are related precisely to a faulty resistor.
- On the left is your car's dashboard console trim. Remove it to find the failed element.
- Wires are connected to it. They must be removed carefully so as not to damage them. It will not be superfluous to check the integrity of the wiring.
- Unscrew the fastening element. The resistor is held in place by a regular screw, so take a screwdriver with you.
- Remove the old element and check its operation.
- A regular multimeter is suitable for checking. Its presence in the garage or in the car greatly helps car owners when diagnosing and repairing their car. Check the resistor for breaks.
- If there are breaks, then the resistor is unsuitable for use. You need to buy a similar new one and install it in place of the old element.
- Reassemble in reverse order.
There is nothing complicated about the work, so you can do it yourself. This will save you time and money on visiting a service station.
Important! If problems arise in the heating system of the VAZ-2114 regarding the fan, be sure to check the fuse. Always start searching for the causes of malfunctions with the simplest ones, gradually moving towards complex potential causes of breakdowns.
It is quite simple to determine that the cause of the heating failure was not a resistor, but a fuse. It is marked F7 and is responsible not only for the heater fan, but also for the headlight washer motor, glove compartment lighting, cigarette lighter and heated rear window. If these components do not work, the problem can be solved by simply replacing the fuse.
If a resistor failed on your car, be sure to write how you dealt with the problem and how difficult it was to change the element. Share your impressions, leave comments and ask questions. We will definitely answer them.
The best prices and conditions for the purchase of new cars
Credit 9.9% / Installments / Trade-in / 98% approval / Gifts in the Mas Motors showroom
In most cases, in a VAZ 2109 car, all electrical circuits are protected by reusable fuses. In order to avoid searching for them throughout the car, AvtoVAZ engineers came up with and put into operation a fuse box, which is located under the hood in the part closest to the driver. Over the decades, it became clear that the place was not thought out, so car enthusiasts began to have questions about this block.
Firstly, in most cases the fuse block simply floods and either it burns out or the contacts begin to oxidize. Secondly, in order to replace a blown fuse, the driver has to open the hood and get out of the car in the severe Siberian frost. On this issue, engineers corrected themselves only in the 10th VAZ model. The fuse box of the VAZ 2110 is located in the car interior at the bottom near the driver’s left hand, which gives it a number of advantages:
- It is not possible to fill it.
- Oxidation occurs to a lesser extent due to the minimal temperature difference.
- Easy to replace a blown fuse.
Heater Gazelle business device.
The tap is controlled automatically by the heater control unit depending on the selected temperature. In addition, the temperature of the air supplied to the cabin is regulated by a central damper, which, by turning, directs the air flow, or part of it, through or bypassing the radiator.
In addition to the central damper, there are a number of dampers that redistribute the air flow. The dampers of the Gazelle Business heater, unlike previous models, are controlled by gear motors, not cables. The control is carried out by the heater control unit. The electric heater fan is located inside the housing and to access it it is necessary to remove and disassemble the entire heater. Despite the fact that the fan electric motor is imported, this arrangement completely negates all the advantages of the heater.
The speed of the electric motor is regulated smoothly by turning the handle on the control unit, due to the electronic regulator located on the heater body. To access it, as well as access to almost all elements
Subscribe to the channel. Gazelle repair
.
How to remove
a panel on
a gazelle
.
Operating principle of the furnace system
As soon as the temperature outside the window drops below zero degrees, coolant in the car begins to flow directly through the furnace tap. After the engine warms up to the optimal temperature (about ninety degrees), antifreeze will begin to flow into the radiator.
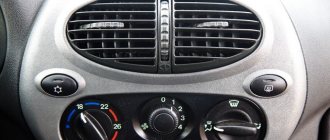
Inside the car there is a special lever on the panel that is responsible for turning on the ventilation system. In the VAZ 21099 it is equipped with three power modes. You can also select the direction of the air flow. The air is directed using shock absorbers located at different points in the car.
GENERAL AIR CIRCULATION SCHEME
When there is no need for heating, intake air purified by the filter is supplied to the cabin directly from the environment. If the car is equipped with air conditioning, in cooling mode, the flow passes through the evaporator before entering the cabin, after which the cold air is directed into the deflectors (more about the principle of operation of the air conditioning system).
Air dampers
Redirection of air flows to regulate temperature is carried out by a special damper. Types of damper control:
- mechanical. The damper drive is connected directly to the switch in the cabin via rods and cables. In this case, the driver, by moving the regulator, manually doses the temperature of the incoming air;
- electronic. The damper is equipped with a servo drive. The electric motor changes the position of the damper, receiving commands from the control unit. This scheme is used on cars with climate control systems. The driver just needs to set the desired temperature in the cabin in the on-board computer, after which the electronic control unit, focusing on temperature sensors, will control the air damper servomotor.
Recycling
In recirculation mode, the main air damper closes, after which the heater fan begins to draw air from the passenger compartment. This mode of operation allows you to block the access of unpleasant odors and polluted air from the street if, for example, you are driving a car along a dusty gravel road.
Types of recirculation drive:
- mechanical (described above);
- vacuum. The damper is connected to the vacuum brake system. When the button is pressed, the valve moves due to the vacuum and remains in the closed position until the button is pressed again;
Why does the stove blow cold air?
If the heater radiator on a VAZ-21099 has stopped heating, most likely the coolant circulation in it has been disrupted. This problem is also caused by a number of reasons, let’s look at them:
- It is quite possible that the coolant is outdated and, as a result, has lost its properties. Note that its service life is approximately five years. If during this time the antifreeze or antifreeze has never been changed, their structure begins to deteriorate with the formation of sediment, which, settling on the cooling lines, interferes with the normal operation of the system. This sediment also clogs the radiator, pipes and pipes of the heater, causing it to stop functioning normally and giving off heat. Therefore, it is necessary to free the system from the old cooling fluid by completely draining it, and then flush it using a special flushing compound. This liquid is poured into the cooling system, after which the power unit starts. The manufacturer indicates on the packaging how long it takes to use the flushing compound in the system with the engine running before draining it. After the flushing has been drained (it usually comes out of the system quite dirty), new coolant should be added in accordance with the manufacturer's instructions and the heater's performance checked. If after this the stove still does not heat, then its radiator is clogged. If, after cleaning and washing it, performance is still not restored, you will have to buy a new radiator.
- One of the most vulnerable elements of the cooling system is the heater valve, which is controlled from inside the car using a special lever on the heater panel. The lever and faucet have a traction connection. It is necessary to check the functionality of the faucet. This is done like this: we move the lever, while controlling the opening and closing of the tap. If the faucet remains motionless or does not open/close completely, then the draft needs to be adjusted.
- The VAZ-21099 stove heats poorly or does not work at all due to a drop in the antifreeze level in the cooling system. Because of this, air accumulates inside the heater radiator, and it practically does not function (it gives off little heat). To eliminate this, you only need to replenish the level of “cooling” in the system and constantly monitor it.
- Airiness in the cooling system of the power unit is also a common cause. The carburetor has a heating pipe, which must be disconnected, since it is the highest point of the system, and accordingly, an air lock forms there. The next step is to free the system from air; to do this, remove the cap of the expansion tank and blow it out. Air will begin to escape from the hose that was previously removed from the carburetor, but as soon as coolant flows in instead, the hose must be put back in place. Air in the system has been eliminated.
- The cause of the malfunction of the VAZ-21099 heater may be a failed thermostat, because of which the power unit does not reach the required temperature (90 degrees).
- Failure of the pump deprives the cooling system of fluid circulation. At the same time, the engine boils and cold air blows from the air ducts. In this case, it is recommended to replace the pump.
As you can see, there are several reasons for poor operation of the stove in the VAZ-21099, and each of them is a consequence of other malfunctions.
Repair and replacement of faulty parts
Many novice motorists ask questions: how to remove the heater regulator on Kalina, what LED is in the heater switch on Kalina, what should be done when the heater mode switch on Kalina does not work. Answering these questions, I want to say that initially it is necessary to dismantle our entire mechanism, after which we proceed to disassembly according to the following scheme:
- First of all, disconnect the negative terminal from the battery. This is done to de-energize the system so as not to short-circuit any of the sensors during the disassembly process.
- We remove the radio and turn off the power coming from the wiring harness.
- We remove the damper switch lever, then remove the temperature regulator and the air flow distribution regulator.
- At the bottom, remove the plugs behind which there are 2 screws, unscrew the fastening screws and gradually begin to remove the instrument panel console.
- After our panel is removed, it is necessary to disconnect the power supply connectors located on the back.
- After eliminating the malfunction, assembly is carried out in the reverse order.
To carry out this work, we only need a flat and Phillips screwdriver from the tools.
Difficult or impossible switching of the temperature regulator may be due to a breakdown of the switch itself. On a Lada Kalina car, replacing the heater switch is quite easy (provided that work has previously been done to remove the heater control mechanism). On the rear console of the control panel, unscrew the four screws securing the switch block. We remove the cable fastening clamps, then remove the cables from engagement with the drive unit. We replace the broken switch and reassemble it in the reverse order. When performing this work, I give you useful advice: the location of the cables on the lever block must be marked with a marker; this is done in order to install the rods in their original places during assembly.
When the stove temperature regulator does not work on Kalina, the main reasons for the breakdown may be: a disconnected connection wire or a failure of the thermistor. Such malfunctions are treated by soldering the wire and replacing the broken element. It happens that the stove regulator on Kalina does not work due to a breakdown of the temperature sensor, which happens quite rarely. This sensor is located inside the car interior lamp. If it is found to be damaged, it must be replaced with a new one.
Answering the question about what kind of LED is installed in the stove switch in Kalina, I want to say that there are LED lamps with a power of 3 Watts and a voltage of 12 Volts. This lamp is quite enough for illumination, but some motorists install LEDs with a power of 5 Watts. This does not affect the work process, the backlight just becomes a little brighter.
To summarize, it should be noted that it is much more comfortable to drive in a warm car. To ensure that the heater switching mechanisms do not break, it is necessary to switch them smoothly and not jerk sharply. Good luck and may your cars be warm and cozy in winter.
No work on modifying the electrical system or connecting additional electrical equipment can be carried out without electrical circuits. Next you will find a set of electrical diagrams for VAZ 1117, 1118 and 1119.
Replacement process
Of course, you would not inspect all the fuses every day to detect any damage. A visual inspection is resorted to if the heater suddenly stops working. Burnt fuses are also indicated by glass washers, power windows and other devices that have stopped functioning. It will be easy for you to understand how to replace, and most importantly, identify a failed fuse, if you read our instructions.
Algorithm of actions
The manufacturer introduces a mounting block into the engine compartment of the VAZ-2108 car, in which fuses are located. This element contains fusible legs, therefore, even with a slight increase in current strength exceeding the permissible norms, these “legs” melt, breaking the contact, preventing the further movement of the “dangerous” current.
If you need to replace a failed fuse, you will not need any additional tools at all. Tweezers, which make it much easier to remove elements from the socket, are present in the mounting block itself.
So, open the hood, pay attention to the part of the space located near the windshield. This is where you will find an oblong closed box. This is the mounting block. There are two latches on its surface that ensure reliable fixation of the cover. Press these latches and the lid will immediately lift up. Now take tweezers, grab the burnt safety element with it and remove it, immediately install a new one in the freed place. By the way, we would like to draw your attention to the fact that replacement should be carried out with identical elements designed for the same current strength.
Some would-be experts recommend placing a jumper on the blown fuse. Indeed, after installing such a jumper, the electrical device instantly “comes to life” and begins to delight you with its impeccable operation. Unfortunately, you are not in a hurry to rejoice at this, because during the next surge in the power supply, the fuse will not work, and therefore will allow the dangerous current to “follow” further directly to the device itself. In most cases, this is followed by a sad loss; this time an important and expensive device, such as, for example, an electric motor, burns out. For this reason, do not skimp and purchase new fuses.
Sometimes drivers are confused, not understanding how to identify exactly the burnt element. There are two ways to make this determination. The first involves removing the elements one by one and visually inspecting them to determine their integrity. The second way is that in the technical documentation for your G8 you can easily find a diagram of the location of the fuses, indicating their number and current strength, as well as indicating which device “serves” this element. If the heater stops working, look in the diagram to see which fuse number is responsible for this process, and then immediately find this number in the mounting block. The same diagram will be easy to find on the Internet if you do not have technical documentation for your car.
However, not only the safety element, but also the heater resistor can burn out. In this case, the heater will continue to function, but only at speed four. First, second and third speed, no matter how hard you try, will be inaccessible to you.
Removing the resistor is easy; just unscrew the screw holding it and then remove it from the heater housing. On the surface of the resistor you will easily find two spirals with different resistances; it is the resistor that allows you to control the VAZ-2108 stove. If at least one spiral burns out, the resistor stops working, and accordingly, it is impossible to regulate the intensity of the warm air supply. The resource of such a resistor is quite large; during normal operation it is enough for 125 thousand kilometers.
So, we recommend that you do not take risks and do not compete with the level of cunning with your car's electrical system. It is better to always have new fuses of different types and resistors in stock. In this case, you can replace the failed element without difficulty, spending only a little time, but continuing to move safely.
The heater and the entire heating system of the VAZ-2114 are in many ways similar to its predecessors. It is considered simple, which makes DIY repair possible.
Repair of the electrical heating system of the VAZ interior
– the fan electric motor does not rotate at any position of the rotation speed switch: most likely, the electric motor itself has failed (the brushes have worn out), or there is no voltage at terminals 2 (ignition switch malfunction) and 4 connectors of the mounting block (fuse F4 has blown), it is also worth checking the mass of the engine itself (it should be no more than 3 ohms). The electric motor on the “classic” VAZ 2101 - 2107, as well as on the VAZ 2121, as well as on the VAZ 2121 “NIVA”: installed in the cabin, immediately behind the heating radiator; in VAZ 2108, 2109, 21099, 2113, 2114, 2115 - under the hood, in the compartment behind the engine shield; in VAZ 2110, 2111, 2112 and Priora 2170 - also under the hood, behind the plastic protection, on Kalina - in the cabin, under the dashboard.
– maximum fan speeds, according to the diagram, are without a switch, and if only the minimum and average speeds do not work for you, then the reason must be looked for in the speed switch button or in additional resistors (values in the diagram);
– sometimes, when you turn on the stove, you hear a very loud noise, high tones (squeaking) and there is no proper airflow. This indicates a malfunction of the heater electric motor itself (jamming of the impeller or armature bearings), in this case either replacement or disassembly and lubrication will help (not recommended, as it helps for a short time);
Autonomous heating control systems
Autonomous heating systems were installed on VAZ 2110, 2111, 2112, 2170 and others:
1 – electric motor of the heater fan;
2 – additional resistance (resistor);
3 – heater control controller;
4 – mounting block of fuses and relays;
5 – ignition switch (ignition switch);
6 – temperature sensor for air temperature in the cabin;
7 – recirculation switch (air intake from the street or the cabin);
8 – recirculation valve;
9 – micromotor gearbox for heater damper drive (cold or hot air);
A – to the instrument lighting switch;
B – to power supplies.
In such a system, if a malfunction occurs, the search must begin with:
- Checking fuses;
- Checking the control controller (it is necessary to check the supply voltage and the output control voltage);
- Switch and sensors (maximum speed mode must work);
- The electric motor itself (brushes, armature);
Often the micromotor that switches the operating mode fails; when replacing it, it is necessary to set the initial position of the micromotor (by connecting it and turning on all positions in turn);
If a fuse is blown, it must be replaced with the recommended rating.
Heater Gazelle business troubleshooting.
What to do if something in the heater does not work? Due to the design of the heater, diagnostics in case of failure of its parts is difficult. Initially, as always, you need to check the fuse.
Checking gearmotors.
Checking the gear motors of the windshield blower dampers and deflectors can be checked without completely removing the panels. It is enough to remove its lower part. The main damper motor is accessible from the driver's side. To check gearmotors, you need to disconnect the connector of its electric motor, the connector with a lock, and connect a tester to it in voltmeter mode or a test lamp. With the ignition and heater on, you must press the button that controls this damper. The control lamp should light up. If the lamp is on and the gearmotor does not work, it must be replaced.
If you are on the road and do not have the opportunity to replace the damper drive with window defroster, you can remove the rod from the damper lever on the driver’s side and turn it manually, locking it in the open position. To open the damper on the passenger side, you will need to unscrew the screws securing the gearmotor and, by turning its housing, secure it in the same way.
Checking the electric motor and speed controller.
To check the heater fan motor and the cause of its failure if the fan does not work, you will need to remove the air intake in the engine compartment. Inside the opened approx.
If the control lamp is on and the fan does not rotate, then its electric motor is faulty. To check, measure the resistance between the motor terminals in the connector. Motor malfunction may be caused by stuck brushes. In this case, you can try knocking on the heater body. In this case, the operation of the fan can be restored before the next time it is turned off, possibly longer, but you can still get to the service center in a warm place.
If the control lamp does not light up when checking the power supply, the speed controller is faulty. If the speed controller malfunctions, you can temporarily connect the positive wire on the connector to the fuse near the battery with a wire. This will allow you to get to the garage or service station in winter.
It is not possible to describe how to remove the Gazelle business heater and disassemble it due to its high labor intensity, but you can download detailed instructions with photographs from the Gazelle Heater file hosting service.
Below is a schematic electrical diagram for connecting the Gazelle business heater and ventilation.
. WINTER COLD - INSTRUCTIONS FOR REPAIRING OVEN 2109
. WINTER COLD - INSTRUCTIONS FOR REPAIRING OVEN 2109
The cold weather has arrived, and most owners of the VAZ 2109 are once again faced with a problem: from the nozzles of the heater pipes at the operating temperature of the coolant (about 90 degrees), barely warm, and often completely cold air is blowing into the cabin; in short, the heater does not heat well. In this state of affairs, in severe frost, even frosty side windows in the cabin “do not come off.”
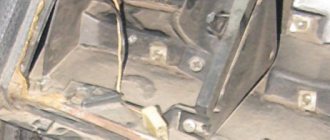
The simplest solution to this problem is as follows. It is necessary to tighten the heater damper control cable. To do this, you can make one or two turns of this cable on the damper control lever. This lever is located on the body of the VAZ 2109 stove, next to the gas pedal (see photo).
All the joints of the air ducts and the edges of the stove damper are covered with foam rubber, which is difficult to fully compress using the damper control lever. This leaves a gap of several millimeters. In this case, the damper directing the flow of air either from the street directly or through the heater radiator does not close completely. It closes “up”, while air flows into the front nozzles through the heater radiator, and into the top and side nozzles from the street, through those same millimeters. When the heater fan is running, and the car is moving, these millimeters are quite enough.
You can even get to this damper lever on the driver's side and try to tighten this lever with your hand while the heater fan is on. In this case, the left ear will be in the area of the air duct nozzle, and you can hear how the sound and temperature of the air leaving the nozzle changes. Also, the reasons discussed below may be the reason for the ineffective operation of the Samara interior heating system:
Incomplete opening of the heater tap
This problem occurs in most front-wheel drive VAZ cars. You can check this by comparing the temperature of the inlet and outlet pipes of the heater radiator; if it is different, most likely the valve is not fully open. The solution is to tighten the control cable for this valve and adjust the valve control lever to the maximum open position. In this case, it is possible that now the valve will not close completely, but as they say, the heat does not break the bones. But here lies another problem. It is known that this valve in Samar is a weak point, and after a certain number of “open-close” operations, the valve at the location of the axis connecting the control lever and the valve itself inside the valve loses its tightness and begins to leak. Some owners simply set the “heat-cold” lever to a certain position and leave it out of harm’s way. In this case, attempting to move the heater tap valve will most likely cause it to leak. If this happens, you can wrap a strip of fabric soaked in sealant around the leak site and fix it all with “cold welding”; this can also be done in the field if the necessary materials are available.
A radical solution to the problem with a leaking heater tap on the VAZ 2109 would be to completely remove it from the system, or install a water supply ball valve. True, in the first case, the ability to adjust the volume of coolant entering the heater radiator is lost, and in the second case, this adjustment can only be made by looking under the hood. But, having got rid of a obviously unreliable unit, we get rid of possible problems in the future, and the remaining adjustment of the temperature of the air entering the cabin by the damper is enough for the eyes. By the way, in the “tens” the manufacturer removed this ill-fated valve.
Air duct leaks
The air forced by the stove fan partially goes into the cracks in the air paths, while the air flow weakens and cools. The solution would be to seal and seal all connections along the air path from the stove to the outlet nozzles. True, this operation is very labor-intensive, since you will have to disassemble the entire front panel, but the result will be a noticeable increase in air flow from the heating system deflectors.
Air locks in the heater core
Heater motor
Heater fan motor connection diagram
1 – generator; 2 – battery; 3 – ignition switch; 4 – fuse block; 5 – heater switch; 6 – additional resistor; 7 – heater fan electric motor
Data to check
| Rated voltage, V | 12 |
| Rated power, W | 20 |
| Shaft rotation frequency when the electric motor is loaded with an impeller at a voltage of 12 V and a temperature of (25±10)° C, min –1 | 3000 ± 150 |
| Current consumption at the specified load and rotation speed, no more than, A | 4,5 |
| Low rotation speed of the armature shaft with impeller, min –1 | 2200 ± 150 |
| Current consumption at armature rotation speed 2200 min –1, no more, A | 2,7 |
Electric motor ME-255 – direct current with excitation from permanent magnets.
When an additional resistor 6 is connected to the power supply circuit of the electric motor, the armature shaft rotates at a reduced frequency. The resistor is secured with two spring washers in the heater fan housing. The resistor resistance value is 1.5 Ohm at 20° C.
As a rule, it is recommended to replace a faulty electric motor with a new one. The only possible repair is cleaning the collector.
1. Unscrew the screws securing cover 6 (see Fig. Heater motor parts) and remove it.
Heater motor parts
1 – lock washer; 2 – washers; 3 – body; 4 – anchor; 5 – crackers; 6 – cover
2. Then remove lock washer 1 from the armature shaft and remove armature 4 from the housing.
3. Assembly is carried out in reverse order.
4. Checking the technical condition is similar to that described for the windshield wiper motor.
Electrical diagram of the stove and main faults
In the “nine”, the VAZ heating system operates using an electric drive. The instruction manual for the VAZ 2109 high panel shows an electrical diagram of the stove's operation. The interior heater connection diagram consists of:
- fan motor;
- the ignition switch, which turns on the stove;
- operating mode switch;
- additional resistor;
- fuse mounting block (fuse F4 is responsible for the stove in the “nine”).
How does a stove fan work?
The car interior heating fan is a conventional AC motor. This can be either a simple axial fan or a diametrical version, which is most often installed on modern cars. The design of the internal part of the stove fan is no different from that of a conventional AC electric motor excited by permanent magnets.
Of greater interest to us is the operation of the electric motor at different speeds. This possibility is realized by including additional resistance in the circuit. Resistors increase resistance, which leads to a decrease in current flowing in the circuit. Consequently, the fan begins to rotate more slowly. The value of the resistor determines how much current will drop in the circuit. The final fan speed is direct because there is no resistance included in the circuit. This allows the heater fan to remain operational even if the resistance has failed.
Niva stove button connection diagram
On our Nivas we have two speeds in the stove. I read on the Internet that you can make four. Nothing complicated really. On the Internet there is a diagram on the left using an old standard resistor:
I didn’t like it right away, and so I began to understand the Kalinovsky scheme. Sheviniva’s is exactly the same:
We buy a Kalinovsky (Shnivsky) resistor with four contacts (200 rubles) and a Kalinovsky heater switch (100 rubles):
Connection diagram for the electric motor of the heater fan and the rear window heating element:
1 – ignition switch; 2 – mounting block; 3 – heater motor switch; 4 – additional resistor; 5 – heater electric motor; 6 – rear window heating element; 7 – switch for heated rear window with control lamp; A – to power supplies; K6 – additional relay; K7 – relay for turning on the heated rear window.
The vehicle is equipped with an electric heater fan motor excited by permanent magnets. To obtain different rotation speeds, an additional resistor is installed in the power supply circuit of the electric motor. The resistor has three spirals and a fuse. When current passes through all three spirals, the 1st speed of rotation of the heater fan is ensured; if the current passes through two spirals - 2nd speed, through one - 3rd speed. When the electric motor is turned on without an additional resistor, the armature of the fan motor rotates at the maximum 4th speed (3000 min -1 ).
If the electric motor fails, replace it with a new one. The only possible repair of the electric motor is to clean the commutator.
As can be seen in the diagram, contacts 4 of the switch and resistor are closed and go to the plus of the motor. We have three wires coming out of the motor. Minus – black, blue-black and red – plus (soldered to one contact in the motor). Just in case, I replaced the short red wire with a longer one (longer than the blue-black one). It will go to the switch, and the blue-black one will go to the resistor (fourth contacts). If you disassemble the motor, mark the cover.
In the place where the resistor stood, cut out a rectangle for the new resistor. In order not to pull the wires through the top of the stove, next to the resistor, where the niche is protected from the fan, we drill a hole and stretch the wires. We make a harness of three wires for contacts 1, 2 and 3.
On the switch, pins 1 and 2 are smaller than the others. Here, where the upper arms are, there is an unnecessary block (for the headlight cleaner). I cut it off and collected all the wires. You can buy it if you wish. Black-blue to 4, and with a harness, respectively, 1, 2, 3. To pin 5 of the switch (in the center), connect the yellow-blue plus from the stove button at the very end when installing the console. I made the illumination of the levers separately, so we use the window illumination wires to illuminate the switch.
To install the switch, take out the original plug and trim the plastic a little on the right and left. We place the switch so that 0 is at the bottom, and the latches are on the right and left. An elastic band fits the frame, I don’t know why. I trimmed it and added speed marks with a stroke. I'll probably redo it in the summer. For illumination, I took a strip with 9 diodes, cut a slot, connected it to the wires from the backlight of another window (+/- not to be confused), and covered it with silicone. I hooked up the backlight of the original key so that the wires would not dangle:
VAZ 2109 heater resistor where is it located
Dear visitors of the site “Everything about cars”! We will be very grateful for your comments on the video clip “VAZ 2109 stove resistor where is it located”, registration is not required for this. We also ask you to let us know if you have any problems playing the video.
thank you, clearly explained
HANDSOME
excellent sp
Thanks to you, I changed the stove, but now there is a problem with the engine, can you help me?
also VAZ2110 2007 8-cl. Troit started on both gas and gasoline. the module is working, checked the spark plugs, new navaya wiring, all available sensors, I think I changed it, can still take it apart, what do you think, thank you in advance
There is compression there, but I don’t know how much, I checked it the old-fashioned way
In any case, thank you for coming too
will you stay in touch with me and help me, I hope?
Thanks OK
How can I contact you personally bro?
Sensible video without unnecessary information. Thank you
very useful information. Thanks a lot. My resistor flew off, I didn’t know where it was located. Now I'll replace it myself.
Well done, he explained in detail. I found out my reason, there was no 1. 2 speed, only 3, I will change the resistor.
When I switch to all modes, A, 1, 2, 3 does not react at all, what's wrong, the fuse is intact
Hello, tell me when you turn on the stove there is a strong vibration
I didn’t even know that there was some kind of resistor there, thanks guys. I went to repair mine
Is this a new model or an old one and how can you tell the difference?
Other details
The standard heater radiator and thermostat are also replaced. Preference is given to three-row copper radiators. They are more efficient in operation and leak less often. The thermostat is replaced with an analogue one or its thermal insert is modified.
Do-it-yourself modification of the stove on Niva 21213 with your own hands is quite labor-intensive and takes a lot of time. To modify the heating system of this car, you can find ready-made kits on sale that make this work easier. The procedure is presented in the video “Remaking the stove on Niva 21213 with your own hands: video instructions.”
Niva-stove cabin filter and fan motor 2108 are easy to install with your own hands in a Niva VAZ 2121 21213 21214 2131 LADA 4x4 URBAN 21215, 21219, Niva-Bronto, 2129, 21310, Niva-pickup, 21214-M, LADA 4x4 URBAN.
Features of the heating system
First of all, you need to understand on what principle heating works. Only after gaining basic knowledge can you judge a potential breakdown.
It is recommended to take the following features into account:
- the electric motor must supply hot air;
- the stove can be turned on and off;
- the fan must operate successfully at various speeds;
- a radiator is required for the successful flow of fluid used when operating the stove.
In fact, only if all the parts are in working order can you count on the successful functionality of the stove installed on a VAZ-21099 car.
Principles of designing cooling systems
A decrease in the efficiency of the cooling system leads to an increase in the temperature of the pistons and a decrease in the gaps between the piston and the cylinder. Thermal gaps are reduced to zero. The piston touches the cylinder walls, scoring occurs, overheated oil loses its lubricating properties and the oil film breaks. This mode of operation can lead to engine seizure. Overheating is accompanied by uneven expansion of the cylinder head, mounting bolts, engine block, etc. Subsequent destruction of the engine is inevitable: cracks in the cylinder head, deformation of the joint planes of the head and the cylinder block itself, cracks in the valve seats, etc. — it’s unpleasant to even list all this, so it’s better not to let it come to that!
The engine and oil cooling system is designed to prevent such developments, but in order for the system to cope with its tasks, it is necessary to use high-quality coolant (coolant). Low-freezing coolants are called antifreeze - from the English word “antifreeze”. Previously, coolants were prepared based on aqueous solutions of monohydric alcohols, glycols, glycerin and inorganic salts. Currently, preference is given to monoethylene glycol, a colorless syrupy liquid with a density of approximately 1.112 g/cm2 and a boiling point of 198 g. The task of coolant is not only to cool the engine, but also not to boil over the entire operating temperature range of the engine and its components, to have high heat capacity and thermal conductivity, not to foam, not to have a harmful effect on pipes and seals, and to have lubricating and anti-corrosion properties.
In the 70s, antifreeze was produced based on an aqueous solution of monoethylene glycol with a crystallization temperature of 40 degrees. It did not require dilution with water when added to the cooling system. This drug was called TOSOL - after the name of the laboratory “Technology of Organic Synthesis”. Because the name is not patented, then TOSOL is a ready-to-use product, and “antifreeze” is a concentrated solution (although TOSOL is also antifreeze).
Ready-made antifreezes are colored for safety and catchy colors are chosen: blue, green, red. During operation, antifreeze loses its beneficial properties - its anti-corrosion properties decrease, and the tendency to foam increases. The service life of domestic coolants is from 2 to 5 years, imported 5-7 years.
The figure below shows a diagram of the car's cooling system. There is nothing special or complicated in the cooling system and yet...
When the engine starts, the water pump begins to rotate. The pump drive may have its own pulley driven by an accessory belt or driven by the rotation of a timing belt. The cooling system contains an impeller, which rotates and drives the coolant. To quickly warm up the engine, the system is “shorted”, i.e. The thermostat is closed and does not allow fluid to enter the radiator. As the temperature of the coolant rises, the thermostat opens, transferring the system to another state when the coolant passes along a long path - through the radiator of the cooling system (the short path is blocked by the thermostat). Thermostats have different opening characteristics. Typically the opening temperature is marked on the edge. It’s probably not worth explaining the design of the radiator. A fan switch sensor is installed at the bottom of the radiator. If the coolant temperature reaches a certain value, the sensor will close, and because If it is electrically connected to the break in the power supply circuit of the electric fan, then when it is shorted, the cooling system fan should turn on. As the coolant cools, the fan turns off and the thermostat closes the long path to a short one. It's simple, but not very...
This scheme is the basis, but life does not stand still and various manufacturers are improving cooling systems. On some cars you will not find a sensor for turning on the cooling fan, because... The fan is turned on by the engine ECU depending on the readings of the coolant temperature sensor
It is worth paying attention to the situation in which when the ignition is jammed, the cooling system fan immediately turns on. Either the temperature sensor is faulty, or its circuits are damaged, or the engine ECU itself is faulty - it “does not see” the engine temperature and, just in case, immediately turns on the fan
On some vehicles, special electric valves are installed on the way to the heater, allowing or blocking the path of coolant (BMW, MERCEDES). Such valves sometimes “help” the cooling system fail.
How to replace a stove radiator
STYLE-AUTO Spare parts for foreign and domestic cars in Pervouralsk
So, how to change the heater radiator? In fact, the procedure is easy, but it still needs to be understood correctly.
First you need to prepare a couple of containers that will be needed for automotive parts. In this case, one container is recommended for plastic elements, and the other for screws.
In order to get to the torpedo bolts, you first need to remove the trim located in its upper part. In this case, it is advisable to place small empty containers nearby, since there is a risk that the coolant will start to leak. For maximum safety, a volume of 6–7 liters is recommended.
Now you need to move on to inspecting and replacing the radiator with an understanding of how to remove the old one. At the same time, new products must be reliable and of high quality, since any defects can negatively affect its functionality. When replacing, it is recommended to use a set of tools: sockets and screwdrivers, a flashlight.
In each case, replacing the stove with a VAZ begins with closing the tap, and at this time the stove must be set to cooling mode. It is best that the engine is also completely cooled.
Now you can unscrew the radiator mount, lift the rod located above the radiator, and remove the pipes
It is important to remember: up to two hundred grams of liquid can leak from the first pipe
After this, you can work with subsequent pipes. Most likely, in this case, the liquid will not drain, but still, for safety reasons, you can put a container, because when removing the pipes, you need to be prepared for various options for the development of the situation.
The next stage is to remove the radiator, which moves easily. At the same time, the edge of the torpedo may interfere with its movement, which is recommended to be raised slightly and rest against the lower part of the glove compartment. After that, you need to put the lower one, located on the side of the passenger seat, on its mount. Fortunately, you will be able to reach the stove freely, because the high panel will no longer be in the way.
High-quality foam rubber, which is sold along with the new part, should be attached around the perimeter of the installed radiator.
Now the radiator can be inserted into the body of the heating equipment, put on the pipes and make a connection using clamps. To prevent antifreeze leakage, the pipes should be carefully tightened after a few days.
After the replacement is completed, you can check the operation of the stove. Knowing how to clean the radiator of the VAZ-21099 stove, you can count on its successful maintenance for the long service life of your heating equipment.
Description of the circuit operation
1. When power is turned on, the last selected power is set. LED_0 indicates the device is ready for operation. LEDs LED_1 - LED_10 display the set fan power.
2. Change power using the PLUS/MINUS buttons.
3. Setting the speed of power change. 3.1. Press the PLUS and MINUS buttons simultaneously. 3.2. LED_0 will start flashing. The number of power LEDs turned on corresponds to the selected speed. 3.3. Use the PLUS/MINUS buttons to change the speed. 3.4. To exit the mode, press the PLUS and MINUS buttons simultaneously again. LED_0 will stop flashing.
4. Via
3 seconds from the last button press, new settings will be written to non-volatile memory.
Stove repair high panel VAZ 2109
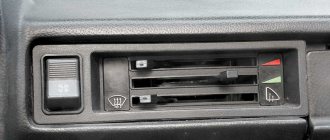
Suddenly winter came. I encountered a problem known to half of the owners of old VAZs - hot air only through the central nozzles of the air ducts, and into the legs, ears and glass - the outboard negative air. (Judging by reviews on the Internet, the remaining half of the owners of old VAZs have sub-zero air even from the central nozzles). At first I tried to solve the problem by bending the heater damper cable, as they write on many forums. It didn’t help, but it can help people whose foam rubber in the flaps is not completely caked, like mine, but a little bit. I decided to look the impudent stove in the face. If it blows hot from the central nozzles, everything is fine with the heater tap, the fault is somewhere in the dampers.
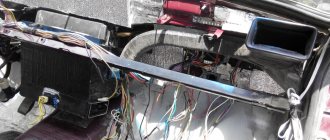
I see this thing:
Most likely, ten years ago this foam rubber was not so compacted, and in this position the damper completely blocked the air from the street. But not now. And in order to close the damper even further, its lever must be pulled not to the side, where the cable pulls from the stove panel, but slightly upward, and no shortening of the cable can correct this. At the same time, if there is at least some gap, the outside air goes into all the air ducts except the central ones, without mixing with the air from the heater. This is the design of the VAZ stove; you can’t force it to mix.
I was prevented from disassembling the panel further in order to glue it all, laziness and lack of knowledge about what to unscrew next, so a spontaneous decision was made: the damper lever, which is usually pulled by a cable, was fixed with a copper wire, which was pulled at the other end through an iron corner to some then the bolt sticking out from above, and the cable from the stove panel was thrown off the lever so that it dangled freely.
While the damper lever is pulled in with a wire, air enters the cabin only through the heater radiator. The air temperature is perfectly regulated by the openness of the heater tap, since the lever on the stove panel is responsible for both the damper and the heater tap. You move it all the way to the right - in the Tashkent cabin, all the way to the left - the faucet closes, after 20 seconds the heater radiator cools down, cold street air comes in, so you don’t even have to return it to how it was in the summer.
Stove design
The interior heater is made up of two plastic casings (left and right). They are connected by fastening brackets. A sealing strand is placed in the grooves of the structure. An electric fan forces forced air into the cabin. It is secured with two screws on top of the stove. It is easily accessible from the combustion engine side.
The stove fan is driven by the impeller of an electric motor. The VAZ 2109 stove motor has two resistor spirals, which provide three rotation speed options. The stove circuit includes an additional resistor to obtain the desired rotation speed. The radiator consists of cooling plates, two rows of tubes and two plastic tanks.
The stove is controlled by three handles. A bracket is attached to the instrument panel, on the axes of which these handles are installed. The stove control lever acts on the radiator valve lever and the damper drive lever. If the walker is moved to the right to the maximum, the damper and valve are completely open - and the VAZ 2109 heater fan supplies air to the radiator, in which heated antifreeze or antifreeze is circulated. Accordingly, if the handle is in the middle position, the damper and tap open halfway - and the air becomes less hot.
By moving the lever to the extreme left position, we get a completely closed tap and valve. The stove blows cold air.