There is nothing perfect in the world. This becomes especially clear when it comes to modifying (upgrading) the stove on a VAZ 2110. No one wants to freeze in a car in winter, not to mention the windows covered with ice. Upgrading the VAZ 2110 stove becomes for motorists not just a momentary whim, but a cruel necessity dictated by the harsh Russian frosts.
Modification of the VAZ 2110 stove
In order to withstand the imperfections of the world in the form of the VAZ 2110 heating system, it will be enough to arm yourself with a tube of silicone or sealant, polyurethane foam, simple plumbing tools, and also a certain amount of patience. Without theoretical foundations, of course, there is no way either.
Refinement of the stove
Owners of VAZ 2110, 2111 and 2112 cars often face the problem of a poorly functioning stove. The most common complaint is the constant fogging of the side windows and poor airflow for the feet of both front and rear passengers. You can very easily deal with these problems even on your own, without contacting service centers. There are many recommendations on the forums for correcting these problems through small improvements with photos and detailed descriptions, but this article will provide an overview of the most common and effective methods.
conclusions
Thus, through far from the most complex manipulations, you can achieve a truly amazing effect. Just sealing the cracks of the VAZ 2110’s thermal channels can improve the temperature balance inside the interior of your car, not to mention a lot of simpler and more reliable methods.
Before you jump into upgrading your heating system, it’s still worth checking the operation of the stove itself. Do not forget to change the air filter of the VAZ 2110-2112 furnace every 15 thousand kilometers. Poor heating of the interior can also be caused by a faulty fan or a leaking coolant radiator.
Air duct modification
Damper leaking
The main reason for a poorly functioning heater is a leaky air flow distribution damper, which is originally installed on the car, causing the heat flow to dissipate in the heater itself.
In order to fix this, it is recommended to make a new damper from plastic, which will fit more tightly and ensure precise direction of air flow. Additionally, the housing is sealed to ensure higher heater efficiency.
As a rule, this helps solve the problem, but a more noticeable effect will be achieved if you additionally tune the heater as a whole.
Side windows fogging
For example, to solve the problem of side windows fogging, two options are used:
- or lay corrugations;
- or seal as tightly as possible the cracks in the panel itself, through which significant losses of air flow occur.
The corrugation helps to improve the airflow of the feet, but it will not have much effect for the airflow of the side windows. So the best way to improve side airflow is to seal all the cracks in the panel. It is especially worth paying attention to the holes for the fastening bolts - they should be sealed with tape or modelin. After this, you can additionally pay attention to the joining of the upper and lower parts of the panel.
These measures will help eliminate air loss, and all the warm air will be directed to the right place, so that the stove will begin to work noticeably more efficiently.
Airflow for the feet of the driver and passengers
As for the airflow of the driver's and passenger's feet. It's all about the air duct grille, it has the wrong angle, and all the warm air is most often directed into the foot mats and dissipated, thereby leaving the passenger's feet cold.
The solution is quite simple - you can dismantle the lower part of the grille and turn the guides to the upper side, thereby redirecting the flow of warm air.
If you don’t want to do something ugly, you can simply replace it with side door grilles, these are sold in car dealerships for about ten rubles apiece. In this case, there will be no overheating, since there is no need to set the heating to maximum, because the low temperature set will be used more efficiently.
Blocking the rear airflow
There is also an option for car owners who often drive alone or only with a passenger in the front seat.
If heating the rear seats is not important, then you can simply block the flow of warm air to the rear, and in fact you will not have a separation of flows - all the warm air will go exclusively to the feet of the driver and front passenger.
Shutting off the interior airflow
A roughly similar principle can be implemented with central dampers.
Car owners often block the flow of air into the cabin, thereby increasing the flow to the feet and blowing the glass, and the cabin itself warms up just as effectively.
Insulation of the interior
In order to make the interior warmer, it is recommended to insulate the interior itself; to do this, change the seals on the doors and additionally insulate the floor, ceiling and doors with any heat-insulating material for cars.
EQUIPMENT WITH THERMAL INSULATION OF FOREIGN CARS
Budget foreign cars are popular in Russia, they differ only in better sealing and good stoves. In fact, there is no insulation as such in foreign-made cars.
It is imperative to insulate the interior of foreign cars in our cold weather. If the thermal insulation of the engine can be solved with the help of a car blanket, then the body needs to be worked on. The best insulation material is penofol with its adhesive base and foil.
We remove the decorative door trim, cut out the insulation to the required size, leave holes so as not to interfere with the moving parts inside the door, and glue the foil part outward. Everything is simpler with the trunk; by the way, there are even places for fastening insulation. Usually this treatment is sufficient.
If your region has a more severe climate, you can cover the floor with insulation and cover the ceiling of the cabin with it.
Foreign cars can be equipped with thermal protection made of vibroplast - this material not only dampens vibration, but is also a good insulator in itself. We lay them on the floor, ceiling, all doors and trunk.
To keep the engine warm, we use a car blanket, although some manufacturers offer a plastic plate to cover the radiator, but this is clearly not enough.
In conclusion, it must be said that the more carefully and thoroughly you treat the interior of your car, the more comfortable and safe you will feel on the road.
Didn't find the information you are looking for? on our forum.
We are modifying the stove on the VAZ 2110
Materials and tools for work: - bitoplast 10; — plastic corrugation (tube); — grille (the author took it from old speakers); - Super glue; - a piece of sewer pipe; - cutting tools, screwdrivers, pliers, wrenches, etc.
Step one. Solving the problem of side airflow
If the stove does not blow well on the sides, then this problem can be solved in two ways. The easiest way is to simply seal all the cracks, which will increase the efficiency of the airflow. You can also lay a corrugation, but according to the author, the corrugation will allow the legs of the front and rear passengers to be well aired, but it will not have any effect for airflow of the sides. Therefore, sealing will be most effective in this case.
To seal the cracks in the panel, anti-creak (modelin) is used. It should also be used to seal the bolt holes.
Step two. Upgrading the stove damper
Thanks to the damper, air is directed to the windshield, legs and face. Initially, this damper does not fit tightly and some of the air goes through the cracks where it is not needed. Using modelin and double-sided tape, you need to seal the valve and all the cracks. The body can be covered with bitoplast 10 instead of a standard sponge. In some places the author glued as many as two layers.
After this, you will need a coffee can, plates are made from it and screwed as shown in the photo. The plates will need to be painted black, so they will not be visible through the grille. As a result, when you turn on the blower in your face, the air goes to the side windows and only into your face. When you turn on the flow to the windshield, the air goes only to the windshield and nowhere else. When the footwell flap is turned on, 50% of the air will go to the side windows, 25% to the feet and 25% to the windshield.
How can you upgrade your VAZ-2110 stove yourself?
Owners of the “ten” often encounter various kinds of problems in the design of this car.
They can touch, in principle, any unit, including the stove. At the same time, when it’s winter outside, of course, no one wants to freeze while traveling. So we have to finish what the designers started, modernizing the stove in order to make it work more efficiently. Considering the harsh Russian climate, such improvements can safely be called a necessity, and not a whim of car enthusiasts. Generally speaking, the design solution of the VAZ-2110 stove can be described as quite successful. But in order for this unit to work normally, it also requires high-quality assembly and the absence of effects in the components. At the same time, both the first and second are long-standing problems of the domestic automobile industry. So motorists have to fix factory defects on their own.
About replacing seats
The seats on the VAZ 2112 cannot be called comfortable. This is especially noticeable on long trips. So, at the first opportunity, drivers put seats from other cars on the “two-wheeler.” As a rule, Skoda Octavia acts as a “seat donor”.
It is impossible to install the seats from this car on a VAZ 2112 in the garage, since serious adjustment of the fasteners and welding are required. There is only one option: use the services of specialists with the appropriate equipment.
Source
How can you improve the VAZ-2110 stove
So, let's look at the situation when the interior of the "tens" is not heated efficiently enough. Accordingly, this problem should be eliminated. By and large, upgrading the stove of a VAZ-2110 car with your own hands is not a very difficult job, but it still cannot be done without a certain amount of time. Of course, you still need to have some skills, but almost anyone can do it. The main thing is to be patient and have the appropriate desire. In addition, to modernize the stove you will also need:
- sealant or silicone;
- polyurethane foam;
- simple locksmith tool.
You can, in particular, follow the simplest path with minimal effort. This option is the most optimal solution when the result needs to be obtained in the shortest possible time, but there is no time or desire to engage in a complete rework of the entire system.
In particular, the easiest way would be to simply block the stove ducts through which warm air is supplied to the rear passengers. Naturally, you sacrifice the comfort of those sitting behind you. But this option is fully justified if the driver almost always drives alone. This simple manipulation will increase the flow of warm air, heating the foot area in the front of the car.
The same result can be achieved using another simple method. In particular, the air channels of the central deflector of the stove should be blocked. To do this, you need to cut, for example, from an aluminum sheet, a plug of suitable size. By blocking the central deflector, you will thereby increase the flow of warm air directed to other furnace ducts of the car.
Another option for upgrading the VAZ “tenth series” stove is to replace the standard 5-hole thermostat with a more modern one, with 6 holes. In this case, you should not have any complications or problems. These thermostats are interchangeable. At the same time, the 6-hole version is more advanced from a technical point of view. For example, it helps to increase the heating efficiency of a stove radiator. And such a replacement will not be that expensive.
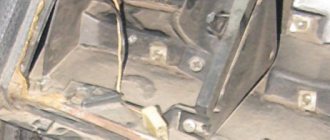
Now let's look at more labor-intensive upgrades to the "tens" stove. We are talking about improving the air ducts, and this will require removing the standard installation. Naturally, more time and effort will need to be spent on such work, however, the positive effect here is much more noticeable. In order to do everything thoroughly, you need to seal the cracks in the torpedo air ducts located on the front panel.
In addition, certain changes should be made to the design of the car's stove damper. It will also be necessary to upgrade the systems responsible for heating the rear passengers and the driver’s foot area. In particular, you will need to lay new heating ducts - this can be done using corrugation. As you can see, there really is something to work on. However, all the time and effort spent will more than pay off in the cold winter season when there is biting frost outside the window, and the car interior is warm and cozy.
So, let's get to work. First of all, you should remove the dashboard, dashboard and air ducts. Do not forget that before removing the instrument panel, you should unscrew the negative terminal from the battery. Next, we dismantle the cover of the floor tunnel lining, the air ducts of the heating system, and then the housing itself. The latter is easy to do - you just need to unscrew the screws. Before removing the dashboard, the glove box must be removed. There is also nothing complicated here, but everything needs to be done carefully so as not to break anything. Next, unscrew the bolts that secure the instrument panel, as well as all the mounting screws.
To ensure normal airflow of warm air into the interior of the “tens”, a sufficiently large number of cracks in the torpedo’s air duct system should be sealed. Thus, you not only reduce heat loss, but also increase the pressure of the air flow flowing to the side windows. To get rid of cracks, it is best to use silicone or modelin. Do not forget to also seal all fastening work. That’s it, the first stage of work on modernizing the “tens” stove is over.
Installation of thermal insulation on UAZ cars
In the UAZ-469, in winter, another heater is installed or the standard one is replaced with a device of increased power. It all depends on the finances and taste of the car owner; we recommend the heater used on minibuses of the KITB.3221-8110010 brand.
If your UAZ is equipped with equipment for running on gas, then a gas autonomous heater is perfect, but its power must be at least 2-4 kW. The electronics of this device automatically maintains the temperature regime inside the cabin, but a specialist must connect the device.
The additional heater is located at the rear at the very end of the cabin.
Insulate the bottom of the cabin with warm linoleum or a set from the store designed specifically for the UAZ floor, consisting of foil foam rubber. Cover the interior ceiling, sides, door panels and the area under the dashboard with the same insulation. UAZ Hunter seals are suitable for all door openings.
Install a warm polymer top instead of a canvas one, and seal all holes and cracks in the interior.
Attention! To truly insulate the interior of a UAZ-469 with your own hands, all of the above must be done only in a comprehensive manner.
When installing heat protection on a UAZ-3909 or, simply put, on a “loaf”, you must try not to seal the standard ventilation system, making the interior a kind of thermos. If you accidentally block the factory ventilation, a large mass of condensation will form in the cabin.
Polyurethane foam, coupled with polystyrene foam covered with foil, prevents heat from escaping from the interior and lasts quite a long time, so this coating is fully justified. Another option is to sheathe the interior with 4 mm plywood or cover it with medium-thick foam rubber.
It is also recommended to cover the floor in the loaf cabin with aluminum sheets. If additional heaters are placed under the seats on such a floor, the heat in the body will remain for a long time.
Warning! The thicker your insulation, the less space in the cabin.
So for little money you can pretty well insulate the interior of a UAZ loaf with your own hands.
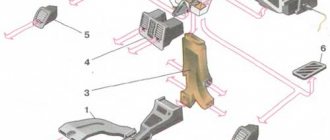
Components
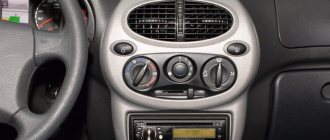
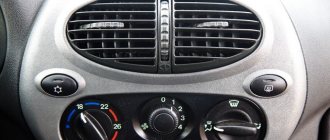
In VAZ 2110 cars, as in most modern cars, the normal air supply to the cabin is combined with heating and is controlled by a single mechanism consisting of:
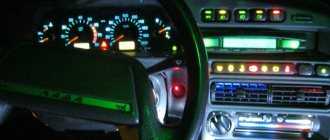
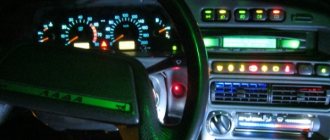
- SAUO block (stands for heater automatic control system). It has two handles. The one closest to the driver sets the temperature of the incoming air. The usual range is 16 -30°C. The extreme position of the handle with a blue dot indicates that the heater damper is closed and only cold air flows. Setting the handle to the position with the red dot means that this damper is fully open, maximum hot air flows. The handle located further from the driver is designed to set the fan speed. With its help, the strength of the air flow is ensured; SAUO unit tuned with LEDs
- Ceiling air temperature sensor in the cabin, and a mini-fan built into it. It is located next to the lighting fixture on the ceiling of the VAZ 2110. From the ceiling sensor, a signal about a decrease (increase) in temperature is sent to the control unit, the corresponding relay turns on or off the motor that controls the damper;
Removing the ceiling air temperature sensor in the cabin Internals of the ceiling air temperature sensor in the cabin
MMR (micromotor reducer) with a shaft position resistor. Available in new or old style. The old one was produced until 2003. These are, in fact, devices that provide comfort from the cabin. You also need to know how those located in the engine compartment work.
MMR of the old type MMR of the new type
Design Features
For the VAZ 2110, it is possible to install two types of stoves - new and old. Regardless of the engine used (injection or carburetor), there are no fundamental differences in the designs of the stoves.
But what is the difference between the new and old type stoves? Let's try to figure it out.
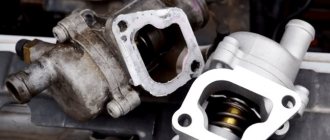
- Radiator design. This is the main difference between the devices. Therefore, when replacing a radiator from an old one to a new one, be sure to take into account the installation nuances;
- The controller knob on stoves is slightly different. Old-style heaters have a main problem - they have been discontinued. They cannot be an analogue for 4 and 5 position controllers, which began to be equipped with dozens of them in the fall of 2003;
- The micro-gear motors for the stoves are different, starting in September of the same 2003. The difference lies in the shaft position sensors (resistors). Therefore, when making repairs, make sure that the devices are truly interchangeable and that you bought old-style resistors for your old stove, not new ones. Otherwise the gearmotor will not work.
We recommend: Wiring on Hyundai accent and other models: its replacement and electrical diagram
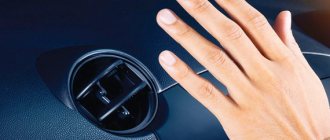
How heating and ventilation work
There is supply and exhaust ventilation in the interior of the VAZ 2110. The windshield trim has holes through which air either spontaneously (when the car is moving) or forcibly - with the help of a heater fan - enters the passenger compartment. The supplied air exits through the provided slots - at the ends of the doors, between the upholstery, and door panels.
But you don’t need to think that the VAZ 2110 is all covered with cracks, and the air simply doesn’t stay in it.
In fact, all of the holes mentioned are equipped with valves that work “for release” and prevent (at least hypothetically) the spontaneous entry of air from the outside.
However, you can make high-quality tuning of the heating system, then the car will be truly comfortable.
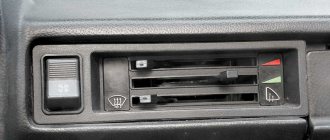
Heating is done as follows:
- The air passes through the heater radiator, while warming up. The heating temperature is controlled by a relay;
- Next, the warm air is distributed through the air ducts;
- Special deflectors direct the main flow of hot air to the windshield and to the center of the cabin. The flaps can be used to block/open the flow to the side windows;
- There are two more flaps - for heating the front window and also for the feet of the driver and passengers. For this purpose, deflectors are provided for the front seats: one pair is at knee level, the other is almost on the floor. For rear passengers, there are air ducts under the front seats plus a pad on the floor tunnel;
- There are special handles to control air flows;
- The fuse located in the mounting block protects the entire electrical heating system from blowing. Operating principle of the heater
If desired, you can carry out tuning, adjust the flow of heat to different parts of the VAZ 2110 interior, thereby improving comfort.
Other causes of failure
In addition to the dampers, the fan often starts to malfunction. Possessing as many as four operating modes, its malfunctions can be very different. The first thing you need to do is look at the fuse (F7). If the fan refuses to work at all, most likely this is the problem.
There are times when the above-mentioned unit performs poorly or even stops rotating at low speeds. This problem is more complicated, since, most likely, it is associated with the burnout of additional resistance. This is not that difficult to fix, but the problem will be the path to solving such a problem. The broken part can only be reached through the engine compartment. In addition, it is in the engine compartment that you often need to look for the reasons why only warm air comes out, while the adjustment is at the “maximum” position.
It's all about adjusting and supplying air inside the car body.
The climatic conditions outside the car are also important to consider. But it’s better to leave all the troubles with the engine compartment in the hands of the service station.
Repairing heaters, stoves, and air circulation in this machine is very difficult, so independent work must be carried out with a great understanding of responsibility and good experience in machine repairs.
Otherwise, when the VAZ-2112’s heater does not heat up, it is better to immediately contact either the insurance service or a private service station. Taking into account the reasons described above, the driver will know exactly what will be done with his car, and may not be afraid of additional markups. The cause of a malfunction always lies in small details and simple parts, since they are often made from inexpensive materials that tend to break. You can’t rush to get into the wilds of the car. First you need to think wisely about what to do, and only then begin the difficult repair of the VAZ-2112 heating system.
Operating modes
You can configure the heater operation manually or automatically. That is, you can set the temperature sensor according to your wishes, for example, at 22°C. If everything is in order, then the manufacturers promise that the deviations will be no more than 2°C, after which the relay will turn on the heating again, and after reaching the specified parameters, turn it off. But if failures occur, then after checking the functionality, it is quite possible that the sensor or relay will need to be replaced.
You can set the automatic mode. For this there is a special screw, the so-called tuning screw. It is advisable to make adjustments with the windows and doors closed. The fan handle should be in position “A”, and set the temperature at your discretion.
Checking components
Naturally, disassembling the stove on a VAZ 2110 and checking its components is necessary if you are dissatisfied with its operation, and also if it cannot be adjusted.
- The first thing to do is check to see if the fuse has blown. And although, if this happens, the thought immediately arises - change the blown fuse, do not rush. This is unlikely to immediately solve the problem; most likely, it is not the cause, but a consequence of some kind of failure that needs to be found;
- First of all, you need to check whether the damper moves when the parameters of the heater sensor change. Carefully, so as not to break the wire going to the backlight, remove the deflectors. Now you can clearly see whether the damper is turning or not. If you need to replace the heater damper, then installing an aluminum one instead of a plastic one will be justified;
- Check the resistance of the temperature sensor. If the temperature in the cabin is 16°C, then its resistance should be 250 Ohms, at 22°C - about 200 Ohms. If this is not the case, then installing a new sensor should help;
- It is also advisable to check the controller: remove it from the socket, turn on the ignition and, using the handle to change the temperature parameters, measure the voltage on the long connector. If the voltage does not change, then it is faulty;
- To check the gear motor of the stove, you will have to do a little disassembly: remove the frill, get to the drive of the gear motor (brown and pink wires are connected to it). Apply current from the battery to the connector. If it spins, it means it’s working, if not, you may need to install a new one;
- If the heater only operates in one position, the additional resistance (resistor) through which the fan is connected may have burned out. Installation of a new one is possible only from the engine compartment;
- Check if the wires in the controller are burnt out. To do this, it needs to be disassembled;
- On the right under the hood you will find the relay box. It is very possible that a wire has come loose from the relay responsible for operating the heater. At the same time, check the relay that turns on the heated rear window. If you do not have such heating, when tuning the stove, you can include this relay in the system;
- If the air entering the VAZ 2110 interior does not warm up sufficiently, be sure to check the antifreeze level, as well as the absence of its leakage from the heater;
If you are thinking about tuning the stove, then you should know that it is possible to install not only the “native” model, but also many others: Priorovskaya, Boshevskaya, etc.
Repair recommendations
So, we have dealt with the causes of malfunctions of the VAZ 2110 stove, now let’s move on directly to troubleshooting the problems.
Problems with temperature control are one of the most common causes of malfunction. In most cases, this is caused by a failure of the control unit or damper.
How to proceed in this case?
Check the functionality of the temperature sensor (it is located on the ceiling, near the interior lamp).
It is because of its malfunction that the required command may not reach the damper.
Diagnosing a sensor malfunction is simple - move the control knob from one extreme position to another. In this case, it is necessary to monitor whether the temperature of the outgoing air changes.
There can be two options here - the temperature does not change at all, or the air begins to warm up only when the handle is in the extreme (maximum) position.
In the first case, repairing the VAZ 2110 stove by replacing the sensor alone will not cost you - you need to look for another reason.
In the second case, we can confidently talk about the failure of the controller itself.
Failure of the gear motor.
If, when the heating is turned on, only cold air enters the cabin, then there are obvious problems with the stove.
In 9 out of 10 cases, the cause of such a malfunction is the failure of the gearmotor. Typically, replacing this element allows the system to return to full functionality.
The sequence of actions will be as follows:
- Remove the windshield wipers;
- Remove the frill (to do this, you need to unscrew three screws);
- Disconnect the wires from the gearmotor;
- Remove the old one, install and connect the new device.
For greater convenience, it is better to hire a partner as an assistant - he will adjust the air from the cabin. By the way, some drivers additionally install autonomous car heaters.
The procedure for removing the gearmotor of the VAZ 2110 stove.
Sometimes the cause of a malfunction of the VAZ 2110 stove can be the heater itself. To verify this (or refute the assumption), it is necessary to dismantle the main deflector.
This is easy to do - just bend the special fasteners and move the flap (you can crawl up to it from the side of the engine compartment).
If the radiator breaks down and needs to be replaced, you will have to disassemble the entire stove (if you wish, you can do this work yourself).
Poor quality of air heating by the stove.
If you are not satisfied with the VAZ 2110 stove in terms of the speed and quality of air heating, then you should take a few simple steps:
- firstly
, do not be greedy with money to buy a high-quality aluminum damper (it’s better to throw away the old “piece of plastic” right away). Such a replacement eliminates the curvature of the damper when switching and, accordingly, helps conserve heat;
- secondly
, install a new heater (the factory type is not of high quality). The most preferable option is to purchase heaters from a VAZ-2112-1 or 2112-2. But there are some disadvantages here too. The first type does not have a cleaning filter, and the second type does not have a recirculation function. Each of the filters described above can easily “go away” 15 thousand kilometers; - thirdly
, it wouldn’t hurt to spend money on installing pre-start heaters, or many people call such a device an antifreeze heater. Their task is to preheat the interior and engine.
Insufficient airflow in the area of the side windows and feet.
According to the complaints of many car enthusiasts, the VAZ 2110 stove does not warm up the legs and windows enough. In such a situation, the only way out is to improve the air channels inside the car.
You must act in the following sequence:
- 1. Make sure the stove is working. Only after this does it make sense to modernize the system.
- 2. Dismantle the panels completely and disassemble them into small components.
- 3. If there are cracks (slots) in the panel, seal them or install a new hose. But in most cases, the first option is quite sufficient.
- 4. Inspect the top and bottom of the panel carefully. If there are cracks, they must be carefully treated with anti-creak. Try to do everything efficiently, because you won’t have time to return to this work later. The fastening points and holes must also be carefully taped.
- 5. Remove the damper along with the factory seal. Now carefully glue the valve using modelin and process the existing gaps (including on the driver’s side).
- 6. Inspect the air ducts that go to the feet. If there are cracks, seal them.
- 7. Remove the factory air distributor, insert corrugated tubes into the holes and seal everything with foam for security. Particular attention must be paid to the pipe - it must have a thickness of at least four centimeters in diameter.
- 8. As a result, you get three tubes, one of which goes back to the passengers, and the other two go to the driver and front passenger. All that remains is to put everything back in place.