1200 rub. for the photo report
We pay for photo reports on car repairs. Earnings from 10,000 rubles/month.
Write:
High oil consumption can occur for both serious and non-critical reasons. The first category includes the following possible malfunctions - wear of the piston oil rings, clogged breather, wear of oil seals, leakage through the gasket or seals, and some others. The simple ones include: the wrong oil is filled, the oil filter is leaking, or leaking through the valve cover.
Also, do not forget that every internal combustion engine has such a concept as “natural waste”. That is, the oil naturally evaporates during engine operation (this is especially true for mineral oils). Therefore, it is necessary to regularly monitor the oil level and periodically add it.
What is normal oil waste
Before looking for the reason for the high oil consumption and the need for constant periodic topping up, it is worth understanding what value of waste is considered normal. And only then figure out why the engine began to consume oil.
Additives that reduce oil consumption
If oil consumption is high, it is necessary to repair the engine or replace the oil caps, but if the oil consumption is insignificant, special additives will help. To reduce the amount of engine oil "waste" use Hi-Gear OIL Treatment, Liqui Moly Oil Additiv or Read more
The oil burn rate depends on the type and condition of the engine. Let's start the review with naturally aspirated gasoline engines . For new engines, the rate of oil loss is about 5...25 grams per thousand kilometers, that is, approximately 0.005%. 0.025% per 100 liters of fuel burned. Occasionally you can find models in which a similar value is up to 30...40 grams (for example, V6 or V8 engines). As for normally worn engines, their natural consumption is considered to be 0.025%. 0.1% per 100 liters. That is, about 25.100 grams per 1000 kilometers. If the gasoline engine is very worn, the value increases to 0.4%. 0.6% per 100 liters, that is, 400.600 grams. The critical level is considered to be 0.8%, that is, 800 grams per 100 liters of gasoline. This engine needs a major overhaul!
Now a little about turbocharged gasoline engines . If the engine is new, then it will consume about 80 grams per 100 liters of fuel (conditionally per 1000 kilometers). As for worn-out units, the critical value is 2 liters of oil per 100 liters of fuel.
As for diesel engines , their waste consumption will be higher than that of atmospheric gasoline engines. So, it is believed that the norm is about 30.50 grams of oil per 100 liters of fuel. The critical value is 2 liters per hundred liters of diesel fuel. In this case, urgent repairs are necessary. Delaying it can lead to irreversible consequences.
Reasons for the indicator to light up
It should be noted that the oil pressure light may come on intermittently in some situations without presenting any danger to engine operation. Such situations include:
If the light comes on while driving or at idle, and does not go out after a while, then appropriate measures should be taken. The oil pressure indicator indicates the occurrence of failures and malfunctions. Such problems occur not only in the engine, but also in the electronic part. Some of the main reasons why this indicator lights up include:
In certain cases, it is necessary to stop and determine the presence of oil in the engine using a dipstick. If the level is normal, then you should get to the nearest station or home, and then determine the reason for the light coming on. If there is no oil, then continuing to move under your own power is strictly prohibited, because this may cause the motor to jam.
Reasons for the increase in lubricant waste in the engine
There are two main reasons why waste is increasing:
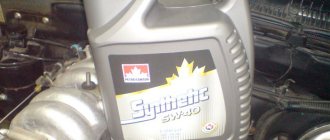
- Incorrectly selected or simply low-quality (fake) oil . It is necessary to fill the engine with oil with the viscosity and tolerances recommended by the car manufacturer. And try not to buy oils from dubious brands and untrustworthy retail outlets.
- Harsh engine operation . In particular, frequent operation at high speeds. At the same time, its temperature rises significantly, and more oil is needed for lubrication and cooling. Remember that more oil is consumed in the cold season. This is due to the peculiarities of crankcase ventilation. Therefore, to reduce waste, try to warm up the car at idle in winter!
Following these simple recommendations will allow you not only to reduce oil waste, but also to generally extend the life of the engine and its individual parts.
A decrease in oil level occurs for two reasons - due to waste and leakage (high consumption). So if the oil is selected correctly and the driving mode is moderate, then with a working engine there should not be excessive consumption. But when, under the same conditions, the lubrication decreases, it makes sense to search for the cause of the malfunction.
Emergency situations
In winter, when driving over bumps, a situation often occurs when the car tilts and the oil gauge lamp begins to flicker. This happens in quiet driving mode, in first or second gear. Subjectively, it is felt that due to the drop in oil level on potholes, there is not enough oil for normal operation of the pump. There are no problems with the engine, it works absolutely fine. The most likely reason for this behavior is a clogged pump valve.
You can get rid of this problem as follows. You need to start the car when cold, let the engine run for about 5 seconds, then press the gas pedal 3-4 times. After this the problem goes away.
When resorting to this method, you need to be aware of the possible consequences. Strong over-throttle on a cold engine can lead to rotation of the liners, so it is better not to resort to this method on unbroken and worn engines.
Conclusion
When determining the oil pressure in the power units of a VAZ classic, there is little point in looking at the gauge needle; it is more practical to focus on the light bulb that lights up when the reading is critically low. This is enough for effective control; it is not for nothing that the manufacturer later abandoned dial gauges.
If you want to constantly monitor the oil pressure in the engine, it is better to visit a professional motor mechanic who will take measurements with a certified mechanical pressure gauge. If you want to know the oil pressure in real time, you can install a similar pressure gauge in your car and display it on the dashboard. Such pressure gauges are sold in stores; UAZ cars are equipped with them, from where they can be removed and installed on a VAZ 2101-2107.
Causes of high engine oil consumption and methods for eliminating them
Let’s conditionally divide the reasons why oil consumption increases into complex ones (the repair of which is difficult and expensive in monetary terms) and simple ones. It makes sense to start diagnostics with simple ones (if there are corresponding “symptoms”).
Simple faults
Oil filter failure . This is a very common and frequent reason why the engine has high oil consumption. The breakdown can affect cars with both gasoline and diesel engines. The malfunction can be indirectly diagnosed by the oil stain that regularly forms under the bottom of the car (only during diagnostics is it important to determine that it is engine oil and not transmission oil). The reasons for this situation may be:
- the filter housing is loosely screwed (or not screwed at all);
- rupture of the filter housing (for example, if it was defective or it was simply of low quality);
- The sealing gasket has leaked.
There is only one way out - replacing the old filter and adding fresh oil. If necessary, you can clean the oil system.
Valve gasket wear . It may simply age from time or sudden temperature changes. As a rule, smudges are visible at bolted joints.
To solve this problem, you can try tightening the bolts to increase the pressure (preferably using a torque wrench). But it is best to completely replace the valve cover gasket.
Wear of the pan seal gasket . Here the situation is similar to the previous one. The engine oil pan gasket can be seen if you lift the car on a lift or work from the inspection hole. Its material becomes tanned over time and it loses elasticity. The way out of the situation is similar - either try to tighten the mounting bolts or completely replace the gasket.
How to fix a leak from the oil filter
So, in most cases, it is enough to fill in high-quality oil, taking into account the manufacturer’s recommendations and seasonality, change or install the oil filter correctly.
If you have basic skills, you can easily cope with cleaning the crankcase ventilation system. This means that in most cases, almost every driver in a garage can fix an oil leak with his own hands.
As for more complex faults, these include a failed pressure relief valve and a damaged thread on the fitting for securing the oil filter. In practice, a problem with the valve is more common, so let's specifically focus on checking it.
The main task is to check the valve spring, which is located under the plug. It is she who is responsible for the operation of the device; the overall performance will depend on the state of the spring. The specified spring must be removed from its socket for inspection. The presence of burrs, creases, bends and other defects is not allowed. Also, the spring should be tight, not loose.
If the spring can be easily stretched by hand, this indicates a weakening of this element. Also, the overall length of the spring should not be increased, which would indicate stretching. A decrease in length is an indication that part of the spring has broken off. In such a situation, debris must also be removed from the valve seat. Detection of any defects in the spring is a reason to replace it.
Why does diesel consume oil?
Diesel engines can also burn oil. In addition to the reasons listed above (which are relevant for both gasoline and diesel engines), diesel engines have one special one. In particular, significant wear of high-pressure pump parts. As a rule, they are lubricated and cooled using a common oil system. Due to worn parts and/or gaskets, engine oil can enter the engine combustion chamber.
Indirect signs of such a breakdown, in addition to an increase in the amount of oil consumed, is the appearance of thick black exhaust smoke (similar to blue smoke in gasoline engines).
What's the result?
Taking into account the above information, it becomes clear that when the first signs of an increase or obvious excessive consumption of engine oil appear, the car owner must take immediate measures to diagnose faults in the lubrication system. This approach often allows you to avoid costly repairs.
It is important to understand that an internal combustion engine (gasoline or diesel) is a complex mechanism in which one minor problem leads to more serious problems, including major repairs of the internal combustion engine.
Reasons indirectly related to the lubrication system should not be excluded. We are talking about a violation of the temperature regime, as well as problems with the fuel system, which lead to malfunctions in the operation of the internal combustion engine itself.
A few words about turbines
Engines with turbochargers have their own operating specifics, which can result in excessive oil consumption. Thus, old turbines were cooled by the engine lubrication system. Accordingly, if the turbine breaks during operation (bearings break), it can transfer oil from the engine through the bearings. Moreover, depending on how broken the turbine is, oil consumption can be quite large, up to 1.3 liters per 10 thousand kilometers.
Also, partial failure of the turbocharger can lead to an increase in crankcase gas pressure. And this in turn leads to oil entering the cylinders directly into the fuel injection through the crankcase ventilation system. In this case, it is necessary to inspect the turbine, repair it, and, if necessary, replace it.
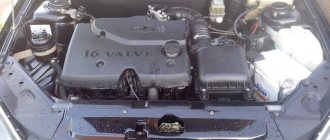
Characteristics of motor 11186
The project of a “people's car” at a budget price for the average LowCost user was seriously hampered by the economic crisis. For the Lada Granta Standard configuration, the technical characteristics of the existing ICE 11183 were sufficient.
However, for the Norma and Lux trim levels, a more powerful internal combustion engine was needed, so the management of AvtoVAZ, not having sufficient funding for the project of a new engine, came out of the situation as follows:
Unlike 11183, the piston of the 11186 motor bends the valve when the timing belt breaks, but the performance characteristics are improved:
| Manufacturer | AvtoVAZ |
| Engine brand | 11186 |
| Years of production | 2011 – … |
| Volume | 1598 cm 3 (1.6 l) |
| Power | 64.2 kW (87 hp) |
| Torque moment | 140 Nm (at 3800 rpm) |
| Weight | 140 kg |
| Compression ratio | 10,5 |
| Nutrition | injector |
| Motor type | in-line |
| Injection | electronic multipoint |
| Ignition | the electronic unit |
| Number of cylinders | 4 |
| Location of the first cylinder | TVE |
| Number of valves on each cylinder | 4 |
| Cylinder head material | aluminum alloy |
| Intake manifold | plastic receiver, electronic throttle |
| An exhaust manifold | combined with catalyst |
| Camshaft | from 11183 |
| Cylinder block material | cast iron |
| Cylinder diameter | 82 |
| Pistons | lightweight |
| Crankshaft | ductile iron, oil channels |
| Number of main bearings | 5 |
| Piston stroke | 75.6 mm |
| Fuel | AI-95 |
| Environmental standards | Euro 4 |
| Fuel consumption | highway – 5.7 l/100 km |
Excessive oil consumption on new cars
Engines that have just come off the production line or that have undergone a major overhaul do not yet have all the rubbing parts in perfect alignment. Because of this, for the first few hundred kilometers the engine operates in break-in mode, when there may be microscopic gaps between the parts. It is through them that oil leakage is possible. The situation will return to normal when the parts are worn in and the engine can be used at full power.
Do not forget that during break-in you need to drive in a gentle mode , and not give the engine heavy loads (including high speeds).
Finally
In conclusion, I would like to note that monitoring the oil level in the engine is not only the direct responsibility of the car owner, but also a guarantee that the engine will operate for a long time and in normal mode. Use the oil (with viscosity and tolerances) recommended by the machine manufacturer. And remember that if the car begins to “eat” oil heavily, then constantly adding lubricant will not solve the problem at the root, it is only a temporary measure that can only worsen the situation. If a problem is identified, it is necessary to diagnose the machine as quickly as possible in search of possible causes of engine oil leakage , and, accordingly, carry out repair work.
Since May 2013, our portal has expanded the thematic sections of the forum for the exchange of experience: subforums Americans, Koreans, Germans, French, Japanese have been added, due to the increase in the fleets of our visitors.
In addition to changing the style, our Chat, Mail, Entertainment and photo/video sections, Literature have become built-in and do not require separate registration. In addition, there are other useful and pleasant innovations that you can all familiarize yourself with when visiting the portal.
You can contact the administration with questions and suggestions in a special section of the forum or through the feedback form.
- print version
- Download/Print theme
- Display Modes
- Switch to: Tree-like
- Standard
- Switch to: Linear
Topic author frostov, 15.5.2003, 22:14
- Log in to reply to this topic
#1 frostov
- Users-2
- 4 messages
- Offline
- Card
- PM
Message added 5/15/2003, 10:14 pm
VAZ-2107 mileage 23000 Shell oil semi-synthetic
The scoundrel eats oil, when you drive to the floor after stopping, an oil smell appears in the cabin, as if you open the lid on an engine to add oil to a recently exhausted engine.
Help with advice, THANK YOU.
#2 MikeMan
- Offline
- Card
- PM
Message added 5/15/2003, 10:17 pm
#3 frostov
- Offline
- Card
- PM
Message added 5/15/2003, 10:46 pm
#4 AndreyF
- Offline
- Card
- PM
Message added 5/16/2003, 9:43 am
Gee-gee-gee. It started the same way for me. resulted in capital with a boring of 40 thousand km.
There may be rings, the piston pins in the connecting rods are jammed, the piston on a cold engine is tearing the block, with all the consequences, the guides may be, the rings may just lie down.
How can you see the rear seal? The front one is still possible, but to install the rear one you need to at least remove the box, and even then the clutch will most likely be driven due to oiling.
How to find a motor oil leak: available methods
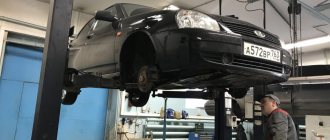
As already mentioned, to find the location of the leak, the engine must be inspected from all sides. First of all, you should check the engine oil level. If the level is elevated, we find out the reason; if it is lowered, we bring it back to normal.
Often a severe leak will be indicated by a drop in the oil level over a short period of time. In such a situation, you should pay attention to the condition of the oil pan. It is possible that repair or replacement will be required.
If we talk about gaskets and seals, severe leaks through them are also possible, but are less common. But the oil can gradually leak out, leaving drops under the car or streaks on the internal combustion engine.
If you can't see where the lubricant is leaking from, talc can be sprinkled on potentially problematic areas to pinpoint the source. The method is simple and convenient, well suited for garage conditions. Next, you need to start the engine for 10 minutes. in idle mode or drive the car for 2-3 km. Then you need to inspect the areas previously covered with talc, identifying fresh oil on the white powder.
Finally, we note that many service stations practice adding a special dye to the oil. This dye is a fluorescent dye. Next, the engine is started, after which it is allowed to run at idle or it is suggested to drive 3-5 km. Then, using a fluorescent lamp, the internal combustion engine is carefully examined, identifying areas where the oil containing pigment glows.
Didn't find the information you are looking for? on our forum.
The engine oil consumption is increased, but the engine does not smoke: the main reasons
To understand why the engine eats oil but does not smoke, you need to study the possible causes of increased lubricant consumption.
First of all, if there is no oil smoke, but oil consumption is higher than normal, at first glance it may seem that there are no problems with the cylinder-piston group.
As a rule, drivers often attribute increased lubricant consumption without obvious engine smoking to poor oil quality. Some people also tend to believe that after driving at high speeds, an increase in consumption is completely normal.
Let us immediately note that in both the first and second cases certain losses are allowed, but if you have to add oil in liters every 2-3 thousand km. mileage, then it has nothing to do with the quality of the lubricant and the operating characteristics of the car.
- In other words, there are problems that need to be fixed. Most often, the main cause is an oil leak. At the same time, there is not always an obvious leak, when after parking you can notice drops of lubricant under the car. For this reason, when parking, you need to place a sheet of white cardboard under the car.
- In this case, a leak cannot be ruled out either, but determining the location of the leak will be even more difficult. So, whether there are stains under the car or not, we move on to the next stage, which involves a visual inspection of the engine compartment and engine compartment.
You should immediately inspect the valve cover gasket, as this problem is very common. If oil leaks are visible on the outside of the engine, then the problem is obvious. The solution is to replace the valve cover gasket or install fresh valve cover sealant.
- The next element to check are the seals. Both the front and rear crankshaft oil seals can leak. Camshaft seals also often leak.
At the same time, the condition of the seals itself is difficult to determine during external examination. A sure sign of an oil leak is “fogging” of the oil seals, heavy oiling at the place of their installation, etc. At the same time, it is necessary to change the engine seals faster. The fact is that in addition to loss of lubricant, oil can get on other parts and components.
- Often grease leaks from under the oil pressure sensor. In this case, the problem is usually not solved by simply tightening the sensor; the leak is eliminated by replacing the device. Also, lubricant leakage may be due to the fact that the oil filter is of poor quality or installed incorrectly.
By the way, on many internal combustion engines the oil pressure sensor is located above the oil filter. Visually, a sensor leak can be mistaken for leaks from under the oil filter housing, but replacing the oil filter with a new one does nothing. For this reason, before deciding to replace the filter, you need to make sure that the sensor is working properly.
- The camshaft plug, which can be found on engines with two camshafts or internal combustion engines with a single camshaft that do not have a distributor, deserves special attention during diagnostics.
The only thing is that if the plastic plug can be changed quickly and easily, then the rubber plug requires more precise installation in place in order to get rid of leaks and achieve the desired tightness.
- If the engine is equipped with a distributor, oil may leak through the O-ring. Replacing such a ring is not difficult, but then you will need to set the OZ.
A more difficult case is when oil gets into the distributor. The main symptom is a characteristic cracking sound (bearing cracks), as well as malfunctions of the distributor. In this case, the distributor will require disassembly, cleaning and replacement of the bearing along with the oil seal.
Why does oil get into the VAZ 2107 engine cylinder?
- To the beginning of the forum
- Forum Rules
- Old design
- FAQ
- Search
- Users
the first three work well, they're all white
,
Before the capital, the car ate oil, but it burned, the spark plugs were black but dry
I bored out the block, changed the pistons and rings, and if you believe the mechanic, I also changed the valve guides and ground the valves. Maybe the cap actually broke? Solex hasn't done anything to the carburetor yet. The only question is, I bought a carburetor for a 1.2 engine, and if you believe the mechanic, it’s bored out, and at 1.5, do the jets in the carburetor need to be changed or something else?
A month ago I did a major overhaul of the engine, after which I drove 1000 km and lost 0.7 liters of oil. I unscrewed the spark plugs and saw that the first three worked well, they were all white, and the fourth was all covered in oil. I swapped the spark plugs, the same story, the spark plug was thrown again. At speed it works poorly, but it works, but in traffic jams it throws up so that it stops working, I unscrew the spark plug and the oil starts to drain. Before the capital, my car was eating oil, but it was burning, the spark plugs were black but dry, but the whole spark plug was wet, oil was flowing inside and along the threads. Nothing is leaking from under the valve cover. Does anyone have any ideas on this??
A month ago I did a major overhaul of the engine, after which I drove 1000 km and lost 0.7 liters of oil. I unscrewed the spark plugs and saw that the first three worked well, they were all white, and the fourth was all covered in oil. I swapped the spark plugs, the same story, the spark plug was thrown again. At speed it works poorly, but it works, but in traffic jams it throws up so that it stops working, I unscrew the spark plug and the oil starts to drain. Before the capital, my car was eating oil, but it was burning, the spark plugs were black but dry, but the whole spark plug was wet, oil was flowing inside and along the threads. Nothing is leaking from under the valve cover. Does anyone have any ideas on this??
We determine the wear of the engine piston group
The simplest and most accurate way to determine the wear of the engine piston group is to disconnect the breather pipe from the air filter and start the engine; if, while the engine is running, thick blue smoke comes out of the breather pipe or oil is knocked out, this indicates significant wear of the piston group, up to the breaking of the piston rings, and replacing valve seals will not help this engine. But no matter how I describe the smoke from the breather, it’s better to see once than to hear a hundred times, everyone has friends who have cars, if a friend’s engine runs well, ask him to remove the breather pipe on his engine and see what kind of smoke comes out (this is the engine with high mileage) but on a fresh engine there is no smoke from the breather; only air vibrates.
Photo. An example of a breather with a good piston group (although the engine has high mileage) the engine is idling. But pay attention that the tube that comes off the filter and to which the breather is connected is broken off. If you have such a problem, change the filter housing or weld the tube to the filter, you can’t drive through this hole directly into the piston group; dust and dirt will fly and this will lead to a quick wear of the piston group. But for a while, you can simply plug this hole with something and just let the breather hang.
Photo. The same engine at 5000 rpm as you can see there is almost no smoke, it is barely visible, this is a good piston group.
An engine with a good piston group will simply knock out air from the breather. Therefore, if the engine consumes oil but there is no breather, it is 99 percent the fault of the valve seals, change them. If the engine is burning oil and strong smoke is coming from the breather, it is the piston group and the valve seals that are to blame, but in addition to a bad piston group there may also be bad valve seals, but this advice is better to start repairing the piston group and immediately change the seals valves
This rarely happens, there is no smoke from the breather, but black-gray smoke is coming out of the muffler, all signs of wear on the valve seals, but after replacing the valve seals nothing has changed. This means the piston group is to blame. Black smoke indicates a very rich working mixture (the muffler will have a thick black deposit), which means the carburetor needs to be adjusted, and blue smoke indicates that oil is getting into the cylinders. In this case, due to wear of the piston group, this was determined only after replacing the valve seals. Advice: if the engine is burning oil, there is no smoke from the breather, always replace the valve seals first (it’s easier and cheaper), but if it doesn’t help, then you already know for sure that the engine piston group needs to be repaired.
Piston group repair advice
Many people simply change the piston rings and do not take into account cylinder wear, which leads to money being wasted and the engine running even worse. Why is it worse? The cylinder is formed by an ellipse (roughly speaking, in the form of the circumference of an egg) and when installing new rings, they do not fit tightly to the cylinder wall and a small gap is obtained between the cylinder and the rings, this leads to poor compression and high oil consumption. Below is a picture of a worn cylinder and a new piston ring with clearance.
Figure 1. Worn cylinder with new piston ring
Therefore, if you decide to repair the piston group, pay attention to the cylinders, the easiest way to determine the wear of the cylinder is to move your finger inside the cylinder from bottom to top in the place where the piston rings reach their top dead center and if you feel even a small step, be sure to bore the cylinders for repair pistons.
Photo 2. Piston with broken partitions
And it’s even easier to determine whether it is necessary to bore the cylinders for repair pistons, if the engine was burning oil, blue smoke was coming out of the breather, when disassembling the piston group, all the piston rings and pistons are intact, don’t even think about it, immediately take the engine block to a workshop for boring cylinders and bore for repair pistons. Buy repair pistons before you take the cylinder block for boring; the boring machine will bore the cylinder block for the pistons.
Photo 3. Piston with a pinched piston ring due to overheating
Even if you overpay a little for spare parts and boring, rather than simply installing new piston rings and new pistons on heavily worn cylinders, the result will be no good, the stingy pays twice.
Photo 4. Piston with drilled hole 1 and chamfered 2
I’ll give you another piece of advice: if you repair the car yourself, or even if not yourself, but in a workshop, ask the mechanic to drill 2 holes in the piston (one hole on both sides of the piston) as shown in photo 4 arrow No. 1 and chamfer it with a file or on the sharpener there is arrow No. 2. I’ll explain why this is necessary, in photo 4 you can see that the piston skirt is very lifted up due to the fact that the piston, when expanded by the edges of the skirt, removes oil from the cylinder and rubs dry. But if you drill a hole and chamfer the edge of the skirt, then the piston does not remove oil from the cylinder with the skirt, but passes it under the skirt, plus additionally oil passes through the hole in the piston under the skirt. Engines with such pistons are more playful, and even when overheated they do not suffer much. If you think that because of the holes in the piston, the engine will consume oil, I won’t immediately reassure you, the piston rings hold the oil, and the engine will definitely run better and faster. Drill the hole in the piston approximately in the center, there is nothing wrong if you drill slightly higher or lower or to the right or to the left. The drill can be from 4mm to 6mm. If this piston in photo 4 was initially drilled and the skirt was chamfered, then there would be no scuffing, but there would be a smooth surface of the piston skirt.
The engine is eating oil, what should I do? Video.
Case from practice
They brought a VAZ 2106 for repairs, some mechanic changed the piston rings, but couldn’t start it. I took up this scrap metal, adjusted the valves, adjusted the ignition, started starting it, the engine didn’t even show signs of life, and the starter turned as if without spark plugs, compression wasn’t even felt in the engine. I unscrewed the spark plugs, poured a full syringe of oil into the cylinders, and started the engine. I think it will work now and start starting again. I began to release the choke, but at less than 2000 rpm the engine stalled, and it was possible to start it only after a portion of oil was poured into the cylinders, plus smoke was pouring out of the breather like from a smoke bomb. I suffered with this engine for almost a whole day, but it still wouldn’t start without some oil in the cylinders. I called the owner, I said, take your scrap metal, I started it. The owner arrived, I said start it, he tried to start it, but it wouldn’t start, I said, let’s start it now, I unscrew the spark plugs, pour oil into the cylinders, the engine started, but only worked at at least 2000 rpm, and stalled below, plus a lot of smoke from the breather. I say just drive like this, take oil and a syringe with you, and when you stall, add oil to the cylinders. In short, he cursed at the mechanic who agreed to fix the engine for him for pennies, and left the six for repairs; of course, he had to bore the block for repair pistons, bore the crankshaft, and change a bunch of parts. I made this six, the owner was satisfied, although he had to pay twice, the first master and me. The point is, you can’t fool the hardware, if the cylinders are badly worn, then installing new pistons and piston rings will not solve the problem, but on the contrary, the problem only increases.
What you need to know about the VAZ 2106 oil pressure sensor: device, testing methods and replacement
The performance of the engine of any car depends on the presence of engine lubrication and the pressure created by the oil pump. So that the driver can control these important parameters, a corresponding indicator and an emergency lamp flashing red are installed on the instrument panel of the “classic” VAZ 2106. Both indicators receive information from one element built into the engine - the oil pressure sensor. The part is simple and can be easily changed with your own hands if necessary.
Purpose of the oil pressure control sensor
All moving and rubbing parts of the power unit are constantly washed with liquid lubricant supplied by a gear pump from the engine sump. If, for various reasons, the supply of lubricant stops or its level drops to critical, the motor will face a serious breakdown, or even more than one. The result is a major overhaul with replacement of the crankshaft bearings, cylinder-piston group, and so on.
To protect the car owner from these consequences, classic Zhiguli models provide two-level control over the engine lubrication system, operating according to the following algorithm:
- After turning the key in the lock and turning on the ignition, the red warning lamp lights up, indicating a lack of oil pressure. The pointer needle is at zero.
- In the first 1-2 seconds after starting the engine, the indicator continues to light. If the oil supply is normal, the lamp goes out. The real pressure created by the pump is immediately shown by the arrow.
- When the engine turns off, a large amount of lubricant is lost, or a problem occurs, the red indicator lights up immediately.
- If the lubricant pressure in the motor channels decreases to a critical level, the light begins to flash periodically.
Malfunctions leading to a drop in pressure - breakdown or wear of the oil pump, complete wear of the crankshaft liners or breakdown of the crankcase.
The main role in the operation of the system is played by the sensor - an element that records the oil pressure in one of the main channels of the engine. The indicator and pointer are just a means of displaying the information transmitted by the pressure meter.
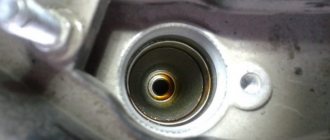
Location and appearance of the device
The sensor installed on classic VAZ 2106 models consists of the following parts:
- an element in the form of a round metal barrel with one terminal for connecting a wire (factory name - MM393A);
- the second part is a membrane switch in the form of a nut with a contact at the end (designation MM120);
- a steel tee into which the above parts are screwed;
- sealing bronze washers.
The large “barrel” MM393A is designed to measure pressure, the “nut” with the MM120 terminal fixes its absence, and the tee is a connecting element that is screwed into the engine. The location of the sensor is on the left wall of the cylinder block (if you look in the direction of movement of the car) under spark plug No. 4. Do not confuse the device with the temperature sensor installed higher in the cylinder head. Wires leading inside the cabin, to the dashboard, are connected to both contacts.
In later models of the “classic” VAZ 2107, the indicator arrow on the dashboard is missing, only a warning lamp is left. Therefore, a stripped-down version of the sensor is used without a tee and a large barrel.
Device and connection diagram
The task of the membrane switch, made in the form of a nut with a terminal, is to promptly close the electrical circuit with the warning lamp when the lubricant pressure drops. The device consists of the following parts:
- metal body in the form of a hexagon;
- contact Group;
- pusher;
- measuring membrane.
The element is connected to the circuit according to the simplest circuit - in series with the indicator. The normal position of the contacts is “closed”, so after turning on the ignition the light comes on. When the engine is running, there is a pressure of oil flowing to the membrane through the tee. Under the pressure of the lubricant, the latter presses the pusher, which opens the contact group, as a result the indicator goes out.
When one of the malfunctions occurs in the engine, causing a decrease in the pressure of the liquid lubricant, the elastic membrane returns to its original position and the electrical circuit is closed. The driver immediately sees the problem by the flashing “control”.
The design of the second element, the “barrel” called MM393A, is somewhat more complicated. The main role here is also played by an elastic membrane connected to an actuator - a rheostat and a slider. The rheostat is a coil of high-resistance chromium-nickel wire, and the slider is a movable contact that moves along the turns.
The electrical circuit for connecting the sensor and pointer is similar to the first one - the rheostat and the device are in series in the circuit. The operating algorithm is as follows:
- When the driver turns on the ignition, on-board voltage is supplied to the circuit. The slider is in its extreme position, and the winding resistance is maximum. The instrument needle remains at zero.
- After starting the engine, oil appears in the channel, flowing through the tee into the “barrel” and pressing on the membrane. It stretches and uses a pusher to move the slider along the winding.
- The total resistance of the rheostat begins to decrease, the current in the circuit increases and causes the indicator arrow to deviate. The higher the lubricant pressure, the more the membrane stretches and the less resistance of the coil, and the device notes the increase in pressure.
The sensor reacts in the reverse order to a decrease in oil pressure. The force on the membrane decreases, it is thrown back and pulls the slider with it. He turns on new turns of the rheostat winding in the circuit, the resistance increases, and the instrument needle drops to zero.
Video: what pressure should a working device show?
How to check and replace an element
During long-term operation, the internal parts of the sensor wear out and periodically fail. The malfunction manifests itself in the form of false readings on the indicator scale or a constantly burning emergency lamp. Before drawing conclusions about power unit failures, it is highly advisable to check the functionality of the sensor.
If the control light comes on while the engine is running and the indicator drops to zero, your first action is to immediately turn off the engine and do not start it until the problem is discovered.
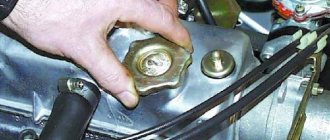
When the light comes on and goes out in a timely manner, and the needle does not deviate, you should check the serviceability of the oil sensor - the MM393A pressure meter. You will need a 19 mm open-end wrench and a pressure gauge with a scale of up to 10 Bar (1 MPa). A flexible pipe with a threaded tip M14 x 1.5 must be screwed to the pressure gauge.
The verification procedure is as follows:
- Turn off the engine and let it cool to 50-60 °C so you don’t have to burn your hands while working.
- Disconnect the wires from the sensors and unscrew them with a 19 mm wrench along with the tee. Please note that during disassembly a small amount of oil may leak out of the unit.
On the road, it is more difficult to check the VAZ 2106 oil sensor, since there is no pressure gauge at hand. To make sure there is lubricant in the engine channels, unscrew the element, disconnect the main ignition wire and rotate the crankshaft with the starter. If the pump is working properly, oil will splash out of the hole.
If the arrow on the instrument scale shows normal pressure (in the range of 1-6 Bar), but the red lamp is on, the small MM120 membrane sensor has clearly failed.
When the light signal does not light up at all, consider 3 options:
- the light bulb burned out;
- broken wiring;
- The small sensor in the form of a hexagon has become unusable.
The first 2 versions can be easily checked by testing them with a tester or multimeter. The serviceability of the membrane element is tested as follows: turn on the ignition, remove the wire from the terminal and short it to vehicle ground. If the lamp lights up, feel free to change the sensor.
Replacement is done by unscrewing the large or small sensor with a wrench. It is important not to lose the bronze sealing washers, since they may not be included with the new part. Remove any leaks of engine lubricant from the hole with a rag.
Both meters cannot be repaired, only replaced. Their metal cases, capable of withstanding the oil pressure of a running engine, are hermetically sealed and cannot be disassembled. The second reason is the low price of VAZ 2106 spare parts, which makes such repairs pointless.
Video: how to check lubricant pressure with a pressure gauge
Video: replacing the VAZ 2106 sensor
Pointer functions and operation
The purpose of the device, built into the dashboard to the left of the tachometer, is to display the engine oil pressure level, guided by the sensor. The principle of operation of the pointer resembles the operation of a conventional ammeter, which responds to changes in current strength in the circuit. When the mechanical rheostat inside the measuring element changes resistance, the current increases or decreases, deflecting the needle. The scale is graduated in pressure units corresponding to 1 Bar (1 kgf/cm2).
The device consists of the following main elements:
- round body;
- pointer mechanism with permanent magnet and windings;
- a control light connected to the corresponding sensor by a separate line;
- scale with backlight;
- compensation resistor;
- connecting wires with connector.
Zero readings of the device correspond to a circuit resistance of 320 Ohms. When it drops to 100-130 Ohms, the needle stays at 4 Bar, 60-80 Ohms - 6 Bar.
The Zhiguli engine lubrication pressure indicator is a fairly reliable element that breaks very rarely. If the arrow does not want to leave the zero mark, then the culprit is usually the sensor. When you doubt the functionality of the indicating device, check it using a simple method: measure the voltage at the connection contacts of the MM393A oil sensor with the engine running. If voltage is present and the needle is at zero, the device should be changed.
The VAZ 2106 oil pressure monitoring system with two sensors and a mechanical indicator is simple and reliable in operation. Despite the outdated design, car enthusiasts often buy and install these meters on other, more modern cars, equipped from the factory with only a control indicator. Examples are the updated VAZ Seven, Chevrolet Aveo and Niva.