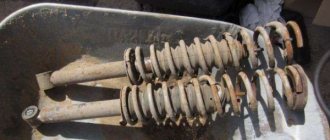
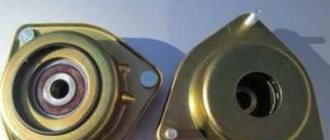
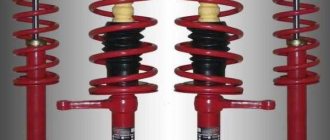
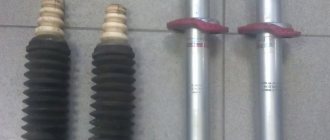
Which shock absorbers to choose
The original shock absorber struts for the Lacetti sedan and hatchback have the following numbers:
- 96407821 - left
- 96407822 - right
Rear shock absorbers for Lacetti station wagon:
- Rear right - 96408641
- Rear left - 96408640
If you need original shock absorbers, then choose Mando. These shock absorbers are original.
You can also choose from analogues;
- KYB - 333420 (left); 333419 (right)
- Amd - AMD.SA116L (left); AMD.SA115R (right)
- Sachs - 317139 (left); 317140 (right)
Kayaba from this list are the most popular and expensive. And for me, more preferable (but with some nuances). Therefore, on this page we will install them.
Selection of shock absorbers
The choice of rear pillars should be approached carefully, since they bear the load when transporting goods, as well as absorbing poor road surfaces, which are quite common in the vastness of the country.
Original
Article numbers of the shock absorber and its elements:
Shock absorber - 55310-1C200 . Cost 5000 rubles.
Bushing - 55315-07000
Upper pillow - 55323-07000
Bottom pillow - 55324-07000
Buffer - 55326-1С000
Rod boot - 55370-1С000
Analogs
In addition to original parts, there are also a number of analogues that are certified and recommended for use for the Goetz family of cars
| Manufacturer's name | Catalog number | Price in rubles |
| Meyle | 37-26 725 0000 | 2500 |
| Japko | MJHY021 | 2500 |
| Toko | T3203005 AUTOX | 2500 |
| Monroe | G21659 | 2500 |
| KYB (Kayaba) | 343398 | 2500 |
| Fenox | A22382 | 2500 |
| SACHS | 313 454 | 3000 |
| Doda | 1060170027 | 3000 |
| Monroe | 21659 | 3000 |
| LYNXauto | G12413LR | 3000 |
| Al-ko | 103463 | 3000 |
| TRW | JGT554T | 3500 |
| Mapco | 40536/2 | 3500 |
| Bilstein | 19-151793 | 4000 |
What is needed to replace rear struts
Materials:
1. Shock absorbers
2. Despite the fact that the shock absorbers come with a rod nut, it is still better for us to buy an original nut. It’s better not to install Kayabovskaya. You will further understand why.
The article number for the nut is GM 94515419. Naturally, you need 2 of them.
3. It is also advisable to replace the supports. Support article number 96457360.
4. Support gasket - GM 96404799
5. If desired - auto plasticine and anticorrosive (ordinary Movil can be used)
In general, this is what it should be. But also take into account the fact that not all nuts can be unscrewed. Therefore, you can still stock up on bolts and nuts:
- GM strut mounting bolt 94500712
- GM strut bolt nut 94515070
It is also quite possible that you will not be able to unscrew the stabilizer link. Then you can get stuck with them too. Their replacement is written and shown here - Replacement of rear stabilizer struts
Tools:
1. Keys/sockets for 17, 14, 9 and 12 mm
2. Metal brush
3. For Kayaba shock absorbers, it is advisable to have a special key for the rod
4. Jack and wrench for removing the wheel
5. Tool kit for removing the trunk trim (depending on the body version). I have enough Phillips screwdriver on my hatchback
How to make sure the rack is working properly?
Sometimes it is impossible to visually determine the cause of extraneous noise when the car is moving. For example, the rear pillars of the Lada Kalina are clean, without any oil stains. Rocking also does not allow one to unambiguously diagnose a malfunction. However, the knocking noise in the rear suspension area does not disappear.
In this case, you will have to drive the car onto a vibration stand. It simulates road irregularities, and special sensors monitor how various suspension elements perform. The data is transmitted to a computer, which draws conclusions about the serviceability of the racks. This pleasure, of course, is not free, but it won’t hit your wallet very hard either. The cost of computer diagnostics depends on the region and is within a couple of thousand rubles. But for this money, the owner will receive data not only on the condition of the shock absorbers, but also all components of the front and rear suspension, which is especially important if there is a long trip ahead.
Shock absorbers Kayaba for Chevrolet Lacetti
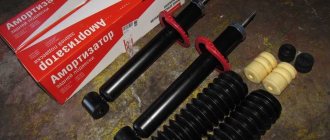
The rear shocks come in fairly large boxes
Because they come without a stem tie
Stickers and inscriptions on the stand
The box also contains a small and not very useful instruction manual and a shock absorber rod nut
Symptoms of a problem
Damage to shock absorbers, unlike many other components of the car, is relatively easy to determine. It is worth thinking about the malfunction of the rear struts of the Kalina in the following cases:
- oil smudges on the shock absorber housing;
- rocking of the car when overcoming bumps;
- knocking in the rear suspension;
- strong lean when turning.
In any case, when doubts arise about the maneuverability of the car, its handling, or any discomfort is felt while driving, you should first of all pay attention to the rear pillars of the Kalina.
Replacing rear shock absorber struts
Partially remove the trunk trim. On a hatchback, just move the felt boots to the side. How to do this is shown here
We have access to three nuts securing the support to the body
Note. On a sedan you can access the support nuts from the interior!
They need to be unscrewed with a head with a small wrench or a 12 mm ratchet
A curved spanner like this is also very suitable for these purposes.
They can easily unscrew even distant nuts.
But! Before unscrewing the support, it is advisable to “tear off” the rod nut . It is sometimes very difficult to tear it off, so it is better to do it now, when the stand is firmly fixed.
To do this, pry off the rubber plug with your hand.
And we take it off
Next, it is advisable to have the same spanner wrench as I showed above. But only at 17 mm
“Tearing off” the nut
The work in the trunk is completed. Now we hang the wheel using a jack and remove it.
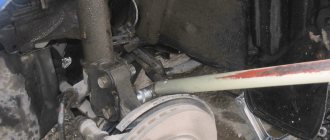
We see this picture
We have to:
Unscrew the stabilizer link nut and disconnect the link (yellow arrow)
Remove the brake hose clamp and disconnect the hose (red arrow)
Unscrew the two nuts and remove the bolts securing the shock absorber strut (green arrows)
Unscrew the stabilizer link and remove the brake hose clamp
Move the brake hose to the side. It is convenient to place it behind the stabilizer bar
Using 17 mm wrenches, unscrew the nuts securing the shock absorber strut
We move the rack a little and take it out from under the car
We take the stand and clamp it in a vice or fix it in another way
Which racks to choose for the VAZ 2110 - reviews from owners
The factory struts installed on the VAZ 2110 cannot be called ideal for this car. In terms of design and technical parameters, they are suitable, but do not provide the desired quality, efficiency and durability.
The main disadvantages of factory suspension elements include:
- Insufficient reliability. Many car owners note that after just a few months of use they can create a characteristic knocking sound in the suspension, which indicates the need for repairs;
- They often leak, which indicates suspension problems and the need to go to a service station;
- When driving at high speeds, the struts exhibit another drawback - they cause strong body roll, which definitely makes high-speed turns difficult to call comfortable.
The most popular brand was SS20. Today SS20 struts fit perfectly on the VAZ 2110. Let’s not hide that these elements are in many ways superior to their domestic, factory-made counterparts.
The SS20 company produces quite a lot of different suspension elements that are suitable for the VAZ model range.
Their distinctive features forced car owners to pay increased attention.
- The product quality is high at a very attractive price.
- The products are provided with a long warranty. So, for struts - 2 years without mileage restrictions, and for springs - 4 years.
- The warranty applies to the product regardless of the installation location. You don’t have to go to a service station and pay money to the technicians to maintain your warranty. Many people change the struts on the “ten” on their own, in their garage. If you do this, the SS20 parts warranty will still apply. This is the only manufacturer that offers such warranty conditions.
The Asomi company can be called a definite competitor. Their parts are of quite high quality and reliable. Only the warranty is only 1 year. Moreover, the elements must be installed at specialized service stations. And this significantly affects the cost of repairs.
How to disassemble a shock absorber strut
Attention! The rear strut does not have bearings, so it must be assembled strictly in the same position as it was before disassembly! If you are doing this for the first time, then it makes sense to put marks. In the video I talked about this in detail. But if you suddenly forgot to do this, then it’s okay - the video also has a way to check the correctness of the assembly.
It all depends on what shock absorbers are installed. Let's start with the original original shock absorber. Its stock looks like this
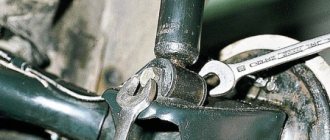
We need to unscrew the nut and at the same time hold the rod. To do this, we put the already familiar 17 mm wrench on the nut.
And we hold the rod with the head at 9 mm
If you remove the nut while still on the car, as I described above, then it will be much easier now.
Recommendations
- Please note that the rear pillar wears out much more actively if the driver carries cargo and a large number of passengers in the car. At the same time, wear increases significantly if a loaded vehicle is driven on a bad road (with a lot of potholes and uneven surfaces) at high speed.
- If you need to change the rear shock absorber 2110, the replacement usually involves installing two new struts at once. It is important to understand which shock absorbers are best installed on the rear axle. Today you can buy gas, oil and gas-oil struts.
In practice, it is better to install “softer” and quieter shock absorbers for the rear axle. For such purposes, oil or gas-oil struts are optimal. The former do not have a long service life, are not designed for heavy loads and can be knocked when cold, but they provide maximum comfort.We also recommend reading the article about which shock absorbers are better, gas or oil. From this article you will learn about the features of gas shock absorbers, as well as what are the pros and cons of gas struts.
- The gas-oil shock absorber is stiffer and noisier, however, a car with such struts holds the road better, handling and stability are improved. For this reason, it is important to select the right replacement struts in advance, taking into account individual preferences, the characteristics of the vehicle’s operation, as well as specific goals and objectives.
- If the rear strut of the VAZ 2110 and/or the spring fails, it is important to purchase only high-quality analogues for replacement. The fact is that cheap solutions can knock immediately after installation, and low-quality shock absorbers and springs often require replacement after 10-15 thousand kilometers.
Do I need to tighten the springs on the rear struts?
By and large, springs in the rear struts do not require ties. It is quite possible to do without them, since the spring is practically in a decompressed state.
But I still recommend having zip ties for several reasons:
1. There is a groove on the rod into which the support should fit. If you compress the spring by tightening the nut without ties, the support may become slightly skewed and not fit into this groove. The nut will tighten and it will seem to you that everything is fine. But after a couple of hundred meters of driving, the support will sit in its place and the nut will not be tightened, which will lead to knocking, and can also break the support and the threads on the rod.
2. It may turn out that your car does not have original shock absorbers or springs. For example, Kayaba shock absorbers have a slightly shorter rod and without ties it will be more difficult to assemble the strut.
3. The price of screeds is not high. About 150 UAH. for a couple. This is about 6 usd or 400 rubles. Moreover, they will be useful to you in the future on the A-pillars. And there you can’t do without screeds.
In general, unscrew the nut...
...and remove the support
Removing the spring cup
Anther
Bumper
Remove the spring and rubber gasket.
Next, we proceed to troubleshooting the rack elements. Most often, only the support and its gasket require replacement. Everything else has gone through more than one shock absorber replacement.
Here is a worn out and specifically tired support
Rear shock absorbers 2110: what you need to know
As with the front struts, the 2110's rear struts are needed to absorb energy and dampen road vibrations.
Shock absorbers also “press” the wheel to the road, which allows you to obtain the necessary stability, maintain controllability, and increase braking efficiency. As a result, the struts affect not only comfort, but also safety when driving a car.
It can be noted that due to the peculiarities of their operation, the racks increase the service life of individual parts and assemblies of the chassis. Due to the fact that the vehicle's stability is significantly improved, driving comfort is increased, and the load on the suspension and steering elements is reduced.
Due to the fact that the body does not jump in the pits, the braking distance is reduced, and the load on the braking system will also be less. It is also important to understand that on a VAZ 2110, the rear struts, like on any other car, also affect tire wear. If the shock absorbers are faulty, the tires will wear out much more actively.
Assembling the shock absorber strut
Treating the spring cup with a rust converter
And then anticorrosive
We do the same with the place where the rack is attached to the body.
How to install new rear shock absorbers on Lanos
After the old and faulty shock absorber has been removed from Lanos, a new one must be installed in its place. It is recommended to use Kayaba brand devices. Installation of new rear shock absorbers occurs in the following sequence:
- Initially, before installation, it is recommended to pump new shock absorbers 6-10 times. This is necessary in order to develop the piston. If this requirement is not met, then the mechanism may fail on the first bump.
- The shock absorber must be installed in its uncompressed state.
- First, you need to install a washer on the rod of the new device
- After this, install the spacer sleeve and the bottom cushion
- If any of these parts are faulty (especially the cushions), they should be replaced
- The upper mount is directed into the hole in the car glass
- First you need to secure the device from above. To do this, you need to place the upper cushion on the protruding part of the rod, and then put on the washer. The nut is tightened, and after that the device can be secured at the bottom
- Compress the shock absorber until it engages the bottom bracket. Then we unclench it a little and insert it into the bracket. A bolt is installed in the hole and baited
- We proceed to screwing the upper fastening nut
- The nut must be tightened so that the rod protrudes from it to a length of 6-9 mm. This is in case you did not measure the length of the rod protrusion before dismantling
- Finally, tighten the bolt of the lower shock absorber mounting on the Lanos
This completes the installation of the new Chevrolet Lanos rear shock absorber. The replacement process is carried out similarly on the opposite side of the car.
Bleeding the shock absorber
Before assembling the strut, it is advisable to bleed the shock absorber. It is DESIRABLE, not mandatory. If you forgot to do this, then it is not a sin and you can survive it.
The shock absorber will self-pump during operation. And it is necessary to pump it for two reasons:
- To check its serviceability
- To avoid damaging the shock absorber when lowering the car from a jack or lift. If you lower it smoothly, nothing will happen. And if for some reason the car suddenly stands on its wheels, the unpumped shock absorber may deteriorate.
To bleed the shock absorber, it must be turned over and placed on the rod. It is better to tighten the nut first so as not to spoil the thread.
We press the shock absorber and smoothly retract the rod. Keep the rod pushed in and turn the shock absorber over. We release the rod and wait for it to come out completely.
Then gently press the rod and press it in all the way. In this case, the rod may move jerkily. At this stage there is nothing wrong with this.
Now let go of the rod and wait until it comes out completely.
We recess the rod again. Now he should walk without jerking. If there are jerks and dips, then the shock absorber is faulty.
If there are no dips, jerks or extraneous noises, then we retract/release the rod again.
The fourth time we recess the rod with jerks. There should be no failures or extraneous sounds. If this is the case, then let go of the rod and no longer turn the stand over! She should now always be in an upright position!
And let's start assembling the rack.
Installing the rubber gasket
And then the spring. We make sure that the beginning of the spring coil is in its place on the rack. (there is a characteristic protrusion there and it is very difficult to make a mistake)
Installing a bump stop
Anther
Spring cup
We test ourselves with a rod or electrode. There are holes in the spring cup and in the shock absorber itself. We thread an electrode through them and take a look. They must be strictly opposite each other
We coat with anticorrosive
And we put on the support:
- It must fit clearly into the groove on the rod!
- The support has the shape of a triangle. The sawed part should be installed to the hole where we inserted the electrode!
Now another important point. On Kayaba struts, there are no edges on the rod for a 9 mm head, like on the original struts. There's just a groove there
Therefore, for this rod it is convenient to use a special wrench for racks
Put the wrench on the nut
And insert the middle part of the key
Now it's not a tricky thing. We hold the middle part of the key (it is convenient to insert the knob into the cut and hold it), and rotate the outer part of the key with a pipe wrench, tightening the nut.
After this, our rack is ready to be installed on the car.
It is quite possible to install it yourself without any problems. It may seem difficult and inconvenient, but in fact the procedure goes without problems.
Note. It is better to tighten the three nuts securing the support in the trunk when the car is already on its wheels. It is therefore advisable to cover all rubber-metal components.
Here is the new rack installed. The thread is protected using Movili and autoplasticine. This is written and shown in detail on the page Thread protection from corrosion
On the opposite side, all procedures are similar
Dismantled rack from the opposite side
The finished result
Shock absorber malfunctions
There are a number of indicators by which you can determine that the shock-absorbing elements of your car have become unusable and will need to be replaced in the near future. Otherwise, difficulties will arise in driving the car, and the braking distance will increase.
Oil leaks
The simplest sign indicating damper wear is the appearance of oil smudges on the body, which can be determined by visual inspection.
A shock absorber leak indicates the need to replace the element.
If such signs occur, it is recommended to verify that the element in question is faulty by sharply pressing the rear fender with your hands and releasing it. If the part is working properly, the suspension will slowly sag and return to its original position. When the shock absorber is not functioning properly, the rear of the vehicle will bounce on the spring, quickly returning to its original position.
Video: identifying a faulty damper without removing it from the car
Knock and squeak when driving
The most common cause of knocking in shock absorbers is fluid leakage. If there are no signs of leakage, it is necessary to carry out the test described above with the machine rocking. The knocking noise may also be the cause of damper wear. If a part has traveled more than 50 thousand km, then you should think about replacing it. Common causes of knocking also include air entering the outer cylinder of the damper due to an oil leak. You can try to fix the problem by bleeding it. If, while the car is moving, a squeak is heard from the rear suspension, then the cause of the malfunction may be worn rubber bushings of the upper and lower shock absorber lugs.
Uneven tire wear
Problems with shock absorbers can also be noticed by uneven tire wear, which significantly reduces their service life. This is explained by the fact that while driving with a faulty damper, the wheels often come off the road surface and cling to it again. As a result of this process, the rubber wears unevenly. In addition, you can notice wear in the form of patches, which is due to imbalance of the wheels. Therefore, the tire tread condition must be periodically monitored.
If your tires wear unevenly, one of the likely causes is problems with the shock absorbers.
Sluggish braking
If the shock-absorbing elements are faulty or there are problems in their operation, the contact of the wheels with the road surface worsens. This leads to short-term tire slippage, reduced braking efficiency and increased brake pedal response time, which in some cases can lead to accidents.
Plunging and pulling of the car to the sides when braking
Malfunction of the shock absorber valves, as well as wear of the seals inside the product, can cause noticeable swaying of the body when you slightly press the brake pedal or move the steering wheel. A clear sign of a malfunction is strong body roll when cornering, which also often requires steering. A malfunction of the shock-absorbing elements is also indicated by dives of the front or rear of the car during sudden braking, i.e., when the front end drops strongly and the rear lifts up. The vehicle may pull to the side, for example, if the rear axle is not installed level. This is possible when the longitudinal rods break and subsequent poor-quality repairs occur.
Car instability on the road
If the “seven” behaves unstably while moving and is thrown to the sides, then there may be many reasons for this behavior. It is necessary to inspect the condition of the elements of both the front and rear suspension, as well as the reliability of their fastening. Regarding the rear of the car, it is worth noting that attention should be paid to the condition of the shock absorbers, rear axle links, and rubber seals.
Shock absorber ripped out
Sometimes VAZ 2107 car owners encounter such a problem when the mounting rings of the rear suspension shock absorbers break off. This problem arises when installing spacers under original springs or springs from a VAZ 2102, VAZ 2104 in order to increase ground clearance. However, with such changes in length, the standard shock absorbers are not enough and the mounting eyes tear off after a while.
When installing high springs in the rear suspension and using original shock absorbers, the lugs break
To prevent this from happening, it is necessary to install a special bracket, which reduces the shock absorber stroke.
To prevent shock absorber lugs from being torn off when installing high springs, special brackets are used that reduce the damper travel
There is another option - to weld an additional “ear” below the old damper, which will also reduce the stroke and prevent failure of the suspension element in question.
Video: why the rear shock absorbers pull out
Kayaba shock absorber rod nut
Now about the nut. The fact is that there is a groove on the rod on which the support is installed. I have mentioned her several times.
But the fact is that the height of this groove is often greater than the thickness of the support body! Therefore, the original nut has a specific shape in order to level out this difference and reliably fix the support on the shock absorber rod. This is clearly visible in the photo. I showed this with arrows. I think the meaning is clear.
But the nut that comes with the Kayaba shock absorbers does not have such a groove. It's just an ordinary nut
Therefore, it will not be able to guarantee a reliable connection between the support and the rod. This is where the knocking feet begin to increase after installing the Kayaba shock absorbers. And, as a result, negative reviews about these shock absorbers are multiplying.
Therefore, keep this in mind and install the original original nut.
It is clear that you can get out of the situation with the help of pucks, but this is somehow collective farm.
Modernization of shock absorbers
Not every owner likes the soft suspension of the 7. To make the car more assembled, reduce roll and sway, and increase rigidity, car enthusiasts resort to modifications, replacing original shock absorbers with products with other characteristics. For example, to stiffen the rear suspension without any modifications or alterations, you can install shock absorbers from Niva. Based on the reviews of many owners of the “Seven”, after such changes the car becomes a little stiffer and holds the road better.
Double
To install dual shock absorbers you will need:
- 4 rear shock absorbers;
- set of heads, screwdrivers, keys;
- hammer;
- welding machine.
The essence of the modification comes down to the fact that it is necessary to manufacture and attach to the body a bracket for the second damper.
To install the second shock absorber, you will need to make and secure a bracket
Installation of the latter to the rear axle is carried out together with a standard shock-absorbing element using a long bolt or stud. The procedure is carried out the same way on both sides.
The second shock absorber is secured from below with a long bolt or pin
With such modifications, it is recommended to install new shock absorbers.
Sports
If the car is modified for a sporty driving style, then the changes apply not only to the rear, but also to the front suspension. For such purposes, it is convenient to use a suspension kit, which includes springs and shock absorbers. Depending on the goals pursued, the installation of such elements is possible both without changing the ground clearance and with lowering the suspension, ensuring maximum rigidity in all modes of damper operation. The kit allows you to get excellent car handling. However, you can install sports elements separately - in front or behind, which depends only on your wishes. One of the common options for sports shock absorbers installed by owners of “sevens” and other “classics” is PLAZA SPORT. Installation is carried out in place of standard parts without any modifications.
Among sports shock absorbers, VAZ 2107 owners often install PLAZA SPORT
The seventh model Zhiguli is technically a fairly simple car. However, poor quality road surfaces often lead to failure of suspension shock absorbers. It is not difficult to identify malfunctions of these elements even in a garage, as well as to replace them. To do this, it is enough to prepare the necessary set of tools, read the step-by-step instructions and follow them during the work process.
Is it worth changing the shock absorber struts yourself?
Replacing rear shock absorber struts costs 300 UAH. for a couple. This is 12 usd or 850 rubles. Is this a lot or not enough for such work? There is no definite answer here, because situations vary. For example, one rack can be easily changed in 30-40 minutes. That is, in just one and a half hours of work you can save 300 UAH. Therefore, in this situation, it is better to replace the racks yourself.
But imagine if there is no garage? This is more difficult, but it is still possible to undertake the replacement yourself.
But this is only if all the nuts unscrew without problems. What if problems arise? We know how difficult it is sometimes to unscrew a stabilizer link, for example.
And it also happens that the shock-absorbing strut mounting nut is tightly stuck. A “heavy” tool is already needed here. For example, an angle grinder (grinder).
Here's another example. When trying to rip off the rod nut, the support fell apart - its rubber part separated from the metal
Then, when I tried to rip off the nut, part of the rod with the edges broke off
Therefore, we have to do something clever in the yews
In such situations, you don’t want any savings.
Therefore, if you are ready to overcome possible difficulties, then definitely do everything yourself. After all, at the service station no one will smear you with anticorrosion agent and protect the threads in order to avoid problems in the future. And no one will bother with the rod nut.
In general, if you want to do it well, do it yourself.
What racks should I install?
This point needs to be decided in advance. It should be said right away that the rear pillars of the Kalina in a hatchback, sedan or station wagon are absolutely identical. Therefore, the choice is limited only by the manufacturer and spring stiffness. As for the manufacturer, experts do not recommend installing original racks due to their short service life. The most positive reviews and recommendations come from SS-20 brand products.
As for the stiffness of the springs, much depends on the driving style of the owner. Softer ones are suitable for leisurely drivers who prefer comfort to speed. If the car owner prefers an aggressive driving style, and the main use of the vehicle is on roads with good surfaces, then it is worth choosing stiff springs. This will improve the car's handling, although at the expense of comfort.
Very often, owners strengthen the suspension in the hope of giving the car some imaginary advantages. For example, they install stiffer rear struts on the Kalina. In this case, the station wagon body, according to repairmen, is capable of withstanding increased load capacity. Manufacturers are wary of such experiments. Increasing the spring stiffness creates additional stress on the car body. This is especially unacceptable for machines that have been in operation for a long time.
