The VAZ company develops on-board computers so that fault codes for Lada 2115 and other models can be read in two ways at once. The self-diagnosis procedure involves collecting and decoding errors through the on-board display. This method is suitable for quick repairs and troubleshooting.
From 2005 to 2022, more accurate diagnostics became possible. A specially designed OBD2 port allows you to connect equipment to the car. An external computer shows problems down to every detail.
Technical description and explanation of error P2020
This diagnostic trouble code (DTC) is a generic powertrain code. The P2020 code is considered a common code because it applies to all makes and models of vehicles. Although the specific repair steps may vary slightly depending on the model.
The code mainly concerns the value provided by the flow control valve/position sensor in the intake manifold. Also called IMRC valve/sensor (usually located at one end of the intake manifold). Which helps the vehicle's PCM control the amount of air entering the engine at different speeds.
The code is set for Bank 2, which is the bank of cylinders that does not include cylinder number 1. This may be a mechanical fault or an electrical fault, depending on the vehicle manufacturer and fuel system.
Troubleshooting steps may vary depending on the manufacturer. As well as fuel system type and intake manifold valve/position sensor (IMRC) type and wire colors.
About notOshibka.Ru
Consent to the processing of personal data
I hereby confirm and give my voluntary consent to the website neoshibka.ru (Internet address https://neoshibka.ru/) in accordance with Article 9 of the Federal Law of July 27, 2006 N 152-FZ “On Personal Data” for processing and the use of my personal data specified during the registration process, commenting, or when filling out any other contact form on this site, with or without the use of automation tools, including collection, recording, systematization, accumulation, storage, clarification (updating, changing ), extraction, use, transfer (distribution, provision, access), depersonalization, blocking, deletion, destruction of personal data in order to collect statistics and improve the services provided by the site. The processing of personal data is also carried out for the purposes of my information notification (distribution of information, if desired, there is an unsubscribe function) and for conducting analytics and statistics.
I am aware that:
- This consent to the processing of my personal data specified during registration on the Site, sent (filled out) using the Site, is valid for 20 (twenty) years from the date of registration on the Site;
- Consent can be withdrawn by me based on a written statement in any form;
- Providing personal data of third parties without their consent entails liability in accordance with the current legislation of the Russian Federation.
Diagnosis and problem solving
The starting point is always to check the technical service bulletins (TSB) for your specific vehicle. Your problem may be known to have a known fix released by the manufacturer. And can save your time and money during diagnosis.
The next thing you need to do is see if there are any other diagnostic trouble codes. If any of them are related to the intake/engine system, have them diagnosed first.
Make sure there are no leaks at the inlet or outlet. An intake leak or vacuum leak causes the mixture to become lean. Exhaust leaks give the impression that the engine is running lean. As air flows past the air fuel ratio/oxygen ratio (AFR/O₂) sensor.
Wiring testing
Next, locate the IMRC valve/sensor (Bank 2) on your specific vehicle. Once found, visually inspect the connectors and wiring. Look for scuffs, scratches, exposed wires, or melted plastic connectors.
Disconnect the connectors and look closely at the terminals inside the connectors. Make sure they are not burnt, oxidized or rusty. When in doubt, purchase electrical contact cleaner from any parts store if terminal cleaning is required.
If this is not possible, use rubbing alcohol and a small plastic bristle brush to clean them. After cleaning, let them air dry. Fill the connector cavity with dielectric compound and reassemble.
Using a fault scanner, clear diagnostic trouble codes from memory and see if the code returns. If this does not happen, then most likely there is a connection problem.
Sensor check
If the P2020 trouble code does return, we will need to check the IMRC valve/sensor voltage signals coming from the PCM as well. Monitor the IMRC sensor voltage on your scan tool.
When an error scanner is not available, it is worth checking the signal coming from the IMRC sensor using a digital volt-ohmmeter. With the sensor connected, the red lead of the voltmeter should be connected to the signal wire of the IMRC sensor. And the black wire of the voltmeter is connected to ground.
Start the engine and monitor the IMRC sensor input. open the throttle. As engine speed increases, the IMRC sensor signal should change. Check the manufacturer's specifications. They should have a table informing you what voltage should be at a given speed.
After passing this test, you need to make sure that the IMRC valve moves and is not stuck in the intake manifold. Remove the IMRC sensor/actuator and grasp the pin or lever that moves the vanes/valves in the intake manifold.
Keep in mind that they may have a strong return spring attached to them, so they may become tense when turning.
When turning plates/valves, check for binding/looseness. If so, you will need to replace them. In most cases, this means the entire intake manifold needs to be replaced. This task is best left to professionals.
If the IMRC plates/valves rotate without sticking or excessive loosening, this indicates that the IMRC sensor/actuator needs to be replaced and retested.
It cannot be emphasized enough that all other codes must be diagnosed before this. Because problems that cause other codes to set can also cause this code to display.
It is also worth noting that some of the IMRC plates/valves may be held in place with the sensor/actuator assembly and cannot be replaced separately. Trying to take them apart may cause them to break. If you are unsure about your vehicle, take it to a professional auto mechanic.
What to do if error 14 appears on the VAZ-2114 panel
The on-board computer that the VAZ-2114 received made life much easier for car enthusiasts. With its help, you no longer have to look for faults based on symptoms, but simply carry out self-diagnosis to detect the problem unit. Let's figure out in what cases error 14 appears on the screen of the VAZ-2114 on-board computer.
- What does error code 14 mean?
- What you need to know about a sensor malfunction
- Replacing the coolant temperature sensor
- What to do if after replacing the sensor the error does not disappear
On which cars is this problem most common?
The problem with code P2020 can occur on different machines, but there are always statistics on which brands this error occurs more often. Here is a list of some of them:
- Audi (Audi q7)
- Dodge
- Ford
- Infiniti
- Mercedes (Mercedes Vito, Sprinter, w203)
- Nissan
- Ssangyong (Sangyong Aktion)
- Toyota
- Volkswagen (Volkswagen Touareg)
You can sometimes encounter other errors with the P2020 fault code. The most common ones are: P0171, P0441, P1664, P1945, P1948, P1950, P1951, P2008, P2015, P2509, P2513.
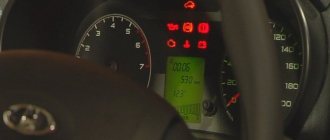
Instructions for self-diagnosis of VAZ-2114
To enable self-diagnosis in a domestic car, take the driver’s seat and sequentially perform the following manipulations:
- Find the odometer key on the instrument panel, press and do not release.
- At this time, turn the key in the ignition, setting format 1.
- The odometer key can now be released.
- Observe what changes occur on the instrument panel, namely the arrows should jump.
- Press the odometer key again and release it again, after which numbers indicating the firmware of the vehicle’s on-board computer are visible on the speedometer.
- All that remains is to press the odometer key a third time, and then remove your hand, and the display of a combination of faults on the screen will not take long. Please note that at a service station the error consists of 4 digits; if you diagnose it yourself, it assumes 2 digits.
How to fix the problem
After diagnosis, the problem should be repaired. When reading a signal, it is necessary to check the circuit and devices following it. The most accurate method is to replace the damaged part with a known good one (new). This will eliminate the possibility of incorrect repairs. If the device is in working condition, the lines are checked; usually a primitive test is sufficient. However, if the control unit or relay fails, you will need a special tester and the ability to use it.
Separately, it is necessary to take into account that factory terminals and blocks become loose and oxidize over time. If the contact on the hitch deteriorates, the on-board computer or laptop program will say that the part is damaged, even if it is not.
You can prevent this from happening in the following way.
- Check the condition of the connectors once every 5000 km. The pads should sit in place tightly, without play. If necessary, elements must be replaced with new ones.
- Check plug connectors two to three times a year for oxidation. Oxides reduce the flow of electricity through on-board wiring, which leads to incorrect display of information.
- Experts recommend purchasing and using oil for electrical terminals. The liquid is similar in composition to transformer lubricants. The formula prevents water and oxygen from reaching metals, which prevents them from rusting.
Important! You can diagnose VAZ 2114 error codes on the instrument panel and ECU yourself, only if you understand the essence of the process. If you don’t have confidence in your own abilities, it is recommended to contact a qualified technician.
If you have the appropriate knowledge and the necessary equipment, you can find and correctly decipher the error codes of the VAZ 2115 injector and other elements yourself. Due to the simplicity of the car's electrical circuit, the user does not require deep knowledge of mechanics or electronics.
The P2020 code indicates that there is a problem with the intake manifold variable valve position sensor or switch (bank 2). This sensor monitors the volume of air entering the intake manifold. The damper opens and closes to allow or restrict air into the intake system.
The following errors may also appear along with error P2020:
Reasons for the failure
If error code 0327 is registered in the ECU, you should first reset it and operate the car again. Perhaps it was a simple glitch. If it appears again, you should:
- check the mounting of the block on the sensor;
- inspect the wires for breaks;
- inspect the power circuit to identify a short circuit;
- check the sensor with a multimeter up to 200 mV.
Sometimes error code p0327 appears due to poor contact between the motor and the engine block. Soot or rust appears on the mating surface, which deteriorates the quality of the transmitted signal.