In English, error P0326 is written as Knock Sensor 1 Circuit Range/Performance, and is translated into Russian as “DDD signal output outside the permitted range.” Essentially , error P0326 indicates a malfunction of the knock sensor .
What problems does the message on the screen of the VAZ 2114 on-board computer indicate - error 0326? How common it is, and what causes it, we will look at in this article.
Error code P0326 on a VAZ 2114 means that the reference voltage in the engine knock sensor (EDS) has exceeded the range set by the manufacturer. In other words, the inscription on the display indicates that the DDD is out of order, or sends distorted information to the on-board computer.
What does it indicate?
If this error appears on the vehicle's electronic control unit, it means that while checking the signal from the knock sensor, a short circuit or a network break was detected. This causes the sensor to stop working.
In a situation where the difference between the noise level and the signal from the sensor is less than the threshold value for the specified period of time, the device records the presence of error P0326.
Important! An error may appear when the signal value coming from the knock sensor is both above and below the maximum permissible values.
What is he responsible for?
The knock controller is a device responsible for vibration in the engine. The functions of the device are as follows:
- track the resulting detonation;
- record problems and send a signal to the computer.
Based on the information received, the ignition timing will change. As a result, detonation will gradually disappear. Without the device, the engine operates in an unstable mode, which leads to increased valve wear.
Signs of an error
The indicators for error P0326 are practically no different from the signs of other detonation errors:
- stable operation of the engine during idling is lost;
- the dynamics of the car during acceleration have decreased significantly;
- engine detonation occurs;
- The ECU operates in emergency mode.
At the moment when error P0326 is detected in the electronic control unit, the “Check Engine” light comes on on the driver’s dashboard.
Connection diagram
The sensor connection in 2115 is shown in the figure.
3 wires are connected to the installed device. Inside the device there is a sensing element and a signal converter, which includes an operational amplifier, a bridge circuit and an output stage.
The operating principle of the sensing element is based on the Hall effect. Once the received signal is converted, it is transmitted to the controller.
Under what conditions is it diagnosed?
To record error P0326 in the electronic control unit, certain conditions must be met.
- The electronic control unit itself must operate in fuel detonation control mode. Usually this mode is set by default in the car, but on some models it requires additional configuration.
- The electronic control unit must receive data from the knock sensor. It then determines that the amplitude of the received signal is lower than the threshold value, which is set to the minimum.
- The car engine is in a warm state and operates at a frequency of more than 2.5 thousand revolutions per minute.
It is worth noting that the presence of an error at low signal amplitude is not immediately established. Data is sent to the driver's dashboard only if the error occurs three times. That is, during the first two drive cycles (from the moment the engine starts to the moment it is turned off), the driver is not notified in any way. The Check Engine light comes on and error P0326 is stored in memory only the third time.
On which cars is this problem most common?
The problem with code P0326 can occur on different machines, but there are always statistics on which brands this error is more common. Here is a list of some of them:
- Chevrolet (Chevrolet Cobalt, Malibu, Tahoe, Trailblazer)
- Citroen (Citroen C5)
- Ford
- Honda
- Hyundai (Hyundai Accent, Santa Fe, Solaris, Elantra)
- Kia (Kia Rio, Sid, Sorento, Soul, Sportage, Cerato)
- Mercedes (Mercedes w212)
- Opel
- Peugeot (Peugeot 307, 407)
- Volkswagen
- VAZ 2112, 2113, 2114, 2115
- Lada Kalina, Priora
- TagAZ Accent
With fault code P0326, you can sometimes encounter other errors. The most common ones are: P0011, P0133, P0332, P0420, P0722, P0743, P1529.
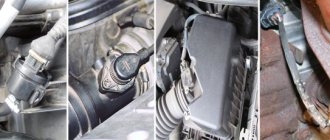
Reasons for the error
There are four main reasons that can lead to problems with the pressure sensor signal range:
- direct breakdown of the pressure sensor, leading to the transmission of incorrect information to the computer;
- contact problems resulting from oxidation on the sensor connector surface or pad;
- problems with the circuit through which information passes from the sensor to the ECU (short circuit or open circuit);
- Over- or under-tightening of the knock sensor during installation.
The last reason usually occurs if the knock sensor has failed, and it was replaced by the driver himself without complying with the necessary standards. It is recommended to install the sensor only after studying the reference literature and using a torque wrench.
IMPORTANT! In some situations, the cause of error P0326 may be a failure in the firmware of the electronic control unit.
Symptoms of malfunction
The main driver symptom of P0326 is the MIL (Malfunction Indicator Light). It is also called Check engine or simply “check light”.
They can also appear as:
- The “Check engine” warning light on the control panel will light up (the code will be stored in memory as a malfunction).
- The motor can operate, but with reduced performance (drop in power).
- Jerking and detonation in the engine.
- Increased fuel consumption.
- There may be no symptoms other than a stored DTC.
Error P0326 is not considered very serious. When it appears, serious problems with the car's handling are unlikely to arise, but a slight drop in engine power is possible.
How to fix
First of all, when working on an error, you need to make sure that its appearance is not a false signal. To do this, you should reset the error information in the electronic control unit using diagnostic equipment, and then artificially create conditions for a possible repetition of the signal. If after this the error occurs again, you should proceed to actions to eliminate it.
If you have a second working knock sensor on hand, you can install it and look at the result. Otherwise, you should check the existing sensor for problems. To do this, you need to ring the wires that extend from the electronic control unit to the sensor using a multimeter and determine the presence or absence of breaks or short circuits. It is also recommended to check the sensor pad for oxides and other problems that may interfere with normal signal transmission.
After error P0326 appears on the dashboard, the driver can easily get the car to the service center. However, long-term operation of a car with this problem is highly not recommended. Due to the presence of an error, the sensor will not be able to transmit data about fuel detonation to the ECU, and this can have a detrimental effect on the condition of the engine.
How to Troubleshoot or Reset Trouble Code P0326
Some suggested steps to troubleshoot and fix error code P0326:
- Visually inspect the electrical wires and connectors leading to the sensor.
- Check the continuity of the wiring from the PCM to the knock sensor wiring connector.
- Measure the resistance of the knock sensor and compare with factory specifications.
- If necessary, replace the knock sensor.
Please note that there are two types of knock sensors, resonant in the form of a barrel and broadband in the form of a ring-washer.
How does the sensor work and why is it needed?
The operation of the mechanism is based on the principle of a piezoelectric element.
This means that if vibration of a different nature occurs in the engine cylinder, a signal will be transmitted to the ECU using electronic pulses. In turn, the final element in this chain will make changes to the operation of the ignition angle. This algorithm of actions allows you to protect components and parts from mechanical damage. On the “fourteenth” in most cases there are broadband mechanisms, but often the manufacturer also installed a resonant type of device, most often on the very first copies of the VAZ-2114
The broadband mechanism is superior to its counterpart in that it has a wider range of capabilities. Such a sensor is capable of capturing noise of various frequencies, which undoubtedly gives the vehicle system additional stability.
The devices operate on different principles, therefore, if the resonant sensor breaks down, it cannot be replaced with a broadband one. The situation is similar in the opposite case. If there is an urgent need to replace or change the operating principle of the mechanism, you will have to purchase a new control unit.
The cost of diagnosing errors for VAZ at service stations in Moscow and St. Petersburg
Approximate prices for computer diagnostics:
| City | Company name | Address | Phone number | Price |
| Moscow | North Motors | St. Dubninskaya, 83 | +7 | 2500 rub. |
| Silver elephant | St. Pyalovskaya, 7 | +7 | 3500 rub. | |
| Saint Petersburg | Automagic | St. Uchitelskaya, 23 | +7 | 2000 rub. |
| ClinliCar | Bolshoy Sampsonievsky Ave., 61k2 | +7 | 3000 rub. |
CHECK AND REPLACE
Even if the scanner showed a malfunction of the DD, it’s a good idea to make sure that the part is not working.
The knock sensor is checked using an ohmmeter by measuring the resistance or a digital voltmeter by measuring the voltage between the contacts. The resistance of a working sensor on VAZ car models is almost infinite, but if it is small or absent altogether, the sensor must be replaced.
The voltage is measured as follows:
- Set the measurement limit on the voltmeter to 200 millivolts;
- The probes of the device are connected to the sensor contacts;
- Gently tap the DD body with any medium-heavy object (screwdriver, pliers);
- At this moment they look at the voltmeter readings.
At the moment of impact, the voltage on the device increases by 20-40 mV, depending on the force of the impact. The stronger the blow, the greater the tension.
REPLACEMENT
Replacing the knock sensor on a VAZ 2114 is very simple. If the DD is broadband, then you will need a combination key of 13; for a single-contact sensor you will need a key of 22. Do it as follows:
- We turn off the engine;
- Open the hood;
- We disconnect the connector plug on the wires going to the DD;
- We unscrew the 13 nut from the stud (in the 2-pin version) or the piezoelectric sensor itself with a 22 wrench (resonant DD);
- We put the new part in place and connect the plug.
That's it, very simple. You also need to take into account the tightening torque - the force is small, about 2 kgf/m². With greater force there is a risk of breaking the thread.
Checking DD at home
How to check the knock sensor of a VAZ 2114 at home? It is possible to determine the performance of the mechanism using an ohmmeter or digital voltmeter. The first allows you to determine the resistance, and the second - the voltage between the contacts. A correctly functioning VAZ 2114 knock sensor has an almost infinite resistance. If this indicator is completely absent, then the mechanism must be replaced.
The procedure for measuring voltage with a voltmeter is as follows:
- Set the limit on the device to 200 millivolts.
- Connect the voltmeter probes to the DD contact.
- The sensor body must be tapped lightly, for example, with a screwdriver.
- Record the reading of the digital voltmeter.
Knock sensor errors 2115
The malfunction is easily determined by the displayed code. They come in the following types:
- 0325 - indicates a contact failure in the circuit. The wiring has broken or the connectors have become oxidized. Sometimes the timing belt comes off. It should be put in place.
- 0326 (0327) - means a weak signal. To eliminate the malfunction, check the reliability of the insulation and the quality of stripping of the contacts. Make sure the sensor is properly tightened.
- 0328 - indicates a problem with high-voltage wires. Possible insulation breakdown.
What you need to know about the phase sensor
So, what is a VAZ 2114 phase sensor, how to find it and what are its signs of malfunction?
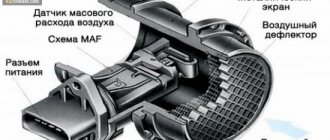
Device and purpose
DF installation location
DF is a regulator necessary to obtain data on the functioning of the vehicle engine and transmit this information to the ECU. As for the design, the DF consists of a sensitive component as well as a pulse converter. The design of the latter, in turn, includes an operational amplifier, an output stage, and a bridge circuit.
The sensing component located inside the structure operates on the principle of a Hall regulator. Its purpose is to transmit an impulse at the moment when a magnetically conductive component is located next to the microcircuit. As for the location of the VAZ phase sensor, it is located on the side of the cylinder block, next to the air filter element.
Malfunctions
A device failure can be identified by certain signs:
- increased gasoline consumption;
- malfunctions in the machine’s self-diagnosis;
- decreased dynamics when accelerating a car;
- Errors 0343, 0340 or a Check lamp may appear on the control panel.
The light bulb Check usually appears if the DF is inoperative.
How to connect DF correctly
Check and replacement
To check on an eight-valve engine, you must perform the following steps:
- At the multimeter terminal V1, you need to set the voltage to 13.5 volts; this probe is connected to pin E. At the second pin, which is connected to pin B, you need to set the voltage to 0.9 volts.
- After closing the contacts, a screwdriver or plastic steel should be brought to the end of the regulator. And if the DF is functioning properly, the voltage at output B should drop to 0.4 volts. If the readings differ, then the DF should be replaced (the author of the video is In Sandro’s garage).
As for the sixteen-valve engine, the principle is slightly different:
- The multimeter is set to operating mode V2, the voltage at output E should be set to 13.5 volts, and at output B to 0.4 volts.
- We again bring a screwdriver or plate to the DF body. If the DF is working normally, the voltage level will increase to 0.9 volts
To perform a replacement, you need to do the following:
- First you need to turn off the battery by removing the terminal from it.
- Using a 10mm ratchet wrench, unscrew the screw securing the device to the cylinder block. Disconnect the wires that are connected to the DF.
- Remove the DF and replace it with a new one. It is a good idea to clean the pad contacts from dirt or oxidation.
Car diagnostics
Of course, it is impossible to detect a malfunction in the operation of a vehicle without diagnostics. This can be done using special equipment, which can be found at every specialized service station. But you can also check your car for faults on your own. Note that when checking the car yourself, the error codes will not be the same as when diagnosing on the equipment.
Car VAZ 2115 tuning
So, how can you independently diagnose the state of the VAZ 2115 on-board computer? This question came to the mind of every owner of these car models. Now we will tell you about this in more detail. But diagnosing the car is half the battle, because the resulting combinations of faults also need to be deciphered.
Self-diagnosis of VAZ:
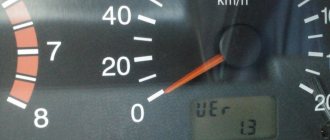
- Find the odometer button on the instrument panel. You need to clamp it down.
- Then turn the ignition key to position 1.
- Having done this, the odometer button will need to be released.
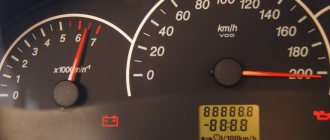
- When you release the button, the arrows on the instrument panel will start jumping.
- Press and release the odometer button again. Numbers will appear on the speedometer indicating the firmware version of the on-board computer.
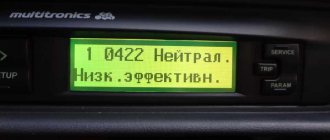
- Finally, hold and release the odometer button for the third time and you can see the fault combination. In the case of self-checking, error codes will be presented in two-digit form, in contrast to diagnostics on equipment, where faults are presented in four-digit form.
Pressing the odometer button to carry out self-diagnosis of the VAZ 2115
Decoding codes
As stated above, without deciphering error codes, diagnosing a vehicle is meaningless. Therefore, deciphering combinations should also be given attention. Especially if you don’t want to pay a lot of money to specialists at the service station for this. So, let's start with the combinations that appear during self-diagnosis of the car.
Self-diagnosis codes
| Combination | Deciphering the breakdown |
| 1 | Code 1 indicates a malfunction in the microprocessor. Sometimes the error is corrected by flashing the device. |
| 2 | The on-board computer reports incorrect operation of the gasoline level sensor in the fuel tank. There may be problems with the electrical wiring. |
| 4,8 | The voltage in the vehicle network is too high or too low. |
| 12 | Incorrect operation of the diagnostic lamp circuit. |
| 13 | The on-board computer stopped receiving a signal from the oxygen level monitoring device. |
| 14,15 | The control unit receives an incorrect signal from the antifreeze temperature sensor in the cooling system. In particular, the signal may be too low or too high. |
| 16,17 | When checking a car for errors, these combinations mean an incorrect on-board voltage indicator. it is necessary to carefully check the network for short circuits and breaks, since the voltage indicator is too high or very low. |
| 19 | The VAZ 2115 on-board computer receives an incorrect signal from the crankshaft position monitoring device. The circuit should be checked. |
| 21,22 | The VAZ 2115 control unit receives a very low or high signal from the throttle position control device. To eliminate the malfunction, you should check the functionality of the device itself, as well as diagnose the electrical wiring. |
| 23,25 | Intake air temperature control device. The control unit receives an incorrect signal from this sensor. The circuit should be checked, as well as the sensor itself. |
| 24 | The on-board computer stopped receiving a signal from the speed sensor of the VAZ 2115 vehicle. |
| 27,28 | These error combinations indicate the receipt of an incorrect signal from the CO sensor to the car control unit. It is recommended to check the circuit for opens and shorts or replace the sensor. |
| 33,34 | Mass air flow control device. These errors mean the receipt of an incorrect signal from the sensor, as a result of which it should be replaced. There is also a possibility of breaks in the circuit, so it makes sense to check the electrical wiring as well. |
| 35 | A malfunction has been detected in the operation of the idle air regulator. The sensor must be replaced to restore correct operation of the device. |
| 41 | The control unit receives an incorrect signal from the phase sensor. |
| 42 | This combination indicates a malfunction in the electronic ignition control wiring. Apparently, everything is in order with the ignition, but the circuit should be diagnosed. |
| 43 | The control unit received an incorrect signal from the knock sensor. You should check the device or diagnose the circuit for breaks. |
| 44,45 | In the injection system, the on-board computer recorded a lean or enriched composition of the combustible mixture. In this case:
|
| 51,52 | These combinations of faults indicate detected errors in the PROM or RAM devices. |
| 53 | The VAZ 2115 control unit stopped receiving a signal from the CO sensor. You should check the functionality of the device. |
| 54 | The signal from the octane corrector sensor has disappeared. |
| 55 | This combination indicates that when the car is moving, in particular when there is a high load on the VAZ 2115 engine, the combustible mixture in the injection system becomes leaner. In this case, the signs of failure may be the same as in the case of codes 44 and 45. |
| 61 | The oxygen sensor is broken. To restore system operation, the sensor must be replaced. |
Connecting special diagnostic equipment to the connector in the VAZ 2115 interior
Controller errors
The following are combinations of errors in the operation of controllers that arise when diagnosing a VAZ 2115.
Loading …
| Combination | Decoding |
| P0101-P0103 | These combinations indicate a malfunction of the mass air flow sensor. In particular, the signal may be increased or decreased. The device should be replaced. |
| P0112-P0113 | The intake air temperature sensor has been reported to have failed. It is necessary to check the electrical wiring, especially in places where the wires have been soldered. Apparently, the on-board computer is trying to inform you that a short circuit or break has occurred. |
| P0116-P0118 | These error codes indicate a malfunction of the antifreeze temperature sensor in the system. As a rule, in such cases, it is better to first check the electrical wiring, and if everything is in order with the circuit, then it is advisable to replace the sensor itself. |
| P2138, P2122, P2123, P0222, P0223 | These error codes indicate that the accelerator pedal position control device is not operating correctly. |
| P0201-P0204 | When such combinations appear, the on-board computer tries to inform the car owner that one of the injectors is not working correctly. In particular, an open circuit or short circuit may be detected in the system. |
| P0130 - P0134 | One of these combinations of numbers may indicate a malfunction in the functioning of the control oxygen sensor. To restore the operation of the sensor, you should check the circuit for breaks and short circuits, or you should replace the device. |
| P0136-P0140 | These errors indicate incorrect operation of the diagnostic sensor for monitoring the oxygen level in the injection system. As in the previous case, errors may indicate incorrect operation of the device or faulty wiring. |
| P0217 | Indicates overheating of the internal combustion engine. In this case, malfunctions may lie both in the operation of the motor itself and in:
|
| P0326-P0328 | The VAZ 2115 on-board computer informs the car owner about a detected breakdown of the knock sensor. In particular, such combinations may indicate not only the failure of the sensor, but also an incorrect signal coming from it to the control unit. |
| P0340-P0343 | Such combinations indicate a breakdown of the VAZ 2115 camshaft position control sensor. In particular, errors may mean:
|
| P0351, P0352, P2301, P2304 | These combinations mean incorrect operation of the ignition coils, namely, we are talking about an incorrect signal sent to the on-board computer. Also, these combinations may indicate a break in the electrical wiring or a short circuit in the circuit. |
| P0422 | The neutralizer device has broken down. |
| P0691, P0692 | The first cooling fan relay has failed. |
| P0693, P0694 | The on-board computer detected a breakdown of the second cooling fan relay. If the fuse is not replaced in a timely manner, the coolant may boil. |
| P0485 | The control unit receives an incorrect voltage signal from the cooling fan. |
| P0560-P0563 | The control unit has detected that the on-board voltage is too low or too high. |
| P0627-P0629 | These combinations may indicate either an incorrect signal from the fuel pump or a breakdown of the relay responsible for the operation of the unit. It is worth noting that if the fuel pump fuse breaks, operation of the vehicle will be impossible, since it will not be possible to start the engine. |
| P1602 | 1602 is a common VAZ error. Malfunctions have been registered in the operation of the engine control system controller. |
Reset error
Disconnecting the battery terminal to reset codes
If you have discovered and eliminated a malfunction, then it must be erased from the memory of the on-board computer. To do this, repeat the following steps:
- Stop the engine and turn off the ignition.
- Disconnect the terminals from the battery.
- Wait a few seconds and connect the terminals back to the battery.
Checking DD yourself
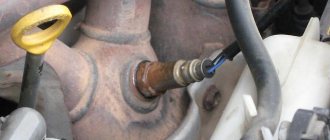
The knock sensor is located between cylinders 2 and 3 on the radiator side directly on the engine block. Checking the knock sensor is a simple matter, especially if you have ever looked under the hood of the fourteenth.
Replacing the knock sensor VAZ 2114
- The key end is 13 for a single-pin DD (resonant) and 22 for a two-pin DD (broadband)
- Simple screwdriver
- Multimeter
How to check the knock sensor
The first thing to do is remove the DD. It’s easier to remove the single-pin one: don’t touch the ignition, turn it off and unscrew the sensor from the engine. The two-pin one is more complicated: we also don’t touch the ignition, but we also need to remove the negative from the battery. Then, remove the wires of the block, unscrew the DD fastening and remove it.
Second, we switched the multimeter to a voltmeter and set the limit to 200 MV. We connected it to the DD and carefully hit it with some piece of iron (the same screwdriver). When impacted, the voltage should jump; if there is no jump, the sensor is dead, go to the store for shopping.
When a two-pin DD is connected, its terminals cling to the multimeter, when a single-contact DD is connected, one contact and its body are clinging.
Third, we look at the wiring, as already mentioned, most often it’s a matter of frost, or broken contacts.
A simple plan on how to check the knock sensor in your garage with properly trained hands.
Opinions agree that a non-working DD should not be replaced with an analogue from the factory. You will buy a pig in a poke with a 1 in 10 chance that you will get a working one. For the fourteenth, DD from 406 engines for the Volga or a universal imported Bosch are perfect.