Code P0133 indicates that the engine control module (ECU) has detected a slow response from the oxygen sensor (bank 1, sensor 1). Along with the Check Engine Light, this may be accompanied by increased fuel consumption, smoke from the tailpipe, or a rough idle.
Although in most cases there will be no symptoms other than the Check Engine light. Read on for information on how to diagnose and fix this problem before it causes costly repairs.
P0133 value
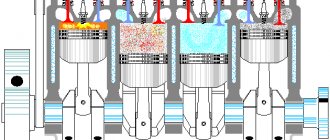
Modern cars are equipped with many sensors that send information depending on engine operating conditions to the ECU. These inputs are then processed by the controller to configure the various outputs to keep the motor running as efficiently as possible.
That's why modern vehicles are able to produce more power while using less fuel and meeting strict emissions regulations.
The DC is a very important input to the control unit as it senses the amount of oxygen in the exhaust stream and allows the ECU to adjust the air/fuel ratio to keep the engine running smoothly and efficiently.
The oxygen sensor associated with code P0133 is installed before the catalytic converter in bank 1. If the vehicle has 4 cylinders, there is usually only 1 bank. If you have a V-twin engine, then you need to find out where bank 1 is located.
Read our article: What are Bank 1 and Bank 2, Sensor 1 and Sensor 2 (Bank 1, Bank 2, Sensor 1, Sensor 2).
A properly functioning upstream oxygen sensor should constantly switch between 0 and 1 volts. When the controller detects that the sensor is not switching quickly enough or is not responding promptly to various driving conditions, it stores a P0133 trouble code.
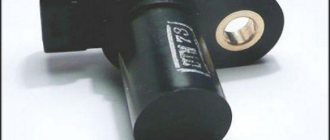
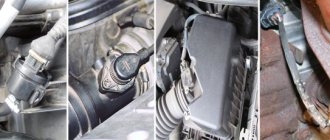
Removing the oxygen sensor Lada Granta, Kalina 2
Removing the oxygen sensor 1 Turn off the ignition. 2 Disconnect the wiring harness connector from the sensor. 3 Carefully unscrew the sensor ( wrench 22 ). ATTENTION. Handle the new sensor with care. Do not allow grease or dirt to get into the sensor wiring harness block or the slotted end of the sensor housing. Installing the oxygen sensor 1 Lubricate the threads of the sensor with graphite lubricant. 2 Screw the sensor into the neutralizer body. Sensor tightening torque 25…45 N.m 3 Attach the wiring harness block to the sensor.
How serious is P0133?
Typically, a P0133 code is not serious. Although, it should be diagnosed and repaired as soon as possible. You may not notice any symptoms while driving. But this can cause the vehicle to run at the wrong air/fuel ratio, resulting in excessive emissions of harmful exhaust gases.
You will not be able to pass an emissions test with this code, and by ignoring it, you could end up causing a bad catalytic converter, which is very costly.
How to fix
The error will be corrected if the following algorithm of actions is followed.
- Using a diagnostic scanner, perform a deep check for errors. If problems other than P0133 are found, correct them, reset them, and retest.
- If the presence of P0133 is obvious, check the catalyst for external and internal damage. If the integrity is damaged, immediately replace the catalyst with a new one.
- Using diagnostic equipment, determine the signal voltage produced by the oxygen sensor. When the ignition is on, it should reach 450 mV, and when off, about 150 mV.
- A voltage of less than 150 mV with the engine off confirms a malfunction of the oxygen sensor. In this case, you need to replace it with a new one. If the voltage reading significantly exceeds the 150 mV mark, this indicates a wiring break. It also needs to be replaced.
Motorists who are dealing with the P0133 code need to take several important points into account.
- On vehicles equipped with gas equipment, it is necessary to make the correct settings and select the optimal mixture. A problematic gas rail can cause error P0133 to appear.
- Fuel injectors must be thoroughly cleaned and flushed.
- You need to make sure the integrity of the exhaust system corrugation. If it burns out, the probability of error is very high.
Error P0133, indicating a slow action of the oxygen sensor, is common, but does not pose a critical danger. The main troubles it leads to are increased fuel consumption and deterioration in car dynamics. To avoid these problems, it is necessary to diagnose and eliminate the error in time.
Source
Troubleshooting Guide P0133
The easiest way to diagnose P0133 is to use a diagnostic scanner or OBD2 adapter.
Freeze Frame Data
The first step in diagnosis should be to record the freeze frame data associated with P0133. This will show you the operating conditions present when the ECU stored the error.
Wiring Inspection
Once you have the freeze frame data, you should do a simple visual inspection of the oxygen sensor wiring. Look for any frayed, broken or melted wires.
Check the connector for moisture or corrosion. Unfortunately, the oxygen sensor wiring cannot be repaired (unless it is the heater circuit). Therefore, if you find damaged wiring, the sensor will need to be replaced.
Checking for exhaust leaks
Next, start the engine and listen for any exhaust leaks in front of the sensor. Smaller leaks around the exhaust manifold may be more obvious on a cold engine due to thermal expansion. This may also be accompanied by a visual inspection of the exhaust system.
In some rare cases, there are leaks that cannot be heard or seen, but can be detected using a smoke generator installed in the exhaust pipe.
Watch the video on how to make a smoke generator with your own hands:
This shows very small leaks in porous welds that can cause codes related to the oxygen sensor. If leaks are found, repair and clear error codes.
Oxygen sensor test
Once you have checked that the wiring is intact and there are no exhaust leaks, you will need to access the ECU data stream using an OBD2 scanner.
Here you can monitor the voltage coming from the oxygen sensor to the ECU. The voltage should constantly switch between 0 and 1 volt. If the engine is a "V" engine, you can compare bank 1 to bank 2 to see if one shifts faster than the other.
Check the voltage at 2000 rpm, close the throttle quickly, then open it. When the choke closes you should see a voltage close to 0 volts and when it opens again you should see close to 1 volt. All this must happen very quickly, in less than 100 milliseconds.
Again, if you have a dual-cylinder engine, you can compare the two sides to see if one responds more slowly than the other. If the sensor fails the test, replace it.
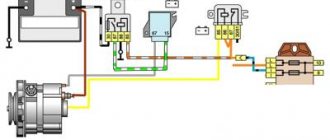
These tests can also be performed using a digital multimeter. To do this, you will need to find a wiring diagram to determine the purpose of the wires. Also, using the diagram, find and make sure that the sensor has a reliable ground.
Causes
In practice, a slow lambda probe response can occur for several different reasons.
It is worth highlighting the main ones:
- contamination of the oxygen sensor;
- node failure;
- violation of the integrity of the controller circuits;
- problems with the fuel pump, injectors, steam traps and other components of the fuel system;
- violation of the tightness of the exhaust and intake manifold;
- damage to wiring and oxidation of contacts;
- violation of pressure indicators in the fuel system;
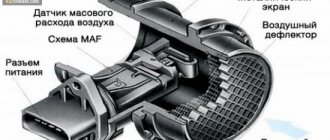
- contamination of the air flow sensor;
- clogged lambda probe holes due to carbon deposits or soot.
Other diagnostic methods
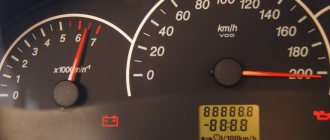
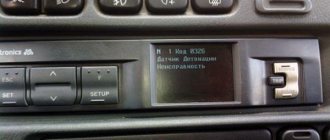
If you don’t have a scanner or laptop at hand, you can conduct a mini-diagnosis. To do this, you need to hold down the odometer button (located on the dashboard). At the same time, the ignition is turned on. After which the button is released. At the same time, the instrument needles begin to jump. Next, press the odometer once. The display will show the firmware number. You should press and release the button again.
This way you can see the two-digit error code. However, it should be noted that not all faults can be diagnosed in this way. Therefore, this does not replace a full diagnosis.
Conclusion
. Engine management problems are not uncommon. Therefore, the skill of independently diagnosing problems will not be superfluous. To do this, you need to know the error codes for VAZ 2114 and 2115. You will also need a scanner or laptop with the program installed. There are usually no difficulties with using this equipment.
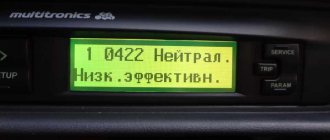
Nuances of self-diagnosis of the VAZ 2114
When carrying out diagnostics at specialized service stations or independently, various results and error codes can be obtained. Not all drivers know that faults can be identified without an on-board computer. An odometer is used for this. A significant drawback of such diagnostics is the addition of error numbers into a single sum. For example, if an error of 8 and 1 occurs, the odometer will display the number 9. The device's memory is not automatically cleared, so error codes will be displayed until manually reset by disconnecting the battery terminals for a few seconds.
Resetting the "checkengine" error
As you can see from the video, the error can be reset by following these steps:
- Turn off the engine, but leave the car's ignition on.
- Disconnect the car battery terminal and wait a few seconds.
- Reinstall the terminal and start the engine.
The error will be reset after these steps, but if it is caused by serious malfunctions in the engine, it will occur again. In this case, the best option would be to contact a service station.
Other indicators indicating breakdowns
The vehicle's instrument cluster contains indicator lights that warn of faulty systems. At the same time, the problem can be recorded by the controllers, the error code can be read during self-diagnosis or by a test device. Some of the faults displayed by the lamps do not prevent the vehicle from continuing to move. The location of the control indicators depends on the generation of the machine.
Color designations
Indicators are used to display faults:
- red (further operation of the vehicle is prohibited or undesirable);
- orange (movement into the repair area is allowed).
Troubleshooting
The red silhouette of a car with open doors indicates that they are not locked tightly. It's worth checking the trunk lid as well. The problem occurs if the sensors are damaged or shorted (the door locks are locked). To eliminate the error, close the covers tightly or make sure the limit switch is working properly. The orange airbag warning light should come on for a few seconds after the ignition is activated. A constant light on the indicator indicates problems with the airbags or the control unit.
The inclusion of red lamps for battery charging, emergency oil pressure, overheating, low brake fluid level or incorrect operation of the ABS hydraulic unit indicates the need to stop and turn off the power unit. Further operation of the machine is allowed after diagnostics are carried out and the reasons for the warning lights are determined (for example, a low oil pressure lamp may be triggered due to a sensor failure or pump failure).
The orange oil change indicator reminds the driver to perform maintenance. Further movement of the vehicle is allowed. A signaling device with a graphic pictogram (called a saw or a spiral by its owners) is used on cars with gasoline engines; the lamp can operate in 2 modes. When the red LED turns on, further movement and operation of the engine are prohibited (for example, cases of failure of the throttle unit with simultaneous recording of error U1123 have been noted).
Activation of the orange LED in the graph indicator indicates faulty electrical or electronic components that allow movement. The driver needs to slow down and get to the nearest car service center. On crossovers with diesel engines there is an indicator for water entering the fuel filter. When the LED turns on, the car is sent for service.