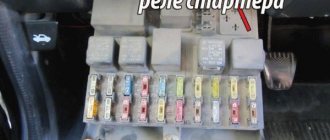
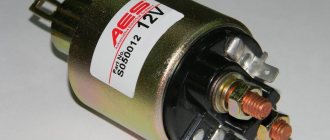
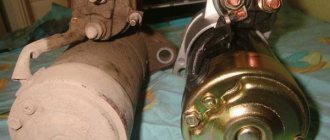
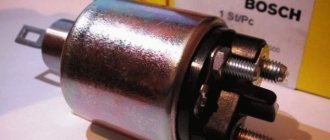
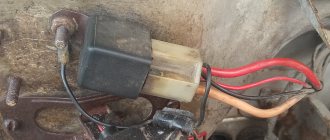
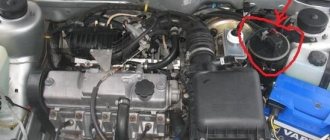
The VAZ 2110 is a good car, but when using it, like any other car, various problems may arise. Sometimes the following situation may arise. The key turns, but for some reason the starter does not turn. At the same time, some clicking sounds are heard from under the hood. This indicates the working condition of the retractor relay. This means that the problem should be looked for in the starter. Then a reasonable question would be where is the starter relay on the VAZ 2110?
Diagnostics using ODB-2 scanner
The general technical condition of the car can always be checked using a personal diagnostic car scanner. Of the options available on the market, we recommend paying attention to the Korean-made scanner Scan Tool Pro Black Edition. This model is perfectly compatible with most domestic and foreign cars.
A special feature of the device is comprehensive car diagnostics. Unlike analogues, this auto scanner is capable of diagnosing not only the engine, but also ABS, gearbox, transmission, airbag, air conditioning system, etc. The device is also great when used as an on-board computer: in real time it displays speed, revolutions, readings from all available sensors, oil pressure, temperature and much more.
VAZ 2115 fuse diagram
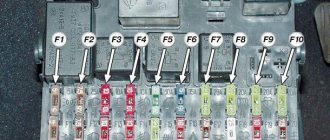
The most common models are 3722010 (since 2004) and 21150 3722 010 10. The set of protective elements of electrical equipment in them is not very different from each other, but there are differences, and they are reflected in the decoding of the diagrams below.
The main mounting block under the hood of the car.
| Item no. | Power, A | What protects |
| 1 | 10 | Lamps for rear fog lights and PTF turn-on indicator |
| 1* | 10 | Headlight cleaner motor and relay (contacts). Headlight washer activation valve |
| 2 | 10 | Turn signals, breaker relay and hazard warning lamp |
| 3 | 7.5 | Interior lighting front, center, trunk Ignition switch Engine management system Brake lamps On-board computer |
| 3* | 7.5 | Rear lights (brake light) Body interior light |
| 4 | 20 | Cartridge for connecting a portable lamp Heated rear window (contacts) |
| 4* | 20 | Cigarette lighter Socket for portable lamp |
| 5 | 20 | Horn Cooling fan motor |
| 6 | 30 | Power windows Power relay (contacts) |
| 7 | 30 | Heater motor Windshield washer Headlight wiper motors (in operating mode) Cigarette lighter Glove compartment lamp Rear window heating relay (winding) |
| 7* | 30 | Headlight wiper motor Winding Heater motor Window washer Rear window wiper motor Windshield and rear window washer activation valve Cooling system fan activation Rear window heating relay coil Indicator lamp Glove compartment lighting |
| 8 | 7.5 | Right PTF |
| 8* | 7.5 | Left PTF |
| 9 | 7.5 | Left PTF |
| 9* | 7.5 | Right PTF |
| 10 | 7.5 | Left dimensions License plate lamps Engine compartment lamp Instrument lighting switch Illumination lamps for switches, instruments, cigarette lighter, ashtray, heater control levers Illumination panel for heater levers |
| 11 | 7.5 | Right dimensions |
| 12 | 7.5 | Right low headlight |
| 13 | 7.5 | Left |
| 14 | 7.5 | Left high beam headlight High beam indicator lamp |
| 15 | 7.5 | Right high beam |
| 16 | 15 | Turn signals, relay-breaker for turn signals and hazard warning lights (in turn signal mode) Reversing light lamps Lamp health monitoring relay On-board monitoring system display unit Instrument cluster Insufficient oil pressure lamp Parking brake activation lamp Brake fluid level lamp Battery low warning lamp Trip computer ( if installed) Generator field winding (in engine starting mode) |
| 17 | — | Reserve |
| 18 | — | Reserve |
| 19 | — | Reserve |
| 20 | — | Reserve |
Some design features
The part in question consists of the following elements:
- Steel electric motor. Its purpose is to remove heat. In addition, it is characterized by water-repellent characteristics. This circumstance ensures that there is a situation in which you can wash the engine without any fear. Water will not be able to penetrate current-carrying parts, and therefore will not cause harm.
- The housing is the location of the solenoid relay. The flywheel and gear are fixed using its lever. This ensures that torque is transmitted. Copper contacts are connected to the core. They transmit voltage from the battery.
- The anchor is the attachment point for the commutator elements, windings, and gears.
- When the car is started, the flywheel is connected to the starter via a bendix. As soon as the car starts, all elements return to their original position.
- The brushes are fixed with holders and allow them to be quickly replaced if necessary.
The starter is fully functional thanks to the presence of two relays. They should be clearly distinguished from each other. The first element is used to turn on the starter. The second device is a pull-in relay. It is located directly on the starter. For VAZ 2110, the starter relay is of great importance for the operation of the tens.
This device is intended for the following purposes:
- Thanks to it, after starting the engine, the gear returns to its original position.
- The energy required by the starter motor and the electromagnetic relay is redistributed.
- The bendix gear is fed.
- Thanks to the device, all parts work synchronously when the engine starts.
It should be said that this part fails quite often, so the VAZ 2110 starter relay needs to be replaced. But getting to it is not so easy. In this case, you will need to disassemble the starter itself.
What could indicate a malfunction?
Various “symptoms” can signal a problem.
If the winding wears out, it may simply burn out. At the same time, at the moment when the car is started, the driver will hear clicks. Despite this, the car still does not want to start. In addition, a breakdown may indicate the following symptoms:
- The driver does not hear the usual click.
- No contact.
- When you turn the ignition switch for the first time, the car does not want to start.
- The car starts running unintentionally.
If you installed it yourself
The previous owner of the car, in the absence of such a standard part, could install it himself. Such installation kits are sold in car dealerships. In this case, the electric relay can be located not only in the “standard” location. Finding it without calling the previous owner will not be so easy.
If a breakdown of this part occurs on the way, then you can start the car by closing contacts 87 and 30 (the location and circuit diagram are printed on the top of the relay housing). In this case, you are allowed to use the machine without any restrictions. But at the first opportunity, be sure to fix the breakdown. The operation of the VAZ-2115 ignition system directly depends on the relay.
List of reasons
This is mainly a consequence of the following breakdowns:
- nuts are not securely fastened. It is possible that they were completely unwinding. To eliminate it, you just need to strengthen the fasteners by tightening the nuts;
- connection points, wires have undergone oxidation. If this is minor, then such places simply need to be cleaned. If the process is significant, a complete replacement is required;
- there is a break in the power supply. This must be eliminated by replacing the wires;
- If the device responds too slowly, it needs to be replaced.
In order to check the winding turns, you must use an ohmmeter.
When checking the solenoid relay, the following algorithm is used:
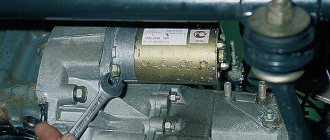
- First, you need to provide access to the starter. It is located next to the gearbox and is located slightly lower than the battery.
- The voltage needs to be checked. It should not be higher than 8 V.
- The moment of operation is accompanied by a certain temperature. If it is above 25 degrees, then you cannot expect effective operation from the device.
Some deficiencies can be detected directly by visual inspection. Once detected, they must be eliminated.
Dismantling steps:
- First, the battery wire with the minus sign is disconnected;
- then the air filter must be removed;
- All wires are disconnected from the solenoid relay;
- the tip of the power cable is disconnected. To do this, you need to unscrew the nut using wrench No. 13;
- the nuts that serve to fix the trigger device are unscrewed. For this, wrench No. 15 is used. But it should be said that this nut is not so easy to get to;
- then the starter must be removed;
- wiring is disconnected;
- the relay is dismantled using key No. 8.
If someone has a desire to repair the relay, then from a theoretical point of view this is quite possible. But there is no economic feasibility. The part is very inexpensive and it is easier to simply replace it. Moreover, there is currently no shortage of spare parts. In any case, the new element will work much longer than the repaired part.
We can only hope that those who read this article have acquired new knowledge and now know where the starter relay is located on a VAZ 2110.
The most common breakdowns
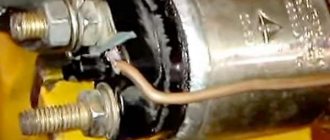
One of the most common problems is the loosening of the power cable tip.
Simply tighten it and check all the other nuts at the same time. The second popular reason for the failure of this unit is considered to be oxidation of contacts. If you notice a problem at an early stage, then just clean the contacts and the unit will work properly. If cleaning doesn't help, you will need to replace them. Oxide often occurs on the winding, making it impossible to block. You can try to clean the winding, but experienced motorists recommend replacing the relay immediately, this way you will be able to drive your car much longer without problems.
Another probable cause of problems with starting the engine is a break in the retractor power supply circuit. You will have to find them and fix the problem. Find the broken wires and place new ones in their place. Upon completion of work, check the relay power circuit again. One way to check the functionality of a disassembled relay is to check it with an ohmmeter. To do this, you need to place the probes of the device on the turns of two windings.
Sometimes it is enough to replace the anchor. This must be done when it operates slowly or is idle. These signs directly indicate a malfunction of the anchor itself. It will be quite difficult for a car enthusiast with little experience to identify problems with this element.
Repairing a relay is more expensive than replacing it, so the easiest way is to immediately replace the faulty part. This will save your time, because it is unknown whether repairs, which are often very labor-intensive, will help. An attempt to restore the unit is fraught with danger - if the relay is repaired incorrectly, you can be left without a car for a long time, since engine starting will be blocked. In this case, you will need to carry out more complex repairs, which cannot be carried out without the participation of specialists.
How to check the starter retractor relay of a VAZ 2110
When sitting behind the wheel of a car and turning the key in the ignition, every driver hopes that the car will start and he will move off successfully. But it doesn't always happen like this. If you do not hear the engine running, you may have a problem with the solenoid relay.
It is not difficult for any car enthusiast to independently determine the breakdown and fix it. It is enough to know its structure well. It's not that complicated. The relay and starter are in the same block. The relay supplies current to the starter motor and controls the freewheel (Bendix). The starter begins to rotate, at this moment the bendix is pushed out. The task of the relay is to engage the flywheel crown and the bendix.
The operating principle is based on the electromagnetic phenomenon. When the circuit is closed, the current acts on the coil, around which an electromagnetic field appears. The return spring, compressing, inserts the armature into the core. When the engine is already running, the electrical circuit opens, the armature is able to move freely and the clutch should return to its place.
There are signs that make it possible to recognize a malfunction of the VAZ 2110 starter solenoid relay.
- The engine is running. The starter has not stopped and rotates at great speed, while “buzzing”.
- We turned the key in the ignition and there was a click, the device worked, but the starter did not rotate.
- There is no click, which means you need to fix problems in the coil or armature.
- The starter rotates, but the engine does not want to start.
The causes of the malfunction may be: damage to the housing, burnt-out windings, burnt contact plates, a weakened return spring, or a problem with the armature. However, most breakdowns occur due to physical wear and tear.
To check the relay, it is not necessary to dismantle it. First, it is checked to see if there is a break in the wiring leading to the relay. If it is working properly, you need to check the traction relay by turning the ignition key; its failure will be indicated by the absence of a click. If there is a click, but the starter does not start rotating, you should check whether the contact plates are burnt. Next, using wiring or a screwdriver, the contact bolts located on the back of the relay are closed so that the current flows directly to the starter windings. If rotation begins, it is concluded that the retractor requires either repair or replacement.
Also use a multimeter to check the voltage going to the starter. When the ignition is on, it should be twelve volts. If the multimeter shows a lower value, then there is not enough energy to start the engine, and the relay should work.
Checking the relay during dismantling
This is a more convenient method, but before dismantling the relay you need to identify problems.
For this:
- The fastening of the terminals and the car battery are checked. If there are oxides on the contacts and terminals of the battery, they must be removed.
- Check the wiring connections to the starter. If the contacts become corroded, they can be cleaned using sandpaper.
- The condition of the starter relay is checked.
The starter is dismantled and checked.
The “+” and “-“ terminals are connected to similar contacts on the solenoid relay. Take the free end of the negative wire and touch it to the starter housing. A clicking sound will indicate that the relay is OK. If there is no click, the relay requires repair or replacement.
If the starter is equipped with a non-separable retractor device, then there is only one way out: it needs to be urgently replaced.
Where is
Where is the VAZ-2115 ignition relay located? It is located in the car interior, to the left of the steering column, under the instrument panel. In order to see it, you need to dismantle the instrument panel. Nearby, to the left of it, there is a relay for turning on the rear fog lights. They are screwed onto the car body stud with a “10” nut and located in special blocks.
The relay also controls the vehicle's washer, heater, rear window defroster, and some other low-current electrical circuits. If these vehicle components are not operating properly, the serviceability of this part should be checked.
The type of electric ignition relay is 90.3777-10, it has four contacts, the control voltage is 12 volts. When buying a new relay, be careful: five-pin analogs designed for 24 volts have a similar appearance. Self-repair of this part is unprofitable due to its low cost.
Video: “Ignition relay VAZ-2115: where is it located?”
How to disassemble the starter solenoid relay on a VAZ 2110
When operating a VAZ 2110 car, it may happen that at one point it stops starting. When the engine starts, the driver will not hear characteristic sounds, but instead, the operation begins to be accompanied by a strange hum. This may reliably indicate problems with the starter relay. In such a situation, the VAZ 2110 requires replacement of the solenoid relay.
Sometimes it happens that the device operates normally and nothing indicates a breakdown. But suddenly, in order to start the car, you have to push it. The only radical solution to fix the problem is to replace this part. In this regard, another question arises: how to change the solenoid relay on a VAZ 2110? You must understand that replacing it requires dismantling. This review will tell you how to do this in practice.
Purpose of the retractor relay
It exists to remotely turn on the electric starter motor. This is necessary so that the bendix and flywheel mesh. This design consists of various systems with a return, contact and magnetic mechanism. They serve to turn on two coils. The core is represented by a pipe in which the anchor is located. There is a winding of copper wire there. At one end it is connected to the electric motor, and at the other to the housing.
Due to the created electromagnetic field, the armature moves in the core. When the voltage disappears, the armature takes its original position. When power is applied, a magnetic field is generated. When it operates, the return springs are retracted. Starting the engine causes the voltage to disappear. The spring pressure on the armature causes it to return to its original position. In this case, the contacts open.
When replacing the starter solenoid relay, you need to make sure that it is the problem.
To check the operation of the starter, you need to take a battery and two wires:
- First you need to remove the starter.
- The relay output is connected to the positive terminal of the battery.
- The connection point for the second cable is the starter ground.
If there is a click, you can tell that the Bendix is working. It is accompanied by a fast and sharp sound. A sluggish, prolonged click indicates some kind of malfunction. Then the device needs to be replaced, and it is purchased at a car dealership.
Algorithm of actions for replacement
When it is necessary to replace the device, the question immediately arises of how to disassemble the VAZ 2110 starter solenoid relay. If there is a non-removable starter, the relay needs to be replaced completely.
In the case of a collapsible starter, the following actions are carried out:
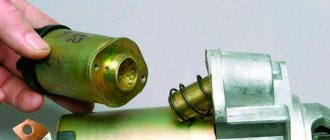
- it is necessary to unscrew the screws located on the relay housing cover. Sometimes the ends of the winding need to be unsoldered;
- It is necessary to check the power contacts. Quite often this is the cause of the malfunction. If the contacts are completely burnt, they need to be replaced. If the defect is minor, then the surface is cleaned with sandpaper;
- The order of assembly upon completion of the actions is in reverse order.
When purchasing a new device, you should take the old element with you. This will help you avoid mistakes when purchasing. The device is secured with three screws.
After reading this article, the driver now understands how to remove the VAZ 2110 starter solenoid relay.
Dismantling and replacement
To make it more convenient to replace the relay, it is recommended not to be lazy and still remove the starter itself. This will allow you to simultaneously check the condition of the starter while replacing the relay.
First, disconnect the negative terminal from the battery. Otherwise, you will be seriously shocked. There is little pleasure in this. Plus, this will lead to burnout of the wiring, which will be extremely difficult and time consuming to change.
The removal procedure described below concerns an assembled relay, which has the ability to replace individual structural elements.
- Disconnect the negative terminal from the battery.
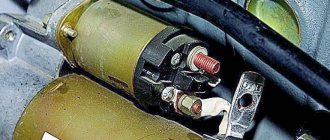
- Disconnect the red terminal from the relay. This is a red wire.
- Using an 8 mm wrench, unscrew the nut securing the brush assembly. You will find it behind the relay.
- Remove the contact that this nut held in place.
- Unscrew the fastening of the solenoid relay to ground. We are talking about coupling bolts.
- Next, you need to dismantle the power wire, after which the relay itself is pulled out.
- The fastening nuts are unscrewed from the end part, which allows you to remove the upper part of the relay.
- It is advisable to immediately replace the relay core with a new one.
- Install a new relay.
- Proceeding strictly in reverse order, reassemble the assembly, which will allow you to complete the replacement of the unit.
- When separating the relay into its two component parts, be sure to ensure that the core does not slip out and the spring does not jump out.
We can say that replacing the gearbox on a VAZ 2114 is not so difficult. It is much easier to replace a non-separable relay, since to replace it it is enough to unscrew all the fasteners in the same way and disconnect the contacts.
