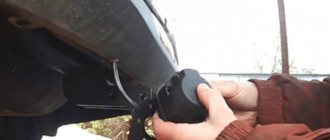
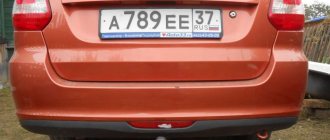
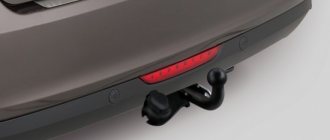
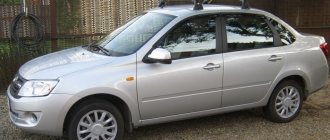
Good day to all! Today I propose to discuss with me the tow bar for Vesta. This is a fairly popular domestic car, the birthplace of which was the city of Tolyatti. Now Vesta is objectively one of the best Russian cars, so the high demand for the model is quite obvious. Sales statistics provided by Krasnodar, Perm, Moscow, Volgograd and a number of other Russian cities clearly confirm that Vesta is on trend.
Despite the noticeably improved characteristics and capabilities, the car retained the main advantages of all domestic cars. I'm talking about low prices, a fairly simple design and the ability to perform a number of repairs and maintenance work with your own hands.
One of such works is the installation of a towing device, that is, a tow bar. Before understanding the nuances of installation and talking about electrical connections, I suggest doing a little research on the issue of choosing a suitable trailer hitch. It doesn’t matter whether you have a sedan or an SV Cross station wagon from AvtoVAZ. Vesta has a decent selection of towbars, so everyone will find the best option for themselves.
Design options
There are several categories of towbars that differ in their design. They are potentially all suitable for installation on the Vesta model. But still try to study the features of each option more carefully.
Manufacturers offer the following devices:
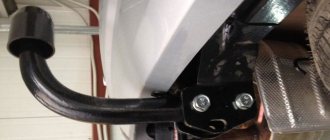
- Flanged. It is considered the best option for Vesta, since the trailer hitch is designed for installation on ready-made mounting points. They are provided on the car from the factory. This will allow you to obtain optimal load distribution. Therefore, before purchasing a flange-type trailer hitch, be sure to make sure that your version of Vesta has a platform for a tow bar;
- Tow hitch with rigid type of fixation. If we talk about cost and functionality, then such towbars are the most profitable. The structure is mounted by welding and bolts. But the monolithic design is now not in the favor of the traffic police, plus such solutions significantly spoil the appearance of the car;
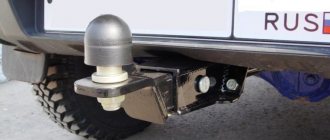
- Removable coupling balls. High-quality coupling, high level of reliability and excellent functionality. In this case, you can easily remove the ball as needed, leaving the trailer hitch frame in place. The only downside is the higher price;
- Under the square. This is an American type trailer hitch, which structurally consists of 4 parts. If you get confused, you can bet on Vesta. But this is pointless, because there are too many complexities and nuances of installation.
If you are going to install an American-type trailer hitch, be prepared to adjust the towbar socket and use a special matching unit.
By purchasing a standard flanged towbar, installation will be much easier. The socket is standard, ideal for Vesta, and therefore there is much less hassle.
Installing a tow bar on the Lada Vesta SV cross
Again, photos of the installation of the tow bar were taken from the Drive2.ru website. Here's what we have:
1. First of all, you need to dismantle the rear bumper in order to install the main part of the power structure under it.
2. Remove the rear spar plugs and install the load-bearing frame.
3. The open holes will be the attachment point for our tow bar.
4. We tighten all the bolts and install the bumper in place.
5. The last step will be to install the towbar ball in place. It is also installed in standard places and tightened with nuts and bolts.
When assembled, the tow bar looks like this:
Installation nuances
To begin with, I advise you to look at photo and video materials that will help you learn all the features of installing a trailer hitch with your own hands on a car like the Lada Vesta.
Installing a towbar largely depends on what type of towbar you choose for your vehicle. In some cases, it is possible to get by with little loss if you take trailer hitch models adapted specifically for Vesta. There are quite a lot of these on the market, and numerous reviews from car owners are direct confirmation of this. Or buy universal designs, with which there are many more problems.
If this is a universal type tow bar, then matching them with the mounting points on Vesta will be problematic. There are some trailer hitches that require cutting out the bumper to install, after which the car looks downright ugly.
Again, I don’t see any point in spending a lot of money on expensive towbars when it comes to domestic cars. Therefore, take a closer look at the assortment of Baltex, the popular company Leader Plus, the same company Avtos or Bosal Autoflex (Russian production).
When planning to perform the installation yourself, you can divide the entire procedure into the following processes:
Connection
To connect, you can use the video instructions and follow the recommendations below.
- The BSF is connected to the car battery;
- The oil pressure sensor, starter, car fuel valve and the on-board computer of your car must be connected to the smart connect;
- They remove the loading panels, prepare a set of wiring, check the operation of the running lights and the trailer brake light;
- The smart connect is installed according to the diagram provided by the manufacturer. It will look approximately as shown in the image.
It’s up to you to install BSF yourself or entrust the installation to professionals. Advice from me personally. If you do not have experience or skills in working with car wiring, or simply do not have time to do it, contact a specialist. They can carry out the entire range of work, from selecting a tow bar and trailer, to selecting a suitable unit and connecting all these devices into a single circuit.
Thank you for attention! Be sure to subscribe, leave your comments and invite your friends to discuss this topic!
204,70
Optimal dimensions of length, width and weight of a trailer for a passenger car
- purchasing and unpacking a brand new towing device;
- removing trim from the luggage compartment of a car;
- search for a mounting platform provided by the automaker represented by AvtoVAZ;
- alignment of the holes on the body with the fasteners of the towbar itself;
- if necessary, making additional holes (if the tow bar is not adapted for Vesta);
- installation of trailer hitch and tightening of connections;
- electrical connection.
As for me, the most important stage is the installation of the electrical part of the trailer hitch on Vesta. But again, if you have experience in such work, and you are well versed in the structure of the car, then this will not be a problem for you.
To begin with, the trailer hitch kit comes with detailed instructions that outline all the installation steps, including connecting the electrics using a socket and standard vehicle wiring. In some cases, depending on the type of towbar, a matching unit may be needed. What it is and why it is needed, you can easily learn from this material.
Principle of operation
The electrics of the towbar and the BSF must be connected in parallel, using high-quality crimp clips. Please note that the connection is made directly to the matching unit, and not through the socket of your car towbar.
The BSF is connected to the battery or power supply. In this case, the principle of its operation will be as follows:
- smart connect receives relevant information from the on-board computer system;
- the matching block transfers a uniform and dosed load to the necessary consumers, that is, the trailer's lighting equipment.
Here we need to add one important point. You cannot take the universal BSF if the car has the so-called trailer towing mode.
Here, to connect the towbar to the towed vehicle (connection of the towbar and trailer, in other words), you will need an original block. Otherwise, the vehicle will not be able to control and monitor the electrical equipment of the trailer using its ECU.
Among the popular block models, users note the following:
Their price is reasonable, that is, there will be no significant costs for operating the trailer. Knowing the item number of the product, you can easily order for delivery online. Choose the purchase method yourself. The main thing is that the BSF matches your car model.
Equipment
BSF has a built-in protection system, with the help of which it is possible to protect the electrical network from overvoltages and short circuits.
When installing the unit, your on-board computer will function normally. That is, it will not start reporting new connected devices or giving any errors.
When choosing a Smart Connect device, pay attention to its configuration. She may be:
There is no special or urgent need for expanded equipment, and it costs more. Personally, I installed a more functional model. For this you will receive, in addition to the basic functions, protection against theft and control over the entire electrical circuit of the towed vehicle.
Popular solutions
First, I’ll say a few more words about the installation. Be sure to buy good quality grease, which must be used to treat all joints during installation. This will not only simplify installation, but will also allow you to disassemble the structure in the future without any problems.
Also apply lubricant to the coupling ball, the types of which you can find here. It is better to install a protective cap over the ball treated with lubricant. It will prevent the adhesion of dirt and dust, and will also keep your hands clean when removing and installing the ball for connecting the trailer to the Lada Vesta.
Now regarding specific towbars. In Russia, Vesta owners actively buy products from Leader Plus and Bosal. I do not limit you to these companies at all, but I still advise you to take a closer look at them. Let's look at a few towbars.
How to check if everything is done correctly
For installation and connection of the structure, only technological holes are used. If they are not available, you can make them in the bottom yourself using special equipment. All elements are mounted and adjusted to the holes, everything is carefully checked, since minimal misalignment can lead to rapid wear of both the towbar itself and its wiring.
The fasteners must be tightened well to avoid possible displacement. Before using a coupling structure, it is tested to determine whether the coupling device can withstand the permissible load. Before installation, it is recommended that all holes and joints be treated with a grease-type lubricant; a plate-type compound for processing the coupling ball is best suited. Before installing the ball itself, it must be covered with a cap.
Related link:
How to remove the interior mirror on a Lada Vesta.
Tail lights for trailers: which ones to choose, where to buy, how to increase brightness
- T-VAZ-41A Leader-plus. This is a removable hook that is secured with bolts. A type A ball is used. The hitch does not imply the need to cut out the bumper. Electrics are not included in the kit, but must be purchased separately. The cost of the towbar will be from 3.4 thousand rubles;
- Bosal 1234-A. An excellent trailer hitch with a type A ball. Also, there is no need to cut out the bumper to fit the structure. Includes wiring and socket. This set costs from 3.5 thousand rubles;
- Leader Plus T-VAZ-44A. Suitable for station wagon, bumper trim required. Socket and wires included, but costs about the same
The final choice is yours. Each product has its own article number, according to which you can easily find a suitable option. Search, watch, consult with specialists.
Required
Towbar
(original catalog numbers):
- Lada Vesta sedan (article 99999218007282), price about 6800 rubles;
- Lada Vesta SW/SW Cross (article 99999218107282), price about 7,000 rubles;
Control unit (coordination)
99999215007182 Smart Connect KA.SC.7.1, price about 2900 rubles.
The matching unit is an unloading device that ensures uninterrupted operation of the vehicle and trailer electronics. The equipment protects the vehicle wiring from overloads - as a result, the vehicle’s on-board diagnostic system does not detect the connection of additional devices to the vehicle’s electrical network, and operates in normal mode.
Where can I buy?
Connection
1.
The connection diagram for the trailer hitch control unit (universal module or smart connect) is included with the device:
2.
The matching block can be made independently based on conventional 4-pin relays:
Almost all the necessary contacts for connection can be found in the rear light area (see electrical diagrams of Lada Vesta and Lada XRAY, or use a multimeter). Additionally, you just have to run the wire from the battery through the fuse on the left side (author of the photo).
Let us remind you that we previously told you how you can make your own organizer in the trunk of a Lada Vesta and Lada XRAY.
Read more: Loan with residual payment - what's the catch?
Found an error? Select it and press Ctrl+Enter..
