Most Russian automakers continue to install fender liners on non-standardly small cars. Plastic linings cannot provide full protection to the body - the wheel arches begin to rust after just a year of use. Plastic elements will help to fully protect the most vulnerable part of the body. When choosing a product, the material of manufacture and the method of fastening are taken into account. The installation of fender liners on a car is carried out at a service station, but protective tuning is easy to do yourself.
Functions of fender liners, installation recommendations
To prevent the occurrence of corrosion processes and to increase the service life of wheel arches, fender liners are installed today. Their second technical name is lockers. Of course, it is very expensive to repair a niche today, so it is better to install the fender liners yourself if they were not installed at the factory. In addition, lockers improve the appearance of the car. Different materials are used to make fender liners:
- polyethylene;
- fiberglass;
- polyvinyl chloride;
- copolymers.
The following types of materials have excellent properties:
- high strength;
- elasticity;
- environmental Safety.
It must be said that they are distinguished by low thermal conductivity. Therefore, snow adhesion and ice formation are not observed on the surface of the lockers. Auto parts stores provide every car owner with a wide range of wheel arch liners. Corresponding elements are produced for almost every car model.
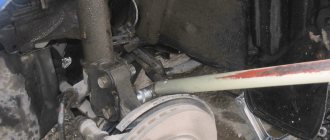
The best quality installation of lockers can be done at a service station. But you can install fender liners on a VAZ yourself if you have certain skills and some specific knowledge. The service life of the VAZ wing depends on the tightness of the fender liners. A tight connection is much easier to make with special equipment. Before installing the wheel arch liner, you must:
- wash;
- dry;
- coat with an anti-corrosion compound.
To carry out such technological operations, a special stand is used. The installation of the fender liners itself does not cause any particular difficulties. They are secured with self-tapping screws, which must be screwed into the “pistons” included in the kit. The wheel arches have special technological holes that coincide with the mounting holes for the fender liners.
Therefore, there is no need to do additional drilling. As a result, the paint coating that was applied to the surface of the wheel arch is not damaged. To install the front fender liner, you need to perform several operations:
- a fender liner is inserted into the wheel arch;
- the mudguard is fixed;
- tighten three screws securing the locker to the front bumper;
- all pistons are installed in the technological holes;
- A self-tapping screw is screwed into each piston;
- the upper fastening of the fender liner is performed;
- Removing the fender liner is carried out in the same sequence, but in reverse.
To install the rear fender liners, follow these steps:
- the rear fender liner is inserted into the wheel arch of the VAZ wing;
- the mudguard is screwed on;
- the top screws are tightened;
- the lower screw screws the fender liner to the rear bumper;
- Remove the rear fender liner in the reverse order.
Return to contents
We insulate the wheel arches to reduce noise in the cabin
There are literally dozens of options for soundproofing wheel arches. Many use traditional methods with the installation of insulation of various shapes and options, others prefer more modern solutions. In any case, you should remember about the effectiveness and durability of the chosen sound insulation method. You can choose to spray special chemical compounds on the fender liner, which will be done for you in a specialized center. You can also use the ideas of liquid sound insulation in the form of various resinous compounds applied to the metal in a thick layer. However, the most popular solution is this method of soundproofing car arches:
- in a car store or on the market, a search is made for the optimal materials for sound insulation specifically for your car or universal ones;
- the material in this case is a foil and fairly thin seal that should cover all metal surfaces above the wheel;
- the material is mounted on mastic, as well as on special glue or other fasteners, which also reduces the possibility of corrosion;
- sound insulation can be single-layer or multi-layer; often the effectiveness of all work performed depends on the number of layers of material;
- the sound insulator is mounted with the foil side to the wheel, this helps to reflect sound and reduces unpleasant noise effects in the car interior;
- A plastic fender is mounted on top of the insulation layer - this is a prerequisite for maintaining the durability of the insulation layer and the efficiency of its operation.
The process of installing sound insulation on fender liners is quite simple, so you can complete all the tasks yourself. Many sellers offer ready-made plastic fender liners with a layer of sound insulation and insulation applied. This is a completely adequate solution, but its effectiveness is somewhat lower than when carrying out high-quality insulation using special materials. You can use a variety of solutions to get the desired result. The main task is to ensure reliable protection of the body from the spread of corrosion. This is one of the first tasks when performing any work related to the installation of additional materials or devices. Therefore, it is recommended that work be carried out by specialists.
Features of replacing the rear wing
Sometimes the rear fender needs to be replaced. This is usually due to the fact that the condition of the item is so poor that it is completely impossible to repair. For example, serious deformation has occurred due to strong mechanical impact, there are cracks and small tears.
Maybe corrosion has created huge holes in the fender. Replacing a rear wing is a fairly complex process, but you can do it yourself if you follow a certain sequence of actions.
- First, the trunk is completely emptied.
- The bumper is removed.
- The headlights are removed.
- The fuel tank is removed.
- The trunk mat is removed.
- The rear wing is removed.
To carry out dismantling, you must use a thin chisel. The wing is slightly pushed forward. The work must be done carefully so as not to cause damage to the body. Where the wing connects to the transverse frame, technological points are drilled. Only then can the rear wing be removed.
After removing the wing, you need to cut off the remaining strips of metal. A grinder is used for this. Wire cutters and a sharp chisel will also come to the rescue. The edges themselves are straightened and polished. The dirt that has accumulated under the wing must be removed and everything thoroughly wiped. The cleaned surface must be degreased.
Installation of steel parts
Before installing a new steel wing, it is necessary to coat it with an anti-corrosion compound and an anti-gravel substance. To successfully mount a new wing, a fastening consisting of several welding points is performed.
When welding work is carried out, it is necessary to maintain a very tight fit of the wing to the working surface. After establishing a tight fit, major welding is performed. The new wing of the VAZ 2110 is painted in the color of the car. Remember that before the main painting the surface is primed in several layers.
In addition, all nearby parts must be covered before painting to prevent accidental paint. After welding the new wing, the fender liner is installed under it in the manner described above.
Wheel arch liners, also called lockers, are a plastic casing on the inside of a car's wheel arch. At the manufacturing plant, cars are rarely equipped with fender liners, completely shifting the responsibility for this to the future owner. Our domestic manufacturer usually does this. It happens that fender liners are installed, but only on the front arches. And their size is negligible, so they do not protect even one third of the arch.
Principles for installing plastic elements
Very often, when plastic wings are installed on a VAZ 2110, you have to replace them. This periodic procedure is associated with many circumstances. Moreover, this work can be performed by each car enthusiast independently. It must be said that the plastic wing is part of the car body.
It is not a separate component of the machine that has no functional responsibility. This opinion is a big mistake of many car owners. Plastic fenders have several design features that affect their operation. Since such a wing is easily deformed, it is safer than its metal counterparts.
The advantage is that they never develop corrosion. Never before have yellow corrosion stains appeared on plastic. They can't appear there. Plastic and corrosion are incompatible things. In addition, the parts have a very affordable price. These wings are easy to install and are very convenient to use. Plastic does not require any special care. To replace a plastic fender, you need the following.
- The wing is fastened with a group of bolts. They are unscrewed with an impact screwdriver. However, there are cases when the resulting rust prevents the bolts from being removed. Sometimes the bolts stick so tightly that you have to drill them out. For this work you will need an electric drill.
- Before replacing the plastic fender, you must first remove the headlights and disconnect the front bumper.
- The factory seams are drilled on one side.
- On the other hand, the wing is completely cut off.
Only this sequence of the operations described above will allow successful removal of the wing.
What are they needed for
Why are fenders needed?
If the owner is responsible or wants to drive the car for a long time without thinking about rust in the arches and on the edges of the wings, then he will definitely install the wheel arch liners himself or at a car service center. In general, they are installed to protect against stones flying from under the wheels. The fact is that stones fly out at great speed and when they hit the wheel arch they spoil the paintwork, which in this place is very weak due to mechanical influences and reagents that are so generously sprayed on our roads. Additionally, an owner who loves his car will definitely cover the arches with anticorrosive. This, among other things, will make sound insulation better, because most extraneous sounds enter the car from the wheel arches.
What you need
Must be washed with water under pressure
So, you have decided to do this simple task and are thinking about how to take on this task, that is, how to install the fender liners? But everything is simple. In order to do this job we will need 4 fender liners, anti-corrosion agent, brush, degreaser, rag, self-tapping screws and a screwdriver. First you need to wash the arches with water under pressure. It would be better to do this at a car wash. Then you go to the garage or other place where no one will bother you for the next couple of hours.
Anticorrosive
First of all, we remove all the wheels one by one, and put the car on trestles or bricks. Now pour degreaser onto a rag and thoroughly wash the wheel arch so that the anti-corrosive agent adheres to the surface of the arch as best as possible. It’s better to do it this way: wash one arch with a degreaser and move on to the other. After the last arch is washed, the first one will already dry.
Now we apply anticorrosive. It is better to use a brush for this rather than a spray bottle.
If you paint with a brush, then do not skimp on the anticorrosive agent. The thicker the layer, the longer it will last and the longer the guarantee that the arches of your car will not be eaten away by corrosion. If you have time and resources, it would be better to paint in two layers.
The application scheme is the same. We painted one arch and moved on to another. By the time you paint the last one, the first one will already be dry.
Applying the composition
Now we move on to installing the fender liners. To do this, it is better to use the services of an assistant. It is necessary that one person presses the fender liner to the arch so that it does not move or slide to the side, and the other at this time, using a screwdriver, screws them to the arch with self-tapping screws. Screw in the screws carefully; don’t just make a sieve out of the arches of your car. And choose shorter self-tapping screws. Centimeter ones with a large cap will be enough.
There are special plastic clips on sale that secure the fender liner to the arch without screws or extra slots. But, unfortunately, they do not fit all cars, so you can ask about them in the store, but if you are the owner of a domestic car, don’t have high hopes.
Special fasteners
Do not leave gaps between the fender liner and the arch. Subsequently, dirt and moisture will get clogged there, which means that rust will form even faster than without wheel arch liners and anti-corrosion.
If such gaps remain, then there is a simple way to seal them. Take a simple syringe and fill it with anticorrosive, bitumen or anti-gravel and pour it into the cracks. After this, the car needs to sit for at least a day. This is necessary for complete drying of the poured substance.
So, it’s not so difficult to properly coat the wheel arches with anticorrosive and close them with lockers. All you need is a little free time and a lot of desire. After installing the lockers, you can be sure that the arches of your car will remain intact for the next three to five years.
How to replace fender liners and how to install new ones on all VAZ cars?
Note! Before you start, remember a few important things that you should know when working with this protective material, namely, before installing a new fender liner, be sure to lubricate the upper part of the wing with some anti-corrosion material to protect it from moisture, but before you start lubricating, water or Whatever else you do (it’s most convenient to use a Karcher) clean the entire inside of the wing from any dirt stuck to it and only after cleaning proceed to lubricating this part of the wing!