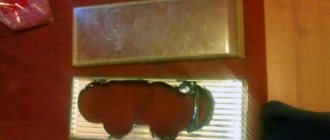
This could be the rear lights of the VAZ 2114
The emergence of modern LED elements has led to the creation of a new stage in car tuning. Motorists began to decorate the car interior, doors and, of course, optics. If the front optics are decorated with “angel eyes,” then the owners of VAZ 2114 and other cars prefer to install LED elements on the rear lights. The taillights on the VAZ 2114 are easy to tune, but almost all of them involve the installation of diodes.
Interesting: in addition to the decorative value, LED lighting also has practical benefits: LEDs increase safety, as their glow is brighter than that of incandescent lamps; Riding becomes more comfortable in any weather conditions. Moreover, such tuning is permitted by law in the CIS countries.
What options are there for decorating taillights?
Quite often, car owners choose so-called angel eyes to decorate the front optics, and LED elements for tuning the rear lights of the VAZ-2114, and other models.
Independent tuning for rear optical devices is quite simple, but it is worth considering that this process will require the installation of diodes, so you need to decorate the lights taking into account the recommendations, step by step and slowly. It is worth noting that LED lighting is not only used for car decoration, but also for practical use. Among the main advantages are the following:
- since LEDs illuminate the road much better than conventional incandescent lamps, driving safety increases several times;
- the driver will be able to travel more comfortably, both at night and in adverse weather;
- This type of tuning is permitted by law, so the driver will not be fined for such decoration.
Before you start tuning the rear lights yourself, you should familiarize yourself with the design options.
Car owners can decorate car optics in the following ways:
- LED overlays;
- diode rings that are installed on the lights;
- additional LEDs or more powerful light bulbs that are pre-tinted.
Let's look at each tuning option in more detail:
- LED overlays. The most inexpensive and, of course, popular tuning option for the rear lights of the VAZ-2114 is the use of LED overlays. Car owners can buy ready-made linings in various designs or make them themselves. Most often, it is independent overlays that are used to decorate optics, since drivers are able to create the most original and best-suited decoration option for flashlights without any problems. And for this you only need two main components: fiberglass and special epoxy glue.
- Car owners began to use tuning with diode rings relatively recently. This method of decorating optics can be done independently by those who understand electronics. Its essence lies in the fact that you need to completely replace the rear lights, having first removed the old ones, and you will need to install those optical lighting devices that are modernized independently.
- Upgrading the rear lights with more powerful lamps, as previously mentioned, is necessary after preliminary tinting, so that the bright light does not blind the eyes of oncoming drivers. According to experts, this tuning option can be used for VAZ-2114 cars, but only as a last resort, since this option implies some disadvantages:
- the load on the generator increases;
- fuel consumption increases several times;
- Car wiring overheats.
And since the engine on the VAZ-2114 does not have enough power, as indicated by numerous reviews from car owners, the use of powerful lamps, one might say, is a rather dubious tuning option for this car model.
- Installation of additional individual LEDs. This tuning option is the most creative, because it is possible to turn your own design fantasies into reality, however, this option will require more time to create a design solution and the installation itself. To speed up the process, experts recommend purchasing ready-made individual LEDs and doing further installation yourself.
Solving the problem with the boards
A situation often arises when the rear light of a VAZ-2114 does not light up, and the reason for this is a burnt-out board (and it burns out quite often). But there is a way to fix this problem.
It boils down to the fact that the rear light boards of the VAZ-2114 are replaced with conventional light bulb sockets, which are used on earlier VAZ models.
The essence of the method is very simple - we disassemble the headlight, dismantle the board, fix the cartridges in the case instead, connect the power wires to them, and put the headlight back together.
Source: auto24tuning.ru
Step-by-step creation of diode pads
As already mentioned, the most popular type of tuning is the use of LED overlays. For independent installation and creation of elements for decoration, you will need to prepare tools and some materials in advance:
- high-quality fiberglass;
- required number of LEDs;
- a sharp knife, preferably using a stationery knife;
- special epoxy-based adhesive;
- tape and paint material.
The manufacturing and installation process should be carried out in stages:
- Using tape, you need to completely cover the surface of the rear optical devices.
- Apply the required amount of tape to high-quality fiberglass fabric and thoroughly saturate the base with epoxy adhesive. Experts recommend applying the adhesive base in several layers, making sure that the layers are not too thick, and in the future it will be possible to correctly fix all additional overlays to the base. For the epoxy base to dry completely, you need to wait 12-14 hours, but it is best to read the instructions for using the glue before starting work.
- After the base has hardened, remove the blank from it to mark the outline of the future design, using a bright marker or tape.
- The resulting outline is carefully cut out with a knife or scissors.
- The cut profile must be puttied. After the putty has dried, the excess is removed with fine sandpaper.
- Primer and paint material are applied.
- If desired, you can apply varnish to protect the surface of the lining, but only after the paint and varnish material has completely dried.
- The finished LED attachments are installed on the rear lights, which completes the tuning process.
It should be noted that such overlays are quite easy to make yourself. You can decorate not only the taillights for a VAZ-2114 or another model, but also fog lights, and even the so-called turn signals, to give originality to your faithful four-wheeled friend.
Components of rear optics
Many people are not satisfied with the standard optical equipment, because the previous VAZ 2109 body model was identical. The optical elements are easily removed and you can improve them with your own hands. But before we begin to consider tuning the headlights, we should consider the elements of the rear optics separately.
The taillights are presented in the form of a headlamp unit (that is, with several components). The rear headlight unit includes: side lights (they always light up when the lights are on), brake lights (when you press the brake pedal they start to light up, warning the car behind you) and turn signals. Fog lights and reversing lights are installed separately from this unit.
Installing LEDs on top of car optics
If the car owner decides to decorate his car with LED overlays that need to be installed on top of the optical device, then the installation will become a little more complicated, since the diode will have to be inserted directly into the car headlights, and this will require, albeit small, but still, skills in working with electronic devices and the ability to use soldering iron Experts recommend carrying out this work in stages:
- select the required number of LEDs and a suitable board;
- familiarize yourself with and make your own voltage stabilization circuit by watching a training video tutorial on an Internet resource;
- prepare for work silicone sealant, epoxy-based glue, fasteners for future diodes and LEDs with resistors.
Features of tuning headlights on a VAZ 2114
Every car owner wants his personal equipment to be the most noticeable and vibrant. Updating the design, replacing classic factory spare parts with modern ones is a long-standing occupation of men. The fourteenth is recognized as one of the popular models of the domestic automobile industry. This technique is similar to foreign models. The most common action is tuning the headlights on a VAZ 2114. It is worth noting that the light fixtures of the 14th and 15th models are identical.
Advantages of tuning lighting elements
When producing equipment, many companies want to make their products as affordable as possible; they try to save on expensive spare parts by equipping models with cheap components. This also applies to lighting structures installed at the Volzhsky enterprise. Independent modification of the optics of the iron horse gives it an attractive appearance. If there is a desire to distinguish equipment from the same type, then a simple modernization of the lights on the VAZ 2114 and tuning the headlights of the VAZ 2115 are allowed. By upgrading these devices and other parts of the car, you will transform the car, getting a unique, interesting car.
Lighting devices are an important part of any car; when modernizing, you need to preserve the functions assigned to them. This will ensure the safety of road users.
Types of tuning
There are a certain number of ways to change the appearance of lighting structures that look quite attractive. This is both internal and external tuning. The most commonly used option is angel eyes on the VAZ 2114. Tuning significantly improves the appearance and attracts the attention of others. Carrying out the production process yourself will provide valuable experience.
Tuning VAZ 2114 headlights and tuning VAZ 2115 optics involves replacing classic factory-installed parts with more powerful ones, or tinting with film. Many people install xenon. This improves lighting performance at night, but is contrary to traffic regulations, so installation of such bulbs is possible only on rear lighting devices. Installation of bixeon lighting structures is allowed.
Tuning rear and front light structures
Very often, car owners want to tune the optics of a VAZ 2114. But this does not mean that they need to purchase new devices in the store: it is possible to improve the existing parts.
Replacing standard headlights with tuning ones
After purchasing a car, you can modify the standard lighting devices. In addition, it is possible to replace factory devices with tuned ones. This is not difficult, because the modified optics are the same size as the factory ones.
Reworking headlights
Tuning the VAZ 2114 headlights is possible in several ways:
- Install xenon. This modernization should be used with caution, as the bright light can blind an oncoming driver, which can lead to an accident. Xenon is prohibited by law, and owners of these lamps will be required to pay a fine.
- Apply LED overlays. The simplest option is to glue an overlay onto the factory elements, which transforms the overall appearance of the standard instruments. In this case, you will not have to interfere with the factory design.
- Install the pads. An option for changing lighting fixtures, in which the covers are mounted on the headlights.
- Install new diodes. Experts advise disassembling the device and replacing standard diodes with modernized ones.
Factory designs often leave the factory without fog light elements. This is a convenient lighting design for the car owner. It is recommended to carry out reconstruction and install PTF in the car bumper.
Taillight modifications
There are many options for upgrading rear optical devices. Tuning the rear lights of a VAZ 2114 with your own hands is not difficult:
- A common method is to replace classic lighting units with modernized ones. The main difference will be that the light bulbs will be screwed in different places and the lighting devices will be of a different type.
- The second way to change the rear lights of a vase is to disassemble the factory devices and replace the filling in them. Next, diffusers - LED strips - are applied to the glass and everything is connected to the electrical circuit.
- The third option is the use of LEDs, which significantly improve the light performance of the VAZ 2114 headlights.
Intervention in optics must be consistent with safety precautions. This will save life and property.
Installation of ready-made tuning lights for VAZ 2114
Optics are perhaps one of the most important elements of a car's appearance. The family of VAZ cars LADA Samara (VAZ 2113, 2114, 2115) is no exception to this statement. By replacing only the headlights and lanterns for the Lada Samara, you can completely change the impression of the car. For many car owners, such an operation as a homemade modification of the rear lights of a VAZ-2114 is difficult to carry out. Some people think that everything will turn out “crooked”, others simply don’t want to do it themselves. For such car enthusiasts who want to change the appearance of the car, there is an excellent option - installing alternative taillights on the VAZ-2114 instead of the standard ones. This modification is convenient because you don’t need to change anything in the headlight unit: you bought a tuning kit for the headlights, installed it instead of the original ones, connected it, and that’s it. The car accessories market offers several types of alternative optics for the VAZ-2114 to choose from, so you can choose the option you like best for installation. Such, for example, are kits for replacing VAZ-2114 headlights produced by OSVAR, ProSport, DLK, etc. In general, there is plenty to choose from. Tail lights VAZ 2108-2114. Model 0013F
Model 0013H
Model 0013G
Model 0013D
Do-it-yourself tuning of VAZ 2114 rear lights
Let's look at how to make LED taillights with your own hands. This option is suitable for those who do not want to spend money on tuning headlights. Please note that it is not possible to change the appearance of the headlight unit in this way, since standard equipment will serve as the basis. But such a modification to the rear lights of the VAZ-2114 will make their glow more efficient and effective. Previously, calculations were made of the required number of resistors, diodes, patterns and other little things. As with any experiment, not everything always works out right away. So my first flashlight configuration was not entirely successful. Having realized my mistakes, I started doing new things. In the end, everything turned out as I expected. Below is a photo report of the lantern assembly. 1
. ProSport headlights were purchased as donors.
2
. All internals have been removed to allow diodes to be placed there.
3
. At work I drew a stencil for placing 6x15 diodes.
4
. Red, orange and white diodes were purchased, as well as a bunch of resistors.
5
.
The first platform for the diodes was not successful - they didn’t move much away from class=”aligncenter” width=”960″ height=”720″[/img] 6
. The next one turned out well.
7
. Trying on diodes and future headlight design. Front view.
8
. Back view.
9
. Next came the long and tedious soldering process.
10
. The turn signal is almost ready.
11
. Reverse soldering.
12
. Since the insides were removed, so that nothing unnecessary could get in, platforms were made of plastic - soldered and coated with sealant.
13
. then painted.
14
. The insides of the first board (not everything is beautiful, the other one turned out better).
15
. The flashlight is already in the housing.
16
. For a better look, the lights have been polished and tinted.
17
. Bottom line.
Well, at the end there are 3 videos of the flashlights working:
1 - not a good option 2 - working during the day 3 - all the functions of the flashlight.
Tuning the rear lights of the VAZ 2114 - Video
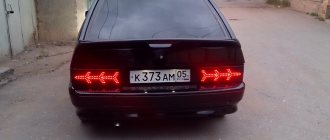
Do-it-yourself tuning of VAZ 2114 taillights: installing diodes and trims
The emergence of modern LED elements has led to the creation of a new stage in car tuning. Motorists began to decorate the car interior, doors and, of course, optics. If the front optics are decorated with “angel eyes,” then the owners of VAZ 2114 and other cars prefer to install LED elements on the rear lights. The taillights on the VAZ 2114 are easy to tune, but almost all of them involve the installation of diodes.
Interesting: in addition to the decorative value, LED lighting also has practical benefits: LEDs increase safety, as their glow is brighter than that of incandescent lamps; Riding becomes more comfortable in any weather conditions. Moreover, such tuning is permitted by law in the CIS countries.
How to make a diode ring
In order to make a taillight based on a diode ring, you will need the epoxy-based adhesive mentioned in this article. The basis for creating a lighting device will be the diode rings themselves or the LED strip. The headlight housing will be made from large or small reflectors, which are quite easy to find on the market if desired. You will also, of course, need paint (you can choose based on your personal aesthetic preferences). Most often, to work with VAZ 2114 cars, a coloring agent with a chrome-plated tint is used.
To make a lighting device, follow this algorithm:
- first of all, mount the diode rings in tin cylinders prepared in advance (as a rule, cans left over from drinks or food are used);
- in jars - carefully cut out the holes so that they look like wells. In this case, there should be two wells: external and internal. If, for example, a jar is suitable for an external well, then the internal one can be simply and cheaply made from a painted half-liter plastic glass;
Install a cylinder for mounting diode rings in each internal well with one standard Soviet-made reflector. They, among other things, must create illumination in accordance with the standard scheme: orange conductors, white reversing lights, red fog lights. After this, a large reflector may contain a certain number of elements that will look quite advantageous inside the module. The entire remaining space can be decorated with an LED ring;
Cylinder with mounted diode ring, install diode ring reflectors. At the same time, in order for their adhesion to the body to be normal, you will need fixing ribs made of a substance such as epoxylin;
Installation of reflectors of diode glass rings can be equipped with additional surfaces, also secured with epoxylin.
LED rings on car tail lights
If this algorithm is performed correctly, tuning the VAZ 2114 can be considered complete.
The emergence of modern LED elements has led to the creation of a new stage in car tuning. Motorists began to decorate the car interior, doors and, of course, optics. If the front optics are decorated with “angel eyes,” then the owners of VAZ 2114 and other cars prefer to install LED elements on the rear lights. The taillights on the VAZ 2114 are easy to tune, but almost all of them involve the installation of diodes.
Interesting: in addition to the decorative value, LED lighting also has practical benefits: LEDs increase safety, as their glow is brighter than that of incandescent lamps; Riding becomes more comfortable in any weather conditions. Moreover, such tuning is permitted by law in the CIS countries.
Tail light tuning options
LED overlays, diode rings for lights, individual LEDs and powerful light bulbs in a darkening film - tinting are very popular. Each option for decorating optics deserves attention:
- LED overlays . Among VAZ car owners, this is the most popular and inexpensive tuning for headlights. Nowadays you can find a huge number of overlays, but among motorists, diode overlays that were made by hand are more valued. Drivers adhere to this opinion due to the fact that ready-made options most often do not look original, and choosing a suitable option for 2114 is very difficult. LED overlays can be made from two main materials: epoxy glue and fiberglass.
Types of tuning rear lights on a VAZ 2114 car
Among the scenarios by which rear lights are most often tuned on VAZ 2114 cars, the following deserve special attention (any of them can be done with your own hands):
- LED overlays. Today, LED overlays are the most common option for tuning taillights with your own hands. At the same time, the vast majority of VAZ 2114 car owners prefer hand-made LED trims. There is a good reason for this - factory-made trims are not visually presentable and, for the most part, are not suitable for the lights of this car. Making LED overlays manually is not so difficult - just stock up on epoxy glue and fiberglass;
LED trims on the taillights of VAZ 2114 diode rings. Since any tuning implies the ability to work with electrical devices, making diode rings should not cause problems even for a novice auto mechanic;
Diode rings
- use of high power lamps. In most cases, this method is used before treating the glass with tint film, because the pure light of this type of lighting is too bright and can blind other road users. The effectiveness that such lamps create is offset by excessive fuel consumption and the prospect of overheating of the wiring. It is better not to use such tuning in relation to the VAZ 2114 car, since the power reserve of this car is below average;
- DIY installation of individual LEDs. This method is the most creative; it opens up a wide field for imagination. Among the disadvantages is the extra time spent, which will inevitably entail developing a design and installing the LEDs themselves on the lights. One of the advantages is the reduced cost of separately purchased LEDs.
LED lamps on the headlight of a VAZ 2114
Manufacturing of overlays
To make your own overlays you will need the following tools and materials:
- Working taillights and a set of LEDs;
- Stationery knife;
- Fiberglass;
- Paints and varnishes;
- Masking tape;
- Epoxy adhesive.
The instructions are suitable for homemade decorative decorations or purchased ones. The diode strips are attached with tape or its alternative:
- The taillights need to be covered with masking tape. After this, you need to apply fiberglass cloth to the tape.
- LED overlays will be installed in it, then the fiberglass needs to be impregnated with epoxy glue. It should be applied in 2-3 thin layers. All irregularities must be removed, and then wait for complete drying, which in normal garage conditions lasts 12 hours.
- When the glue has dried, you can remove the workpiece and then outline the contours of the future decoration with tape or a marker. After this, the designed profile is cut out with scissors. Once the two shapes are cut out, you can move on to putty. The dried surface should be sanded with fine-grained sandpaper. Afterwards the primer is applied, and then the main coat of paint.
- After 100% drying, a protective varnish is applied. LED covers are installed on the rear lights. Tuning is complete.
Tip: LED lamps can be used to decorate not only the rear lights. VAZ owners often install LED strips as turn signals and fog lights on the front optics. Another interesting option is to decorate the rims and dashboard.
How to make overlays
To make LED headlight covers for a VAZ 2114 with your own hands, you will need the following tools, devices and consumables:
Recommended literature on repair and maintenance of the VAZ 2114:
If you have everything you need, you can start tuning. These instructions are suitable for installing LED overlays, both home-made and purchased. The procedure is as follows:
- completely cover the taillights with masking tape;
- Apply fiberglass fabric to the same adhesive tape (it is in it that the LED overlays will be mounted);
- treat the fiberglass with epoxy adhesive liquid (apply it in 2-3 thin layers);
Blanks for overlays
Blanks for overlays before and after sanding and priming
At this point, the tuning of the VAZ 2114 car can be considered complete.
Installing LEDs in taillights
If LED covers are installed on top of the optics, then the diodes need to be inserted into the headlights - you will need skills in working with electronics and a soldering iron. Before starting the installation, you should prepare the LEDs along with the board; here everything depends on the capabilities and desires of the motorist - in the future, the LEDs should be freely connected to the wiring of the VAZ 2114. It is also necessary to make a stabilizing circuit. Stabilizers sold under the number “7812” are suitable for this. This is necessary so that the lights in the parking mode provide a weaker glow, and in the “STOP” position they provide 100% power.
For those drivers who value creativity, we can advise you to add LED arrows to the rear lights, which will be used in the future to indicate turns. It looks stylish and original. The motorist will need to assemble several boards that will represent an arrow.
This kind of DIY tuning requires a large amount of materials. This is a set of LEDs along with resistors, fasteners for diodes, adhesive film, sealant (preferably silicone), epoxy glue. You may be taken by surprise by the question “How many tuning LEDs does it require?” Here you need to independently study your tail lights, while taking into account the turn relay. You need to buy LEDs with a reserve, since they can burn out over time, and an exact copy may no longer be available. According to motorists, white LEDs are better suited for the role of diffusers, the turn signals are decorated with orange diode elements, the brakes are red, and the reverse gear is transparent.
Reversing lights
Lamps, which are a light-signal element that notifies you when you are reversing, can significantly increase the level of safety on the road.
The turning on of the rear lights indicates that the car is moving backwards, so you should be careful. Non-working lights can easily lead to accidents and collisions, for which you will ultimately be the culprit.
What is this?
3X headlights are white lighting fixtures. They turn on when shifting into reverse gear.
Step-by-step instruction
Installation of LEDs on the rear lights is carried out in the following sequence:
- The flashlight must be removed from the car. Next, it needs to be cut into two parts - a high-quality burning device can handle this. The result should be an even and thin seam.
- Now you have access to the reflectors and reflectors - they need to be removed.
- The taillights need to be completely disassembled. It is recommended to mark with a marker the position of future LEDs on external surfaces.
- Inside you need to stick circles of self-adhesive film with a diameter of 15 mm.
- The surface of the side lights and brake lights must be coated with silver paint. When the paint is completely dry, the self-adhesive film can be removed.
- The reflectors are installed on a small layer of epoxy glue. After this, you can coat all joints with sealant as a preventative measure.
- The LED boards are attached to the wiring and placed in the headlight housing.
- A stabilization circuit is installed that will regulate the LED connections.
- The pivot blocks can now be assembled and connected to the taillight. It is necessary to place the modules on epoxy glue. If the optics are working properly, then you can glue the block together - the tuning is complete.
Taillight tuning ideas
If you decide to modernize and tune your VAZ brake lights or taillights on your own, it will be useful for you to familiarize yourself with some ideas. Options for tuning headlights on a VAZ 2114 are given below.
Manufacturing of overlays
In order for the front or rear lights on a VAZ 2114 to be equipped with overlays, you need to perform the following steps:
- First of all, the rear lights of the VAZ 2114 must be covered with masking tape, and then the tape should be applied to a special fiberglass cloth.
- The diode pads will be mounted into this fabric, so it also needs to be impregnated with epoxy glue. The glue itself is applied in two or three layers. To make VAZ signals look better, you should get rid of all irregularities on the surface, and then wait until the glue has completely dried.
- After complete drying, the workpiece is dismantled. If you are making overlays for the rear lights, then you need to use a marker to mark the contours of the elements, and you need to take into account that the overlays do not interfere with the headlights burning normally. Once the outline is marked, the shapes themselves need to be cut out using scissors, and then they will need to be puttied. When the surface is dry, it will need to be treated with fine-grained sandpaper, after which primer is applied to the pads, and after it has dried, a base coat of paint is applied.
- When the paint has dried, varnish should also be applied to the surface. After this, the covers for the rear lights can be installed in the optics.
Angel eyes of the domestic VAZ
Installing LEDs in taillights
Another tuning option is to install LED lights in the optics.
The scheme of work is as follows:
- First, the headlight is removed from its installation location. After this, you need to cut it into two parts - separate the glass from the main structure, you can try cutting the seam with a knife.
- After this, you will be able to access the reflectors, as well as the reflective elements - these also need to be dismantled. Next, in accordance with the diagram, the headlights are completely disassembled, and the place where the diode lights will be located is marked on them with a felt-tip pen or marker.
- Circles of self-adhesive film should be glued inside the structure. The diameter of these circles should be 1.5 cm.
- After these steps, the surface of the dimensions, as well as the brake lights, must be treated with silver red. After it has completely dried, the previously applied film is dismantled.
- Installation of reflective elements is carried out on a small layer of glue. For prevention, all joints of the structure can be treated with sealant. The diode boards themselves must be installed in the optics housing and securely fixed. After this, a stabilization circuit is installed, the purpose of which is to regulate the diode connections. Having completed these steps, the rotating blocks can be connected back to the main optics, and the modules themselves should be installed with epoxy glue.
- At the final stage, it is necessary to check the functionality of the flashlights - if everything works in normal mode, then you can assemble the optics in the reverse order. Securely glue the glass of the lantern to the main block - if the fastening is unreliable, this can lead to fogging of the glass (video author - Alexander Amochkin Kolomna AAK channel).
Manufacturing of diode rings
The procedure for making diode rings is as follows:
- The rings themselves must be placed in special cylinders; they must be made with your own hands in advance; for these purposes it is quite possible to use tin cans, for example, from canned food. These cans are carefully cut so that you end up with a well-like structure. In total, you should have two wells - external and internal. After this, the wells themselves can be painted.
- After this, conventional reflectors must be installed in the internal elements to reflect light. If you install diode rings in the rear lights, then the reflectors should be white, if in the dimensions, then yellow, if in the fog lights, then red. The remaining space that remains after installing the reflectors must be equipped with a diode ring.
- The next stage is the installation of reflective elements and diode rings. In order for these components to be securely fixed, it is necessary to equip the structure with stiffeners in advance. Epoxyline can also be used for these purposes. The structure is installed in the optics, after which the functionality of the optics is checked (the author of the video is the LexA channel!).
Tinting
As for tinting, the choice of this option must be approached responsibly. If a tint film is chosen that is too dark, this will result in lower visibility of the car on the road.
Accordingly, this may affect the safety of the driver and passengers:
- The optics are removed from the car, thoroughly washed, wiped and dried. If there are chips or irregularities on the headlight glass, they must be sanded using sandpaper.
- The corresponding piece of tint film is cut and glued to a flat surface.
- When applying the sticker, do not allow bubbles to form on the glass; you can use a hair dryer to smooth the film.
- After this, the excess pieces are cut off and the headlight is put in place.
Manufacturing of diode rings
To create taillights with your own hands, you need the same epoxylin and strong glue. The basis is diode rings or tape. The body will be made from small and large reflectors, which can be found on the hardware market. The last element is the paint, which the motorist likes best. Most VAZ 2114 owners choose chrome paint.
- Diode rings must be installed in cylinders, which are best made from tin cans. Coffee or canned food cans are suitable for this.
As a result, you should get such tuning yourself. Detailed visual aid for installing LEDs in VAZ optics:
Possible options for tuning rear headlights on a VAZ 2114
The model of the domestic automaker VAZ 2114 was literally created for tuning and modifications. A number of external changes allow you to transform the car and give it new colors. Some go further, and in addition to external tuning, they use methods to improve technical characteristics.
Today we’ll talk about tuning optics, or rather rear headlights.
Standard rear lights
LEDs as an impetus for development
With the advent of LEDs, the development of tuning rushed forward sharply. More and more new and unique solutions began to appear; no other light bulbs can achieve such a visual effect as diodes.
Using LEDs you can decorate the interior, doors, and optics. If it is now fashionable to install so-called angel eyes in front, then special elements based on diodes are most often mounted for the rear lights.
LEDs
LEDs have not only decorative, but also practical properties. Due to them, safety increases, since the level of luminescence is higher. But most importantly, such an option for modifying optics is permitted by the legislation of our country and not only that.
Types of tuning
Tuning optics is not difficult, even if you are relatively new to this matter. The main thing here is to first decide which option for modifying the rear headlights you want to use for your VAZ 2114.
There are a few basic ideas that are particularly popular today.
Tuning type
Peculiarities
LED overlays
A popular and affordable option. There are many ready-made overlays offered on the market, but you can also make them yourself. To create the overlay you will need fiberglass, LEDs and epoxy glue
Diode rings
This modification option involves a complete replacement of the rear optics with diode rings. To manufacture them, you will need serious experience in working with electronic devices.
Powerful lamps
This type of modification also involves the use of a tint film for headlights. Due to the tone, bright light will be better focused. But powerful lamps have disadvantages - they increase fuel consumption, load the generator and overheat the wiring. Since the engine power of the VAZ 2114 is not high, it is not entirely reasonable to use this option
Individual LED elements
The most original modification option, since it allows you to express your own imagination as much as possible. But you will have to spend time and effort creating a pattern of diodes and installing them
From a cost-saving point of view, purchasing individual LEDs will be more profitable than purchasing finished products. But in this case, you must be sure that you will be able to get high quality devices. Otherwise, it’s better not to take risks and spend more money.
Manufacturing
Now we will tell you how you can create with your own hands the above types of LED devices intended for installation in the rear lights of the fourteenth model from AvtoVAZ.
Overlays
Let's start by creating diode pads. To work you will need the following set of tools and materials:
- Fiberglass;
- LED set;
- Stationery sharp knife;
- Paint and varnish material;
- Epoxy adhesive;
- Masking tape.
We suggest you read the instructions, which will help you understand the nuances of making and installing ready-made overlays yourself. You can use tape or similar materials to secure the elements.
- Cover the rear lights with masking tape. Then apply fiberglass cloth to the tape.
- Impregnate the fiberglass with epoxy glue, which will allow you to install the overlays into it. The glue should be applied in two or three layers, but only the layers should be thin.
- Drying usually takes about 12 hours. But still, read the instructions for the epoxy glue that you purchased and are using.
- Now remove the blank and mark the contours of the future decor. To do this, use tape or a marker.
- Using scissors, cut out the resulting profile.
- After cutting out the shapes, start puttingty.
- When the surface is dry, sand it with fine-grained sandpaper.
- Now apply a coat of primer and then a coat of paint.
- When the paint is completely dry, you can apply a protective varnish.
- Install the covers on the rear lights, after which the tuning can be considered complete.
Such overlays decorate both the rear lights and the turn signals and fog lights in the front. Consider the option of installing diodes in the rims or inside the cabin.
Installing diodes inside headlights
The covers are mounted directly on top of the rear optics, and the next option involves inserting them inside the headlights.
- Before installation, prepare the LEDs and board. If everything is done correctly, you will be able to connect new LEDs to the wiring of your car in the future without any problems;
- Make a stabilization circuit. Stabilizers with catalog number 7812 will come in handy here. This will allow the diodes to shine more dimly when the lights are turned on, and to produce their maximum power when the brake lights are turned on.
For work you will also need:
- LEDs with resistors;
- Fasteners for diodes;
- Adhesive film;
- Silicone sealant;
- Epoxy glue, etc.
To determine the number of diodes needed, study your tail lights, and be sure to take into account the turn signal relay. Be sure to buy diodes with a reserve, since over time they can burn out, and finding the same ones in a year or two may be a problem.
Diodes inside
For lenses, choose white diodes, for turn signals - orange, brakes - red, and reverse gear - simply transparent.
- Remove the lantern, then cut it into two components. For this you will need a quality burning tool. Try to get a thin, even seam as possible.
- Remove the reflectors and reflectors.
- Completely disassemble the rear optics. Use a marker to mark the position of the diodes on the outer surface.
- Cover the interior space with circles of self-adhesive film. Their diameter should be 15 millimeters.
- Treat the side lights and brake lights with silver paint. After it has completely dried, remove the film.
- The reflectors are mounted on a thin layer of epoxy. It will not be superfluous to treat all joints with sealant.
- Boards with LEDs are mounted on wiring and placed inside the headlight housing.
- Now it’s time for the stabilization scheme. It will regulate the diode connections.
- Assemble and connect the rotating blocks to the rear optics. The modules are seated with epoxy glue. If checking the operation of the rear lights shows that everything is working properly, glue the block together and complete the tuning.
Diode rings
A very common option for tuning rear optics, which achieves an incredible visual effect. The result largely depends on the efforts made, the design developed and the quality of the materials used. All in your hands.
Diode rings
To create elements, use strips or ready-made LED rings. The body is made from reflectors of different sizes, which are not difficult to find in the automotive spare parts markets.
Choose paint at your discretion. Today it is popular to use chrome or silver.
- Diode rings must be located inside the cylinders. Simple tin cans are suitable for their manufacture - for coffee, canned food, etc.
- Cut them carefully with a sharp knife or metal scissors to create a mini well. Make two of these elements. One will be internal, and the second will be external.
- As an option, the outer well is made of tin, and the inner well is made of plastic, which is then painted in the desired color.
- Soviet reflectors are installed inside the inner well, which will provide a glow according to the standard scheme. Namely, the turn signals are orange, the reverse is white, and the fog lights are red.
- A large reflector may leave a decent amount of extra elements that will perfectly complement the internal space of the module. Fill the remaining space with other LED rings of your choice.
- Now you need to mount the reflectors and LED rings. To securely fix them, provide stiffening ribs. It is important to use epoxylin.
- Additional lighting is often installed on plexiglass and the whole thing is secured with epoxy glue.
There are a lot of options for improving the rear optics on the fourteenth model. You just have to choose the type of tuning that you like more than others and corresponds to the possibilities for independent production.
One of the tuning options
If you don’t have enough experience, but you still really want to improve the appearance of your VAZ 2114, we advise you to contact the appropriate tuning studio. Today there are many of them, so there shouldn’t be any problems finding a performer.
Why don't FZH work?
There are several reasons why FZHs can fail. Let's try to understand them.
| Cause of malfunction | What to do |
| Lamp burned out | Replace the burnt out bulb with a new one, check the condition of the contacts |
| The fuse is broken | Check, replace if necessary. A fuse can lead to loss of functionality of the entire contact circuit |
| There is no ground on the board | The board is located under the lamp. Simple repair to fix the problem |
| The contacts have oxidized and become coated | Cleaning contacts is not difficult |
| The wiring is broken | You will have to diagnose the condition of the circuit, check the integrity of the wiring using a tester and a visual method |
| The contact on the headlight film has burned out | You will need to clean the contacts and replace the elements if necessary. |
| There is a breakdown in the gearbox mechanism | In such a situation, the issue of gearbox malfunction will have to be resolved. |
| The frog (sensor) has failed | Check the condition of the reverse sensor, replace the device if necessary |
There are a lot of reasons for the failure of the FZH, so the driver must know exactly how to eliminate this or that type of breakdown.
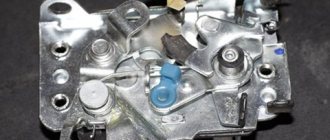
Block ZF
Removing the rear light board
To remove the board, you will need to perform a few simple manipulations:
- Open the trunk;
- Remove everything unnecessary from the space so that it does not interfere with your work;
- Remove decorative trim;
- Remove the plastic casing;
- Remove the back panel;
- Having gained access to the socket and the license plate lamp, you can remove the devices;
- Remove the reversing sensor mounting studs and the headlight itself.
Many people confuse the reverse sensor with the speed sensor, since these devices are located in close proximity to each other.
Dismantling works
Checking the functionality of the sensor
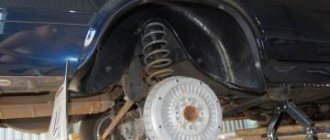
If the taillights do not turn on, the culprit may be the reverse sensor, that is, a frog in the people.
Remove the contacts from the sensor and clamp them together, then turn on the ignition. If the light appears, the sensor needs to be replaced. If there is still no light, the integrity of the circuit is broken, but everything is fine with the frog itself.
Replacing the sensor is quite simple:
- Place the car on a pit or overpass;
- Apply the handbrake;
- Remove the protection from the bottom, opening access to the gearbox;
- Remove the contacts from the old sensor;
- Place an empty container under the sensor and remove the frog. The container is needed because when the device is removed, oil will leak out of the gearbox;
- Remove the old frog, insert a new one in its place;
- Let the car sit for a while;
- Check the oil level inside the gearbox;
- If necessary, add oil to the required level;
- Reassemble.
Article on the topic: Replacing stabilizer struts on a VAZ 2110 (reasons and complete replacement process)
Such repairs can be done with your own hands, and the cost will be approximately 250 rubles. This is exactly how much a new sensor for a VAZ 2114 costs now.
Problem with the light bulb
It is not uncommon for taillights to stop functioning normally due to the failure of the bulb itself.
- To replace it, you need to disconnect the block with wires and remove the contact panel from the flashlight. Here you just need to squeeze the side latches to remove the plastic panel;
- Apply a little pressure on the cartridge and unscrew it counterclockwise;
- Check the condition of the contacts and wiring;
- Screw in a new light bulb that matches the previously installed one;
- If necessary, before screwing in the new lamp, clean the contacts and test the wiring with a tester. There may be a break in the circuit, so a new light bulb will not work.