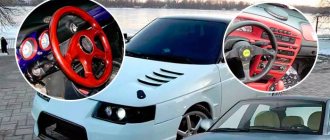
Doing car tuning yourself is quite simple, thanks to the huge selection, both in stores and markets, of LED elements with which car owners can decorate not only the car interior, but also optical devices. Recommendations from specialists, which we will further analyze, will make clear how tuning is done correctly for VAZ-2114 car headlights. In addition, watching a video tutorial on a web resource will simplify the implementation of this activity.
Components of rear optics
Many people are not satisfied with the standard optical equipment, because the previous VAZ 2109 body model was identical. The optical elements are easily removed and you can improve them with your own hands. But before we begin to consider tuning the headlights, we should consider the elements of the rear optics separately.
The taillights are presented in the form of a headlamp unit (that is, with several components). The rear headlight unit includes: side lights (they always light up when the lights are on), brake lights (when you press the brake pedal they start to light up, warning the car behind you) and turn signals. Fog lights and reversing lights are installed separately from this unit.
Installing LEDs on top of car optics
If the car owner decides to decorate his car with LED overlays that need to be installed on top of the optical device, then the installation will become a little more complicated, since the diode will have to be inserted directly into the car headlights, and this will require, albeit small, but still, skills in working with electronic devices and the ability to use soldering iron Experts recommend carrying out this work in stages:
- select the required number of LEDs and a suitable board;
- familiarize yourself with and make your own voltage stabilization circuit by watching a training video tutorial on an Internet resource;
- prepare for work silicone sealant, epoxy-based glue, fasteners for future diodes and LEDs with resistors.
Replacement of VAZ 2114 taillights
Some people are intimidated by replacing headlights themselves, but in fact this procedure is quite simple.
- All that is required for replacement is a 10" wrench. To remove the headlights, you need to open the trunk.
- The following actions should be performed with the engine turned off to avoid electric shock.
- Carefully disconnect the contacts of the flashlight boards, without damaging the lamp itself and the board.
- The final step is to unscrew the 4 nuts that secure the light to the rear of the car, holding the light so as not to scratch the car's headlight coating.
Based on the ultimate goal of removing the headlight, you can remove the lamp holder from the headlight by disconnecting the fastening latch. Ready!
Step-by-step instruction
Installation of LEDs on the rear lights is carried out in the following sequence:
- The flashlight must be removed from the car. Next, it needs to be cut into two parts - a high-quality burning device can handle this. The result should be an even and thin seam.
- Now you have access to the reflectors and reflectors - they need to be removed.
- The taillights need to be completely disassembled. It is recommended to mark with a marker the position of future LEDs on external surfaces.
- Inside you need to stick circles of self-adhesive film with a diameter of 15 mm.
- The surface of the side lights and brake lights must be coated with silver paint. When the paint is completely dry, the self-adhesive film can be removed.
- The reflectors are installed on a small layer of epoxy glue. After this, you can coat all joints with sealant as a preventative measure.
- The LED boards are attached to the wiring and placed in the headlight housing.
- A stabilization circuit is installed that will regulate the LED connections.
- The pivot blocks can now be assembled and connected to the taillight. It is necessary to place the modules on epoxy glue. If the optics are working properly, then you can glue the block together - the tuning is complete.
Types of tuning rear lights 2114
A person always has a desire to stand out from others. He directs his desire to the equipment he owns. Then it comes to tuning cars. Regarding the rear lights on the car, there is a choice of how to modify the rear optics. The following types of optics tuning are distinguished:
- Complete replacement of headlights with options that differ from standard headlights;
- Installation of LEDs.
Let's consider each type separately.
Complete replacement of headlights
This is the simplest tuning option, but more expensive. The convenience is that in this way you can save time, because other options require complete disassembly of the headlight. There is also no need to be afraid that the headlights will be damaged or that something will not stick. In this case, there will be no such concerns, because here it is enough to purchase a tuning kit and install it instead of standard optics, in accordance with the instructions given above.
When choosing alternative headlights for a VAZ-2114, you should pay attention to a number of recommendations that you should follow in order to avoid unnecessary expenses and the purchase of fakes.
- When choosing a kit, pay attention to the quality of the material, plastic, and fasteners. If there are any chips, thin elements, or unreliable fastenings, you should not take the kit. Thus, there is a risk of breaking it during installation, or during operation it may fall off, or completely crack.
- The product must have seals. Their presence will provide a gap between the headlights (material - plastic) and the body (metal) and will extend the wear resistance of the purchase.
- Each headlamp has its own bulb. A good manufacturer will not save on a turnkey kit, because in the future they will become like samples, according to which, when burned, new light bulbs will be purchased.
How to make overlays
To make LED headlight covers for a VAZ 2114 with your own hands, you will need the following tools, devices and consumables:
- functioning car rear lights;
- set of LED lamps;
- fiberglass;
- materials for painting works;
- adhesive tape for painting;
- epoxy based adhesive.
Recommended literature on repair and maintenance of the VAZ 2114:
VAZ 2113i / 2114i / 2115i petrol from 1997 / 2007, repair manual
More details
VAZ 2115 / 2114 / 2113 petrol repair manual
More details
LADA 113 / 114 (VAZ 2113 / 2114) petrol repair manual
More details
LADA 113 / 114 / 115 – SAMARA petrol repair manual
More details
If you have everything you need, you can start tuning. These instructions are suitable for installing LED overlays, both home-made and purchased. The procedure is as follows:
- completely cover the taillights with masking tape;
- Apply fiberglass fabric to the same adhesive tape (it is in it that the LED overlays will be mounted);
- treat the fiberglass with epoxy adhesive liquid (apply it in 2-3 thin layers);
Blanks for overlays - remove all defects and irregularities from the surface and wait for complete drying (in most cases, this stage lasts at least 12 hours);
- after the glue has dried, the workpiece should be removed and the contours of the future decoration should be marked on the resulting surface;
- cut the prepared profile with a knife or scissors;
- sand the prepared surface with fine-grain sandpaper;
Blanks for overlays before and after sanding and priming - apply a primer layer;
- cover with base paint;
- apply a special varnish for protection;
- install LED blanks on the taillights.
At this point, the tuning of the VAZ 2114 car can be considered complete.
Operating modes of LED optics
If you decide to install LED headlights yourself, then it will be useful for you to learn about the operating modes of this type of optics.
Depending on the manufacturer, the optical control unit may have several operating modes:
- urban;
- bad weather mode (rain);
- all-weather mode;
- high speed;
- as well as the mode for driving through complex intersections (the author of the video is Big Test Drive).
As a result, in order to adjust the level and position of the light beam, it is not necessary to completely change the lighting angle. To do this, it will only be enough to turn off those few diode elements that blind the driver of an oncoming vehicle. You will not suffer from this, and the driver of the oncoming car will not be “blind”. It should be noted that the Audi automobile concern recently tested various adaptive light systems, and the results of these tests were interesting.
In particular, a dull darkened spot clearly covered exactly the area where the control unit detected the oncoming light beam. And even if this beam moved in different directions, the dark spot followed it without slowing down. Moreover, this did not affect the quality of the light beam of the vehicle in any way. The shadow simply covered the oncoming light, but at the same time, the sections of the road necessary for the motorist were always well lit.
Of course, the Audi company produces only high-quality lighting systems, you can’t argue with that. If you opt for cheaper Chinese options, then the situation here is somewhat different. Firstly, such systems can be equipped with only a few mode functions - for example, only all-weather and rain or rain and city. Secondly, on cheaper options the quality really leaves much to be desired.
It is not a fact that a “smart” control unit that automatically adjusts the direction of the light flux will be truly smart. Therefore, when choosing optics, it is better not to opt for cheap options - after all, we are talking about the safety of the person behind the wheel. In the video below you can see what the tuned headlight optics on a Lada Priora car looks like (the author of the video is Alexander Kuleshov).
Manufacturing of diode rings
To create taillights with your own hands, you need the same epoxylin and strong glue. The basis is diode rings or tape. The body will be made from small and large reflectors, which can be found on the hardware market. The last element is the paint, which the motorist likes best. Most VAZ 2114 owners choose chrome paint.
- Diode rings must be installed in cylinders, which are best made from tin cans. Coffee or canned food cans are suitable for this.
As a result, you should get such tuning yourself. Detailed visual aid for installing LEDs in VAZ optics:
Typical faults and methods for their elimination
There are many reasons why taillights may fail or partially not work, but the main one is failure of the flexible printed circuit board. This is, in fact, the most sore spot of the rear light devices of the VAZ 2115.
Often, flimsy contact pads that pretend to be light bulb socket contacts fail, although in fact there are no sockets in the flashlights - a plastic ring that fixes the light bulb, a plastic pressure pad (all with latches) and contact pads on the board. It couldn't be simpler, but funnier too.
The service life of such a “cartridge” is six months maximum. Considering that the car was produced for 15 years, then this approach of the developers to the flashlight, the design of which has not changed over all these years, is surprising, to say the least. But the fact is clear.
Converting the board to cartridges
You can, of course, regularly change the flexible board - this is not a problem. But, firstly, the board costs money and, in principle, should not be a consumable item in order to buy it in packages. And, secondly, when someone is dead, for example, you won’t immediately notice “stop”, which means that at any moment we risk getting “in the butt” in the literal sense of the word.
Therefore, it’s better to tinker and do what the VAZ designers should have done a long time ago - replace all this flexible hack with normal cartridges. So, we go to the store, buy three ordinary plastic lamp sockets: one for a single-helix P21W, two for a double-helix P21/5W lamp. They are practically the same in size and appearance.
You will also have to buy a set of four-pin male-female car connectors. The photo below shows only an option, but there are many types of such connectors. In addition, any others for a larger number of contacts will do.
How to disassemble the rear light board? Elementary and without any tools. For speed, you can use an awl, the tip of a knife or a screwdriver, but you can do everything with your bare hands. We press the latch (photo on the left) and pull out the plastic imitation of the cartridge. Everything else will fall apart on its own. We remove all three cartridges.
We completely disassemble the panel - remove the plastic lamp clamps, remove the flexible board. We mark places for new cartridges, while focusing on the position of the old ones.
We remove the mounting posts for old cartridges and everything that interferes with the installation of new cartridges using, for example, a soldering iron. We drill holes of such a diameter that our new cartridges fit in there tightly and do not dangle. If there is no appropriate drill, drill with a smaller diameter, then bore with a round file.
For the turn signal bulb we use this socket - it takes up less space, but you can put another one - just cut it a little (however, this one also had to be cut a little).
We install the cartridges in their places and fix them in any available way. In the photo below they are simply soldered with a soldering iron. Not exactly aesthetically pleasing, but reliable. But this “aesthetics” will still not be visible. We take out the wires of the “turn” cartridge through the hole made.
All that remains is to solder the connectors: – one – to the light bulbs, the other – to the flashlight power harness, having previously cut off the old one.
We install the board in place in the lantern, connect the power supplies, and check.
Modified board installed in its original place
The cartridges we have chosen are, of course, optional. This is how the author of the photo below came out of the situation. He used metal cartridges.
Replacing the power connector
Sometimes the sockets in the rear light work like clockwork, but the connector, which is integral with the flexible circuit board, fails. If you don’t want to work on installing cartridges, you can solder a regular block to the board tracks, and replace the standard block on the power harness with its mating part. The idea itself looks like this:
The photo above shows a modification of the flashlight for the VAZ 2114. For our 2115, everything looks the same, only there will be 4 wires, and the block can be taken with 4 contacts, and not 6. Well, it would be nice to protect the soldering area from moisture with a sealant or hot glue gun.
LEDs as an impetus for development
With the advent of LEDs, the development of tuning rushed forward sharply. More and more new and unique solutions began to appear; no other light bulbs can achieve such a visual effect as diodes.
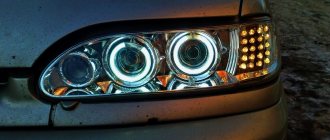
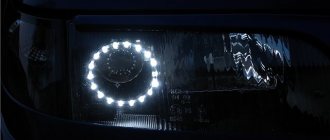
Using LEDs you can decorate the interior, doors, and optics. If it is now fashionable to install so-called angel eyes in front, then special elements based on diodes are most often mounted for the rear lights.
LEDs
LEDs have not only decorative, but also practical properties. Due to them, safety increases, since the level of luminescence is higher. But most importantly, such an option for modifying optics is permitted by the legislation of our country and not only that.
