Home » Domestic auto industry
Reading time: 7 minutes. Updated 08/04/2019
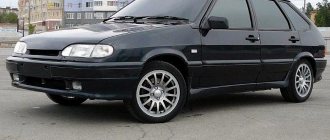
Often, lovers of domestic cars encounter problematic bodies. For example, you bought a used VAZ 2109. At first glance, everything seems to be fine, but when it comes to the body, you understand that not everything is so smooth, you even think about replacing the entire body. But don't be afraid of this problem.
With the right tools and steady hands, you can get rid of a rotten arch, bottom or threshold. In this article we will describe the step-by-step process of body repair.
What the different modifications have in common
The metal frame 2109 is a supporting structure of the hatchback type with five doors. The unified body was created on the basis of the VAZ 2108, but most of the parts have different sizes. Both models have solid frames and attachments.
The body parts of 2109 are connected by spot welding, and areas of high load are reinforced by electric arc welding. For their production, sheet steel with a thickness of 0.7–1 mm is used. Small parts are stamped from thicker steel.
The body structure of the VAZ 2108 is all-metal welded, three-door type. Available in passenger and cargo-passenger versions. The “nine” has a five-door body, the internal and external side panels are equipped with openings for doors. Otherwise, the 2109 frame does not differ from the 2108.
Why do thresholds wear out?
Thresholds are load-bearing elements that provide the body with additional rigidity. Due to the fact that these parts are located in the lower part of the body, they are constantly exposed to negative factors:
All this significantly reduces the service life of the thresholds. In addition, the mediocre quality of painting and anti-corrosion treatment of body elements from the factory leads to the fact that almost every owner of a “Nine” is faced with the need to replace the thresholds on their car.
Signs of the need to replace thresholds on a VAZ 2109
The appearance of even small areas of corrosion on the thresholds is the first sign that these body elements need to be paid attention to.
At first glance, such areas may seem harmless, but if you examine them in more detail and clean them, it may turn out that under the layer of paint there is a serious source of corrosion or completely rotten metal.
It is important not to miss the moment when replacing the threshold is still possible. It often happens that the threshold rots around the perimeter and there is simply no need to weld a new part. In this case, more serious and labor-intensive body work will be required.
Threshold repair options
Repair of the body elements in question can be performed in two ways:
- welding patches;
- complete replacement of parts.
The first option requires less effort and financial investment. However, this is where its advantages end. If you follow the recommendations of specialists, then repairing the load-bearing part of the body with patches is not the best option. This is due to the fragility of such repairs.
It will not be possible to completely remove corrosion with partial repairs, and its further spread will lead to new rust and holes.
The weakest link
The frame of VAZ 2109, 2108 cars has several weak points that are most susceptible to corrosion.
Rear beam mountings
The rear beam is attached to triangular brackets on both sides of the body with rubber-metal hinges. The brackets are secured with studs welded to the rear spar reinforcement. Foci of corrosion appear around the fasteners, destroying the thresholds, amplifier. If the damage is severe, the beam can be torn out of the body, which leads to loss of control. The bottom of the 2109 is repaired in the early stages of corrosion.
Fastening the brace brackets
The radiator frame in these places is reinforced with thick metal, which is subject to corrosion. The VAZ 2109 bottom repair insert is sold in specialized stores. The spare part is welded into place of the destroyed one, respecting the geometric dimensions of the body.
Suspension strut cups
Dirt accumulated in the wheel arches destroys mudguards and suspension cups. Cracks appear in the places where nuts and studs are attached due to high vibration load. Defects are eliminated by overcooking the glasses. For preventive purposes, it is recommended to use fender liners and renew the protective coating of the arches.
Thresholds
The most common problem with “nines”, which reduces body rigidity. Corrosion spreads under the plastic covers. It is impossible to change the thresholds without restoring the floor. Either the part is replaced completely, or the most damaged elements - amplifiers, lower part, outer lining.
Algorithm for carrying out body work on the “nine” in general terms
Let's get acquainted with the work process so far in general terms:
- First of all, it will be necessary to remove those areas of the body that are rotten or deformed;
- On the “nine”, over time, the front floor with sills and reinforcements, the bottom in the rear, doors and fenders rot most quickly.
Note. It may even be impossible to install a jack, since the area provided by the manufacturer for it (the jack) becomes unusable. To work in this place, the car can be raised using an engine support beam instead of a support.
- The hood of the “nine” also cannot “boast” of endurance. In the place where the battery is located, it becomes covered with rust;
- The floor of the fuel tank is also considered a noticeable problem on the “nine”;
- The same fate befalls optics reflectors, muffler and other parts over time.
Tools
Body repair of a VAZ 2109, including replacing the bottom yourself, begins with the selection of tools. Restoration work requires specific equipment:
- hammers of different sizes for straightening work;
- grinder, set of discs for removing rust and paintwork;
- carbon dioxide cylinder;
- welding machine;
- metal drills, chisels with a hardened tip;
- two jacks, a lift;
- metal brush;
- standard set of tools - screwdrivers, wrenches.
Application of metal patches
Welding the bottom begins with disconnecting the battery. The welding process will require the presence of an assistant. One fixes the patch, the other scalds it from below, carefully with a distance of several centimeters. If the patch is applied to a flat surface, it can be fixed using a semi-automatic welding machine.
The geometry of the body is constantly checked to avoid problems with doors not closing after repairs. The final seam is made continuous.
Bending the metal to weld the rotten bottom is done using gas welding. The softened metal quickly takes on the desired configuration. You can also use a special device for bending metal blanks. The seams on the surface are cleaned with a grinder and coated with anti-corrosion compounds.
Where to start and where to end
Repair work begins with dismantling the deformed, rotten parts of the “nine”:
- Disassembling the engine compartment, draining coolant and antifreeze.
- Removing the doors.
- Dismantling the amplifier - “TV”.
- Rusty areas are cut off with a grinder.
- The holes will have to be repaired or patched.
- Problem areas are strengthened with iron.
- Mudguards are reinforced with spot welding.
- Spare parts are adjusted in accordance with the geometry of the car.
- Thresholds and wings are fastened with bolts followed by electric welding.
- New arches are installed, and if necessary, the bottom is completely changed.
Wings of the "nine"
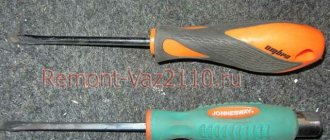
The fixation of the front wings on the “nine” was done quite well, if we mean ease of removal. Just a few bolts hold them in place. Therefore, no welding is required to dismantle them; you just need to arm yourself with a pair of good shaped screwdrivers and an 8-size socket with an extension.
- Remove the fender liners, which are held on by self-tapping screws;
- The fender bolt holding the body element from below at the threshold is unscrewed;
- Two more bolts hold the wing on the inside;
- You will have to completely dismantle the bumper or unscrew its side fastenings, and then move it to the side to gain access to another bolt securing the wing;
- Finally, it remains to remove a few bolts securing the wing from above.
It is also not customary to tinker with a wing if it is deformed. You can easily replace it with a new one, especially since it is inexpensive - 1200 rubles. If you use auto-disassembly, you can buy the part even at half the price.
If, however, the wing has received minor deformations or there are traces of rust on it, then it is easy to repair the part. Again, it can be removed and then finished to perfection on a garage workbench.
If you don’t want to remove the wing, you can repair it directly on the car using straightening hammers, pliers and a jack.
Complete replacement
In case of severe damage from corrosion or metal obsolescence, the bottom of the “nine” is completely replaced. This requires:
- amplifiers;
- thresholds;
- jack;
- connectors;
- bottom;
- spars.
To repair the “nine”, you can use one second of the bottom of the 2108 cabin.
Preparatory work
Before replacement, doors, fenders, and sills are dismantled. If there are traces of corrosion, the cover plate and connector are replaced. Installing braces for rigidity increases the accuracy of the work. Using a chisel, the old metal is removed down to the undamaged body. The internal surfaces of thresholds and cavities are treated with zinc chromate primer GF-073 before replacing the floor.
Along the lines connecting the threshold with the trim, holes with a diameter of 5 mm are drilled at a distance of 40–50 mm. The geometry is checked by installing doors in the openings, maintaining gaps of no more than 3 mm. The doors are then removed.
The threshold is welded to the trim with electric rivets through stitched holes, to the side of the body, to the central pillar - with a continuous seam. After completion of the work, the welding areas are cleaned with a grinding machine, primed, and coated with an anti-corrosion compound.
Body repair is a harsh thing, or use a chisel to “CHISEL”
For everything about garage welding of rotten cars, see the new book on car repair from Khoma
In August 2009, a nice young lady approached me with a small request - to weld a hole in the side member of a VAZ-21093 car, in common parlance - “chisels”, they say, the husband is a diagnostician, “fumbles” with engines at 10c plus, but there is no one to do auto body work.
Well, helping your neighbor is a sacred thing, I thought and invited them to the show. The initial examination raised a lot of questions, ranging from year of birth to:
WHERE IS THE CAR'S FLOOR? Brief questioning of the owner revealed the following: the car was produced in 1996, stupidly stood in a pit for three years, after which it was bought outbid, hastily patched up, coated with various mastics and successfully sold off to the current owners, and since the diagnostician husband figured out that the engine was in good condition, he didn’t bother with the condition of the body…..But in vain!
The young lady was offered the following options:
— replace the floor, sills, rear side members
— completely change the body (the engine is excellent)
- cover it up again and sell it off to other less fortunate buyers at an even lower price (there was no recycling program at that time).
Ultimately, the decision was made - COOK!
Disassembling the interior took two hours, they opened the Shumka and “rejoiced”:
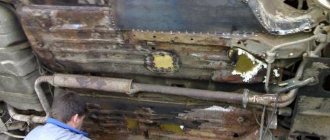
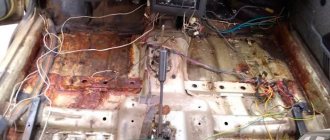
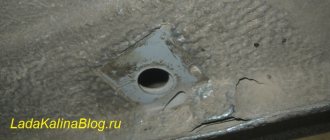
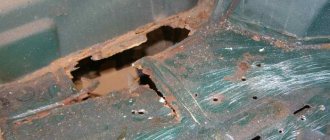
the floor of the car was practically destroyed by corrosion (see photos 1, 2, 3) The place of the “happy” driver, who almost ran along the “path with his own legs” (photo 4) looked especially impressive
Since the floor tunnel miraculously survived, only the “trough” was replaced
After cutting off the rags, cleaning off mastics and other offal, drilling out resistance welds on the side members, and carefully marking them, welding of the floor began.
By the way, everything was cooked using a domestic carbon dioxide semi-automatic PDG-165.
Next in line were the rapids.
After opening the outer panels, a view appeared no less gloomy than the appearance of the floor (photo 9, 10)
In order not to take risks, stretchers were installed in the body for rigidity (see photo 26, where the car looks quite naked) and this measure, I think, was not unnecessary - it’s better to be overdressed than underdressed.
The remains of the side members and jacks brought tears to my eyes... (photo 11, 12)
Having mercilessly chopped off pieces of old metal with a grinder and a chisel, we got to the living metal of the body. We welded in the amplifiers, connectors and front jacks. Buy a new book on auto repair from Khoma. We decided to wait a while before installing the doors to install the external sill panels in order to prevent the appearance of unnecessarily large gaps.
Finally, the turn came to the spars. This “hole” was what the sweet girl wanted to seal (photo 14)
The same photo shows that the edges of the wheel arches still have the same deplorable appearance. Removing the rear bumper and examining the trunk for integrity forced me to take up the camera again:
The left trunk well (see photo 21) and the rear panel (see photos 15, 32) also suffered from terrible rot. For further repairs, we had to remove the gas tank and the rear beam (photo 28). While they were filming, the soured brake pipes were told to live to death for a long time (see photo 23). There was no time to mourn for them, so the chisel, grinder and drill were used again. The edges of the arches were trimmed, the side members were drilled out, and the rear panel was cleaned down to bare metal. First, new spars were installed, and then new edges freshly cut from millimeter sheet metal were welded to them by spot welding, as well as parts of the rear panel (see photos 24, 25, 27, 16). At this point, the welding work was completed, but the owner expressed a desire , taking the opportunity to “make noise” of the interior, and treat it with anticorrosive... No sooner said than done, especially since the customer supplied the materials himself, with the exception of body iron.
So, the hidden cavities were treated with Movil, the interior was glued, the bottom was treated with bitumen mastic (the rear panel, of course, also got it) see photos 18, 19, 20.
Post-weld treatment
The first stage is polishing the bottom with coarse pastes with mechanical additives. Pastes without abrasive substances are applied after washing and drying the car. All work is carried out using a polishing wheel, which processes each part separately.
Primers
They cover clean surfaces of the car according to the instructions. The primer provides adhesion to anti-corrosion compounds. Manufacturers offer different formulations:
- Tectyl is available in three types. Classic creates an organic microfilm on steel; zinc provides an additional coating that neutralizes salts; Tectyl HT zinc is intended for vehicles operating in urban environments.
- Movil is an economical composition that is in demand in auto repair shops.
- Bitumen mastic based on polymers, rubber, mineral shale.
- Dinitrol based on polymer rubber.
After restoration of body parts, sound insulation must be installed. The bottom can be coated with Prim, which simultaneously acts as an anti-corrosion agent.
Corrosion protection
To protect the body from rust, two methods of anti-corrosion treatment are used.
ML oils
The method, invented in Scandinavia, involves pouring special oils into the technical cavities of the body through factory drains. The compositions impregnate the welding seams, covering the internal surfaces with a film, isolating them from contact with air. The bottom is coated on the outside with similar oils.
The inhibitors included in ML oils allow them to be applied over rust. They slow down the spread of corrosion, but for maximum effect, it is advisable to wash the body of the “nine”.
The disadvantage of the ML method is its low mechanical strength. Oils wear off quickly in open areas, but remain for years in closed spaces.
Bitumen compounds
Open bottom panels and wheel arches are coated with protective bitumen. The method places high demands on the preparatory work. External elements must be thoroughly washed, otherwise the bitumen composition will quickly be washed away.
The advantage of such coatings is their high mechanical strength. They protect the VAZ 2109 body from external influences for a long time. Bitumen compounds can be used as additional sound insulation: a film applied in several layers reduces the level of vibration of the panels.
Bitumen coatings can be applied to traces of corrosion, but with some reservations. Surface rust is pre-impregnated with ML oils, after which solid compounds are applied. For deep damage, this method will not help control the development of corrosion, since bitumen products, unlike ML compounds, are opaque. Because of this, when inspecting a car, the technician assesses the level of rust damage and decides whether to apply bitumen compounds on top.
Ways to save
What often accounts for the high cost of service station services? It's rare to get by without tricks. Often the repair specialist inflates the price by simply exaggerating the labor-intensive and time-consuming repairs. To avoid this, the car owner can independently assess the condition of the bottom of the car.
To do this, you will need an overpass or inspection hole, powerful lighting and a hammer. Suspicious areas are tapped with a hammer, the extent of the rot is determined, from which the need for materials is approximately determined.
How to digest the bottom without the help of outsiders? Gas welding and semi-automatic welding equipment will be required. Using both types of welding improves the quality of repairs, and anyone can master the process and it won’t take much time.
How much will the repair cost?
Restoring the worn out bottom of a “nine” or “eight” costs a significant amount - from 5 to 29 thousand rubles. The price of overcooking in car services varies depending on several points taken into account by the craftsmen:
- size of damage, depth of corrosion;
- possibility of carrying out repair work;
- difficulty of recovery;
- order fulfillment time;
- car service pricing policy;
- place of work.
The cost of overcooking the bottom of 2109 when purchasing the cheapest repair kit will be 5–8 thousand rubles. Purchasing consumables in specialized auto stores will cost 11–12 thousand rubles. For the work of a service technician, you will have to pay from 20 to 30 thousand rubles, depending on the assessment of the damage, the volume performed, and the complexity of the restoration.
Car painting
Repairing the body of cars assembled in Togliatti, including the VAZ 21099, is not complete without restoring the paint layer. Car painting can be:
- complete (involves removing old varnish and paint, applying new ones);
- partial (the paint layer is restored only in places where chips, scratches or peelings occur).
The choice of the necessary tool is determined based on the total volume and specifics of the work.
Painting a car can include various stages:
- grinding and cleaning (various abrasive materials are used, such as sandpaper or an abrasive wheel);
- applying a primer followed by sanding;
- coloring;
- applying varnish;
- polishing
Painting a car, including the VAZ 21099, can be done either in your own garage with your own hands, or at a service station, in a special chamber. Everything directly depends on the budget allocated for body repairs.
Often, lovers of domestic cars encounter problematic bodies. For example, you bought a used VAZ 2109. At first glance, everything seems to be fine, but when it comes to the body, you understand that not everything is so smooth, you even think about replacing the entire body. But don't be afraid of this problem.
With the right tools and steady hands, you can get rid of a rotten arch, bottom or threshold. In this article we will describe the step-by-step process of body repair.
When is it no longer possible to drive?
It is much worse when the bases of the roof pillars or the power structure of the sills, the cups of the struts or the side members in the engine compartment have completely rusted. All these places belong to the load-bearing elements of the body. If the rust has penetrated a third of the thickness of the metal, then driving such a car is already dangerous.
It's easy to spot serious problems. When driving over artificial bumps, the body flexes excessively under load. If you climb one wheel onto a stone or curb and stop, then the “rotten” body may have problems opening the doors or trunk. The body bends, deforms and pinches moving elements. There is nothing good about this anymore. In the event of an accident, such a body will not be able to resist the impact impulse and will collapse like a house of cards.
Metal cups also sometimes rust through. Their damage is indicated by knocking in the suspension and noticeable problems with handling.
It is no longer possible to drive with such damage due to the risk of a serious accident. It is impossible to fix them, although some garage mechanics, of course, weld patches onto the side members or try to restore lost suspension fastenings, but it is no longer possible to restore the body’s former strength.
Engine Condition Assessment
Let’s make a reservation right away that everything said below about how to make repairs applies equally to both carburetor and injection engines of the VAZ 21099 - apart from the power supply and spark generation systems, they have no fundamental differences.
Simply but effectively, the condition of the engine can be assessed by measuring the compression in the cylinders. A normal indicator would be a pressure of at least 10 kg/cm2. Lower values indicate wear of the piston group parts.
If there is a “failure” of pressure in one of the cylinders, while the rest are good, then pour 30-50 g of engine oil into the spark plug hole. If after this the compression increases sharply, then the piston rings are either broken or sunk. The absence of changes indicates burnout of the valves or breakage of their springs.
Skipping the engine removal procedure, let's move straight to how you can assess the condition of its parts and what measures should be taken to eliminate possible defects.
Removing rotten parts
We begin the repair by dismantling rotten, deformed and rusty parts.
Problem areas in the car:
- Our car (which we are repairing in this article) has a completely rotten floor, along with jacks and stiffeners. The jack had to be installed under the engine beam.
- The floor in the back was also rotten. The bottom was practically absent. The wings also required replacement.
- The front hood is covered with rust, all floor and gas tank mounts and spare wheel mount are missing. The front spar burst in the gearbox area. And a huge hole appeared in the trunk floor above the muffler.
- The doors were corroded at the corners.
We have prepared the tools necessary for body repair, and we begin installation.
How to replace the thresholds of a VAZ 2109 with your own hands
If a significant part of the thresholds is damaged by corrosion, then there are no options other than completely replacing these body elements. To carry out repair work you will need the following list of tools and materials:
- semi-automatic welding machine;
- new thresholds;
- Bulgarian;
- drill;
- sandpaper;
- putty and primer;
- anti-corrosion compound (mastic).
Features of replacement and preparation for it
When planning body repairs, you need to understand that the design of the VAZ 2109 thresholds consists of the following elements:
- outer box;
- inner box;
- amplifier
The outer and inner boxes are the outer walls of the threshold. The outer element goes outside and is located under the door, and the inner one is located in the cabin. The amplifier is an element located between two boxes inside. Most often, the outer frame is subject to corrosion, and when replacing thresholds, this particular body part is in mind.
Even though new parts are used when replacing thresholds, they still require preparation. From the factory they are covered with shipping primer, which must be cleaned before installation, i.e. the metal must shine. This is done using sandpaper or grinder attachments. After cleaning, the elements are degreased and coated with epoxy primer.
The final preparation of the thresholds comes down to drilling holes with a diameter of 5–7 mm for welding in the places where the parts adhere to the body.
Preparatory procedures also include the dismantling of doors, aluminum sill trims and interior elements (seats, floor covering, etc.). Before the immediate start of work on removing the old thresholds, a metal corner is welded to the racks from inside the cabin. It will provide rigidity to the body and prevent it from deforming after cutting off the thresholds.
Step-by-step replacement instructions
Having prepared everything you need, you can begin the repair. The procedure consists of the following steps:
- Place the new threshold on top of the old one and outline it with a marker.
Video: replacing thresholds on a VAZ 2109
Damage to the sills by corrosion on the VAZ “Nine” is common. These body elements can be replaced by every car owner who knows how to use an angle grinder and semi-automatic welding. If you don’t have such experience, then it’s better to trust the specialists. Only in this case can one hope for high-quality repair work and a long service life of the thresholds.
Dismantling
To dismantle the box, we recommend that you rely on the instructions, strictly follow the sequence and reinforce your skills with visual videos.
- Disconnect the negative terminal from the battery and drain the oil from the gearbox system.
- Unscrew the bolts that hold the crankcase guard in place and remove it.
- Disconnect the ground (wire) from the clutch housing.
- At the end of the clutch cable, loosen the tension on the nuts slightly.
- Remove the cable end from the clutch lever.
- Disconnect the block from the traction relay.
- Disconnect the wire going to the starter traction relay.
- Dismantle the starter itself directly.
- Disconnect the drive rod from the joint tip. We are talking about traction, which switches gears.
- Disconnect the cable from the car's speedometer drive.
- Unscrew the tie rod ball joint.
- Remove and press the steering rod hinge pin out of the strut swing arm.
- The shank of the inner CV joint of the front wheel drive should be pressed out and moved to the side.
- Disconnect the second CV joint.
- Remove the clutch housing shield.
- Release the gearbox from the fasteners holding it to the engine.
- Remove the box.
Carefully remove the gearbox
Be sure to move it horizontally away from the engine before directly removing the gearbox. Then disengage the input shaft. Be careful not to damage the clutch spring petals.
Checkpoints
Measuring the distances between body control points is the most common way to check the condition of a car. After taking measurements, you need to check them with the passport data.
The check is performed as follows:
Check Point
Passport sizes
Tolerance (+/-)
Diagonal of the front doorway from the edge of the lower threshold to the middle of the roof
Diagonal of the front door opening from the lowest point of the windshield to the middle of the lower threshold
Distance between front door hinges and pillar in a straight line
Diagonal of the rear door opening from the point where the lower sill joins the central door pillar to the roof
Diagonal of the rear door opening from the top of the B-pillar to the lower threshold
Long diagonal rear side window frame
Short diagonal rear side window frame
Distance from the middle of the windshield to the middle of the hood
Cylinder block
In any case, it needs to be repaired. First of all, clean the entire surface of oil, dirt and other deposits. The repair consists of boring the sleeves to the required size. You cannot carry out this procedure yourself; it is better to trust a specialist. The lathe who carries out the boring must have the skills to operate the machine. Do not trust such a task to an inexperienced person. Its reliability depends on how correctly the overhaul of the VAZ 2109 engine is done.
There are two boring options: under the mirror and with a fine mesh. In the second case, honing is done - the entire inner surface of the liners is covered with thin lines. Some people claim that this gives a boost in power. But in reality, the picture is the opposite - the wear of the piston rings increases, since the surface of the cylinder is similar to an ordinary file. Fortunately, this continues for 10-20 thousand km, after which the sleeve takes on a mirror-like appearance. Moreover, the geometry is not always ideal. For this reason, it is better to carry out boring under a mirror.
