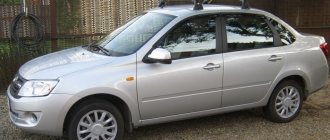
Hello everyone, dear friends, today we’ll talk about why the central locking on a Lada Granta car does not work. The main task of the central lock is to open and close doors remotely.
This is controlled either from the remote control or by turning the key in the driver's side door lock. Try to be careful when handling the control panel, because inside there is an electronic circuit that can be damaged. And do not forget to change the battery on time, since the remote control will not work without power.
Drivers of this car should be aware that when removing the terminals from the battery and then installing it after some time, the central locking does not begin to work fully. When you press the remote control, most likely, only the driver's door will close, and the other doors will have to be closed by hand. In order for the central locking to work at full capacity, you need to remove the negative battery for a couple of minutes and put it back in place.
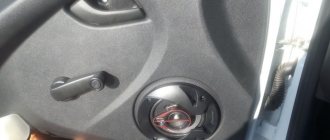
After using the vehicle for a long time, a problem may arise in one of the passenger door lock latches. Namely, this latch will not lower all the way and because of this the lock will not work and the door will remain open. To fix this problem you will have to remove the door trim and deal with this unit. Namely, with traction or maybe the plastic assembly has become loose, you need to fix it. Well, that’s all, we have looked at the main reasons why the central locking on a Lada Granta car does not work.
Here we will only look at what the alarm connection to the central locking circuit is, and we will talk about different Granta configurations. The first option is intended for “luxury Grant” cars, those that have a central locking control button in the cabin. If there is no such button on the armrest, as, perhaps, the armrest itself, then another design option will suit you. We will now look at all this in more detail.
Preparing the car before connecting
What controls the central locking? A special block to which the lock actuator wires fit. There are also two wires connected to it, connected to the driver's door microphone. More precisely, this wire is used alone in “Grant”, it has a brown sheath, and the second contact from the “micrik” is connected to ground.
The “micric” itself is located inside the actuator. So, the first piece of advice: after removing the left front door trim, you need to find the cable going from the actuator to the 7-pin connector.
Depending on the configuration, under the trim you will see the following:
- There are 6 wires suitable for the connector (from 2 microphones and a drive);
- The cords from the electric drive (pins “2/7”) are not connected, but there is still a brown wire connected to pin “1”;
- Only those wires that, according to the diagram, should be connected to contacts “4/6” are missing.
Connecting the signaling means that the wires from contacts “2/7” are still connected to the central locking control unit. The cords coming from the three actuators are always connected to the standard unit. You need to connect a fourth one, if this is not done by the factory. You may have to lay a two-wire cable from the door to the central lock control unit:
The central locking control unit is located under the fuse block, it is designated BUBD-2190.
Here's how one of the car owners coped with the task:
The cords that come out of the door are connected to the wires of the standard terminal block. The following connector pins are used: “3” and “4”. The main thing is not to confuse them. Take another look at the diagram to see what exactly we are talking about.
The simplest reasons
Why doesn't the central locking open or close the doors? To answer this question, sometimes it is enough to look at the fuse box. The central locking system is dynamic. Various short circuits and other similar violations are not uncommon. Therefore, fuses blow quite often. Don't forget to check the condition of the alarm unit. On some models, fuses are also provided there. If at least one of them is faulty, the central locking will not work. Sometimes you may encounter such a situation.
So you go out in the morning, press the door open button, and nothing happens. Most likely you forgot to turn on electrical appliances in the car. This led to the battery being completely discharged. To verify this, open the car with the key. And turn on the ignition. It probably won’t turn on, or will go out immediately when you try to start the engine. All that remains is to charge the battery. If the engine does start, then you should look further for the reason.
The next step is to check all the chips and connections related to the signaling and central locking. Even a small contact movement can lead to this system failure. Don't forget that one of the chips is located in the door. Therefore, you will have to remove the door trim. Just before doing this, check the condition of the wire going to the door motor. The tourniquet is usually placed in the area of the lower loop. Wires often break, especially in winter. In this case, again, the central locking will not work.
Connecting the signaling to the central locking system
Now we get to the most interesting part. The contacts of the signaling relay must be connected to the gap in the brown wire (see diagram in Chapter 1). Moreover, this will be required regardless of the configuration. Oddly enough, we won’t need power cables at all. And the task now looks like this: you need a two-wire signal cable connected to the break in the brown cord.
The moral here is:
- If you were able to remove the central lock control unit, connect the cable to the break in the wire connected to pin “7” of the control unit;
- If you have removed the door trim, then pull the cable out of it (from the point where the brown cord breaks).
It is clear that the second side of the cable must reach the relay connector of your alarm.
Option for the “Lux” package
So, this means that there is a button on the armrest in the cabin that allows you to lock the locks. From one of the contacts of the button, to which a “plus” is applied when pressed, you need to stretch the cord to the signaling unit. Nothing else is required, and you can connect the alarm according to the following scheme:
According to reviews, this option is suitable if we are talking specifically about the “luxury” configuration. By the way, the resistor can be connected to the gap in the wire designated “blue” (the common contacts are then connected with a jumper).
It must be remembered that when working with any electrical equipment, you must first remove the negative terminal from the battery.
Each cord that is re-laid must not touch metal surfaces. Otherwise, in places of contact, the wire is protected with a tube that can withstand temperatures of 250 degrees. This is how you can protect yourself from unforeseen consequences.
Option for the “Norma” configuration
Let's say there is no button in the cabin that allows you to perform emergency closing. Then you need to connect the signaling to the central locking system according to the following scheme:
As you can see, unlike the first option, there are no resistors here, and positive voltage is not used at all. But in the luxury configuration the effect that is characteristic of this scheme will not be observed:
- We perform closing from the key fob - all locks are locked;
- We try to open the locks with the key fob - only the driver's lock unlocks.
If you are satisfied with this property, try to implement the scheme in practice. And other options, more advanced, look much more complicated.
Read what is said about installation safety in the previous chapter. Do not neglect the advice about disconnecting the negative terminal. We work only with signal circuits, so nothing will fail even if connected incorrectly. However, be careful not to confuse the locking and unlocking relays, which are located in the alarm unit. This unit is usually equipped with a 6-pin connector (for details, see the signaling manufacturer's instructions).
Disabling dimming on electrochromic mirrors
One of the advanced solutions for the car interior is an electrochromic rear view mirror. The dimming function prevents the driver from being dazzled through the mirror when there is a strong light source from behind: high beam headlights or a spotlight. If the mirror has two “eyes” and one is directed forward and the other backward, then it is an electrochromic mirror. And if there is a lever, when used, the image in the mirror darkens, then this is an ordinary mirror with a mechanical dimming function.
The dimming mode is not always convenient, but it can be turned off and on again. For this purpose, there is a special button on the electrochromic mirror. On some models, you must hold the button for several seconds to activate it.
Programming the duration of control pulses
Even if the alarm is connected correctly, it is not a fact that the owner will be able to control the locks from the key fob. The point is that it is necessary to correctly select the duration of the control pulse (for locking and for opening). There is no need to make it too large so as not to overheat the actuators.
See what exactly the manufacturer Starline offers. We can set the pulse duration to 0.7 s, which should be enough. The value “3.6” will be redundant at the same time.
The “Lux” package has the following property: after 15 minutes of inactivity, the electronics “fall asleep”. It may take an extra boost to wake her up. So, try to use the option that provides for a double pulse. The main thing is not to activate the “comfort” option, which uses a 30-second duration. To connect the signaling with “comfort”, you need to install an additional unit in Grants (AvtoVAZ does not produce it). We wish you success.
Automatic door locking when driving
The more complex the car, the more electronics it contains, the more fun are the secrets hidden in it, Easter eggs, so to speak. I've already made myself a navigation and video player, now it's time to automatically lock the doors when moving. In my opinion, the lack of this functionality in a modern car is a shame, this matter needs to be corrected.
1.
For work, we will need a device with which we will connect to the car; I ordered an ELM 327 USB HS-CAN/MS-CAN. I specially took USB so that the connection would be more reliable, and I specially took it with an HSMS switch so as not to deal with nonsense and independently modify the device.
2.
When you have the wire, the first thing we do is find drivers for it so that your computer, with which you go to the car, and the wire become friends
3.
Download the excellent FORScan
4
. It’s not enough to download the program, you also need to request an extended license for greater capabilities.
Instructions for requesting rights. Features:
- extended rights are given for a limited time (2 months), request them when you are ready to go tuning the car - request rights for the computer with which you go to the car, because extended rights are given specifically on a PC - confirmation of rights usually arrives within 24 hours - figure out the program itself, go through the settings, everything is clear and simple, but if you have questions, I’m ready to advise and answer
5.
We walk to the car, start the PC, plug in the wire, launch the program, turn on the ignition, press the button to connect to the car, watch what is happening (checking the car modules will run), then go to the left menu item where the chip is drawn and select the item:
R_BCM module configuration (in AS BUILT format)
6.
At the bottom, press the play button, and this sign will appear in which you will need to change 2 values, but before changing anything, press the “Save all” button (it’s at the bottom), otherwise you never know =)
When
choosing a car, future owners they pay attention not only to its dynamic characteristics, but also to the comfort of the interior: comfortable seats, pleasant upholstery, reliable headrests, airbags. But at the same time, even experienced drivers do not always know about all the interior functions designed to ensure the convenience of the driver and passengers. In this review we will talk about some of them.
How to replace the central locking unit
Required
: remove the mounting block (put it aside without disconnecting the connectors with wires), a new central locking control unit (article 21900651201000, price about 1100 rubles).
- Remove the two screws securing the block.
- Disconnect the block with wires (pull it towards you).
The most difficult thing: unscrew the screw securing the mounting block, unscrew the bolts securing the central locking unit, remove the connector from the central locking unit and install it in its place. If it is not possible to tighten the bolts of the central locking unit in the reverse order, use plastic ties.
The process of removing and installing the central locking control unit on the Lada Granta is also shown in the video:
By the way, do you know that LADA cars can be equipped with sensors? This update will change the way you think about lock management.
The central locks (CL) installed on Grants allow their owners to lock and open the doors of their car from a distance using the remote control, or to perform this manipulation by turning the key in the lock of one of the doors (driver's).
Installation recommendations
When purchasing a VAZ 2110 at a specialized car dealership, there is a possibility that the functionality of the basic security system will be limited. That is, only doors (sometimes not even all) can be locked with a remote control or key. For car safety, drivers install alarms on all opening parts of the car.
To do this, you can use the services of specialists from a service station, or you can do the installation yourself. If you know the circuits of the central locking and the operation of the electronic device itself, then you can install the lock
to any part of the car. Specialists of various levels use instructions when installing an alarm system on a car.
The VAZ 2110 central locking diagrams and the rules for installing the security system are included with the alarm system. Despite the fact that such a simple but important system as central locking can fail, you will not meet a driver who would not praise it. When purchasing a car, everyone looks at the package, which should include an electric alarm (or central
lock).
Many cars do not have alarms, but have central locking
, which was installed at the factory. There is no big difference, but the convenience of the presence of a centralized blocking system is appreciated. This is better than waiting for passengers to get out of the car, then closing all the doors from the inside and closing your own when exiting. It is convenient to press one button on the control panel so that all doors close/open at once.
A problem with the system is possible when the battery in the key is dead. But this is not a very serious “trouble”, which can be solved by simply replacing the power source. The central locking diagram clearly proves the simplicity and uniqueness of the device.
Sources:
https://electronavto.ru/poleznaya-informaciya/raspolozhenie-shtatnogo-predoxranitelya-cz-na-vaz-2110.html https://assa59.ru/rele-centralnogo-zamka-vaz-2110-gde-nahoditsja/ https ://expertvaz.ru/2110/tsentralnyiy-zamok.html
general information
On machines equipped with Norma, central locking control units are installed, which are replaced with new ones if they break down. On Luxe vehicles, TsBKE are used instead. Below we will try to take a more detailed look at the central locking unit and its control unit, their relationship with the remote control, symptoms of a malfunction of this part, and also provide instructions for replacing it yourself.
Now let's look in more detail at remote control, which is intended not only for locking and unlocking car doors at a distance with synchronous activation of the security mode. In addition, it allows you to lock all locks with one turn of the key, lock and unlock all door locks by pressing one button located inside the cabin, and also turn on and off the car alarm both remotely and with the key.
Operating modes
Door locks on Grants are blocked by pressing the corresponding key on the remote control, after which they can be unlocked using the remote control in stepwise and simultaneous unlocking modes. The first of the listed modes will allow you to unlock all door locks by double pressing the key (first the driver's door is unlocked, and then all other doors). When you activate the second mode, you can unlock all the doors of the car at the same time, with one click.
To change the mode, the car owner will need to perform the following steps:
- first you need to turn on the ignition with the remote control key;
- then you will need to press and hold the unlock and lock keys in this position for five seconds;
- After the buzzer sounds, release the keys.
Blocking
If, after unlocking the door locks, you do not open the trunk or one of the doors, or do not turn on the ignition, then after twenty-five seconds all doors will be locked again.
Control from the cabin
When blocking doors directly from inside the car, you need to press the corresponding button located on the driver's door, or press a similar button in the module of the same door. Unlocking will require lifting the desired key on the door or pressing it in the module. To lock the doors from the outside, you will need to turn the key in the lock located on the driver's door clockwise, and to unlock the doors, turn the key in the opposite direction.
Window control
By pressing and then holding the lock button in this position for three seconds, you can raise the lowered door windows, with the front windows going up first, followed by the rear door windows. By pressing and holding the unlock key for three or more seconds, you can lower the raised windows in a similar sequence.
Opening the trunk
Unlocking the trunk lid lock on a Grant using the remote control is possible only after turning off the ignition. So, when opening the lid, you must either press the key on the remote control twice, with a minimum interval, or press it once, but hold it down for at least several moments. When the security mode is activated, the trunk will open synchronously with the security zone being turned off for at least half a minute. To close the lid you will need to slam it shut again.
Signs of trouble
The occurrence of any malfunction in the operation of the central car lock instantly manifests itself in the form of a violation of its functionality. In this case, the signs or symptoms of a breakdown correspond to what exactly happened to the system. Therefore, problems can be identified by the following nuances:
- it is not possible to open the car using the key fob;
- opening does not work when using the key;
- the key fob does not lock the car;
- the key or button does not work when closing the door;
- one of the doors does not open or does not open;
- The central locking is triggered, closes everything, but immediately opens without a corresponding command from the driver;
- locking and unlocking work spontaneously.
We can say that malfunctions manifest themselves in the form of incorrect operation of the system. The central locking system is a complex device that consists of a large number of components and control units. This is a whole network of electrical wires, which sometimes covers the entire car. Given the complexity of the system, consideration should be given to who will carry out the repairs. It is often recommended to entrust this to specialists. At the same time, every motorist has the right and opportunity to know what malfunctions occur with the central locking, what is their cause and how they can be dealt with. Whether to repair it yourself or trust the experts is a purely individual question.
Replacing the central lock on Lada Granta
When replacing the central locking unit, first of all, remove the mounting block, which is put aside, but do not disconnect the block with wires from it. After this, a new central locking control unit is installed (article 21900651201000), the approximate cost of which is 1100 rubles.
To begin, unscrew both bolts on which the block is attached, for which you can remove the fuse box cover and unscrew the steering column casing. Then the block is moved towards the street and they begin directly to disconnect the block, which for this you need to pull towards you. Then the central locking is pushed out, after which the connector is pulled out. Next, reassembly is carried out with the installation of a new central lock.
This seemingly simple job is fraught with some difficulties associated with very limited free space, which makes replacement very difficult and complicated. The most difficult and problematic part of the work process is unscrewing the mounting screw of the mounting block and the bolts on which the central locking unit is attached. After this, the connector is removed from the central locking unit and the new part is installed in its proper place. Problems often arise when tightening the block bolts, which must be tightened in the reverse order. If you have problems tightening the bolts, it is recommended to use plastic ties.
Starter, ignition, rear fog lamp relay
In order to carry out quick checks and repairs, the ignition system relay is installed under the front dashboard of the car, behind the hood release handle. It is located just below the central dashboard. The module is closed with a plastic plug, which must be opened slightly to test for functionality.
Next to the indicated relay, there is a similar one for the rear fog lights and the starter.
The main task of the relay when igniting is to reduce the applied load to the contacts. When the engine starts, the relay turns off some electrical circuits in the vehicle system. The system is used not only in injection, but also in carburetor engines.
In the event of a malfunction or malfunction in the ignition system, it is necessary to monitor the operation of the relay. For this purpose, open the box and carefully remove the desired element. It is attached using contacts to special grooves. The first thing to do is look at the oxidation of the contacts, if necessary, clean them with a soft cloth or treat them with a special liquid.
To check functionality, you need to use a regular multimeter. We connect to incoming connections and check the numbers. If there is no short circuit when current is applied, it means the element is not working. Replacement is carried out in a similar manner. It is necessary to use a standard element with the number of amperes indicated on the housing.
Useful tips
In order for the door to open if there is a problem with the key fob, you must complete the emergency deactivation procedure. It involves introducing a special code value, but is sometimes performed without it. It all depends on the alarm model.
Interested in how to open a Starline car alarm without a key fob, the user needs to perform the following steps:
- Open the door mechanically.
- Activate the ignition circuit and leave it on for 20 seconds.
- Press the “Jack” mode activation key three times.
- Turn off the ignition. If these steps are performed correctly, the security mode will be deactivated.
You can also use this method:
- Open the car door, start the engine and ignition.
- Enter the first digit of the password using the “Valet” button.
- Turn off and turn on the ignition again.
- Carry out the second action with the remaining numbers.
Having dealt with the reasons for the key fob not working, all that remains is to find the best way to eliminate them.
Answers
TOP products in the store (more)
Lada.Online
Lada (“Lada”) is a brand of cars produced by JSC AVTOVAZ. Previously, it was used only for export cars, and for the domestic market, cars were produced under the Zhiguli brand. In 2004, the management of AVTOVAZ announced the transition to the Latin alphabet for the official spelling of the names of all cars produced by the plant: Lada - instead of "VAZ" and "Lada".
Lada.Online is the largest Russian-language automotive resource with a daily audience of thousands, which is dedicated primarily to cars of this brand, the domestic automotive industry and the automotive world in general.
This site is not the official LADA website.
© 2022 Lada.Online. Copying of material is permitted only with a link to the source.
Source
Review of spare parts prices
| Name/article | Price, rub.) |
| 00001003833121 Bolt M5x10 with serrated shoulder | From 100 |
| 00001003831801 M5 nut with serrated shoulder | From 100 |
| 00001002624101 Washer 5 mm | From 50 |
| 00001003275901 Screw M6x10 | From 50 |
| 00001002605371 Lock washer 6 mm | From 50 |
| 21230610542000 Lock cylinder | From 550 |
| 11180610515000 External front right handle | From 650 |
| 11180610515100 External front left handle | From 650 |
| 21900610518000 Inner front right handle assembly | From 950 |
| 21900610518100 Inner front left handle assembly | From 950 |
*prices are current as of November 27, 2018.
Recommendations for choosing and replacing door handles
When choosing spare parts, always give preference to original ones. Good, high-quality parts are always 10 - 15% more expensive than analogues. At the same time, by purchasing a factory part, you can count on a long service life of the mechanism.
A cheap counterfeit does not provide even a third of the required resource. The final choice is up to the owner of the technical device. The deciding factor is the budget.
Instructions for removing the trim from the front and rear doors of Lada Granta
Before we get started, let's collect everything we need.
Tools and materials
- flat blade screwdriver;
- Phillips screwdriver;
- a plastic spatula for removing the trim (it can be purchased at any VAZ specialized store);
- set of plastic door latches.
The process of properly removing trim from the front door of a Granta
- The hood of the car is opened and the negative terminal is removed from the battery.
- The trim on the front door handle is carefully pryed off with a plastic spatula and removed. This allows access to the top fastening screws of the casing.
The trim on the Granta front door handle can be removed manually
The screws from under the door handle of the Lada Granta are unscrewed with a Phillips screwdriver
Two self-tapping screws from the upper recess of the Grant door are unscrewed with a Phillips screwdriver
The lower part of the door trim of the Lada Granta is held on by two screws
The lock button on the Grant is unscrewed manually
Door seals hinge arms Grants are removed manually
Granta's front door trim gently moves back towards itself
Access to power supply wires for Lada Granta windows is now available
Window lifters of Lada Grants are disconnected from the control unit
Rules for rear doors Grants
- The car hood is opened and the negative terminal is removed from the battery.
- If the car is equipped with manual window lifts, then the rear window lifter handle lock is pryed from behind with a flat-head screwdriver and carefully pulled out.
The door latch on the Granta handle is pryed off with a screwdriver
The Granta window lifter handle moves to the left and is removed
The Lada Granta window lifter handle socket is removed manually
The rear door lock button of the Lada Granta is unscrewed manually
The Granta rear door handle trim is pryed off with a spatula and removed
The fastening screws from under the cover on the Grant handle are unscrewed with a Phillips screwdriver
The rear door trim of the Lada Granta is pryed from below with a spatula and removed manually
How to remove door trim from LADA Granta - video
The car opens itself after closing from the key fob
and today the following started: I get out of the car, use the key fob (standard original key) to lock the car, everything is as usual (the emergency lights blink, the doors close), but after that the car immediately unlocks itself and remains open.
Has anyone had something similar? Where to dig?
Most likely this is not the case. Today I tinkered with the car. I noticed 2 things: 1. if you open the door (any door!, I tried every one) and with your hand on the door lock move the lock lever to the closed position (i.e., simulate a closed door when it’s actually open) and close the car using the key fob, then the car will lock , but the light on the tidy blinks randomly. 2. I closed the car by pressing the button twice, ok, but the alarm goes off, and also chaotically: maybe after 20 seconds, or maybe after 30 minutes.
The Astra is unlocked completely by a signal from the sensor of any door; if it is sour, then there will be false alarms of the sensor (and signals to unlock all locks). The alarm goes off for the same reason.
Check the connectors of all doors, the contact may have soured, the wire in the rubber corrugation of the body-door may have frayed, there is water inside the connector or corrugations. Try drying it and blowing it with a compressor.
The Astra is unlocked completely by a signal from the sensor of any door; if it is sour, then there will be false alarms of the sensor (and signals to unlock all locks). The alarm goes off for the same reason.
Thanks for the answer, I think we need to go in this direction.
I looked and touched the door connectors, so far no results. I haven’t washed the car for a long time, there shouldn’t be any moisture.
A question arose: Maybe it’s not the terminal devices (sensor) and wiring? Is there some kind of control unit for all this? Maybe that's the reason?
Correct seat belt adjustment
The seat belt must pass through the center of the shoulder, no matter how tall the person is. Few people know that the position of the mount on the B-pillar can be changed in the vertical direction. To do this, just press the latch and move the loop.
There are two options for connecting this option: 1) Lever in “D” – the doors are locked, lever in “P” – the doors are unlocked
2) When you start moving and pick up speed up to 20 km/h, the doors are locked, lever in “P” the doors are unlocked
I’m telling you : Today I was visiting Dima Hedgehog. Clicked this option.
According to 1 option
I like it. Additionally, I can say this (I experimented) - when you stop (the lever is in D) and open the driver's door (button), when you start driving at 20 km/h, it is automatically blocked again. If you stopped and opened any passenger door (or several) and then drove off, the doors are not blocked, but if you open the driver’s door, then all are blocked.
| Greg777 | 16.12.2009 18:13 |
| ohotnik | 16.12.2009 20:26 |
| Earl_Vadim | 16.12.2009 20:34 |
Sorry for being offtopic, but the feature is of little use. it improves security in only one case. slow motion, . in a traffic jam, for example. once you arrive at the subway and park to wait for someone, that's it.. you're open.
you will object, they say, you parked and manually pressed the lock. What is the point of automation then? As soon as I started up in the parking lot, it locked. and until I arrive at the office, even at a traffic light, anywhere, it’s always locked... and there are no unnecessary twitches of the lock drive.
Source of the article: https://o-ladagranta.ru/avtoblokirovka-dverej-pri-dvizhenii/
Garage door remote control
Some car models have one or more buttons that, when pressed, emit an infrared (activity up to 20 m) or radio signal (activity up to 100 m). If your garage door or automatic barrier has a remote opening function, then you can try to program the signal button to automatically open the gate.
To do this, you need to combine the parameters of the signal from the car with the parameters that are specified in the instructions for the automatic gate. This is not always easy to do, but if this event is successful, it will result in a very convenient function. You can, with a clear conscience, forget the gate control panel at home.
Let's proceed to the second stage: dismantling the side view mirror
- Using a screwdriver, unscrew the three screws that secure the mirror frame to the body.
- Using pliers, remove the locking bracket.
- We remove the mirror and remove the hinges through the diagnostic hole.
- Using an “8” socket, unscrew the bolt that secures the outer handle to the end of the door.
- In the inner tunnel, unscrew the second bolt holding the handle.
- Using a screwdriver, carefully pry up and remove the rods from the lock.
- We remove the handle from its seat, turning it slightly from side to side.
