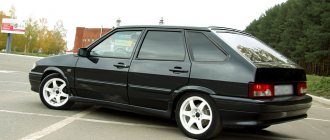
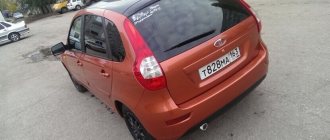
The cost of painting a Lada Priora depends on the amount of work and quality of materials. The greater the amount of work required to paint Lada Priora, the cheaper the final cost will be. Car painting can be: partial, local and complete.
Local painting of Lada Priora
looks like this - for example, there is damage on the bottom of the door that requires repair and painting. We are repairing the lower part of the door and painting with a transition. Those. in fact, we are repairing and painting half of the element.
Partial painting of Lada Priora
This is done when you need to paint one or more elements. We repair or completely replace the element, paint, polish and install it on the car. We guarantee a complete color match with unpainted body parts.
Full painting of Lada Priora
A car is needed when you need to put the entire body in order. Full painting of the car is necessary if there are bugs, chips and cracks all over the body. In the event of a serious accident, the car is usually also completely repainted.
| Cost of painting Lada Priora | Price |
| Front fender painting | 4,500 rub. |
| Rear fender painting | 4,500 rub. |
| Hood painting | 6,000 rub. |
| Roof painting | 6,000 rub. |
| Painting the door | 4,500 rub. |
| Painting the trunk | 4,500 rub. |
| Front bumper painting | 4,500 rub. |
| Rear bumper painting | 4,500 rub. |
| Painting the threshold | 2,000 rub. |
| Side mirror painting | 1,000 rub. |
| Full body painting | from 80,000 rub. |
| Paint selection | for free |
The final cost of painting depends on the quality of the chosen paint and consumables. For example, one element may require 1 thousand rubles worth of materials, and if the paint is three-layer or “chameleon” type, then another 3-4 thousand rubles may be added.
How to paint a Lada Priora with us:
1. Arrive from 10 to 20 hours, daily at the address: st. Voroshilova, house 7. Telephone 8 (812) 701-02-01
2. Send photos for evaluation on WhatsApp
or
Viber
at
8-962-684-75-25
3. Send photos for evaluation by email. email: [email protected]
Car painting guarantee
– 10 years, without restrictions on vehicle mileage.
How to remove a torpedo on a Priora? Practical method and sequence of actions
Knowing how to remove a torpedo on a Priora, you no longer have to worry about calling a specialist. As a rule, this procedure is carried out before soundproofing the engine compartment or after reupholstering the torpedo and painting it. After carefully studying the instructions that we provide below, you can safely get to work. Everything will work out - the main thing is desire and a little patience. How to remove a torpedo on a Priora? Some suggest that special tools are needed. We hasten to calm you down. Nothing like this. It is enough to have a minimum set on hand: a screwdriver with two ends (curly/flat), a 10-point head and pliers. On the other hand, this operation can be called painstaking. It will require maximum patience and care. Under no circumstances should you rush. Algorithm for dismantling a torpedo
- The battery needs to be de-energized;
- Turn the three locks of the mounting block cover 90 degrees;
- We snap off the latches that hold the fuse box cover;
- If the Priora has a radio installed, then first of all you will need to remove it. This is easy to do: using special pullers that fit into the sides of the device. After this, all that remains is to separate the ends of the pullers and pull them towards you;
- After dismantling the radio, do not forget to disconnect all existing connectors;
- The time has come to remove the metal frame where the radio was fixed;
- We see two self-tapping screws on the sides of the lining of the Priora’s center console. We turn them inside out;
- In the normal place where the radio was, we find two more screws. We also unscrew them;
- We remove the ashtray. To dismantle it easily, you need to press one side forward and pull the other side towards you;
- In the place where the ashtray stood, we see two more screws, which we also unscrew;
- We remove the instrument scales;
- We remove the part of the torpedo that will connect to the central tunnel and the floor;
- The current sources will also need to be disconnected from the EPS (electric power steering);
- Clamps made of plastic hold the upholstery on the left front side. We snap them off and do the same on the right side;
- Find the driver's door window blower nozzle and pry it off with a screwdriver. Here it is highly recommended to use a method that will help not damage or scratch anything. You need to place some soft material under the screwdriver;
- The car panel has a top mount, which is located in the cavity under the nozzle (for this we removed it). Here you need to use a 10mm head. We do the same on the right side;
- With the same tool you will need to unscrew the ground wire bolt.
- It is worth noting that most of the operation has already been done. You can have a smoke and relax a bit.
Let's continue:
- We see the wires. They are located above the fuses and go to the bracket. Disconnect them;
- Don't forget to disconnect the other pads;
- Now you will need to unscrew the nut securing the controller to the center console. We use the head again. It is advisable that the tool be at an angle of 90 degrees;
- We remove the controller from under the dashboard, free it from the blocks with wires;
- The current source is also disconnected from the airbag control unit;
- Remove the panel trim using a screwdriver;
- We unscrew the screws located in the glove compartment and on the console. We check everywhere whether there are any fixing screws left;
- We remove the Priora panel from the car interior.
As you can see, nothing complicated.
In just 40 minutes you can easily complete the entire operation. Having learned how to remove a torpedo on a Priora and received a couple of practical tips, the procedure can be completed much faster. If for some reason something is not clear to you, watching the corresponding video review or getting recommendations from “experienced” drivers will not be superfluous. AutoFlit.ru
Cost of our services:
- Bumper painting from 5,000 rubles
- Hood painting from 7,000 rubles
- Door painting from 4,500 rubles
- Wing painting from 3,900 rubles
- Trunk painting from 6,000 rubles
- Express scratch repair from 1,500 rubles
- Chip removal from 1,500 rubles
Almost all companies are shady with deadlines and call one price over the phone, but upon meeting another, they repair it while hiding defects! Our vector, along which we have been developing for more than seven years: honesty, consistency and openness, so that you are impressed and recommend us to your friends and acquaintances!
Sergey Dyuzhev master
Our car service carries out a full range of painting works for Lada. Prices for basic services:
Types of tuning of the Priora central console
Below are some of the most popular examples of console modifications by Prior owners.
Painting
Painting is carried out in several stages. To begin work on modifications, it is necessary to dismantle the console and remove all attached electrical equipment from it, such as a clock, climate control unit and media system.
Then the factory paintwork on the plastic is sanded, primed and painted.
Pros and cons of this method:
Pros:
- Durability;
- Reliability;
Minuses:
- The impossibility of returning everything to its original appearance;
- Long and expensive work process;
Pasting with film
This type of modification is the most popular and widespread due to its speed and low cost. With such modification, as well as with painting, it is necessary to dismantle the center console and all attachments. After removal, the console is treated with a degreaser and a film is glued to the degreased surface and, using a hairdryer, stretched over all convex areas.
Pros and cons of this method:
pros:
- Cheapness;
- Rapidity;
- The ability to return to its original appearance;
Minuses:
- Not durable, the film quickly begins to sand and crack;
Installing a 2DIN radio
This modification involves sawing off excess parts of the console, which may interfere with the installation of a large two-din radio. Practically no modifications will be required if you install such a radio in the center console of a luxury Priora, since a larger multimedia system is installed there from the factory.
Work performed
Painting a Lada includes the following works:
- Lada body elements ;
- Painting chips and scratches Lada ;
- Lada parts ;
- Full painting of Lada ;
- Lada plastic parts ;
- Full or partial painting of Lada ;
- Polishing the paintwork of a Lada .
On a note
Do not forget that nitro enamel from cans contains an aggressive solvent. If you apply a thick layer of such paint, the plastic may dissolve, not the entire part, of course, but the surface - very likely.
To prevent this result, it is better to use a special primer. In addition, you should not allow a subsequent layer of paint to be applied without the previous one completely drying.
Why you should contact us
Many clients order Lada in our car service center, since cooperation with us has the following advantages:
- wide range of services provided;
- use of advanced equipment and technologies;
- highly qualified craftsmen;
- painting car bodies of all brands;
- acceptable prices;
- high quality of services provided;
- the shortest possible time for painting.
In our car service you can order Lada painting of any complexity. Contact us! We will restore the body of your car, it will look like new!
Technology for painting plastic car with your own hands at home and video of work processes
Consistency and thorough implementation of the technology for painting plastic elements guarantees the quality and durability of the paintwork. If you wish, you can familiarize yourself with the technique using the available video materials provided by the masters. Briefly, the list of works consists of the following points:
- Degreasing the surface using solvent or white spirit.
- Treat the plastic part with an antistatic agent (for example, Plak or Liqui Moly) so that when painting it does not attract dust to the surface.
- Before painting old plastic on a car, you need to eliminate defects using a special putty, which is more elastic than standard polyester.
- After drying, remove all irregularities using sandpaper P300 - P400 , and the process must be carried out using water.
- Dry the part thoroughly and degrease its surface again.
- Prime the surface in 2-3 layers, avoiding the appearance of drips.
- The dried primer should be cleaned before painting using abrasive paper P400 - P500 .
- 2-3 layers of acrylic paint with plasticizing additives are applied to the cleaned surface, each layer needs to dry for 15-25 minutes.
- After final drying, a layer of varnish is applied.
- Polish the finished paint surface with polishing pastes.
The technique of polishing the body has been worked out for a long time; to perform it, it is advisable to have a grinder and appropriate accessories. But if necessary, small areas can be processed manually.
Using a brush when painting plastic car parts
It happens that painting with a brush looks more convenient and profitable than using a can of aerosol paint. You won’t see this method of painting the standard plastic of a car with your own hands in the video. However, this does not mean that you should not pay attention to it; on the contrary, it guarantees high-quality adhesion and good coverage of small fragments. However, when working, a number of features should be taken into account:
- Paint applied with a brush takes longer to dry, so the drying time should be increased by 15-20 minutes.
- When painting, you should try to ensure a minimum layer thickness. To do this, during the process, the brush should be pressed well to the surface and work quickly.
- Carefully wipe off excess paint on the edge of the can.
- When working, maintain the same painting angle.
Lada painting by model:
- 1111 Oka
- 2101
- 2102
- 2103
- 2104
- 2105
- 2106
- 2107
- 2108
- 2109
- 21099
- 2110
- 2111
- 2112
- 2113
- 2114
- 2115
- 2120 Nadezhda
- 2121 (4×4)
- 2123
- 2129
- 2131 (4×4)
- 2328
- 2329
- EL Lada
- Granta
- Kalina
- Largus
- Priora
- Revolution
- Vesta
- XRAY
Other technical contents of the interior
Having paid considerable attention to acoustics, it is advisable to install something more serious instead of the standard audio system. A full-fledged multimedia center with video outputs for a monitor will be the best choice for tuning the Lada Priora interior. This kind of device will not only be advanced in terms of its capabilities, but will also provide high quality sound tracks.
Along with the multimedia center, it would be nice to install a full-fledged monitor. This is a very useful thing to while away the time in traffic jams while driving or when you simply want to rest and relax. Now it will become real even on the side of the highway. It would also be a good idea to take a closer look at the range of on-board computers on the Priora.

