The speedometer cable on the Niva is attached at one end to the dashboard and the other to the transfer case, so replacing it will require a pit, overpass, or lift.
You can jack up the car on blocks of wood, which is what I did.
We start from the bottom, otherwise it will be impossible to pull out the dashboard (I unknowingly started from the top, but this is no longer in danger for you).
The speedometer cable cap can be unscrewed and removed manually, but if it gets stuck, you can use pliers, but without pressing hard.
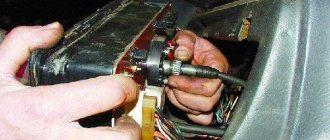
All that remains is to cut the ties that attach the electric cable to the cable. connecting the speed sensor, and you can move to the top, since the cable is freed, and in fact, if you wish, you can pull it out into the cabin, but let’s wait for now.
In the cabin, we look under the steering column and unscrew the two screws that secure the dashboard trim
The cladding is fastened on top with metal clips, so that without self-tapping screws it is simply pulled out with force, after which the long plastic nuts of the bolts securing the panel itself are unscrewed, and the entire panel is pulled out.
If the panel does not want to be removed, then you need to tighten the cable from below, since only it can hold it.
This is done right in the salon. The cable in the cabin runs to the left of the stove, and that’s where you need to pull it up.
After this, the panel will be easily removed and the cable can be easily disconnected from the speedometer.
Now you can pull out the cable, but a small ambush awaits here. The rubber seal through which it passes is almost impossible to remove, so there is only one option left: break the top cap and pull out the cable from below. Then the elastic band will be easily squeezed out.
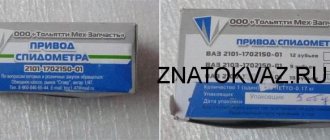
The old cable has been removed. Now we install the new one in reverse order. For a simple Niva, it has this look and size, and in the car market it is called long.
First, we push it into the interior from below, attach it to the speedometer, assemble the panel, attach it to the transfer case, adjust the sealing rubber from below and secure it to the cable with electrical ties. speed sensor connection.
In continuation of the previous post. So I installed a whole new steering wheel and almost started jumping for joy when I was informed that if the steering gearbox was from 213, then the pendulum had to be taken from it. (It’s all the fault of the modified bipod on the improved VAZ 21213) To tell the truth, when buying, I only looked at the length of the rod (since it’s short on the VAZ 21214) and was not at all familiar with the topic. So I had to and now I’m telling everyone who doesn’t know. The pendulum, of course, turned out to be 2121. But I had already assembled this config and started testing. Firstly, the wheels immediately moved apart in convergence in different directions (with the same thrust), secondly, the turning radius of the wheel to the left and to the right was different! I changed the pendulum to 213 and thought now everything would return to normal, but that was not the case. The turning radius leveled out and the toe remained to the sides. After which, with reluctance, I still went to the wheel alignment and the computer showed that I needed to unscrew the rods by 2 cm and there was nowhere else to go! And so the threads are a little bit. I started using the Internet further and there I found something interesting. It turns out that when the VAZ 21213 came out, the steering was changed, namely the bipod of the gearbox and pendulum, as well as the swing arm of the fist! This means that if you want to change the outdated design to 21213, then you will need steering knuckle levers, a pendulum and a bipod (all rods remain unchanged). The steering knuckle arms 21213–3001020 and 21213–3001031 are approximately 20 mm longer than the previous 2121. The pendulum lever 21213–3414084 and the bipod 21213–3401090 differ from similar parts 2121 in configuration and arm angle. With parts 21213, the force on the steering wheel will be reduced by approximately 20%. But at the same time a little maneuverability is lost. If you leave the old kit, then in case of repair you will have to buy and install all the specified parts with the initial index 2121. Important note: the named parts can only be replaced as a kit! Otherwise, the geometry of the trapezoid is violated, which is unacceptable. By the way, the steering knuckle lever 2123 is also different. It is shorter than 213, almost as long as 2121 (all because with the advent of power steering, special efforts are no longer needed and the design was returned to a more maneuverable one) I hope it was useful.
I had to change the cable because it was rubbing against the front universal joint and the sheath was worn out.
There are three different cables for the Niva, the store gave me a short one, it turned out that it was from a VAZ-2121 (that is, from the old one! Its length is L = 1180 mm, model GV 307D). I needed it from a VAZ-21213 (also 21214 is coming! GV 307-11 and its length L=1350 and up to 1420 mm). It also comes from the VAZ-2131, it is shorter, L=1300 mm and the GV 307-08 model. I handed in the short one and asked to bring the long one, I waited a week.
Construction and repair, mushrooms and fishing, home economics and health
Why the speedometer may not work on a Niva 2121 car
The Niva car or VAZ-2121 is one of the most successful developments of domestic engineers. Having begun mass production in 1977, the car was in demand not only in the USSR, and then in Russia, but also abroad. In some countries, fan clubs of this model have even been created. The first Nivas were equipped with a three-door body and a carburetor engine with an output of 80 hp.
They rolled off the assembly line with virtually no changes in design and technical characteristics until 1993. In 1994, car enthusiasts saw a modified body and an 82.8-horsepower engine. The car was named VAZ-21213 Niva. Then the Niva VAZ-21214 appeared, on which, starting in 2002, injection power units began to be installed. In 2006, the name Niva officially ceased to exist. The car, until 2022, was called “LADA 4×4”, and now it is “Lada Niva Legend”.
From the very moment of its creation, until today, the Lada-Niva has been distinguished by the extreme degree of reliability of all components and assemblies. It is not for nothing that a huge number of these cars continue to travel on roads and off-roads, despite the fact that they came off the assembly line several decades ago. But, which is quite natural, the older the car, the more breakdowns there are. Along with the transmission, engine and body, failures of motion control systems occur, which include the speed control system.
In the article we will look at the reasons why the speedometer on the Niva does not work, using the VAZ-21213 and VAZ-21214 as an example, since these cars are the most typical and widespread representatives of the family of Tolyatti SUVs. But first, briefly about the structure of the speedometer itself and the principle of its operation.
Elements of transfer case 2121
The multiplier is installed only on VAZ models with 2 drive axles. Located behind the gearbox. A driveshaft is mounted on the transfer case itself. Basic elements for the Niva transfer case, which are present in all models of Soviet-made demultiplicators:
- frame;
- intermediate and drive shafts;
- set of bearings and gears;
- satellites;
- drive shafts of the front and rear axles;
- oil seals, flanges, couplings;
- differential;
- control and control levers.
The connection between the unit and the Niva gearbox is rigid, which is carried out through a coupling and a shaft. The transfer case of the VAZ 21214 or Chevy Niva model differs from the classic one only in the presence of a speed sensor drive.
Speedometer
The basis of the speedometer design is:
- speed sensor;
- electronic control unit;
- display.
The speed sensor receives indirect information about the speed of the vehicle, which is removed from the drive located in the transfer case. This is typical only for Niva. In other cars, the gear drive of the speedometer is installed on the output shaft of the box or on the drive of the front left wheel.
The sensor, converting the drive speed into electrical impulses (using the resulting Hall effect), transmits them to the electronic unit, which processes the signal and sends it to the display. The latter shows on its screen what the current speed of the car is. Data can be presented as numbers or a scale on digital displays, or indicated by a moving arrow pointing to the values on a graduated scale on analogue indicators.
For your information. The electronic unit, receiving and processing information, sends it not only to the speedometer display, but also to the fuel supply system. The higher the speed, the more fuel will flow into the engine. It is also interesting that the program contains an algorithm that prevents the electric power steering from operating when the speed sensor is faulty.
Device characteristics:
- Recording mileage in all service blocks - mileage increase is not determined during maintenance.
- Convenient and quick installation.
- Winding speed up to 500 km/h. You can quickly increase your mileage.
- Connection inside the car.
- Can be used on the move!
The most modern device for increasing car mileage for Lada (VAZ) 2121 (4×4)
The device is designed to independently increase the mileage of a car. Does not require installation or configuration and starts working immediately after connecting to the diagnostic connector and turning on the ignition. Just connect it to the OBD2 connector, which is used for diagnostics, and it will immediately start working
The speedometer twist is used to wind up the mileage of the speedometers of the Lada (VAZ) 2121 (4x4) car and can be used on several cars of this model. The advantage of twisting is that it can be removed at any time.
Instructions for turning the speedometer
Cranking speed : 2000 km/h
Connection: Self-connection via diagnostic connector.
Material: High quality plastic
Dimensions: Length 68 mm, Width 44 mm, Height 23 mm.
Weight: 27 gr.
Power: 12V from the diagnostic connector, no additional connection required
Device, instructions, warranty card, packaging
Each product comes with a 5 year warranty. You can always consult with our support team about connecting and configuring the purchased equipment.
information about delivery
Delivery in Moscow by courier. Payment in cash after verification. To other regions of Russia, delivery by Russian Post. Payment in cash upon receipt.
Payment Information
For residents of Moscow, St. Petersburg, Simferopol, Chelyabinsk, Novosibirsk, Rostov-on-Don, Volgograd
Payment in cash upon receipt (after checking the device on your car)
For residents of other regions of Russia
Payment upon receipt of the parcel, at your Russian Post office (we work without prepayment)
And also in another way convenient for you, transfer to a bank card, electronic money (Yandex money Webmoney)
The most modern device for increasing car mileage for VAZ
The device is designed to independently increase the mileage of a car.
The speedometer twist is used to wind up the mileage of the speedometers of a VAZ car and can be used on several cars of this model. The advantage of twisting is that it can be removed at any time.
Device, instructions, warranty card, packaging
Cranking speed : 210-270 km/h
Connection: Self-connection via cigarette lighter
Material: High quality plastic
Dimensions: Length 98 mm, Width 28 mm, Height 21 mm.
Weight: 38 gr.
Power: 12V from cigarette lighter
Each product comes with a 5 year warranty. You can always consult with our support team about connecting and configuring the purchased equipment.
Why does the speedometer not work?
There may be several reasons why the speedometer on the Niva suddenly stopped working.
- The malfunction may have occurred due to a broken speed sensor.
- Secondly, the car wiring is damaged or the contact in the electrical circuit is broken.
- The third reason, sometimes, is the speedometer needle getting stuck in a certain position.
- A problem with the electronics of the control unit can also cause a speedometer malfunction.
- Incorrect installation of speed control system parts after they have been replaced or removed.
Product delivery options
Note! Below are the shipping methods available specifically for this product. Payment options may vary depending on the shipping method. Detailed information can be found on the “Delivery and Payment” page.
Parcel by Russian Post
Available payment methods:
- Cash on delivery (payment upon receipt)
- Using cards Sberbank, VTB, Post Bank, Tinkoff
- Yandex money
- QIWI
- ROBOKASSA
Shipping throughout Russia. Delivery time is from 5 to 12 days.
Parcel by Russian Post 1st class
Available payment methods:
- Cash on delivery (payment upon receipt)
- Using cards Sberbank, VTB, Post Bank, Tinkoff
- Yandex money
- QIWI
- ROBOKASSA
Shipping throughout Russia. Delivery time is from 2 to 5 days. More expensive than regular delivery by Russian Post, approximately 50%. Parcel weight up to 2.5 kg
Express Parcel EMS
Available payment methods:
- Cash on delivery (payment upon receipt)
- Using cards Sberbank, VTB, Post Bank, Tinkoff
- Yandex money
- QIWI
- ROBOKASSA
Shipping throughout Russia. Delivery time is from 3 to 7 days. More expensive than regular delivery by Russian Post, approximately 100%.
Transport companies
Available payment methods:
- Using cards Sberbank, VTB, Post Bank, Tinkoff
- Yandex money
- QIWI
- ROBOKASSA
Delivery is possible to any locality where there is a representative office of the transport company. Delivery time is from 2 to 10 days. Sending large parcels is approximately 50% more profitable than by Russian Post.
Pickup from our warehouse
Available payment methods:
- Cash upon receipt
- Credit, installments
- Using cards Sberbank, VTB, Post Bank, Tinkoff
- Yandex money
- QIWI
- ROBOKASSA
Pickup times must coincide with store opening hours.
The DSA is located under the bottom of the car in the gearbox housing. Since the sensor itself is made of plastic, this place can be considered well protected and allows you to maintain its integrity during operation. It should be noted that when using the vehicle in difficult conditions such as mud or snow, the DSA may fail.
When replacing or inspecting the speed sensor, you must be extremely careful, as it is quite fragile.
On-board network malfunction
Often, this is precisely the reason why the speedometer has stopped working. After all, all information in modern devices is transmitted through electrical wires. A break or short circuit may occur in the vehicle wiring. A multimeter can detect this. If you have the skills to work with this device, you can try to find and fix the problem yourself.
Before you start searching for a break, you need to carefully inspect the wires to visually detect damage. After this, the tightness of the terminals is checked. If everything seems intact, the search begins using special equipment:
- The multimeter is set to ringing mode.
- The probes are attached to the ends of the area being tested.
- If the wiring is intact, a beep will sound. Its absence will mean that the break occurred in the location being tested.
To check for a network short circuit, the multimeter is also set to ringing mode. Before starting work, the wire is disconnected from the vehicle's electrical circuit. And, if in the case of a break, the signal indicated that the cables were in good condition, then the sound of the multimeter will now show where the short circuit occurred.
As a rule, eliminating problems with the wiring and replacing the speed sensor resolves the issue with the performance of the speedometer. But, if this does not happen, you need to contact specialists as soon as possible. After all, driving a car with inoperative speed control not only harms its technical condition, but also poses a real danger to the life and health of all road users.
LADA Niva Legend 3 doors from 559,900 rubles* with benefits up to 60,000 rubles!
1.7 (83), MT5, Full, 4 seats
1.7 (83), MT5, Full, 4 seats
1.7 (83), MT5, Full, 4 seats
1.7 (83), MT5, Full, 4 seats
Engine
Transmission
Body
One of the first domestically produced civilian jeeps, the Niva 2121 with a classic, recognizable design looks brutal and courageous, as befits a car with an off-road character.
Among the main features of the car’s exterior it is worth noting:
- Large round headlights complemented by turn signals on top;
- The traditional radiator grille, which is the hallmark of the brand;
- High ground clearance, revealing the car's massive axles;
- Stylish 16" Niagara alloy wheels with Pirelli tires;
- Spare full-size 16″ steel wheel.
In the spacious, laconic interior, the driver and passengers will feel comfortable thanks to the following interior elements:
- Heated front seats;
- Ergonomic power steering wheel;
- An informative dashboard with a new instrument cluster;
- Electric windows for front doors;
- Heated exterior mirrors with electric drive;
- Air conditioning.
Repair of mechanical speedometer and odometer
Reg.: 10/23/2011 Messages: 110 From: Moscow region. Voskresensky district village. Beloozersky Age: 47 Car: VAZ 21213 99 ICE 1.8l 2011 onwards (was.) Now VAZ 2131 2013 onwards Honeysuckle.
Reg.: 12/28/2011 Messages: 21 From: St. Petersburg Age: 37 Car: BMW 530 iA'01, LADA 21214'02
Reg.: 10/23/2011 Messages: 110 From: Moscow region. Voskresensky district village. Beloozersky Age: 47 Car: VAZ 21213 99 ICE 1.8l 2011 onwards (was.) Now VAZ 2131 2013 onwards Honeysuckle.
Reg.: 08/26/2011 Messages: 15 From: Russia, Novorossiysk Age: 41 Car: VAZ21213, 1996
Reg.: 02/27/2011 Messages: 1504 From: Biysk Age: 46 Car: PEUGEOT 308
Repair of mechanical speedometer and odometer
Reg.: 08/02/2008 Messages: 51 From: Khakassia, Abakan Age: 40 Car: Niva 21213, 2000
Either slips or somehow becomes disengaged with this mechanism, with great torsional resistance
Now a question involuntarily arises. During the repair process, I repeatedly removed the tidy, and also pulled off the instrument needles and put them back. The tachometer needle seems to be pointing correctly. I'll check the speedometer needle using GPS. Everything is clear with the fuel level arrow - it never shows correctly. But how to accurately set the pihl temperature arrow? Heat for ten minutes and set at 90 degrees?
Reg.: 08.23.2007 Threads / Messages: 5 / 4030 From: Dnepropetrovsk, Ukraine Age: 36 Car: 21213 96
31″ tires, ShNiva clutch, subframe, expedition vehicle, Gen 80A, air filter 3302, linted bi-xenon, Weber 32DGAS carb, SRPM, wide welded bridge, vertical shock absorbers ShN, ZDT, VUT Omega-B, etc.
Reg.: 01/23/2009 Messages: 16 From: Mednogorsk Age: 43 Car: 2121, 1984, 1600
Name: Evgeny Reg.: 03/26/2008 Threads / Messages: 141 / 4957 From: Irkutsk Age: 37 Car: Jimny 2013
Reg.: 01/23/2009 Messages: 16 From: Mednogorsk Age: 43 Car: 2121, 1984, 1600
Name: Evgeny Reg.: 03/26/2008 Threads / Messages: 141 / 4957 From: Irkutsk Age: 37 Car: Jimny 2013
Reg.: 01/23/2009 Messages: 16 From: Mednogorsk Age: 43 Car: 2121, 1984, 1600
Reg.: 08/20/2007 Messages: 81 From: Volzhsky Age: 41 Car: 2121. 1978
Name: Denis Reg.: 04/14/2008 Messages: 662 From: Belgorod Age: 35 Car: 2121, 1989 1.6k gearbox-4
Reg.: 01/05/2010 Messages: 11 From: Nizhny Novgorod Age: 36 Car: 1999, 21213
help with speedometer advice
Here’s the story, one day the speedometer needle went out of line, well, without hesitation, I changed the cable and everything worked, but the happiness didn’t last long, about 4 days. during the next trip it twitched and fell to zero again
Knock sensor Niva 21214: where is it located, replacement - AutoExpert
...disconnect the sensor connector.
Using a 13mm spanner, unscrew the bolt securing the sensor to the cylinder block...
- ...and remove the sensor.
- In photos 1–3, the exhaust pipe and air filter housing have been removed for clarity.
- Before installing the sensor, clean the surface of its contact on the cylinder block.
Install the sensor in reverse order. The tightening torque of the sensor mounting bolt is 20–25 Nm.
The knock sensor is removed for replacement or when repairing the engine.
- Where is DT located?
- — It is installed in the upper part of the cylinder block, on the right side, in the area of the 2nd and 3rd cylinders (more about this sensor)
- Turning off the ignition...
...disconnect the sensor connector.
Using a 13mm spanner, unscrew the bolt securing the sensor to the cylinder block...
...and remove the sensor.
https://www.youtube.com/watch?v=Ghzz6V5Ht3k
Before installing the sensor, clean the sensor contact surface on the cylinder block.
How to check the sensor
Connect a tester connected in voltage measurement mode to the sensor terminals. Tap the sensor body against a solid, massive object (for example, a hammer).
In this case, the voltage should change. If the voltage remains constant, the sensor is faulty and needs to be replaced. (More accurately, the serviceability of the sensor can be checked while the engine is running using the DST-2 diagnostic tool.)
In photos 1–3, the exhaust pipe and air filter housing have been removed for clarity.
Before installing the sensor, clean the surface of its contact on the cylinder block.
Install the sensor in reverse order. The tightening torque of the sensor mounting bolt is 20–25 N.m.
1200 rub. for the photo report
We pay for photo reports on car repairs. Earnings from 10,000 rubles/month.
Write:
The knock sensor (DS) is designed to detect the occurrence of detonation in the cylinders of gasoline piston engines.
The piezoceramic element of the knock sensor, reacting to vibrations of the cylinder block, sends a signal to the controller.
Lada Kalina ground wire
The controller (ECM), in turn, processes this signal and, in the event of detonation, reduces the ignition timing. In this case, the ignition timing changes for each cylinder separately. This is due to the fact that the temperature of the cylinders, when arranged in a row, is different. The coldest is the first, the hotter is the fourth or last, then the second and the hottest is the third.
From the driver’s point of view, the presence of a detonation elimination system makes it possible, if necessary, to use low-octane gasoline (keep in mind, the controller will assume that you have A-95).
Another advantage is maximum efficiency and excellent dynamic properties when using gas-cylinder equipment.
Indeed, in this case, you can safely set the maximum acceptable ignition timing for starting, without the risk of running into “knock of fingers” (the popular name for the sound that occurs during detonation).
The sensor is mounted on the cylinder block (see photo).
1 — knock sensor on engines 21126, 11194
Knock sensor on engine 21214.
Replacing the knock sensor
Removal
- To replace the knock sensor, first turn off the ignition.
- Then remove the wiring harness block by first pressing the latch.
- Unscrew the fastening bolt with a replaceable head x13 or an appropriate wrench (the head is preferable to prevent “licking the edges”).
Installation
Install the sensor in place so that the connection block is directed towards the free space.
Touching hot engine parts may damage the insulation of the wiring harness. Touching cold elements is a point of chafing due to the natural vibration of the engine in relation to the body.
Try to keep the block “looking” down in case of water ingress. Make sure the pad is clean and dry - the fastening bolt is wrapped in a block and thus connected to ground. Contact between the bolt and the pad through a layer of dirt that has been exposed to oil or water will lead to engine malfunctions.
The fastening bolt must be tightened using a torque wrench with a replaceable head of 13. The tightening torque is 15. 24 N.m. In this case, the correct tightening torque affects the sensitivity of the sensor to engine vibrations. Incorrect tightening leads to malfunction of the motor.
Knock sensor malfunction
The most common fault is “low signal level” code 0327 . With the ignition off, the integrity of the circuits from the sensor block to the controller, and from the block to the sensor, is checked. It’s a good idea to check the tightening torque. If the torque was insufficient and it was necessary, you can restore it and test for the absence of code 0327.