VAZ-2121 is a specific car. It has increased cross-country ability and can travel in places that owners of ordinary cars cannot even dream of. It is used by hunters and fishermen, villagers and simply off-road enthusiasts.
However, driving on roads with poor surfaces or rough terrain leads to large dynamic loads on the body. Sooner or later the time comes to strengthen the Niva's side members.
Reasons for body weakening
The design of the VAZ-2121 is quite rigid. It has a short base - 3740 mm and a width - 1680 mm, which prevents twisting well. The 3-door body further enhances rigidity. Despite the strong construction, over time, cracks appear on the side members in the steering area, as well as in the places where the suspension arms are attached. Why is this happening?
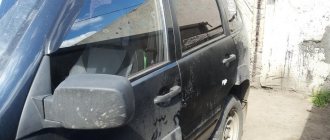
The Niva travels a significant part of its mileage off-road, experiencing constant impact that is transmitted from the chassis to the vehicle's side members. Over time, these impacts lead to fatigue of the body metal. In addition, the protective mastic that the car is treated with at the factory comes off and exposes the metal surface. Corrosion appears. It further weakens the load-bearing elements.
There comes a time when strengthening the Niva's side members becomes inevitable.
Let's sum it up
Using the Niva in an aggressive environment often leads to rupture of the vehicle's chassis components. To use an all-wheel drive SUV in severe off-road conditions, reinforcement of the vehicle drives is required. To carry out the necessary work, you can turn to specialists for help, however, not everyone can afford it.
To improve your car yourself, it is important to have repair skills and the necessary tools, as well as an equipped garage. Keep in mind that changes to the design features of the car can also have a negative result. Start work only if you are completely confident in your abilities.
Major malfunction of the rear body of the car
In the rear part of the body, the transverse link mounting bracket, popularly called the “soldier”, suffers more. Its correct position ensures the exact location of the rear axle relative to the front wheels. When the car moves along a deep rut at a decent speed, this bracket experiences shock load from the lateral rod. Constant exposure leads to fatigue and the metal weakens. The time comes when a good blow is enough for the “soldier” to change his position. As a result, the running parameters are violated.
In addition to the above reasons, the side members may weaken as a result of an accident. Despite the fact that the geometric parameters are restored, the places where they were deformed acquire “memory”. Subsequently, they can bend in these places from a slight load.
Off-road enthusiasts also strengthen the Niva's side members. They strengthen the body for the installation of non-standard chassis and additional equipment. For example, a winch.
Refinement of the gas distribution mechanism
After replacing the jets and accelerator pump, you can proceed to the second stage of tuning the VAZ-2121 engine. It includes modification of the gas distribution mechanism (GRM), namely, an increase in the diameter of the valves with their subsequent sealing. Such tuning of the Niva 2121 engine will increase the power of the power plant by almost ten percent.
It makes sense to replace the pusher (with a new one with a diameter of at least 1 mm) during the modification of the Niva engine. Work is being done to increase the pusher wells of the intake and exhaust channels. The result of such modification will be especially good for the Niva 4x4.
Subsequent work concerns the replacement of injectors and the control unit itself. Tuning the VAZ-2121 engine will be incomplete unless the standard crankshaft is replaced with an advanced modification, which will significantly increase the power of the power plant. This is due to the increase in piston stroke. It is also recommended to replace the piston rings with new ones. When replacing the crankshaft, boring should be done, as this will provide an additional opportunity to make the engine more powerful. However, be prepared for the fact that fuel consumption will also increase.
Such tuning repairs are capable of:
Preliminary work
Before you begin repairing the side members, you need to do some preliminary work. It consists of preparing the work area and hanging the front of the machine on stands.
It is better to carry out work on strengthening the Niva's side members in an inspection pit or on a lift.
Before starting welding work, remove the floor covering and remove the sound insulation that is adjacent to the engine shield. This is where the pedals are installed.
To do this, you need to remove the plastic trim from the car sills and fold back the trim. In this way, it will be possible to control the absence of fire in the cabin. It is also necessary to release the upper suspension arm. To do this, you need to disconnect the ball joint from the steering knuckle. Subsequently, this will allow you to install the repair part on the spar.
Before work, it is necessary to clean the intended welding areas. This will make it possible to obtain good penetration and will help avoid fire of the polyurethane mastic.
Repair
Of course, minor defects that appear during operation of the 2121 are not at all a reason to replace the body. These defects can be easily eliminated with your own hands, saving on expensive specialist services.
Scratches, for example, can be easily and easily removed by polishing. Several types of grinding compounds and materials are used that effectively remove the top layer of paintwork and smooth out perfectly worn areas of the body.
Note. Complete elimination of the scratch in such cases is guaranteed, unless, of course, the outer layer of the paintwork is completely damaged. And in general, you shouldn’t overdo it during the polishing process either, because in this case you can achieve the opposite effect, which will lead to a mandatory painting procedure (more costs).
Body repair also includes geometry restoration. Curvature of the frame and its components occurs not only due to impact, but also due to temperature changes and metal aging.
However, it is highly recommended not to follow the operating instructions thoughtlessly. For example, if a book says that the body will last for so many years, you don’t need to believe it, since more active use, extra loads and poor quality of the road surface cause excessive tearing in individual joints, reducing the service life of the vehicle.
Note. Diagnostics and restoration of the geometry of the automobile frame is the main and mandatory phase in the course of a full repair.
It is recommended to restore the geometry by stretching or compressing the metal frame only in specialized car services equipped with advanced equipment (computer systems), machines, and so on. Unfortunately, it will not be possible to carry out competent editing on your own.
On the other hand, if after diagnostics it was possible to find out that only some elements of the body are deformed, then by tapping and squeezing everything can be quite effectively eliminated. And in this case, the work can be done in two ways: without painting or with it.
Strengthening the front side members on the Niva
Before welding the repair kit, it is necessary to inspect the fastenings of the beam on which the engine is mounted. It often happens that the nuts that secure the engine mounts are torn out of their seats. In this case, you need to separately hang the engine on a jack and remove the rubber cushions on which it is mounted.
Then you need to cut out a window in the spar with a grinding machine, which will provide access to the nuts. Then the nuts are fixed by welding, the window is closed, and it is also welded.
This must be done before the reinforcement plates are welded, because they will block access to these nuts, which will greatly complicate the repair.
There are two options for strengthening the side members on the Niva 2121:
- Make a plate that follows the shape of the outer part of the spar.
To do this, take a sheet of metal with a thickness of 2 to 4 mm. You can use a sheet of greater thickness, but in this case it will be difficult to fit it to the spar profile. In order to cut it correctly, you first need to make a pattern from thick cardboard. A sheet of cardboard is applied to the spar, and the boundaries of the future part are outlined. All holes are also marked along the way. After the pattern is ready, it is placed on a steel sheet and outlined with a marker. The part is cut out with a grinding machine. After this, you need to drill holes in increments of about 5 cm. They will act as electric rivets, that is, through them the part will be welded to the body.
- Purchase a ready-made kit to strengthen the side members for the Niva.
They are already fully prepared for welding and do not require any modification. These spare parts differ in the different thickness of the metal from which they are made. The price for these amplifiers is about 3 thousand rubles.
Video 2
Regardless of whether you have chosen a budget or professional elevator, after final assembly it is necessary to conduct test runs . If there are flaws in the installation, or the dimensions are incorrect, it is better to check it away from public roads.
Tuning a Niva 2121 with your own hands, traditionally for the “classic” model range, is a relatively simple process. The result is the creation of exclusive modifications of the all-terrain vehicle, which in appearance, interior and technical characteristics are not inferior to foreign middle-class models. Do-it-yourself car tuning can be turned into a profitable business, and Niva 2121 will become a training ground and will allow you to gain the necessary knowledge and skills.
Strengthening the rear side members on the Niva
The rear side members suffer due to the aging of the body. Corrosion eats through the metal, weakening it. They are sheets of iron bent into a U-shaped profile.
They can be strengthened either by welding new spars on top of the old ones, or by reinforcing the rotten areas with a rectangular pipe. The second option is cheaper.
However, the main thing in strengthening the rear end is not the spar, but the transverse link bracket. Before strengthening it, you need to measure the position of the rear axle, and then install the bracket in the correct position. This is done using hydraulic stretchers. Only after this can it be scalded.
Replacement
ATTENTION! A completely simple way to reduce fuel consumption has been found! Don't believe me? An auto mechanic with 15 years of experience also didn’t believe it until he tried it. And now he saves 35,000 rubles a year on gasoline! Read more"
Today, various companies offer owners of universal all-terrain vehicles to purchase assembled or metal bodies. Accordingly, the price will differ. In addition, a wide selection of colors allows each owner to choose their favorite option.
For example, an assembled body on a Niva will cost about 300 thousand rubles, but a metal frame will cost almost half as much.
Niva bodies are sold in the following colors.
| Colors of VAZ Lada 4x4 3-door | |
| Color | Code |
| Jasper | 140 |
| Snow white | 202 |
| Glacial | 221 |
| Nessie | 368 |
| Baltika | 420 |
| Color range of VAZ Lada 4x4 5-door | |
| Color | Code |
| White cloud | 240 |
| Nice | 328 |
| Quartz | 630 |
| The Snow Queen | 690 |
Final works
In order for the result of the work to please you for many years, it is necessary to protect the welding areas from corrosion and impacts from stones flying from under the wheels.
For this purpose, rubber-bitumen mastic is used, to which polymer chips are added. It is applied with a brush or a special sprayer connected to a compressor. Before applying the composition, the bare metal should be coated with primer. It must contain phosphoric acid, which will protect the part from corrosion.
Tuning Niva 4x4. Replacing wheel bearings. How to do it yourself:
Next came the assembly:
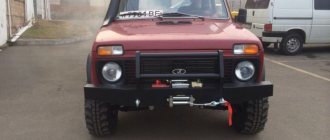
Upgrading the Niva requires, as a necessity, the installation of a power body kit, an expeditionary trunk and headlights on the roof of the car. A power body kit is, first of all, replacing the bumpers at the front and rear or installing a kangurin. The front bumper must be equipped with a winch. In addition to reinforced bumpers, you can also install reinforced sills, and there you can also make a special support for the winch. When tuning a Niva, it is extremely necessary to install underbody protection. This protection covers weak points such as steering rods, transfer case and crankcase.
In addition to auto make-up, a salon upgrade is required. Reupholster it, install a new heater, computer, controllers. Change the steering wheel to a sports type, order sports covers, install aluminum pedals, install additional lighting next to the passenger seat, make an LED control panel for better readability.
Preparation stage
Let's analyze the well-being of the nest house for the shock absorber. When the part is not rotten, it will still work, and it must be removed. To do this, we drill out welding points (at 5 and 10). They become clearly visible after the spar is cleaned to bare metal. We mark the 5th drill bit, and drill the 10th one completely (the process is quite labor-intensive).
We dismantle the house. Then we clean the entire surface of the spar and inspect it for possible flaws and nuances. We decide on the overlay itself: it should be a little longer in length. We thoroughly clean the areas, since without this there can be no question of high-quality welding. We'll have to sweat.
Remedy
Increased noise from the rear wheels
— The wheel fastening is loose
Tighten the wheel nuts
— Wear or destruction of the axle ball bearing
Inspect the axle shaft and replace the bearing
Constant increased noise when the rear axle is operating
— The rear axle beam is deformed, the axle bearings are damaged
Straighten the beam and check its dimensions, replace the axle bearings
— The axle shafts are deformed and have unacceptable runout
Replace the axle shafts with new ones
— Incorrect adjustment, damage or wear of gears or gear bearings
Determine the gearbox malfunction, repair or replace the gearbox
— Worn or incorrectly adjusted differential bearings
Remove the gearbox, repair and adjust
Noise when accelerating and braking the car
Also interesting: Which battery is better for the Niva?
— Incorrect adjustment of the main gear gear engagement
Adjust the engagement
— Damage to the axle bearings
Replace bearings
— Insufficient amount of oil
Restore the oil level and check for leaks in the seals or rear axle beam
— Incorrect side clearance in the meshing of the final drive gears
Adjust the gap
— Increased clearance in the drive gear bearings due to loosening of the flange nut or wear of the bearings
Adjust the clearance, replace bearings if necessary
Noise when cornering
— Damage to axle bearings
Replace bearings
Knock when starting to move the car
— Wear of the hole for the pinion axle in the differential box
Replace the differential box and, if necessary, the pinion axle
— The rear suspension rod mounting bolts are loose
Tighten the bolts
Oil leak
— Worn or damaged drive gear oil seal
Replace the oil seal
— Wear of the axle shaft seal, leading to oiling of the brake shields, drums and pads
Check the runout of the axle shaft and beam deflection. Repair or replace damaged parts
— Loosening of the bolts securing the rear axle gear housing, damage to the sealing gaskets
Tighten the bolts, replace the gaskets
Reinforced rods
The appearance of cracks between the rod base and the lugs will shorten the service life of the parts. This problem can even cause an accident - the car suddenly pulls to the side when the traction breaks.
To avoid unpleasant surprises, special reinforced parts are installed in the rear suspension. They are made of alloy or cold-rolled steel and differ from conventional ones in the diamond-shaped section of the base and powerful welding seams that hold the lugs.
Reinforced rods differ from standard ones in the following characteristics:
- Reduced weight of parts.
- Improved paint coating that prevents corrosion of elements.
- High strength welded seams.
- Increased resistance to torsion, compression and tension.
Installation of reinforced rods is recommended for full use of the Chevrolet Niva off-road. They don't offer much benefit for city or highway driving. Under gentle operating conditions, the strength of standard rods is quite sufficient, so there is no point in overpaying for reinforced parts.
Getting access
To straighten the spar, you must first reach it. For these purposes, we drive the car onto a lift and remove the wheel. Of course, in the absence of a lift, you can use a pit or overpass by lifting the desired side with a jack, but this can threaten the safety of work if you lose balance. Next, you need to remove the caliper, unscrew the nut from the upper ball joint.
We hit the lever with a large hammer or - carefully - with a sledgehammer so that the knot can be disassembled. Also, unscrew the upper one on the shock absorber, loosen the lower fastening, and move the device itself to the side. We hang the brake cylinder on the hoses. The upper lever must be removed, then the cup and the upper bump stop. We release the gearbox or steering pendulum (depending on the side of the front end on which we are working). And now, finally, we have already gained access to strengthen our spar, tired from time and use.
