What problems does installation eliminate?
Domestic cars have a sad reputation as vehicles with low body rigidity, and many foreign cars also suffer from this. Installing rear strut struts is designed to reduce body torsion and increase resistance to vibrations. The effect will be most noticeable on cars that have been weakened by corrosion or have been in a serious accident. After installation, car enthusiasts note a decrease in roll when turning, a partial disappearance of squeaks of body elements, and noise from plastic interior panels.
It should be taken into account that in the event of even a small impact in the area of one of the glasses, the deformation will be more strongly transmitted to the mating part of the body.
Why install
Amplifier
If the stiffness is insufficient, the car's handling is characterized by sluggish response. In theory, the presence of a spacer or extension allows you to maneuver more confidently and take turns at speed. Also, the body will not be greatly deformed, and the effect of metal fatigue will be avoided. This is especially true for owners of the VAZ 2114, who regularly drive on roads that are not of the highest class.
To summarize, let's look at what exactly spacers will do.
- They will increase the car's controllability when cornering.
- They will reduce the likelihood of spontaneous transmission shutdown at the gearbox.
- They will protect the engine from active displacements during maneuvering.
- Maintains the integrity of the body and power unit.
Some note that it is not worth installing a spacer, since it significantly increases the noise level in the cabin. The statement is true, but partially. The noise level will indeed increase, but only slightly. In practice, it is impossible to feel the difference, since the increase will be no more than 0.5 decibels.
For reference, specially trained people are able to distinguish noise levels only starting from 1 decibel.
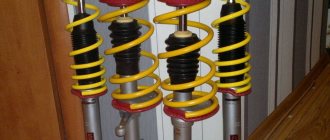
Types of stretch marks
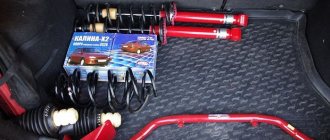
The market for automobile spare parts and tuning parts is quite extensive, and therefore, when purchasing extensions for popular cars, you can choose among several options. Of course, the greatest variety in the domestic space is among the banners for VAZ cars. Let's look at the main advantages and disadvantages of the spacers available for purchase.
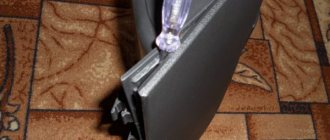
- A one-piece stretcher is the simplest option, taking up a minimum of usable space in the trunk.
- Model called TV. Between the rear glasses there is a round pipe with an adjusting screw. The lower part of the body is attached to the bottom of the passenger compartment (on VAZ models to the seat belt mounting bolts). The advantage of this stretch is that it remains possible to fold the rear seats and put large cargo in the trunk. But while maintaining functionality, we lose rigidity. A square-shaped structure acquires good rigidity only if the corresponding corners are rigidly connected to each other diagonally. So it turns out that the effect of having a lower part in the structure is not too superior to the result that can be obtained from regular stretching.
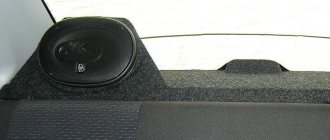
- The spacer is cross-shaped, in the shape of a butterfly. This type of stretching will have the greatest rigidity, as it has diagonal reinforcements. There is only one drawback, but a rather significant one - after installing the extension, access to the interior is blocked, and therefore folding the seats does not add useful space to the trunk.
Not all models on the market are described. In your search, you can even come across products of a similar format.
Agree, the product looks quite technologically advanced. But on a car with a living body, you definitely won’t be able to feel the difference between such a strut and the simplest one-component stretch.
Mounting options
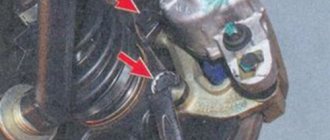
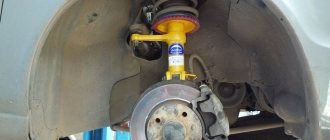
The rear strut brace must only be attached to the vehicle body. The closer the main fixing points are to the shock absorber mount, the better for rigidity. After all, it is the places where the shock absorbers are attached to the body that experience the greatest loads when driving over uneven surfaces and in turns.
In models from some manufacturers, the method of implementation of fastening leaves much to be desired.
The upper part of the spacer rests on the glass and is pressed from below by two crescents welded to the bolts. Judging by the reviews, the mount is quite flimsy and does not inspire confidence. But due to the fact that the bottom of the upper part is made of a cone, the spacer should fit tightly to the glass, thereby ensuring a more or less stable position. You can find reviews online from people who speak positively about the effect after installing this type of product.
Which stretcher is definitely not worth buying?
Despite its seemingly obvious uselessness, on the market you can find a rear strut brace attached to the shock absorber rod. Roughly speaking, it would be more correct to call such a strut an additional anti-roll bar. What adds to the absurdity is that in order to reduce vibrations, the shock absorber is attached to the body through a kind of silent block. In some cases, after some time, new extraneous noises appeared in the car from this type of strut. Therefore, we would not recommend purchasing this kind of tuning elements.
You can resort to installing such a spacer only if the rear pillar glasses do not have a clearly defined shape (for example, as on Renault Logan). In this case, it will be impossible to secure the cup spacer in any other way without welding.
How to install
Installing rear window extensions, as well as front strut struts, will not cause problems even for a novice car enthusiast. The adjusting screws are designed to accurately fit the product to the body of a specific car. This must be done before screwing it to the body. The car must be parked on a flat, horizontal surface. After tightening all the screws, you can slightly tighten the adjusting screw, creating a slight tension on the stretching of the glasses. But no more than that! Excessive spin will result in constant stress, which over time will weaken the body and cause geometry changes.
If you have the desire and straight hands, you can repeat the factory version of the rear struts with your own hands (an example is shown in the video).
- Do-it-yourself spacer: increasing body rigidity
- Why are they needed?
- Rear strut brace
- Front strut brace
Almost every motorist, while driving, compares his car with the “swallow” of the driver who is standing next to him in a traffic jam. It’s good if you have an expensive car made a couple of years ago.
It’s much worse if your neighbor in a traffic jam has one that’s also tuned. It is precisely this small competition, lasting 5–10 minutes, that forces motorists to “stuff” their cars with various bells and whistles. Some of these bells and whistles are not needed at all, and some are even useful. One useful tuning technique is installing spacers.
Minuses
Of course, there are disadvantages to such modernization. The steering wheel on the Grant has become heavier - a pleasant pouring heaviness. When compared with Logan, this is the difference between hydraulic power steering and electric power steering. The difference will be very noticeable and for the worse if the Grant does not have an electric booster. Then it will be much harder to turn the steering wheel.
So if your car doesn't have power steering, reconsider. It may be easier to install the subframe straight away. If you don’t have the money for it, and you don’t want to completely rebuild the car, then just buy 5 adjusting washers for each saber. The washer costs about 20 rubles. Bring castor to zero, as it was.
It turns out that the steering wheel turns easily, and the rigidity of the body increases. Taxiing will be better than stock in any case.
Replacing the turn signal relay on a Lada Granta
Subscribe and tell us how you improved the steering on the Lada Grant. What methods were used, and is it worth doing at all? Surely there will be those owners who doubt the advisability of such auto-tuning.
Rear strut brace
Since the car is very vulnerable in its rear part, it makes sense to strengthen the body there. There are several such “amplifiers”, they all differ in shape. For example, a rectangular strut, popularly called a “TV”, increases body rigidity by 20 - 25%, and due to its shape it practically does not take up space from the trunk. The cross brace will strengthen the body by 11%, but will take up quite a lot of space in the trunk. There is also a type of guy wire that looks like a straight beam.
Thanks to them, the rear suspension mounting cups and the rear beam attachment points to the body will move 20% less, and the overall torsional rigidity of the body will increase by 5%, due to which the body elements will be less loaded.
But such a spacer will give a noticeable result only when it is attached to the power elements of the body, and not to the intermediate ones. Another advantage of this spacer is the method of fastening. It is conical, which completely eliminates any displacement of parts. A nice bonus will be the preservation of trunk volume.
Rear suspension features
The rear suspension of the Grant is the same for the sedan and liftback. In fact, this is the same beam with springs and shock absorbers that is installed on Kalina, Samara and Samara 2. Instead of a stabilizer, a beam is used, which means the structure is dependent. Structurally, the rear part of the suspension system remains unchanged. Looking under the bottom, you can see the usual picture - a beam fixed in a semi-rigid position. It is attached to the body using hinges.
Support struts (springs with shock absorbers) are attached to the levers on the right and left. Despite the outdated design, a semi-rigid beam with racks has a number of undeniable advantages:
- even the maximum load actually has no effect on its behavior, which confirms the high level of energy intensity;
- maintenance, even according to regulations, should be carried out once every 100,000 km, but this period increases for the entire period of operation;
- Parts can be replaced in a garage even by beginners.
The rear suspension of the Granta has a feature that distinguishes it from the Priora - a negative camber of the rear wheels of 1° is created at the rear. This was done to improve the vehicle's directional stability, but given the design features of the suspension system, this solution is not capable of significantly changing anything.
Front strut brace
Stretch bars for the front pillars can be solid or composite, that is, those that can be adjusted in length. Solid guy wires can only be installed in the car model for which they are designed. The composite spacers have a powerful thread and a lock nut, thanks to which such a device can be installed in a car with almost any body width. The linings on the glasses of the racks can also be different.
There are those that are made by hot stamping, and there are also linings that are made by welding individual elements. The strength of the first type of lining is better, but the strength of the second type of lining is enough to make the body much stiffer.
Most A-pillar braces have only two mounting points, but there are models that have three mounting points. The third point is made in order to secure the brace to the body partition, for which you will have to drill several holes.
As for the material from which spacers are made, the most common is duralumin. There are also spacers made from carbon fiber and carbon fiber. Carbon parts are quite expensive. We should not forget that installing a new part into a machine significantly increases its weight, so the spacers must be light but strong. Duralumin stretchers from Japanese manufacturers have received very good reviews, as they are quite rigid and do not tear or deform.
To make a spacer yourself, you need to be able to work with an angle grinder and other tools for working with metal. First you need to measure the diameter of the glasses between the distant bolts on which the spacer will be attached. It is advisable to use an existing spacer as a basis. In order to make an element that will be attached to the glass, you need to take a metal plate (the thickness should be 5 - 7 mm)
, and you need to put a cardboard stencil on it, which needs to be cut to the diameter of the glass after measuring all the dimensions.
Next, you can apply a drawing to the metal itself using a can of paint.
Using a grinder, you need to cut out one of the parts of the future spacer according to the finished drawing. To make an inner circle, you can try cutting a hole with a grinder, or take a drill and drill circles along the entire diameter using a drill, and only then remove the unnecessary metal circle. If you decide to cut a hole with a grinder, then you need to take a diameter slightly smaller than the true diameter of the glass, so that you can then bring the circle to the required size with a file or on a sharpening disk. Based on the finished product, like a pattern, you need to make an element for the second side of the spacer. The next step will be making the frame. To do this, you need to take a 20 mm pipe 2.5 m long and bend it.
There is no point in immediately moving on to deforming the pipe. It is better to make a blank from wire, which will need to be changed according to the shape into which the pipe will then need to be bent.
Using a pipe bender, you need to change the shape of the pipe so that it fits well under the hood. The already curved work, which you must adjust to size, needs to be welded to the platforms, and on the sides of the work you need to weld 2 rectangular plates, which will make the structure more durable.
After the entire spacer is twisted, it needs to be sanded, degreased, primed and painted. Installation of the stretcher consists of screwing the platforms to the glasses. That's all. Financial costs may vary. Whether to do the spacer yourself or not is up to you. The main thing is to remember to park the car on a flat surface.
Some people consider spacers to be a cheap show-off, but some people simply need them. The choice is yours. Good luck on the roads.
Subscribe to our feeds on social networks such as Facebook, Vkontakte, Instagram, Twitter and Telegram: all the most interesting automotive events collected in one place.
Among the total number of motorists, there are always people who strive in various ways to improve their “iron horses”, increase their performance, reliability and durability. The vast majority of these drivers install metal struts (aka braces) on their cars for the front and rear struts. But such an improvement causes a lot of controversy, and the number of supporters and opponents of such tuning is approximately the same. Therefore, it is worth taking a closer look at the question of why stretch marks are needed and how to make them with your own hands.
Pros and cons of using front strut braces
According to the results of tests conducted by some automotive publications and reviews from many drivers, installing a spacer provides the following advantages:
- The car's controllability and steering sensitivity are increased, especially in high-speed turns.
- Body vibration is reduced.
- Stability increases when moving in a straight line.
- The risk of cracks due to metal fatigue is minimized.
- Simple installation with 6-8 threaded connections, which can be performed by almost every car enthusiast.
The jumper is placed on standard studs and screwed with nuts
It is not recommended to operate vehicles that are 15 years old or more and have had their side members stretched without front strut struts. The reason is the same “tired” metal, more prone to deflection from impacts from the suspension. Without reinforcement, the body will quickly return to a state of disrepair.
Reference. According to reviews from owners of Russian-made cars, thanks to the tightening of the pillars, one of the common “diseases” - the creaking of the plastic dashboard - has disappeared.
Of the negative aspects of using stretch marks, three significant ones are worth noting:
- any impact, including when falling into a hole or bump, is transferred from one wheel to another;
- the opposite part of the body may be damaged from a side impact to the place where the pillar is attached;
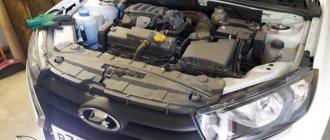
- A rod standing in the engine compartment can block access to elements of various systems, for example, an expansion tank with brake fluid.
Here you can see how the stretcher rests on the brake system reservoir
The last drawback can be avoided by using a spacer made by yourself, taking into account all the protruding parts. Prices for factory hardnesses are quite affordable and start from 1000 rubles.
Types of spacers
A jumper made from a profile pipe looks more beautiful
Jumpers for racks are made of round and rectangular pipes. There is no particular difference in their operational parameters, except that the profile pipe looks a little prettier. There are 2 ways to attach the rod to the mounting flanges:
- rigid, made by welding;
- movable, made on a hinge.
Hinge type stretcher
The hinged design is more reliable than the rigid one, since welded seams can burst over time due to body deformations. According to the method of fastening, spacers are divided into 2 groups:
- Two-point. They are attached to the front pillar glasses, that is, they have 2 support points.
- Three-point with intermediate fastening to the body.
- Three-point with additional engine mount.
The third fulcrum is the engine
The last type of guy wires is equipped with a bracket attached to the bar through a rubber support. The upper part of the engine is screwed to it, which allows you to significantly reduce the vibration transmitted to the entire body of the car.
Here the third point of support is the body
According to functionality, jumpers are divided into regular and adjustable. In the latter, the rod consists of two parts, rigidly connected by means of a threaded coupling, whose rotation lengthens or shortens the pipe. The idea is that the strut should be suitable for cars of any age, including old ones, where the struts are already shifted towards the center.
Two-point stretch with adjustable length
On most factory cross members, manufacturers make special deep notches. In this way, they are trying to neutralize the main drawback of all stretch marks - the ability to transfer impacts from one side of the body to the other. According to the sellers, in the event of an accident with a side collision, the notched element will simply fold and will not transfer the impact energy to the opposite pillar.
Conventional cross member and with engine mount
Reference. In reality, much depends on the strength of the mechanical force and the angle at which it is applied. Practice shows that even spacers with notches sometimes do not save and the second rack still has to be straightened.
Adjustable rear cross member
Owner reviews of the Granta suspension
The opinions of motorists are largely similar. They note a number of advantages of the suspension system:
- for Russian roads it has a strong and reliable design;
- at very low temperatures it does not freeze and works out all the irregularities;
- capable of “swallowing” even deep holes without much damage;
- The car does not pull to the side at high speed when driving on the highway.
There are also disadvantages:
- the suspension is not soft and smooth;
- Unlike Logan, with which the Grant is often compared, the chassis is clearly stiffer.
In general, this is the same suspension system from the “nine” with minor changes, but for the Russian automotive industry this is a big step forward. Especially when you consider that the condition of the vehicle depends entirely on your driving style.
The unpretentiousness, simplicity and reliability of the chassis are the pride of Granta. There is one minus: the suspension with negative caster of the front wheels, front anti-roll bar and negative camber of the rear wheels is installed exclusively in modifications above the basic one - “Norma”, “Lux”. For owners of the “Standard” configuration, a suspension option borrowed from Kalina is provided.
Front suspension:
1 – steering knuckle; 2 – eccentric bolt; 3 – shock absorber strut; 4 – lever; 5 – stabilizer bar; 6 – mounting bracket for the stabilizer bar cushion; 7 – stabilizer bar strut; 8 – ball joint; 9 – stretching; 10 – bracket
The front suspension is independent with telescopic hydraulic shock absorbers, coil springs, wishbones, two braces and a stabilizer bar.
Shock absorber parts:
1 – telescopic stand; 2 – spring; 3 – metal bushing; 4 – upper support; 5 – rod nut; 6 – rebound limiter of the upper support; 7 – support plate of the upper support; 8 – bearing; 9 – spring gasket; 10 – compression stroke limiter of the upper support; 11 – compression stroke buffer; 12 – protective cover
Preparing for self-production
To make a jumper for the front pillars yourself, you need to prepare the following materials:
- sheet steel with a thickness of at least 3 mm;
- pipe with a diameter of 32-40 mm with a wall thickness of 3 mm or more;
- thin cardboard and marker for making a template;
- primer for metal and paint in an aerosol can.
A thick-walled pipe is what you need to make a guy wire
Regardless of which cross member design you choose - rigid or with hinges, you will not be able to do without a welding inverter, as well as without the skills to work with it. The easiest way is to weld a rigid, non-adjustable spacer, clearly defining all the dimensions. In addition to welding, other tools will be required for the job:
- an angle grinder (in common parlance - a grinder) with a circle for cutting metal;
- electric drill with a set of drills;
- plumbing tools - hammer, core, round file and pliers;
- metal brush;
- spanners;
- measuring devices - tape measure, ruler, square;
- welding gloves and safety glasses.
Required tool kit
Advice. To make a stretcher of the desired shape, which also looks nice in appearance, you will probably need a machine - a pipe bender. Since not every car enthusiast has one, you will have to contact a specialized workshop or bend the pipe manually. To obtain a beautiful turning radius, the metal must be heated.
At the preparatory stage, it is important to decide where in the engine compartment to place the pipe and whether it can be made straight. The jumper should not interfere with vehicle maintenance or block access to the brake system or clutch reservoirs. At the same time, it is necessary to provide a distance of 3-5 cm from the closed hood so that the lid does not rub against the metal of the cross member and mounting flanges.
Advice. When developing the spacer design, keep in mind that the pipe can be moved back or forward within the diameter of the rack cups. It is not allowed to extend it further by welding a long bracket, because in this case forces will act on the flange, tending to rotate it around its own axis.
Making a spacer with your own hands
The first thing to do is to make flanges. To do this, unscrew the nuts securing the stands to the glasses and, placing cardboard on them, mark the future holes with a marker. Then cut them out in paper and put it on the pins. Now all that remains is to outline the outline of the flange according to the shape of the glass and trim off the excess cardboard. Inside the template, make a round opening corresponding to the protruding part of the support.
Ready cardboard template with holes
Important point. Make the outer edge of the template facing the engine not round, but straight, since a rib for attaching the pipe will be welded to it.
Perform further operations in this order:
- Attach the cardboard template to the sheet of metal, outline it with a marker and cut out the steel flange using a grinder. Round all edges and sand to ensure there are no burrs.
- Mark the centers of the holes and drill them according to the diameter of the studs. Use a small drill first and then a large one. Bevel both sides of the holes and try the part in place. If a discrepancy is found, widen each hole slightly with a round file.
- Cut a 4cm wide strip of steel and weld it at a 90° angle to the straight edge of the flange. To prevent the strip from bending back under pressure from the pipe, make triangular stiffening ribs and weld them along the edges.
- Place the flanges on the studs and check for distortions. Press them with two nuts and carefully measure the distance between the strips to cut the pipe as accurately as possible.
- Disconnect the battery and cover the engine compartment with a damp cloth. Attach a pipe cut to size to the flange brackets and securely weld it at both ends. Check the gap between the hood cover and your structure.
- Unscrew the nuts and remove the brace from the car. Boil all the seams thoroughly, remove the slag and try to put it back. If the structure has been welded so badly that the flanges do not fit on the studs, file the holes again.
- Remove the finished spacer again, clean it with a brush from rust, degrease it and paint it in 2 layers, after applying a primer. Place the jumper in place and finally tighten it with nuts.
Advice. If you plan to bend the spacer, do it before cutting the pipe to size.
The coupling for regulation is placed in the pipe gap
If you are a specialist in welding, then you can easily make the stretch adjustable. To do this, buy a ready-made threaded coupling of the required diameter and weld it in the middle of the cross member, having previously cut it into 2 parts. After welding, twist them together, secure the coupling with a locknut, and only then cut the pipe exactly to size between the flanges.
Note. The described method is quite suitable for making a back stretcher, if you want to do it yourself. In this case, think carefully about the design so that the jumper takes up minimal space in the luggage compartment and does not block it in the middle.
Successful design of the stretcher - it stands right behind the seats