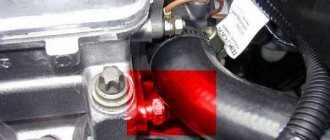
Not even after 20 thousand the pump started leaking. I also noticed that antifreeze was leaking at the junction of the pump supply pipe and the block. For those who don’t know, it is located at the rear of the block, in the most inconvenient place in the front-wheel drive family.
At first the pump did not flow much, then a river appeared.
I chose the time and started replacing. I carefully drained the antifreeze and had to come up with a whole system. It was not difficult to remove everything. When I removed the carburetor heating hose, I saw that it was all cracked and dry. It's strange that it hasn't leaked yet.
The oil seal on the pump leaked and a creaking sound appeared when rotating. The gasket on the supply pipe is rotten. In principle, I could have left the old pipe, but I immediately stocked up on a new one.
I bought the pump from Mstart
.
To be honest, I have never heard of this, but the seller assured me that it was good. I immediately took a roller of some kind, a Continental Contitech
, I had heard a lot about its quality.
I cleaned the seats of old gaskets and spent a long time fiddling with the seat pipes. It was very inconvenient, I had to jack up the car and clean it while lying under it. I wiped off the old traces of antifreeze a little to suddenly see a new leak.
While I was taking pictures of the whole thing, in the light of the flash I saw fogging on the intake manifold. You'll have to change the gasket.
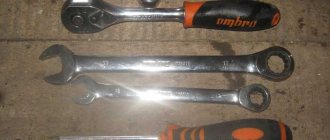
The new pipe laying was sealed with sealant. It is extremely inconvenient to put it in place. While baiting, I reapplied the sealant 2 more times: it had time to dry, and rubbed a callus on my finger. Tightening is also inconvenient; you can’t get anything in there except a spanner.
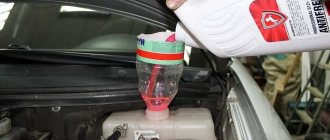
I assembled everything, installed it, tightened it. Replaced the carburetor heating hose. Filled with antifreeze. Everything is fine. Everything is working.
After that I drove another 1000 km. Everything is dry, you can only see that the belt has eaten a little. Now I'm wondering why he's slipping. Most likely the pump is crooked. We'll watch.
Well, according to tradition - smooth roads to everyone))
Price tag: 1,500 ₽ Mileage: 200,300 km
Diagnostics and identification of supply pipe faults
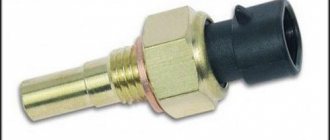
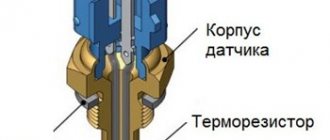
A malfunction of the cooling system associated with an antifreeze leak is manifested by a decrease in its level in the expansion tank and a critical reading of the temperature sensor.
Mechanical damage to the supply pipe or its depressurization in the area of attachment to the pump or engine block may be accompanied by:
- The release of steam in the engine compartment due to coolant entering the “pants” of the manifold.
- The appearance of a stain from leaked antifreeze where the car is parked, VAZ 2110, VAZ 2112, VAZ 2114 and Priora - in the area of the front part, VAZ 2109 - between the engine and the passenger compartment.
Regularly topping up antifreeze and adding additives to eliminate coolant leaks is not a solution to the situation. Replacing the pump supply pipe with a new one will not take a lot of time and money to purchase parts and gaskets.
How to check the pump
Usually, a broken pump immediately reveals itself with a pungent smell of antifreeze in the cabin. This indicates that the seal is broken and the coolant is leaking out. In advanced cases, antifreeze can form a puddle, which indicates complete wear.
In addition to direct signs of malfunction, there are also indirect ones:
- Motor overheating. This is especially noticeable in winter, when in principle it should not overheat. You can check it visually: warm up the car and turn on the heater. If cold air comes out, it means the pump is leaking and you need to check the water pump.
- Timing belt wear. The pump has a guide bearing that holds the belt. Its wear leads to misalignment, which tilts the belt slightly and grinds the teeth unevenly.
Please note that replacing the VAZ 2114 and 2115 pump with 8 valves is required every 70,000-100,000 km - this resource was provided by the manufacturer.
Replacing the supply pipe on a VAZ 2110
The pipe, gaskets and hose for the radiator must be purchased from a trusted dealer. Cheap counterfeits cannot withstand the high temperature and pressure of the coolant.
To carry out the replacement procedure, you must:
- Drain the antifreeze from the engine block (work on a “hot” engine is prohibited) into a previously prepared container.
- Unscrew 2 bolts securing the pump and 2 from the engine block.
- Remove the pipe from the engine compartment.
Before installing a new supply pipe, apply a thin layer of automotive sealant to the gaskets. Reassemble in reverse order. Fill with coolant and check for leaks. If you suspect the integrity of the rubber hose of the expansion tank, replace it.
Features of draining antifreeze and replacing the pump pipe on a Priora
The coolant pipe on the Priora is connected through a hose to the thermostat. It regulates the circulation of antifreeze in a small or large circle, depending on its temperature. If a defect is detected on the pipe itself or at the junction with the pump and the unit, it must be dismantled. The procedure involves preliminary draining of antifreeze.
The work is performed in the following order:
- The engine protection is removed;
- The expansion tank cap opens;
- Carefully unscrew the “lamb” of the drain located at the bottom of the block;
- Antifreeze is poured into the prepared container.
Drain hole on Priora
Draining is performed on a cold engine. To completely drain the coolant, you need to turn the motor shaft using the starter.
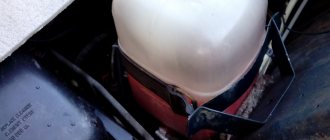
Expansion tank
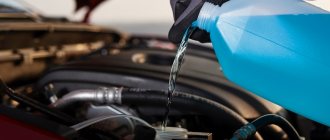
The supply pipe is dismantled after unscrewing the 2 mounting bolts on the cooling pump and removing the thermostat hose. The new part and gasket are installed in the reverse order. After adding antifreeze, it is necessary to test run the engine and check for fluid leaks at the connections.
Air lock formation
Replacing the pump supply pipe and draining the antifreeze associated with the work can lead to the formation of an air lock in the cooling system.
There are 2 ways to fix the problem:
- With the engine warm, remove one of the 2 throttle body hoses for 5-10 seconds. A small amount of antifreeze may leak out, which must be added through the expansion tank.
- The car is installed on a rise (overpass) so that the radiator is higher than the engine. The expansion tank cap is removed and the engine is started. After removing the plug, coolant is added.
Maintaining the cooling system in good condition ensures high-quality operation of the car engine. When replacing the supply pipe of the coolant pump on a car with high mileage, it is recommended to simultaneously replace the used antifreeze and flush the entire system.
Steering rack cover (corrugation) for VAZ 2108-21099, 2110-2112, 2113-2115
with 12% discount
Modernized AGAT clutch cable end guide for VAZ 2110-2112, Lada Priora, Kalina, Granta, Datsun
with 10% discount
COOLING SYSTEM PROBLEMS
As a rule, due to malfunctions in the cooling system, the engine overheats, and this leads to engine failure. Any of the elements may be faulty.
- It may leak. Possible leakage through aluminum tubes and plastic tanks. Often the plastic outlet for the return hose of the expansion tank breaks off.
- It may clog, and for this reason the engine will heat up.
Pipes. Because of them, antifreeze leaks due to the fact that the pipe:
- Ragged.
- Old and lost elasticity.
Thermostat. Depending on how incorrectly the valve in the thermostat operates, the internal combustion engine can:
- Overheat (in this case, the antifreeze “throws out” through the expansion tank).
- Do not reach operating temperature. As a result, the car drives poorly, and in cold weather it is cold inside the car.
Water pump (three main problems):
- Noise and play in bearings. It is not worth driving with such a defect for a long time; the pump may jam or fall apart.
- Liquid is leaking through the inspection hole. It also signals the imminent “death” of the part.
- Broken impeller. With such a defect, the engine overheats very quickly.
- A faulty fan also leads to overheating of the internal combustion engine.
The clamps may be faulty or poorly tightened. It happens that thin hoses become clogged with debris (“return”, throttle valve heating).
Diagnosing water pump faults
The design of the water pump is quite simple. In most cases, the bearing on which the impeller rotates fails. There are two possible types of failure, varying in severity.
- The bearing has failed. In this case, the motor begins to “squeal” - make a loud, high-pitched sound. The source of the “squealing” is usually located at the front of the engine near the timing belt. As the rpm increases, the sound frequency increases, and as the rpm decreases, it decreases.
- The bearing is stuck. This happens after prolonged use of a pump with a worn bearing. The “squealing” suddenly stops, but the engine temperature rises sharply. The pump stops working, and the coolant continues to move slowly through the channels without pressure. This, of course, is not enough to cool the engine. If such a situation arises, you should drive at low speeds and with frequent stops to the nearest car service center.
If the liquid level in the expansion tank is normal, but the coolant is boiling and steam is coming from the air valve, do not rush to open the cap. Firstly, you can get burned by the steam. Secondly, boiling antifreeze can burst out in a stream. You need to wait a certain time for the coolant to cool down and only then unscrew the expansion tank cap.
There is another way to check the pump's performance. To do this, you need to partially pinch the thick hose going from the engine to the radiator with your hand and start the engine at idle speed. If the hose pulsates under your fingers, the pump is in working condition. If there is no pulsation, the impeller does not rotate and the pump is faulty. To avoid injury, such diagnostics should be carried out very carefully, without touching the rotating fan with your hands. You need to compress the hose by 10–20% - this is enough to feel the pulsation of the coolant. You should also not touch the engine with your hands - you can get burned.
Then, after removing the protective plastic casing above the belt, you need to inspect the pump mounting location. Typically, when a bearing fails, characteristic leaks appear on the axis of rotation. Under the influence of vibration, the oil seal is deformed. It may look dry, but it leaves a dirty brown mark on the body. This indicates that coolant leakage occurs at high speeds. When the engine is not running, the fluid does not flow out, and the leak area dries out.
The location of a coolant leak due to a faulty pump is marked in red.
The serviceability of the bearing can be checked by rocking the pump drive pulley by hand. To do this you will have to remove the transmission belt. If the bearing is worn out, then when you rock the gear by hand, a certain amount of play will be noticeable, which should not be there.
DIAGRAM AND DEVICE OF THE COOLING SYSTEM
The cooling system of the VAZ 2114 is liquid, with forced circulation. Antifreeze or antifreeze is poured into the system as a coolant. In the most extreme case, you can fill it with water, but you can’t drive it for a long time - in winter you can defrost the engine, and during the rest of the season, when the engine is used for a long time on water, the cooling jacket in the block and cylinder head is corroded, and rust accumulates in the radiator.
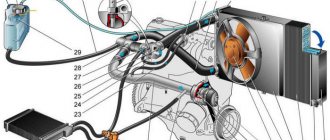
The VAZ 2114 engine cooling system (SOD) consists of the following elements:
- Radiator. It is the main cooling part in the system and performs the function of transferring heat to the liquid into the surrounding airspace;
- Water pump (pump). The pump creates forced movement of antifreeze in the system, thereby cooling the entire SOD, including the internal combustion engine (ICE). The pump rotates from the timing belt;
- Branch pipes (hoses). Antifreeze circulates through them;
- Thermostat. It regulates the passage of coolant through all pipes or only in a small circle and maintains the required operating temperature of the internal combustion engine;
- Electric fan. The fan is located on the plane of the radiator and, due to the air flow created, cools its surface when turned on. The electric motor turns on only when the temperature set by the sensor is reached (103°C);
- Expansion tank. Liquid is poured into the tank, and when the fan is activated, antifreeze flows into it through the return hose, thereby releasing excess pressure into the SOD;
- Expansion tank plugs. There are valves in the plug that relieve excess air pressure created in the system when antifreeze circulates.
REPAIR OR REPLACEMENT OF RADIATOR
Let us consider in detail the features of the work.
RINSE
Replacing the cooling radiator is required if the internal combustion engine heats up due to its clogging. But before changing it, you can try flushing the cooling system of the VAZ 2114 engine. Often flushing helps, and the engine stops heating up. We perform washing as follows:
- We park the car on a level surface;
- Unscrew the expansion tank cap;
- Drain the coolant from the radiator by unscrewing the bottom plug;
- We unscrew the water plug from the cylinder block (it is located between the internal combustion engine and the fan in the starter area) and drain the antifreeze from the block;
- We wrap the plugs and fill the system with plain clean water;
- Let the engine run and drain the water. If the water that comes out is dirty, repeat the flushing. We repeat the procedure several times until the draining water becomes clear;
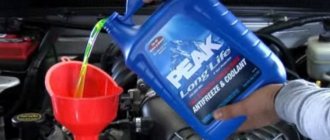
- After flushing, fill in new coolant. It should be noted that the volume of the VAZ 2114 cooling system is 7.8 liters, and if all the antifreeze is not included in the system, most likely an air lock has formed in it. It is necessary to fill the container as much as possible to avoid overheating of the internal combustion engine.
Instructions for replacing the cooling system pipes of the VAZ-2114
Step-by-step replacement of cooling system pipes in a VAZ-2114 car looks like this:
- Remove the battery cable that comes out of the negative socket.
- Carefully drain the old coolant, but wait until the engine has cooled completely before doing so. Otherwise, there is a risk of getting burns from the coolant.
- Remove the following components: set aside the upholstery that provides sound insulation, the fan, the trim going to the windshield frame, the facing material.
- Now your goal is to get to the air collector; to do this, unscrew the brackets in the form of springs and the screws responsible for fixing them. A screwdriver is ideal for spring clips; for screws, you need a wrench.
- To loosen the clamps, remove the front housing, and then remove the old hoses from the fittings.
- All that remains is to install new silicone hoses in a specially designated place; it is preferable that the parts are manufactured abroad - they will last longer.
- Reinstall the other components by following the reverse order of this step-by-step instruction.
