The disc brake caliper in the Lada Vesta car from the AvtoVAZ plant is one of the key systems that ensures a smooth reduction in speed while it is moving, and is responsible for the safety of everyone who travels in transport. Unfortunately, even on new cars the calipers sometimes rattle. Vesta has its own problems and shortcomings - this is one of them. Read the article to the end and nothing will rattle or knock in your car. The price of a front repair kit, right or left, starts from 10,000 rubles.
The mechanism is mounted on a suspension, or hub rim. By gripping the disc, the mechanism can reduce the wheel speed to zero in a matter of seconds. The front wheels of the Lada Vesta, except for the cross and sport versions, are equipped with disc braking mechanisms, and the rear wheels are equipped with drum brakes. The combination of the two systems allows you to take advantage of their advantages on the road.
When you press the lever, a special fluid enters the caliper cylinders. Mechanism parts press the brake pads against the disc. Resistance arises, after which the car begins to slow down until it comes to a complete stop.
A high-quality mechanism must have high strength parts, resistance to high temperatures, and optimal heat transfer.
Causes of knocking in brake mechanisms
The main reason why calipers rattle does not lie in the unevenness of domestic roads. Due to high mileage or untimely maintenance, the holes for the guides are broken. At least once every year it is recommended to check the presence of oil in them, as well as the wear of the rubber boots.
There are several main reasons why this phenomenon occurs:
- poor fastening of the caliper itself;
- premature wear of guides;
- severe wear of the brake pads.
It is better to start diagnostics by checking the condition of the pads. To do this, you can assess the degree of wear during driving. The car begins to brake worse; increased effort is required when pressing the pedal. Characteristic creaks and beating of the pedal also indicate that the pads must be replaced. Experienced drivers can determine the degree of erasure even by eye.
Installing the spring on the brake caliper
The frequency of replacing pads can be different for different brands of cars; most often it is done every 10-15 thousand kilometers. The sound of the pads on bumps is indeed somewhat reminiscent of the similar thunder of the calipers. Full application can cause the brake disc to wear out or even push out the brake cylinder.
Guides are also important components of the system. In practice, we often talk about wear and tear of the sockets in which they are placed. In the first case, you will have to go to the store for a new set. In the second, experienced car enthusiasts suggest resorting to special rubber bands, with which you can solve the problem on a budget and quickly. Such rubber bands are placed on the guide pins - this allows you to get rid of extraneous noise.
In some cases, it is possible to correct the situation by lubricating the guides. To do this, it is removed from the planting nest and processed thickly. For a certain time, this method helps solve the problem. For inexpensive brands of cars, in the old fashioned way, additional holes are drilled in the brake block and caliper - through them they make a tie with a spacer spring.
Poor fastening of the caliper itself is actually not so often the culprit of the situation. The fasteners unscrew when driving on unpaved or simply roads with poor-quality road surfaces. Another option is that a service station employee did not secure it properly during repairs or diagnostics of the brake system. In such cases, a good tightening of the bolts and nuts is sufficient to get rid of the knocking noise.
Brakes (discs, pads, sensors) Lada Vesta
Products from the Dustershop77 range on the topic of the article:
| Name | Manufacturer | Price | Availability | Add to cart |
| 410607115R | Front brake pads original 440603905R / 410605961R / 410607115R / 410600379R for 280mm disc | Original | 5000 / 4300 rub. Discount: 3900 rub. | 4 |
| 410608481R | Front brake pads Duster, Vesta original 410608481R for disc 260-269mm | Original | 3000 / 2300 rub. Discount: 2200 rub. | 2 |
| DC441-GDB3332 | Front brake pads 1.6 and 2.0, TRW GDB3332 (410608481R for 260-269mm disc) | Analogue | 3000 / 2500 rub. Discount: 2200 rub. | 2 |
| DC1399 | Hex key for replacing pads | Analogue | 200 / 150 rub. Discount: 100 rub. | 4 |
| DC444-23973.175.1 | Front brake pads for disc 260-269mm ZIMMERMANN 23973.175.1 (410608481R) | Analogue | 4000 / 3800 rub. Discount: 3400 rub. | 2 |
| DC1149-8200276361 | Renault brake pedal sensor original 8200276361 | Original | 700 / 550 rub. Discount: 500 rub. | 1 |
| DC510-7701205518 | Set of springs for rear brake pads Duster 4x2 original 7701205518 | Original | 3000 / 2700 rub. Discount: 2500 rub. | 1 |
| DC396-MR0276361 | Brake pedal sensor MANOVER MR0276361 (8200276361) | Analogue | 500 / 400 rub. Discount: 350 rub. | 1 |
| DC627-ASAM32116 | Brake master cylinder with ESP ASAM 32116 (460119952R) | ASAM | 2500 / 2200 rub. Discount: 1800 rub. | 1 |
| DC1657-479703074R | ABS ring Lada Vesta rear original 479703074R | Original | 2000 / 1600 rub. Discount: 1400 rub. | 3 |
| DC1650-8450031577 | Front brake disc Vesta, XRAY original 8450031577 (260mm - 1 pc.) | Original | 2900 / 2500 rub. Discount: 2400 rub. | 2 |
| DC912-QZ-120-0410 | Front pad mounting kit (plates) (D259mm ventilated) Quartz QZ-120-0410 (kit) | Analogue | 1300 / 1000 rub. Discount: 700 rub. | 2 |
| DC1689 | ABS ring Lada Vesta rear analogue 479703074R | Analogue | 1500 / 1000 rub. Discount: 800 rub. | 1 |
| DC2222-410605536R | Front brake pads Vesta, X-Ray, Largus, Sandero, etc. for 258mm disc) original 410605536R, 410604682R, 8660005291 | Original | 2300 / 1600 rub. Discount: 1400 rub. | 1 |
| DC1651-24165 | Front brake discs Lada Vesta, XRAY FEBI (260mm - 2 pcs.) | Analogue | 4900 / 3600 rub. Discount: 3300 rub. | 1 |
| DC1655-11196350208900 | Rear pads Lada Vesta (for disc brakes) original 11196350208900 | Original | 2800 / 2500 rub. Discount: 2200 rub. | 1 |
| DC1652-8450031131 | Rear brake disc Lada Vesta, XRAY original LADA 8450031131 (260mm - 1 piece) | Original | 2700 / 2300 rub. Discount: 2000 rub. | 2 |
| DC1656-440609415R | Rear pads Lada Vesta (for drum brakes) original 440609415R | Original | 2900 / 3200 rub. Discount: 2800 rub. | 1 |
| DC1656-BS-5717 | Rear pads Lada Vesta (for drum brakes) LYNX BS-5717 | Analogue | 1900 / 1500 rub. Discount: 1200 rub. | 1 |
| NF0010851 / 410608481R | Front brake pads NF0010851 Duster, Vesta analogue 410608481R for disc 260-269mm | 750 Discount: 750 rub. | 0 | |
| 000050BSX / 440603905R | Front brake pads Duster (2.0 doors) Stellox 000050BSX non-original, analogue 440603905R for 280mm disc | STELLOX | 1200 Discount: 1200 rub. | 0 |
1
Sergey 06/23/2020 at 09:52 pm#Reply
you can't do that. With this plate you clamp the caliper, which should move horizontally when you press the brake, pressing the outer pad. As a result, you will have one pad slowing down because the outer one is clamped by the plate. RESULT: THE CALIPER WILL NOT RATTLE, BUT THE BRAKE WILL BE BRAKED BY ONE SHOE THIS IS DANGEROUS.
Bleeding brake fluid
Installing and removing a brake caliper on a VAZ (Lada Vesta), in addition to the work listed, includes the procedure for pumping fluid. After assembling all the elements, remove the special cap from the fitting to drain the liquid when pumping. Next, you will need one more person to work.
The assistant will need to press the brake several times and then hold the pedal. Then put a preferably transparent hose on the fitting and immerse it in any suitable clean container, unscrew the fitting and tighten it only after the liquid flow stops. Once air is no longer detected in the liquid, stop the procedure.
Next, repeat the process with the rear wheel positioned diagonally. Do similar work with the other two wheels. Be sure to fill the reservoir with liquid as needed, ensuring it is not empty below the minimum mark.
Owners of cars of different brands encounter extraneous noise from brake calipers, and LADA is no exception. Most often, drivers of Grant/Kalina, Largus and Vesta encounter this problem. The malfunction is less common on Priora and XRAY. Let's consider what can be done in this case.
To make sure that extraneous noise while driving comes specifically from the brake mechanisms, you need to rock the caliper from side to side (you can do this without removing the wheel):
Front wheel brake diagram:
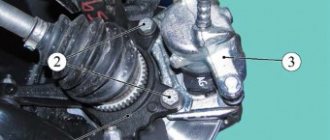
1 – wheel cylinder; 2 – fitting for bleeding the brake drive; 3 – sealing ring; 4 – piston; 5 – protective cap; 6 – retaining ring; 7 – caliper; 8 – pad guide; 9 – brake pads; 10 – protective cover; 11 – guide pin; 12 – guide pin fastening bolt; 13 – brake hose; 14 – bolt securing the cylinder to the caliper.
The sounds may resemble metallic knocking, rumble, clanging, strumming, etc. The first step is to contact your dealer with the problem. As far as we know, there are no AvtoVAZ regulations in this case. If the official representative refuses, you can try to get rid of the knocking of the calipers yourself using one of the suggested methods:
1. Fill the guide pins with refractory grease (it’s called “Grease for calipers”).
2. Replace the caliper guide pins with new ones.
3. Make a small groove in the guide pins (using a lathe), onto which we put a ring made of oil-gasoline-resistant and heat-resistant rubber.
4. Turn out new guides (using a lathe), which will be slightly larger in diameter than the old ones.
5. Replace the brake pads. It is better to choose ones that have a special rubberized coating on their outer side (survey for Vesta, Largus, Granta/Kalina/Priora).
6. Tighten the brake pad guide using a plastic clamp or spring (can be done without removing the wheel).
7. Fold the top part of the noise reduction plate (number 4) down. This will get rid of the rattling of the calipers on Vesta:
This method is also shown in the video:
Information letter No. 19-18: When contacting owners of Lada Vesta cars, the effect of “noise from the brakes of the front wheels” emitted when driving on roads with broken surfaces is functional and cannot be eliminated under the warranty obligations of AvtoVAZ PJSC.
Have you encountered rattling noise from the calipers on your LADA? Did the official dealer help in this situation or did you have to fix it yourself? Let us remind you that knocking noises in the front part of the car can come from the suspension (for example, on Vesta from the anti-roll bar) or from the engine mount.
Removing and checking the front brake disc
We carry out work to prepare the car as described above.
Remove the front wheel and clean the front wheel brake.
Using a 18mm socket, unscrew and remove the bolts securing the front brake guide to the steering knuckle, remove the front brake assembly 1, Figure 4, and hang it from the suspension spring.
Checking the technical condition of the front brake disc
The brake disc cannot be ground. If there are deep scratches, the disc must be replaced. If the disk thickness is less than 19.8 mm, the disk must be replaced.
If you replace a brake disc on one side, you need to replace the brake disc on the other side as well.
When replacing brake discs, you need to replace the brake pads.
Using a Torx T40 socket, unscrew and remove two screws 3 securing the brake disc to the front wheel hub and remove the brake disc 2.
Brake disc installation
Reinstall the brake disc and secure it to the hub with two screws. The tightening torque of the screws is 12 - 16 Nm (1.2 - 1.6 kgf.m).
Install the front brake assembly onto the steering knuckle and secure it with new mounting bolts. Bolt tightening torque 91 - 120 Nm (9.1 - 12.0) kgf.m.
Install the front wheel.
Press the brake pedal 2-3 times, check, and if necessary, bring the level of brake fluid in the hydraulic brake reservoir to normal.
We check the effectiveness of the service brake system.
The mount has come loose
This happens, but quite rarely. A common reason is traveling on poor quality roads. Vibration can cause bolts to become loose and unscrewed. Usually, this happens soon after a repair affecting the caliper. In this case, you or the master simply did not tighten the bolts. For prevention, always pull fasteners with a certain torque when assembling.
This will save you from problems. To eliminate this knocking noise, simply tighten the bolts. If one of them is lost, make sure it is not broken off and screw on a new one. The broken bolt will have to be drilled out.
Conclusion
. There are quite a large number of different mechanisms near the wheels. They periodically fail. Therefore, the question of what to do if the calipers are knocking is not uncommon. In many cases, this is a design feature that will be quite problematic to eliminate. But it is still quite possible.
What types of brake pads are there?
In total, the following types of brake pads are distinguished:
- Polymetallic (they consist of 35 to 65% metal, have a long service life and have high thermal conductivity. However, they can make noise, damage the rotor and react with reduced performance at sub-zero temperatures).
- Organic (they are made from a fibrous base such as rubber, glass or carbon. When used, these elements are quiet because they have a soft base, but they wear out faster and become covered with dust faster).
- Low-metal (made from an organic medium with the addition of steel or copper, which improves heat transfer and braking speed. Their disadvantage is that if the base contains a large amount of metal, the brake pads make a lot of noise and quickly gather dust).
- Ceramic (the highest quality brake pads, which are made of ceramics. They are very quiet, do not get dusty and are very expensive).
Description of the problem
Friends, I had a problem familiar to all motorists. About six months after purchasing a new car, its calipers suddenly began to rattle. This circumstance became an annoying obsession, because purchasing a car at a car dealership meant eliminating technical faults.
I took the car to Uncle Vanya, because the official caliper knock is not covered by the warranty. Garage Kulibin dug into the suspension with the wheel removed and issued a verdict - wear of the caliper guides. He says I know how to help, I cleaned out all the factory grease and sprayed some kind of aerosol. I left satisfied and joyful.
But my happiness was short-lived, literally the next day, not only did the rattling return. The calipers began to knock more loudly. Realizing that Uncle Vanya was not rummaging around in the garage, I decided to solve the problem myself.
Problems when paying with bank cards
Sometimes difficulties may arise when paying with Visa/MasterCard bank cards. The most common of them:
- There is a restriction on the card for paying for online purchases
- A plastic card is not intended for making payments online.
- The plastic card is not activated for making payments online.
- There are not enough funds on the plastic card.
In order to solve these problems, you need to call or write to the technical support of the bank where you are served. Bank specialists will help you resolve them and make payments.
That's basically it. The entire process of paying for a book in PDF format on car repair on our website takes 1-2 minutes.
If you still have any questions, you can ask them using the feedback form, or write us an email at
Inspection of calipers
In 40 percent of cases, the front caliper rattles due to dry lubricant. Many car owners do not know that this part requires periodic maintenance. How often should you do it? Experts give the answer - lubrication is carried out every time the pads are replaced. The service life of the latter can range from 20 to 60 thousand kilometers, depending on the location (front or rear), as well as the driver’s driving style.
How to perform an audit? First you need to find a quality lubricant. It must be specialized - specifically for guides. Reviews do not recommend using grease for hubs, as well as copper and ceramic analogues. They dry out quickly and are not suitable for use in this location. A popular manufacturer of specialized lubricants for calipers is Liquid Moly. Typically this product is sold in vacuum bags. One is enough for two guides. The lubricant does not lose its properties at temperatures up to 200 degrees Celsius.
Note! If the piston boot is damaged, it must be replaced immediately. Otherwise, the rear calipers and the front ones will rattle constantly
The same work must be done on the adjacent brake mechanism. In order not to run to the store when you discover a damaged boot, it is recommended to purchase a repair kit in advance (in extreme cases, it will remain “in reserve”).
If the calipers rattle, what should I do? Lubrication may not help if the pads are worn significantly. As the friction material wears out, the distance between the mating elements increases. Even a working spring cannot compensate for this gap.
Pull up the handbrake
But if you really know how to tighten the handbrake on a Lada Granta standard, this procedure will not take you much time and effort. The only thing that is required for its implementation is a jack or an inspection hole, because access to adjustable components and assemblies occurs from below and you will have to work under the car. To tighten (adjust) the handbrake you will need 3 tools:
- two open-end wrenches for 13, one of them is preferably a socket one;
- one key head for 8;
- a faithful assistant (although in desperate situations you can get by alone).
The process of directly adjusting the manual braking system of a Lada Granta car is carried out in nine main stages:
- We lower the handbrake lever inside the car.
- We climb under the car, unscrew the rubber cushions (brackets) from the resonator, and remove the muffler from its attachment to the body.
- We remove the protective screen of the parking brake adjustment mechanism. To do this, use a socket wrench to unscrew the 4 nuts from the fastening bolts.
- We remove the protective screen or move it to the side behind the muffler - in this case, the necessary space for work is also quite enough. In this case, the muffler can be pulled back with something, for example, by pushing a block of wood under it.
- We take two 13mm wrenches - the first one is to slightly loosen the locknut, holding the adjusting nut. Then vice versa - hold it, and secondly turn (also loosening) the adjusting nut.
- Actually, we adjust the hand brake as follows: tighten the handbrake cable, for which we tighten the adjusting nut (move the key clockwise).
- Next, you should check the travel of the handbrake lever - this is why you need a partner, or you will have to do it yourself. The lock nut can be tightened when the handbrake stroke is 2-4 clicks (see above).
- Then we test the operation of the parking brake mechanism as a whole. To do this, lift the rear wheels and check how freely they rotate when the handbrake is lowered and how completely they lock when fully raised (in this case they should not rotate at all!).
- If the handbrake is working properly, tighten the locknut and replace the protective screen and muffler. The handbrake adjustment is complete!
As the mileage and life of the vehicle increases, the handbrake becomes less and less adjustable. It happens that even after adjustment, the manual braking system does not work properly and does not “hold” the car. This indicates that the wear on the brake pads is too high or the cable stretch is irreversible.
Tools:
- Ratchet wrench
- Extension
- 10 mm head
- 13 mm high head
- Open-end wrench 13 mm
Parts and consumables:
Aerosol lubricant type WD-40
Notes:
The parking brake should hold the vehicle on a 23% grade. The full travel of the parking brake lever should be from 2 to 4 teeth (clicks) of the lever ratchet device.
1. To adjust the parking brake, place the vehicle on an inspection ditch or overpass and lower the parking brake lever.
2. Using a 10 mm socket, unscrew the four nuts securing the rear heat shield of the additional muffler, having previously treated them with WD-40 lubricant.
3. Remove the rubber cushion from the front suspension bracket of the additional muffler.
4. Slide the heat shield forward to expose the parking brake adjustment assembly.
5. Holding the adjusting nut of the cable end with a 13 mm wrench, use a socket of the same size to unscrew the lock nut.
6. Turn the adjusting nut clockwise to tighten the cables.
Note:
It is convenient to adjust the tension of the cables with a high head with a ratchet and an extension. In this case, do not unscrew the lock nut completely, but, aligning its edges with the edges of the adjusting nut, put on a 13 mm high socket and rotate both nuts at once.
7. Use the locknut to secure the adjusting nut. When the lever is lowered, the suspended rear wheels should rotate freely.
The article is missing:
Photos of parts and consumables
Adjusting the handbrake lever on the Lada Grant is necessary if its stroke is more than 6 clicks. The optimal stroke is 2-4 clicks, but during operation it is allowed to increase its stroke to 8 clicks.
An increase in the travel of the parking brake lever occurs for several reasons, the main ones being stretching of the handbrake cable and wear of the brake pads.
Independent actions
Before you eliminate the knocking noise from Vesta calipers with your own hands, you need to make sure that it comes from them. To do this, you need to rock the mechanism from side to side. In this case, it is not necessary to remove the wheel, although if you have alloy wheels with many spokes, you will have to jack up the car and remove the wheel.
This situation is clearly shown in the video.
If your fears are confirmed, you can try to resolve the issue in the following ways.
Replacing brake pads
Replacing Vesta brake pads is not complicated and can be easily done independently. When purchasing a new set, it is recommended to choose those that are equipped with a rubberized pad on the reverse side.
Pads with a rubberized lining can eliminate knocking.
Guide lubrication
To do this, you need to unscrew the guide pins from the calipers and generously lubricate them with grease.
Lubrication also helps sometimes.
Replacing guides
If lubrication of the guide pins does not help, it is recommended to replace them.
New fingers instead of old ones.
Production of new guides
In this case, you will have to contact a turner. He will be able to turn out new “fingers” on a machine, the diameter of which will be larger than the standard ones.
Recess groove
You can also order modifications to the factory guides at a turning workshop. It consists of making small indentations in the fingers at the edge. Subsequently, cuffs made of rubber with heat-resistant, as well as gasoline and oil-resistant characteristics must be placed in these grooves.
Guide pins with rubber inserts.
Plate
To eliminate noise, you can bend the plate (noise reduction) downwards. This option is demonstrated in the video
Caliper guide clamp
To do this, you need to arm yourself with a spring or a plastic clamp, and then tighten the guide, pressing it against the caliper. You can also use both options at the same time. To do this, you always need to remove the wheel.
These are quite simple and effective tips for getting rid of knocking and rattling of Lada Vesta calipers. Most operations can be performed independently, but to carry out some you will have to hire a turner.
Visit to the dealer
First of all, you need to go to the Lada dealership. However, it is unlikely that the dealer will recognize the case as a warranty, since there is no regulation in this regard. Nevertheless, it is worth trying to solve the problem of Vesta calipers knocking through the dealership. In addition, some owners who have had their calipers replaced under warranty note that the new components installed in the car are no better than the old ones, and soon they also begin to rattle.
However, if you are refused, or you live far enough from the nearest salon and do not want to travel with a question that will most likely be refused, you have the opportunity to try to eliminate the source of the noise yourself.
Guides
The caliper is constantly subject to quite heavy loads. Therefore, problems with them are not uncommon. And on some Chevrolet models, this is a generic disease that appears after 20,000-30,000 kilometers. There are several ways to fix this problem:
- Replacing guides. This method does not always help. We buy a set of new guides and install it. If everything is in order, then the problem will disappear. But, she will return after some mileage. When the knocking occurs again depends on the characteristics of your vehicle. In some cases, the knocking noise is caused by wear on the guide seats. Dealing with such a malfunction is much more difficult. In this case, special rubber bands are installed on the pins. To do this, you will have to purchase special reinforced guides. But this pleasure is not cheap. Each set contains only 1 elastic band. Accordingly, one wheel will require from 2 to 4 sets. But, you will forget about the knock for quite a long time;
- There is a special lubricant for calipers. In general, this is a preventive measure. But, in some cases it helps to get rid of knocking. To use, pull the guide out of its seat and lubricate it thickly with lubricant. After that, we place part of the lubricant in the socket. We insert the pin into place and secure it. Depending on the degree of wear and the quality of the lubricant itself, one treatment should be enough for 500-10,000 kilometers. This lubricant is usually sold in small bags per guide;
- There is also a rather radical way to solve the problem. This is the addition of a spacer spring. To do this, you will have to drill holes in the caliper and brake cylinder block. After which, the parts are tightened using a spring. Suitable from VAZ drum brake repair kit.
Replacement procedure
During replacement, you will need to bend or trim the steel screen.
After replacing the brakes, the spare wheel fits, but the clearance is too small. Just in case, you could take a set of 6 mm wheel spacers (4/5*100 CB-60.1).
ATTENTION
owners of Ptalomey R16 wheels! After installing Nissan Tiida brakes, there is critically little space left between the caliper and the disc spokes, less than a millimeter! In this case, it is necessary to install 5 mm spacers:
What other components of the car should we look for the cause?
For those who are interested in what to do when rattling and other noises appear, the following instructions for action will be useful:
Inspect and evaluate the condition of the brake pads by eye
Pay special attention to pads that have worn out more than half. Specifically find a bulge on the road, for example, any bump, and press the brake pedal. If after this the sound disappears, you can make a diagnosis - the problem lies in a faulty caliper. To get rid of the last doubts, it is better to dismantle the wheel
The caliper itself is rocked across its position and the size of the play is assessed. It should be no more than 1-1.5 millimeters.
Any calipers operate on brake fluid, which means there is a possibility of a leak. Most often, seals or protective anthers suffer from this. Dirt and water penetrate through worn boots onto the caliper and corrosion processes begin. A leak may appear in the rubber hose connecting the caliper to the brake line.
When you turn the steering wheel, the position of the caliper changes, and with it the position of the brake hose. Due to bending and temperature changes, rubber cracks and subsequently leaks. The fitting used to bleed the system may also fail. Because of this, it becomes airy and the pressure drops. The brake pedal either fails or reacts worse to pressure. All this reduces braking efficiency and road safety.
Getting rid of brake caliper knock using a spring
You can get rid of a leak in the caliper by timely checking this unit for the appearance of foreign stains. They are characterized by another “illness” - the so-called souring of the pistons. Rust gradually eats away at it and prevents it from moving freely in the nest. In practice, this immediately leads to the car moving to the side when braking. The sensitivity of the pedal is impaired, the disc and pads begin to wear unevenly
This is why it is so important to inspect the condition of the anthers
Front and rear calipers can break and knock with approximately the same probability. Souring of pistons, leakage of seals and clogged boots are typical for each of the car’s axles. In this case, the load on the front brakes occurs more often, so the operation of their components can occur faster. The rear ones can fail due to the handbrake mechanism located in their pistons.
The life and health of the driver, his passengers, and other road users largely depend on the efficiency and serviceability of the braking system. The caliper, as one of its elements, requires regular checking of its condition
The driver must pay attention to any creaks and other extraneous noises and respond to them in a timely manner.
Detailed diagnostics: structural component of knocking
Guided only by a thermal sign, it will not be possible to find out exactly why the hydraulic compensators are knocking. An additional set of tests is required. Its essence is to analyze changes in the acoustic design of the Vesta engine, changing the speed and taking into account the temperature of the coolant.
Operating with revolutions
The testing stages boil down to analyzing the operation of the motor in various modes:
- A knocking sound when cold or hot, which disappears at high speeds, indicates wear of the ball valve of the hydraulic module or its clogging with wear products. Option No. 1 - change the oil and oil filter to ones known to be suitable for the 129 engine. As a last resort, replace substandard hydraulic compensators.
- A clattering sound exclusively on a hot engine, which goes away with increasing speed, indicates a critical condition of the plunger pair. It can only be eliminated by replacing the compensator assembly.
- Tapping noises are heard only at high speeds, regardless of engine temperature, and at idle the engine operates smoothly - check the oil level. It is advisable to fill slightly above the average dipstick level, without exceeding the MAX mark. A damaged oil pickup has a similar effect.
Consequences of ignoring a fault
The main prerequisite for troubleshooting is intrusive extraneous noise. Few people know what the real danger of tapping is. Excessive clearances in the timing belt affect the operating mode of the cams: the resulting shock loads significantly reduce the service life of the crankshaft.
Possible reasons
To repair a fault, it must be found. Therefore, first we will look at the main causes of caliper knocking:
- Worn pads. Actually, it is not the caliper that is knocking, but the pads;
The guides were taken out, as a result the caliper moves along them, while it knocks; The bolts holding the caliper have come loose.
Each of these problems has its own methods and repair methods. Let's look at them in more detail.
Often, a metallic grinding sound is added to the knocking. This happens when the lining on the block has been removed completely. The knocking does not come from the caliper itself, but from the pads. The repair consists of replacing the pads. If you ignore the problem, your braking performance will be significantly reduced. But that's not all.
Having worn down to iron, the pads actively wear down the brake disc. A hundred kilometers in this mode and it will simply “cut off”. And you will have to buy a new disk at the store. It can also easily push out the working cylinders. This is fraught with jamming. The most common problem in this case is brake fluid leakage.
For what reasons do hydraulic compensators knock on Lada Vesta: fault diagnosis
Sounds and background
Poor maintenance of the engine oil system can cause knocking of hydraulic compensators in Lada West even at low mileage. Unsuitable oil viscosity or untimely replacement of it are direct preconditions for the appearance of clattering noise from “hydrikis” in the near future.
Not all owners correctly recognize a specific engine knock when they hear it for the first time. Meanwhile, the hydraulic modules rattle identically to a running diesel engine. To be more precise, the sound is similar to the acoustic design of a functioning injection pump of a diesel or gasoline engine with direct injection.
Simply recording the presence of a knock will not help identify the cause of the problem. It is necessary to find out how hydraulic modules behave:
- Hot.
- To the cold.
- At different speeds.
It will become clear later that these circumstances are important in determining a strategy for eliminating tapping.
Knocks when cold
A sudden clattering noise should not always be regarded as a breakdown. This fully applies to the case when the sound appears briefly when starting a cold engine - literally for 1-2 seconds. Such a reaction only indicates the bleeding of oil from the hydraulic tappets due to long-term parking, but does not in any way indicate problems with the oil supply to the hydraulic compensator unit during operation of the power plant.
Longer tapping when cold is unacceptable. The prerequisites for violation of the operating mode are identical to the reasons for the clattering of hydraulic compensators on the Lada Priora, of which there are several:
- Insufficient pressure in the oil system (oil pressure lamp is on).
- Excessive contamination with wear products or mediocre quality of the oil composition.
- Oil of inappropriate viscosity: it is impossible either to push the fluid through small channels or to maintain the specified pressure.
- Coked holes in the oil system lead to knocking from the hydraulic compensators of the Lada Vesta engine due to a decrease in pressure inside them.
- Hydraulic pusher wedge due to carbon deposits.
- Wear of the plunger pair, leading to oil emulsion leaks.
Tapping on hot
Vest owners sometimes notice that when the engine is cold, it whispers, and as it warms up, a clattering sound occurs from the hydraulics. Such a symptom can appear for any of the above “cold” reasons. However, more often the knocking of hydraulic compensators on a hot engine has its own prerequisites:
- Incorrect oil level. Engines equipped with hydraulic compensator devices are quite sensitive to foaming of the oil composition, which occurs when the lubricant is overfilled. Underfilling is also fraught - the oil pump will pick up air.
- The increase in landing areas for hydraulic pushers is the result of overheating of the cylinder head.
How to change a brake caliper
To replace this element of a Lada Vesta car, you will need an hour or two of time and a standard set of tools. To begin, place the car on a level surface and secure its position with the parking brake.
Next follow these steps:
We pump out the brake fluid from the reservoir using a special bulb
- Loosen the wheel nuts
- Raise the front of the car with a jack
- We remove the car wheel by completely unscrewing the nuts securing it
Use a flat screwdriver to press the piston in, resting on the outer block.
We remove the brake hose, having previously prepared any container for draining
Using a 13mm socket, unscrew the bolts securing the bracket to the lower and upper guide pins, holding the pin with a 15mm open end wrench.
Removing the brake pads
Removing the guide pins
Thanks for subscribing!
Removing the front brake mechanism
Installation is done in reverse order by hand
It is important to check the condition of the guide pins and, if necessary, replace them, and when installing them in place, lubricate them with special lubricant
Standard caliper repair kit for Vesta car - article number and price
- Front right assembly: article number 8450006843, price - 10,750 rubles.
- Front left brake caliper assembly: article number 8450006844, price - 10,750 rubles.
- Rear: article 11196350208900, price 2200-2500 rubles.
- Rear right pads 8450006849, price 2100-2200 rub.
- Rear left pads 8450006850, price from 2200-3600 rubles
- Rear drum pads 7701208357, price from 2200 rub.
- Lada Vesta caliper repair kit - price 450-500 rubles.
- Front caliper guides, price 350-400 rubles.
- Guide pin bolt, spare part number in the manufacturer's catalog 7703101617, price 270 rubles.
Knocking and rattling of calipers, how to eliminate them
Many people are faced with a fairly common problem: caliper rattling. The main symptom is a metallic rattle, which disappears if you lightly press the brake and mainly appears on cobblestones or similar roads and is also clearly audible when you get into holes. The sound itself can be either sonorous or more dull. The main reason is the broken holes for the guides due to untimely maintenance. Although once a year it is necessary to check the presence of grease on the caliper guides, as well as the condition of the rubber boots.
How to eliminate knocking calipers
If the knocking has just appeared recently, an inspection of the calipers may help, that is, lubricating the guides with high-quality lubricant and checking the boots.
It is important to use high-quality lubricant special for guides. It is not recommended to use copper, ceramic and hub grease
These types of lubricants will jam the caliper guides under certain conditions. The optimal lubricant for guides is SLIPKOTE 211 DBC or similar. If the necessary lubricant is not available, as a last resort, use blue lubricant for the hubs, up to 170 degrees; without sudden braking, such lubricant will work normally. In principle, there were no problems with it on the Starex bead; the anthers did not swell.
However, even on broken calipers, after lubrication, the knocking will disappear for a while.
The knocking sound of the caliper can also appear from wear of the pads; as the pads wear, the distance between the pads and the brake disc increases and the caliper begins to seem to dangle. So after replacing the pads with Starex, one of the calipers went completely quiet. But it also depends on how far the brake cylinders are moved back, perhaps differently on different cars, thereby leaving a different distance between the pads and the brake disc when the brake pedal is not pressed. The same applies to the brake disc. So check the pads and brake disc wear, replace if necessary and the rattling may go away.
If all else fails and the holes for the guides are sufficiently broken, only re-grooving for new guides will help.
There are also other options, more “collective farm” ones. Below are photos taken from various forums.
Installing a spring bracket. For some models, such brackets are produced almost commercially. For installation you need to drill two holes.
You can simply install a spring that will tighten the two elements of the caliper.
If one spring is not enough, install two.
Or one big one.
Some service stations offer the installation of fluoroplastic rings on the guides, although this is not safe. Some car models have factory guides already with a rubber ring (for the same Starex) which are provided only for the lower guide.
And finally, check the guides at least once a year, with good lubrication and intact boots, there will be no problems with them, although potholes on the roads do their job.
Replacing the brake caliper piston
In addition to replacement, there is also the option of repairing the caliper on a Lada Vesta car - if the piston is faulty, it can be replaced. Replacing the brake caliper boot is also possible if there is a leak. But any of these actions is only possible if the body (including the cylinder) is in full working order. So, to repair this unit, you will need a new piston and a repair kit consisting of the following elements: protective corrugations of the guide pins, a piston sealing collar, an outer piston cover and a cap for bleeding the brake fluid. Next, follow the algorithm:
Remove the piston boot Apply slight air pressure from the brake fluid entry point, then carefully remove the piston from the cylinder Carefully, without damaging the cylinder walls, pry and remove the cuff Lubricate the cylinder surface with brake fluid Install new parts in the reverse order
How to solve the issue without replacement
I decided to fix the problem in another way, which was suggested to me. I tried swapping the pads and grinding down the edges on them. If this doesn't help, I'll make a replacement.
I decided to apply all the tips I found on the Internet. I took off the pads, cleaned everything, ground down the edges on them, and swapped the inner ones with the outer ones.
I bought two types of lubricant:
- For the non-working surface of the pad.
- For the surface that comes into contact with the caliper.
I put everything back in place, but there are big doubts about such actions. As long as I drive for a few days, everything is fine. If the brakes start squeaking again, then I will change the entire front and rear pads.
Soon there will be an update of the car and its restyling. I would like the factory engineers to eliminate all the problems that exist in new cars.
Is the caliper really knocking?
In fact, there are many elements in the car that can knock. These are the same engine valves and the notorious hydraulic compensators, the knocking of which we recently talked about. But the calipers also knock. Moreover, this phenomenon is quite common.
For some cars, such symptoms are quite common and their appearance is purely a matter of time.
The first step is to determine whether the calipers are actually knocking. Fortunately, there is no need to go to a car service center and spend money on expensive diagnostics. You can do it on your own. The knocking noise is most noticeable when the car is moving at low speed. It is worth intentionally driving through easy obstacles. The easiest option is to drive over a speed bump or drive onto the ground. And as soon as you press the brake, the knocking will disappear.
One of the disadvantages of the defect in question is the fact that it is not covered by warranty defects. Roughly speaking, if the car is under warranty, you will have to repair the calipers at your own expense.
The pads are frozen, the ABS signal is on - how to fix it
Most often, the PTC or ZTK jams after washing in cold weather or heavy snow accumulation under the brake system sensor. When the car starts, the control unit recognizes a sticking error and signals it with a yellow indicator on the dashboard.
It is quite easy to fix the defect on your own, repeat the following steps:
- Start the engine.
- Engage reverse gear.
- Increase the speed, back up a few meters.
- A similar distance forward.
The indicator on the dashboard should go out and the sensor should return to its original position. If the recommendations do not help, wash the PTC with a stream of warm water at a car wash, contact an authorized dealer to have the breakdown repaired.
Causes of knocking noises
Since you can independently determine the knocking noise from the caliper when testing the suspension on uneven surfaces, you can also safely tackle the problem with your own hands.
There is nothing scary or difficult about this. This happens on a variety of machines, including:
- Toyota Corolla;
- Gazelle;
- Lada Largus;
- Ford Focus;
- VAZ 2110;
- Mercedes Sprinter;
- Renault Logan;
- VAZ 2114;
- Lada Vesta;
- Chevrolet Aveo (every 30 thousand km);
- Hyundai Solaris, etc.
The reason usually lies in one of 3 reasons.
This includes poor fixation of the element, wear on the guides, as well as wear on the brake pads. In the latter case, the pads themselves will actually knock, although the symptoms manifest themselves identically. In any case, you will have to go there and take appropriate measures.
Now we will consider each reason separately.
The pads are worn out
The first thing that should be checked when such symptoms occur is the pads.
There are two simple diagnostic methods that you can do yourself.
- While driving. If you feel that the car brakes worse with the same pressure on the pedal, plus there is a creaking noise when braking, the pads are probably seriously worn out. This also includes such a symptom as beating in the pedal;
- Visual method. You will have to get to the pads by removing the wheel and examine their condition visually. Worn linings indicate a problem. Even if they are not completely erased, it is better to treat the node immediately.
On every car, the pads must be replaced after a certain period. Usually this is 10-15 thousand kilometers.
If the pad is worn out, the driver will observe a sound reminiscent of a knocking sound from the caliper. Under no circumstances should the pads be allowed to wear excessively, otherwise this could result in damage to the brake disc. Also, such pads can squeeze out and cause jamming of the car brake cylinder.
Having dealt with the wear of the pads in the calipers, we move on.
The culprits are the guides
There is a rather important component in the brake system, called caliper guides. When they wear out, it is necessary to take measures to replace the components.
In fact, there may be 2 problems here.
- The guides themselves are worn out. If these elements are worn out, then there is no need to repair or restore anything. You just need to purchase new guides and install them in place of the old ones. Based on the video instructions, this will be quite easy to do;
- The sockets are worn out. The guides have sockets that also wear out over time. Special repair rubber bands will help you here. These rubber bands are put on the pin, thereby the guides stop causing knocking.
What you shouldn’t do is use the so-called collective farm method. It consists of drilling additional holes in the brake system cylinder block, as well as in the caliper itself, after which the elements are tightened. For this, a spacer spring is used.
In some cases, knocking noise due to the guides can be eliminated with lubricant. It is applied in a thick layer, after first removing it from the nest.
Sometimes lubricant helps to get rid of extraneous noise for a long period. For some, the sound appears again after 200-500 kilometers, for others it lasts several thousand kilometers.
Caliper mount
The rarest malfunction is considered to be a loose caliper mount. But since this also happens, this problem definitely needs to be addressed.
I'm not even talking about the mistakes of the craftsmen who installed the part and did not tighten it properly. The fastening may become loose for a fairly trivial but common reason. This is the low quality of roads. Constant vibrations lead to loose connections.
The problem is easily solved. You just need to tighten the bolts and that's it.
Finally, I suggest you consider another of our recent materials, in which we answered the question of why the clutch slips. I think this will be useful and interesting for many to know.
That's all I have
Thanks everyone for your attention
Subscribe, leave comments, ask questions on the topic and don’t forget to invite your friends to join us!
YORUMLAR • 132
cool vid! buy new side cutters!
Damn it's the same on the Honda, it's loud. They install the spring and there is silence. Stop criticizing VAZ.
Melt from the temperature
Chevrolet is the same garbage - all the calipers rattle. Already changed the entire chassis.
Generally simple! Thanks comrade! And then he came up with different collective farms. This one is the simplest!
We've been doing this in Largus for a long time
The calipers are heating up wildly. This clamp will melt immediately. I checked, this advice does not work.
Maybe I'm just driving quietly, but I've had these clamps for a year now
The point is not about the wire cutters. Everything was licked off Logan and the marketers weren’t smart enough to finish it, not the designers.
One sharp braking and the plastic clamp immediately melts.
Yes, it's been going on for almost a year now
So did you bend the plates? These ears. They don't bend them
So did you bend the plates? These ears. They don't bend them
I sold the VAZ and took a Toyota, I drive in silence and nothing bothers me
Well, apparently I took a fresh one. I have pounding and the symptoms are similar to these
The calipers do not rattle, but something knocks very loudly when hitting a sharp bump of 5-7 cm at high speed. It sounds like a caliper, although I could be wrong. Who will say what?
I have the same problem on a Mitsubishi Galant. I still can't get around to removing the wheel and looking.
I got a new one after 750 km, thanks to the author, I’ll arrange it myself
I bought side cutters in the sadomaso department or something
Let's have some more videos. Class.
Where did you grab the spring from?
For AvtoVAZ, the main thing is to buy them, well, then it’s your headache
After your video, I drove on a rough road with the window open - no shit, silence, car 2022 June, mileage 15,000.
I also put the same springs on my Opel. Fits well from the bike trunk
Damn, complete crap, I myself keep such a car, until you change the entire caliper, nothing will happen
I have silence from the calipers
I bought Veta St. That’s why I won’t go feed the parasites, I myself have a mustache.
The Polo sedan has the same problem. Friends you are not alone
How did you check and find out that it was the caliper knocking? I’m driving on gravel roads and there’s no rattling noise from the front. I knocked on the wheels of a stationary car - silence.
Your dad inherited bocarezes from your campaign
Is there a video of them knocking? They just told me under warranty that it was the calipers knocking, I have a hard time believing it (It sounds like a support or testicles)... but can they really knock on a new car? I left the car and immediately there was a knock.
Thanks for the method!
How are your zip ties doing now in 2022? And in general, how did I solve this problem? I bought a Vesta car, and for 2 months I have the same knocking sound on the calipers.
Features of knocking noises when braking
Rattling of calipers is typical for all vehicles after a certain mileage.
The driver should pay special attention when driving at low speeds or passing obstacles to extraneous noises that were not previously observed. The knocking of the calipers clearly manifests itself when driving over speed bumps or on bumps in a dirt road.
This sound disappears when the brake pedal is pressed.
Why this phenomenon occurs will be described below. Many drivers may not immediately think that the problem lies in this particular unit of the brake system. More often they are blamed on chassis malfunctions or wear on the shock absorbers. Extraneous sound can appear in the form of clattering or ringing, rattling or knocking, but often disappears when braking.
The knocking noise intensifies when hitting a road obstacle, but may weaken when making a maneuver or turning. The front caliper is easier to repair - for this you need to buy a special repair kit. Next, drill several holes in the assembly and insert springs into it. Each set is designed for 2 calipers. By the way, new knocks can be a consequence of the pads being worn out by 50% or more. To make a correct diagnosis, it is better to remove the wheel and examine the caliper carefully.
The third way to eliminate rattling calipers
The principle of its operation is similar to the first method, however, the “tension” is created not by a rubber bushing, but by a metal bracket. This method is widely used on foreign cars of a more expensive price group.
To eliminate knocking, buy two TRW PFK 241 brackets,
Buy bracket TRW PFK 241
Prepare a jack, wrenches for removing the wheel and caliper, a drill, and a drill with a diameter of 3 mm.
Then jack up the car, remove the wheel and fit the bracket onto the caliper, while marking the locations for drilling holes.
To drill holes, it is better to remove the caliper.
Tip: Drill the holes at an angle because the ends on the brackets are slightly bent.
When the calipers are prepared, install them and insert the brackets.
Using a screwdriver, insert the bracket into the holes
Start inserting the bracket into the caliper
Then reassemble everything in reverse order.
We hope that you will choose the most suitable option for yourself.
The caliper is knocking - what to do: how to eliminate the rattling noise with your own hands
Hi all! It is unlikely that anyone will argue with the fact that proper operation of the braking system is the key to the safety of every driver. Therefore, today we will continue this topic by talking about why the caliper is knocking, what to do in this situation and who is causing the noise.
Surely everyone knows that you should always monitor the degree of wear of the brake discs. We also talked to you about grooving brake drums, and also studied the nuances of grooving brake discs yourself. I don’t encourage you to do this yourself, but you must know the features and tasks of such procedures.
The caliper refers to the braking system of a vehicle. It comes in both front and rear. But in both cases, his treatment is carried out approximately according to the same scheme. And the reasons for the knocking are identical.
Preparing to install new pads
Having assessed the degree and form of wear on the friction linings of the removed pads, they diagnose the operation of the brake cylinders (if necessary, they are moved or repaired), and the caliper is prepared for the installation of new pads.
Spring brackets and guide sockets are cleaned of rust and dirt with a metal brush. Protective covers (boots) of the guide pins are checked for damage, loss of elasticity and, if necessary, replaced:
- the lower pin is removed from the guide hole and lightly lubricated with graphite grease, the worn cover is replaced, a little grease is also put into the hole, after which the pin is inserted into place;
- the cover of the upper finger is changed in the same way - after unscrewing the bolt of the upper fastening of the bracket, which is removed from the seat and, without disconnecting the brake hose, is temporarily suspended on a wire.
It is strictly forbidden to use “Litol”, “Solidol” and other non-heat-resistant lubricating compounds when replacing guide pin boots, as they liquefy when heated and will cause oiling of the friction linings, which can lead to a sharp loss of efficiency of the braking system.
