Life hack: Vesta car front and rear wheel bearings - replacement instructions
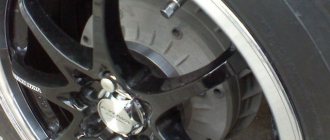
In order for the wheel to rotate and stay firmly in place, in addition to the ball joint, the suspension mechanisms include a hub bearing. On Lada Vesta cars there are front and rear bearings, since in some Vestas there are drums at the back, not calipers. Replacing a part on a hundred will cost from 1000 to 2000 rubles. The wheel bearing tends to howl, the first Vesta cars were famous for this disease. As always, the first models come out like raw meat, often inheriting the diseases of previous models. Lada Vesta did not break this tradition. AvtoVAZ even gave an explanatory letter admitting that the front right/left wheel was howling and advised changing the assembly. Below in the article you will find the official letter. The price for the front wheel bearing of a Vesta car starts from 1000 rubles. The part is available for cars with and without abs. True, I have never seen Vesta without abs.
Is it dangerous if the wheel bearing makes noise, and how long can you drive?
If you ignore the hum of the hub while driving a car, you may encounter the most unpleasant consequences. Firstly, at high speed, complete destruction of the part can occur. Due to significant overheating, the wheels may simply jam. Secondly, a significant increase in play will interfere with the rotation of the axle, which will inevitably lead to loss of vehicle controllability. Thirdly, due to wheel runout, the brake pads may separate. As a result, the risk of brake failure at the most inopportune moment increases.
To play it safe, when the first symptoms of wheel malfunction appear, you should determine the cause of the noise.
It is impossible to delay repairs, since friction pairs will surely break down. Driving such a car is very risky. All responsibility lies with the motorist. Destruction of the front wheel bearings is especially dangerous. Under such circumstances, the wheel may simply fall off in the most inappropriate conditions.
As soon as a humming noise appears inside the hubs, you need to act as follows:
- Initially, you need to perform diagnostics and identify the problematic part.
- The problematic front bearing must be replaced immediately.
- If problems appear on the road, then you need to get to the garage, moving carefully and slowly. While driving, it is advisable to stop periodically to check the degree of heating of the hub. If necessary, problem units should be allowed to cool down.
Repairing faulty rear wheel bearings should also not be delayed.
Basic faults
As a result of regular use of the car, over time, most parts wear out and may break. One of the most vulnerable parts of a vehicle is the suspension, which smooths out road unevenness and takes the blows.
The bearing design consists of two metal rings. Inside there are balls of insulating material. The entire structure is covered with plastic casings. Internal graphite-based lubricant protects materials from abrasion while the internal race of the part rotates along with the hub.
For no apparent reason, car parts usually do not break. The process occurs unnoticed, but allows the driver to have time to react to a breakdown if he pays attention to the characteristic signs in time.
The purpose of bearings is to ensure the rotation of the wheels and also to hold the hubs firmly. Let's look at their main malfunctions and possible causes:
- Front wheel play.
- Vibrations of different degrees of intensity.
- A pronounced hum and other extraneous sounds when the wheel rotates, similar to the grinding of metal, crunching, knocking.
- Vibration in the steering wheel that increases with speed.
- The car skids to the side.
- Off-road driving, extreme driving, with sharp braking, acceleration (drifting), can damage any, even reliable, part of the car.
- The cause of component failure may be vehicle overload.
- As a result of sand, moisture, or dirt getting into the rotating parts of the bearing, the lubricant may evaporate and the inner or outer rim may crack. During long-term operation, the protective elements of the part become unusable, the tightness of the structure is compromised, and dirt can penetrate into the working area, washing out the lubricant.
- The rollers themselves are rarely destroyed. The reason may be inadequate factory quality.
- If the mechanism is replaced incorrectly, another replacement will be required.
The technician will advise you, after detecting a malfunction, to go to the nearest workshop, not exceeding a speed of 40 km/h.
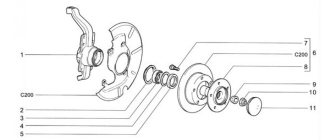
Structurally, the front and rear hubs of the Lada Vesta car consist of:
- metal frame: external, internal;
- a bearing with metal balls (rollers) located in it;
- insulating rings;
- special filler - graphite-based lubricant.
Before starting to disassemble the mechanism, it is necessary to diagnose the hub mechanism. To this end:
- Place the vehicle on a level platform with the parking brake released to check the front row.
- Install wheel chocks to check the rear row: jack up the front (or rear) part.
- We turn the car wheel and carry out troubleshooting.
- Use your hands to loosen the wheel up and down; there should be no play. If there is one, we dismantle it, replacing worn parts and components.
How to check a wheel bearing and is it safe to drive if it is humming?
Over time, as a result of vehicle operation, various noises appear when driving, which indicate wear of one or another part. Replacing it in a timely manner solves the problem in the best possible way.
The main thing is to identify the worn part in time. Experienced drivers can do this by listening to the sound. On the other hand, this is quite difficult to do, since many other components and suspension parts also make noise when worn. Therefore, here you need to stick to proven methods.
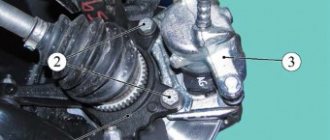
Replacing the front wheel bearing Lada Vesta - removal and installation
- Place the steering knuckle in a stationary vice and knock out the central part of the part.
- To dismantle the inner part of the cage, use a chisel, applying targeted blows with a hammer. Leave the outer part of the inner ring.
- Remove the mud ring from the hub.
- Using a chisel, move the inner race of the bearing.
- Use a puller to compress the part.
- Use pliers to remove the retaining ring.
- Remove the bearing. To do this, disconnect the inner race of the hinge; it is convenient to use round teeth.
- Remove the part along with the puller.
- Clean the surface from accumulated dirt, rust, and grease. Lubricate the inner surface of the steering knuckle.
- Clean out dents from the chisel, if any have formed.
- Apply a thin layer of graphite grease to the surface. Press in the new mechanism; the retaining ring should fit with the edge of the part.
- Press the new mechanism into the steering knuckle, applying force to the outer ring.
- Install a locking device on the groove of the steering knuckle socket.
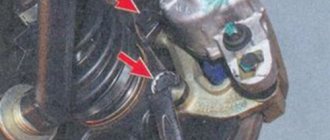
- Attach the steering knuckle to the shock strut bracket, align, and tighten the nuts of the steering knuckle bolts.
- Insert the splined part of the outer drive joint into the wheel hub. Put on the washer and tighten the new fastening nut without tightening it.
- Attach the ball pin of the suspension arm to the steering knuckle and tighten the two bolts.
- Install the front brake guard and disc.
- Secure the front brake to the steering knuckle with two bolts.
Causes and prevention of premature wear
The cast iron hub body is quite strong and wear-resistant, so the seat is very rarely damaged. The same cannot be said for bearings. Their service life is 50,000-150,000 kilometers. At the same time, these parts last longer on the rear axle.
Thus, worn parts need to be replaced in a timely manner to prevent serious problems from arising.
The following causes of wheel bearing wear can be identified:
- penetration of moisture, dust, dirt into the hub due to damaged anthers and seals;
- insufficient or excessive amount of internal lubrication;
- low quality, inappropriate parameters of lubricants;
- contact with the bearing by chips and other wear products of rubbing parts;
- violation of the front wheel alignment;
- excessive speed when driving;
- merciless operation, constant off-road driving;
- using a car at extreme temperatures, high humidity;
- problems with brake mechanisms.
To prevent problems with wheel bearings, it is important to avoid the operating conditions described above.
Thus, the serviceability of the hubs directly affects the comfort and safety of a particular vehicle. Therefore, these nodes need to be given sufficient attention.
Source
How to replace the rear wheel bearing of Lada Vesta
Place the car on a lift and turn off the ignition
Remove the cap 2, Figure 1, rear wheel hubs.
Checking the axial clearance of the wheel bearing
The axial play in the rear wheel hub bearing should not exceed the permissible value of 0.03 mm. If the axial clearance exceeds the permissible value, the bearing must be replaced.
We install an indicator on the brake drum, rest the indicator leg against the end of the hub axis and check the axial clearance of the rear wheel hub bearing by applying an alternating load to the drum along the hub axis.
If the axial play in the bearing exceeds the permissible value of 0.03 mm, the bearing must be replaced.
Using a 30mm socket, unscrew nut 2, Figure 2, securing the hub and remove brake drum 1.
Using a three-lever puller, we press magnetic ring 1 from brake drum 2, Figure 3.
Remove the locking ring 4.
We install brake drum 2, Figure 4, on the press table, install mandrel 1 on the bearing and press out bearing 3 of the rear wheel hub from the brake drum.
Clean, rinse and blow out the steering knuckle and hub with compressed air. Clean the grooves for the retaining rings.
Place brake drum 3, Figure 5, on the press table on a technological stand under the surface indicated in the figure.
Install hub bearing 2 into the brake drum, install mandrel 1 onto the bearing and press the bearing until it stops.
Apply the pressing force to the outer ring of the bearing.
Secure the bearing in the brake drum with retaining ring 4, Figure 3.
Place brake drum 3, Figure 6, on the press table with emphasis on the surface indicated in the figure.
Install magnetic ring 2 on the brake drum, install mandrel 1 on the ring and press the magnetic ring until it stops.
The hub nuts must be replaced; reuse of the nuts is not permitted.
Install the brake drum onto the rear wheel hub axle and tighten the new fastening nut. The tightening torque of the nut is 158 - 192 Nm (15.8 - 19.2 kgf.m).
Press cap 2, Figure 1, of the rear wheel hub into the brake drum.
Check the operation and, if necessary, adjust the parking brake drive.
Press the brake pedal 2-3 times, check and, if necessary, bring the brake fluid level in the brake hydraulic reservoir to normal.
Check the effectiveness of the service brake system.
Source
The bearing is humming on the hub: how to determine which is to blame, front or rear
Noises, knocking and humming noises that occur when turning corners and when the car is moving at high speed confirm the presence of problems with the bearings. Some proven methods will help you more accurately determine the location of the fault.
How to check for damage while driving when accelerating and turning
When the wheel bearings wear out, the vehicle body will tilt in the direction opposite to the direction of its movement:
- For example, when turning left, the main part of the load will be concentrated on the right wheel.
- If you turn sharply to the left at a low speed of about 15 km/h and the extraneous noise disappears, this indicates a malfunction of the left hub bearing.
The same verification algorithm is also suitable for the right side of the car.
The most common manifestations of the malfunction occur when the car is moving at a speed of 50-90 km/h. A heavily loose part shows itself even at low speeds.
While the vehicle is moving, you can check the bearings of a specific hub, taking into account the following signs:
| Bearing location | Signs | Recommended driver actions |
| Left front | Increasing sound when accelerating. Vibrations during a right turn, driving in a straight line. Increasing hum during acceleration. | While driving in a straight direction, reduce speed, wiggle the steering wheel, focusing on the right turn. |
| Right front | Steering wheel vibration. The appearance of extraneous sounds on the right side when turning left. | Follow the algorithm described above, paying more attention to left turns. |
| Right and left rear | Increasing sound from behind while accelerating. The appearance of sharp knocks when driving over bumps. | Change driving speed, listening to the rear axle. |
Thus, by performing the “snake”, you can approximately identify the malfunction. A more accurate diagnosis can be made by lifting the car with a jack.
Heating on the move
Worn or faulty bearings always heat up more intensely than others. Thus, for diagnostics, you can focus on the temperature of the hub. For example, if driving a car is accompanied by a humming sound, abnormal knocks, or noise, then you need to immediately stop and check the temperature of the wheel nuts with your hand. (Such actions are hampered by decorative caps, which make them difficult to access.)
With a jack
If the car is partially lifted, then with the wheels suspended, a more accurate diagnosis can be carried out:
- Raise one or two drive wheels and support those on the ground with wheel chocks.
- Start the engine and accelerate the drive wheels to a speed of 70-80 km/h.
- Then switch to neutral gear.
- A faulty hub will be manifested by a hum that appears.
You don't have to start the engine. In this case, it is necessary to determine a non-working bearing using the following algorithm:
- Lift each side of the car one by one using a jack. Rock the hanging wheel in two planes. A worn element will appear through increased play.
- Spin the wheel quickly. If you have to exert significant effort and extraneous sounds appear, this indicates a breakdown.
- Vibrations that occur as the wheel rotates also indicate a problem.
- Ask an assistant to press the brake pedal and at the same time rock the wheel. Loss of play indicates that the bearing is at fault.
Sequencing
The procedure for removing the hub support bearing is as follows.
- Drive the car into the garage and loosen the bolts holding the wheel. It is important to just loosen the bolts - you do not need to unscrew them completely. Next you will need to remove the terminals from the battery.
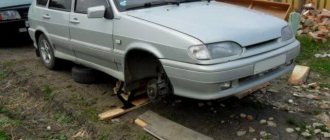
- Raise the car with a jack and place it on trestles. If possible, it is recommended to use a lift. This will make the operation more comfortable.
- Remove the wheel from the car. Next, using a soft brush, you should clean all surfaces from dirt, plaque and dust. The further procedure must be carried out with utmost cleanliness. It would also be a good idea to place cardboard or a rag under the work area.
- Next, you need to open the cap of the hub nut and use a 30 socket to unscrew it. In this case, you should use a lever - the device is clamped tightly enough and secured, which prevents it from unintentionally unscrewing.
- When you have access to the caliper, you need to use a flat-head screwdriver to move the piston and spread the pads. During the procedure, you need to monitor the level of brake fluid in the Republic of Belarus. If the liquid overflows, it is convenient to remove the excess with a syringe.
- The next step is dismantling the caliper. Using wrench No. 18, unscrew the two mounting screws and hang the brake on a spring or other element. In this case, you will need to be careful and remove the brake line away from sharp objects.
Next, the brake disc is unscrewed. To do this, take a TORX head of the appropriate size and unscrew the two fastening screws. The disc itself must be carefully placed on a clean surface. During removal, it is recommended to touch the working surface of the rotor less - this part is sensitive to grease. Next, using the same torx, you will need to unscrew the protective covers and speed sensor. For convenience, the sensor can also be attached to a spring.
- Next, you should rip off the tie rod mounting nut and, using a squeezer, remove it from the steering knuckle. For convenience, you can hold the ball part from turning with a hexagon.
- After preparation, you need to dismantle the suspension arms and wheel drive. Here the mounting bolts and nuts are unscrewed in order. The master’s task is to completely free the steering knuckle and hub from the suspension elements.
- After all the manipulations, you can begin to replace the bearing itself. The fist is clamped in a yew or fixed in another convenient way.
- Next, using a special puller, you need to remove the retaining rings from the seats. In this case, you need to act carefully - the rings are made of special steel and can bounce off. Then, using a tool, you need to knock out the hub along with the bearing from the steering knuckle. The main rule here is accuracy. You need to hit the guide carefully so as not to damage the part.
- Now the hub is completely freed from the knuckle and the bearing can be pulled off.
- Subsequent steps require a special squeeze. If there is no such thing available, you should not even start the procedure. The principle of operation is shown in the photo.
- Next, replacing the support bearing of the Lada Vesta proceeds to the vehicle assembly stage.
- Using a stream of compressed air, you need to clean the seats and completely remove all dirt from the parts.
- Install the outer retaining ring onto the steering knuckle and press the new bearing all the way into its seat. Insert the second ring into the retaining groove.
- The final stage is pressing the hub into the inner part of the bearing.
- Subsequent assembly of the mechanism is carried out in reverse order. The most important factor is maintaining utmost cleanliness and precision. Even a small amount of dirt that gets into the inside during installation significantly shortens the life of the parts.
How to replace the rear bearing on Vesta
The standard replacement of the Lada Vesta rear wheel bearing is carried out independently only after measuring the axial clearance and checking the condition of the part. If the troubleshooting results are not satisfactory, the bearing needs to be replaced. The operation will require similar instruments. And the procedure itself looks like this.
- The preparatory work is similar to the procedure for replacing the front wheel.
- The disc is removed from the car and the brake drum is exposed.
- Using wrench No. 17, the hub cap is removed and the brake drum is dismantled.
When using a magnetic puller, the magnetic ring is squeezed out. The part helps hold the structure in place. After disassembling the mechanism, the TB should be installed on a flat surface and an extension should be installed in the inner part of the bearing to press it out. For the best effect, you will need a press; if you don’t have one, you can use a hammer.
Replacing front wheel bearings
Standard replacement of the Lada Vesta wheel bearing is carried out in a workshop or equipped garage. To perform the operation you will need the following tools:
- set of wrenches;
- wheel removal tool;
- jack and goat stands;
- special bearing puller;
- chisel;
- circlip remover;
- screwdriver;
- hammer;
- pliers with round jaws.
A metal brush, rags, and WD40-type liquid may also be useful for cleaning dirt.
Generator repair
The following describes the repair procedure for sliding inserts and power generation devices. Replacing the Lada Vesta generator bearing will require the tools indicated at the beginning of the article. The repair procedure itself looks completely different.
- Place the machine on a level surface and securely fix it.
- Disconnect battery power.
- Loosen the tension roller of the crankshaft belt and accessories.
- Using a Phillips screwdriver, unscrew the power conductors of the generator device and remove them from the repair area.
- The generator is removed using a 13 mm wrench and a screwdriver. To do this, you need to find and unscrew the two bolts on the bracket securing the device to the engine block.
- Next, you can carefully remove the device itself from the machine for subsequent repairs.
- After dismantling, use a screwdriver to unscrew the two screws of the cover and remove the latter.
- Under the cladding there is a diode bridge and a regulator. The parts are fixed on a special panel, which is pulled off the shaft along with the bearing.
Bottom line
On Lada Vesta, replacing bearings is carried out in the same way as on other cars. There are no fundamental differences. Still, to access the sliding insert, you will need to disassemble the serviced mechanism and use special squeezes and attachments to dismantle the assembly. In principle, such a procedure can be performed independently, but in the absence of experience and the required tools, the procedure should be entrusted to professionals. A penny saving on labor costs can result in serious costs for replacing damaged parts.
