Lada Granta cars are equipped with a clutch of the same system as the Lada Kalina. Reliable, correct operation of the clutch ensures correct gear shifting and allows the car to move smoothly. If the system malfunctions, the car moves jerkily, and the driver experiences problems when changing gears. The problem can be resolved by replacing the clutch with a new one. You can do this yourself with a special mandrel for centering the clutch disc and some repair skills.
Replacement is carried out in the following order:
- The car is placed on a lift and the gearbox is removed;
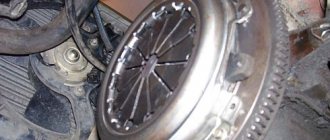
- If there is no need to change the basket, marks are made on the flywheel with a center punch;
- The six bolts that hold the basket in place with an “8” key are unscrewed;
- The basket is removed from the flywheel and the driven disk;
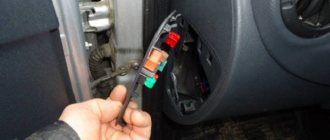
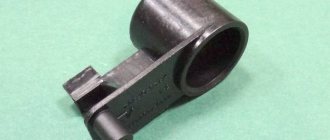
- Next, the release bearing is removed. To do this, use a flat-head screwdriver to remove the spring that holds the bearing;
- The release bearing and clutch are removed from the guide sleeve;
- The spring holding the release bearing is removed;
- If there is a need to change the clutch fork or its bushing, use a screwdriver to pry off the rubber boot;
- The fork bushing is pulled out from the clutch housing;
- The clutch fork is removed from the seat and removed from the clutch housing by lifting it up. If the need arises, we replace it with a new one;
- The clutch is assembled in the reverse order of removal. Before this, all removed parts must be washed with kerosene;
- Next, “CV joint-4” lubricant is applied to the bushing guide and the splined part of the input shaft;
- All removed parts of the clutch housing are installed in the reverse order of removal;
- To center the clutch, you need to use a mandrel that is inserted into the hole in the end of the crankshaft;
- After this, the driven clutch disc is placed on the mandrel, with the side where the hub protrudes larger directed towards the gearbox;
- Next, the basket is installed;
- We align the marks made before disassembly and tighten the bolts;
- The centering mandrel is removed and the gearbox is installed in place.
After replacement, you should check the operation of the clutch drive. If everything is done correctly, gears will shift without crunching and clearly, and the car will move smoothly, without jerking or beating.
This completes the replacement of the clutch on the Lada Granta. This work is not difficult to perform, but if you have absolutely no experience in carrying out this type of operation, then it is better to do it with a person who has already replaced clutches on cars.
general information
Like the vast majority of modern cars, the Lada Granta is equipped with a fairly simple clutch, which contains only a few elements.
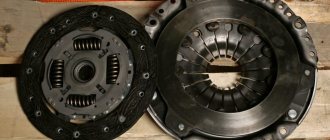
The clutch (also called the clutch basket) includes a housing, a driven disc, and a throwout bearing. The casing, in addition to itself, also includes a pressure disk; in addition, a complex part is the driven disk, consisting of a damper, friction linings and a ring.
Each Granta is equipped with a closed-type single-plate clutch, which has a special element designed to dampen vibrations generated during rotational moments during shifts. The coupling is ensured by dry friction between the driven disc and the friction linings, which is why this type of clutch is called dry.
In addition, clutches on Grants are devoid of gaps between the release bearings and the legs of the pressure springs located in the casing, which is their main distinguishing feature compared to all previous modifications.
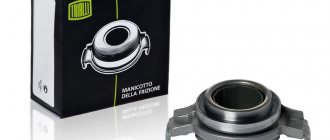
Which release bearing is best for Kalina based on price and manufacturer?
We recommend choosing the clutch release bearing for the Lada Kalina according to the table presented in the article on “Replacing the release bearing on a VAZ 2114”. The list contains information on the best manufacturers of spare parts of this type (which is better, according to reviews from auto repair shops/motorists): price, number (article), manufacturer, equipment. In the table you will find out exactly how much a release bearing for Kalina costs. Before buying a spare part, look at the original photos and technical specifications, which are given there. We also recommend watching a video with an overview of push couplings.
- pressure ball bearing - 111-1601182;
- coupling assembly – 21100-1601180-02;
- bolt - 2108-1601207;
- driven disk - 11186-1601130.
Types of faults
All types of clutch malfunctions installed on Grants are divided into the following groups:
- The clutch cannot be completely disengaged. The reasons for this type of breakdown lie in incomplete pedal travel, vibrations and possible jamming in the driven disk hub, warpage and distortion in the pressure disk, loose rivets and faulty friction linings. In addition, such a problem is often caused by a malfunction of the drive cable, a breakdown of the compensation mechanism, or disturbances in the mechanism that compensates for the wear of the driven disk linings.
- The clutch cannot be fully engaged. This breakdown can occur due to wear of the friction linings or due to their oiling. Other reasons for this malfunction include an oily surface of the flywheel and clutch basket and jamming (or damage) on the clutch drive.
- The clutch works with jerks. This violation is caused by oily friction linings, as well as an oily flywheel and clutch basket, a stuck drive and a damaged pressure plate surface.
- An increase in noise level when the clutch is engaged is caused by a malfunction of the damper springs.
- An increase in noise level during clutch disengagement is caused by a leak from the release bearing, as well as its damage or wear.
As a rule, if the clutch pedal fails and clicking and creaking sounds are detected during its operation, most often you just need to replace the clutch cable. Exactly how this procedure is performed will be discussed below.
Tips, tricks and useful repair videos
1. Follow general recommendations for transmission operation to increase service life.2. Service life is 80-100 thousand pedal cycles, do not press or hold the clutch unnecessarily.3. Before installation, generously lubricate the new VP.4. Removing a manual transmission is a time-consuming operation (2 hours), so it is recommended to immediately troubleshoot the disk, fork, flywheel, and also replace the cable if necessary. 5. Do not purchase spare parts at the car market or other dubious retail outlets.6. Watch useful videos on repairing, replacing clutches and more!
1. Clutch Lada Granta and its possible malfunctions
2. Adjusting and replacing the clutch cable on a Lada Granta
3. Operations for adjusting the clutch cable Lada Granta
4. How to eliminate squeaks and clicks in the Granta clutch pedal
Lada Granta clutch and its possible malfunctions
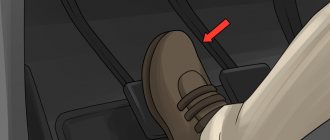
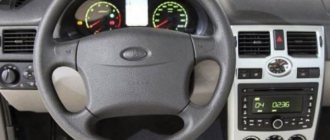
The car has a clutch from the Lada Kalina model. The clutch is a flywheel on which a basket is attached. The basket constantly presses the clutch disc, and it is due to this that torque is transmitted to the gearbox from the engine. When you press the clutch pedal, a metal cable connected to the clutch fork is stretched. The petals of the basket are wrung out and stop pressing the disk towards the flywheel, while no torque is transmitted from the engine.
Here is a drawing for reference only, with the design of the Lada Granta clutch.
Clutch and its drive: 1 - metal clutch drive cable; 2 — cable sheath; 3 — lower tip of the cable sheath; 4 — protective cover; 5 - leash; b - fork lever; 7 — bearing guide sleeve; 8 — clutch release bearing; 9 — clutch casing; 10 — pressure spring; 11 — pressure (drive) clutch disc; 12 - flywheel; 13 — friction linings of the driven disk; 14 — driven disk; 15 — damper spring; 16 — torsional vibration damper; 17 — driven disk hub; 18 — spring; 19 — toothed cable tip; 20 — housing of the automatic cable length adjustment mechanism; 21 — spacer sleeve; 22 — cable sheath bracket; 23 — clutch housing; 24— gearbox input shaft
The clutch does not need adjustment throughout its entire service life.
Clutch malfunctions of Lada Granta
The table below shows possible clutch malfunctions of a Lada Granta car and methods for eliminating them. For more detailed information about the operations carried out to repair the machine’s clutch, see the individual articles in the category.
Adjusting and replacing the clutch cable on a Lada Granta
On a Lada Granta car, the clutch is disengaged and engaged by changing the position of the clutch paddles. The petals are pressed out using the clutch bearing, which is moved by the clutch fork. The clutch fork, which is actually a lever on an axle, is driven by a metal clutch cable. This article provides information on replacing and adjusting the clutch cable on a car.
Preparation for repair
To remove and subsequently replace the clutch, prepare a set of tools consisting of:
- center punch;
- extension cord;
- funnels;
- heads (8, 10, 15, 17, 19 and 30 mm);
- high head (13 mm);
- heads Torx E12 and Torx E14;
- Phillips and flat screwdrivers;
- pliers;
- curved spanners (8 and 13 mm);
- straight spanners (17 and 19 mm);
- two adjustable stops;
- metal brush;
- ratchet wrench;
- caliper;
- stands;
- hammer;
- jack;
- balloon wrench;
- torque wrench;
- centering mandrel.
In addition, you will need to apply certain parts and consumables. So, you will need CV joint-4 lubricant, a guide pin M12×1.25 mm, transmission oil, wood blocks, a technical container, a hose, rags and the clutch itself.
Removing the clutch
Replacing any part begins with dismantling the old one. When performing this manipulation, the car must be placed on a lift, after which the gearbox is dismantled. Then you should mark the marks on the flywheel, and the bolts securing the clutch should be unscrewed; at this time it is recommended to hold the flywheel with a screwdriver. Next, the clutch basket is removed from the engine flywheel together with the driven disk.
The final stage of work is removing the release bearing. First, pry up the ends of the spring holding it with a flat-head screwdriver, and then remove the part from the guide sleeve. Next, the bearing and coupling itself are removed, then the spring that previously held it should be removed.
How do I replace the clutch assembly or its components?
Many are also interested in the question of how the clutch is replaced. Next, we will consider the features of replacing a disc or other elements in the clutch units of Lada Granta, Prior and Kalin. Choosing a clutch is not difficult, since the market is represented by many offers. This aspect is influenced not only by individual preference, but also by the price factor.
The disc replacement process is identical, regardless of the modification of the designated VAZ models, including the Lada Granta. Having decided on the choice of element, we proceed to the direct replacement procedure.
- The initial action will be to dismantle the LADA Granta transmission unit.
- If you plan to reinstall the pressure plate (basket), you will need to first mark the location of the flywheel and housing. This manipulation allows you to save balancing and install the disk in a position identical to the element previously located here.
- Next, we mount a special bushing (mandrel) into the central hole of the pressure element. If such a mandrel is not observed, then it is possible to dismantle the assembly without it, but you will need to hold the driven disk during removal in order to prevent it from falling out.
- To eliminate the risk of the flywheel turning, we arm ourselves with a locking component (screwdriver or mounting blade).
- We unscrew the 6 bolts that hold the basket on the flywheel. The action should be characterized by uniformity and without completely removing first one screw, then the second, etc.
- Now we remove the casing together with the driven disk.
- Having detected the presence of damage on the surface of the assembly elements, the next step is a complete replacement of the clutch.
- We focus special attention on the degree of wear of the friction linings on the disk in LADA Granta. When it is discovered that they are oiled or the rivets are deepening, we urgently replace such an element. We check the rigidity of the damper springs. If they are found to be damaged, the disk must also be recycled. We inspect the disc for runout. If its value exceeds 1 mm, then this fact means the part is unsuitable for use.
- We inspect the pressure element and the flywheel, especially the plane of their contact. Areas with scuff marks, signs of overheating and wear are strictly unacceptable.
- We study in detail the condition of the disc spring, on the surface of which traces of the indicated defects are also unacceptable. The contact points of the petals of this part to the bearing device (“release”), which carries out the process of disengaging the clutch of the disc with the flywheel, must be in a single plane. No defects are appropriate in this case, and the discrepancy should not exceed 0.8 mm. If this parameter is not maintained, then a complete replacement of the clutch is necessary.
- Don't forget to inspect the spring support rings. It also excludes the presence of any defects.
- When, based on the completed set of testing manipulations, the fact of the need to replace certain elements of the clutch assembly or the entire assembly structure has been identified, then before starting work it will be necessary to monitor the characteristics of the movement of the driven disk along the corresponding section of the transmission unit shaft. If, during movement, the fact of jamming, jamming, or other aspects that do not allow free movement of the disk emerges, then these negative factors must be eliminated without fail. When achieving such a result is not possible, you should resort to replacing the entire list of defective parts.
- When carrying out the installation procedure, it is imperative to take into account the issue related to the correct installation of the driven disk in relation to the pressure component of the basket.
- First, we center the disk, using the mandrel we previously designated for these purposes. This will require careful consideration to ensure the element is positioned correctly in relation to the flywheel.
- Now we fix the basket directly to the flywheel using the bolts indicated here. We proceed by analogy with the dismantling procedure in terms of ensuring reliable retention of the flywheel from the risk of turning.
- Do not forget about the correct tightening of the basket fixing bolts. The procedure involves an algorithm of actions with uniform screwing of each of the fasteners. It is impossible to fully tighten one particular bolt, since such an action may cause the basket to skew, thereby causing incorrect operation and uneven wear of the clutch elements.
- The next step involves removing the previously installed mandrel from the corresponding recess in the center of the flywheel.
- After this, you can attach the transmission unit to the engine block.
- Now we mount the lower end of such a part as the clutch cable to the corresponding bracket on the gearbox housing, after which we carry out the previously indicated adjustment. Do not forget to install the compensation device in its original position, which will allow you to return the clutch cable to its original position. This procedure is necessary so that the compensation device, shifted to its lowest position, can signal to the owner that the disc is worn out. Replacement of the clutch cable in the LADA Granta has been completed.
Selection of components
The clutch life on Grants depends on the operating conditions in which the car is located, and therefore can have significant differences. When using the car sparingly, the clutch is changed after 100,000 km. One of the most common types of clutch installed by the Volzhsky Automobile Plant is LUK clutches.
As a rule, clutches are sold in the form of kits, which include a clutch disc and basket, as well as a release bearing. The approximate cost of clutches for Granta starts at 2,000 rubles and can vary significantly in a particular region.
To purchase an original kit and not a counterfeit, buy parts only in specialized retail outlets, based on real customer reviews, or order the kit directly from the manufacturer (for example, using the Internet). Sometimes clutches are assembled from components made by different manufacturers.
Reviews
| № | Positive |
| 1. | Vladimir: I have been successfully using the machine for two years now, there are no comments on the work. Investments are minimal, consumables, filters, oils. |
| 2. | Gennady: I attend every scheduled maintenance according to the schedule. The car is in good condition, the technician is carrying out computer diagnostics. Soon the mileage will be 90,000 km, I hope that repairs will occur after 105,000 km. |
| 3. | Vasily: at 60,000 km I replaced the cable, it started to creak, I didn’t lubricate it, I bought a new one. There are no more comments, everything works properly. |
| 4. | Ignat: I have no special complaints about the car. Of course, Lada is not ideal, but for the budget segment it is the best solution. |
| 5. | Dmitry: at 80,000 km I replaced the repair kit for the bushings on the clutch pedal, it started to creak. Additionally, I lubricated the cable. My recommendations to motorists. All work was carried out independently, without the help of service station workers. |
| 6. | Kirill: I replaced the clutch at 95,000 km, I think that this is a very good mileage for a domestic car. The installation process is not complicated, I did the work myself. Special thanks to the store manager for recommending quality spare parts. |
| 7. | Georgy: replaced the release bearing at 105,000 km, mileage as in the instructions. There are no problems with the engine, the car runs like a watch. |
| Negative | |
| 1. | Victor: my bearing fell apart at 50,000 km, it was replaced at a service station. After 10,000 km the cable creaked and was also replaced with a new one. The Granta model is crude, has many flaws, I do not recommend purchasing it. |
| 2. | Vyacheslav: over the past six months it has undergone unscheduled repairs twice. Initially, the basket flew off after a problem with the starter. |
| 3. | Kirill: despite the manufacturer’s warranty, the clutch basket has already flown for 60,000 km. Contacted the service for diagnostics and repairs. The manufacturing quality is low, the actual service life of the parts is lower than stated. |
Replacing the clutch cable
To replace the clutch cable, you will need to perform the following manipulations sequentially:
- unscrew the nut that secures the cable to the pedal assembly (it is located under the panel);
- remove the stopper from the braid pin;
- then use pliers to remove the locking clip;
- then remove the pedal axle;
- remove the pedal bracket spring;
- Use pliers to remove the tip stop;
- release the pedal from the cable end;
- Next, you need to remove the cable sheath seal from the engine compartment;
- pull the end of the cable connected to the fork towards you, and then remove it;
- dismantle the tip driver;
- dismantle the guide bushing;
- to complete the work, it will be necessary to pull the cable through the hole located between
- engine compartment and car showroom.
Before installing the cable, it is lubricated, and a small amount of machine oil is poured between its shell and itself. Install the cable, carrying out actions similar to its removal in the sequence directly opposite to dismantling.
When to change and how to check the clutch - its service life may have come to an end
Good day, dear car enthusiasts! Each of us is always concerned about how long this or that part or car system will last. It `s naturally. Especially considering the quality of some products, the “skills” of workers, etc.
This issue fully concerns the car’s clutch. Very often on motorist forums there is a serious question about when to change the clutch, and how to know when the time has come to replace it. So let’s try to figure out together what the actual service life of the clutch is, and whether it exists at all.
Is there a certain clutch resource?
Whether or not you will be upset when you find out that the manufacturer does not indicate specific figures for clutch service life. If, for example, in the brake system, it is clearly stated that the thickness of the brake disc should be such and such, then why is this not applicable to the clutch?
The fact is that clutch wear depends on many reasons, and first of all, of course, on how the driver changes gears and in what mode the clutch is used.
And while clutch disc thickness cannot be measured the same way brake disc thickness can be measured with a caliper, there are ways to measure it. There are two of them.
- The first way to measure the thickness of the clutch disc is with a special measuring gauge. This method does not require dismantling the clutch; it is performed on a lift. But you are unlikely to use it.
- the second method is simpler to implement and allows you to determine the wear of the clutch disc in order to replace it. Replacing the driven disk is a procedure provided by the manufacturer, because The driven disk is a consumable part. The check is carried out as follows: with the engine running, you need to put it in high gear, accelerate it, and if the car does not stall, this means that the driven disk is worn out and requires replacement. It must be remembered that such a check of the thickness of the clutch disc is not technologically correct, but it is effective and allows you to determine the condition of the disc extremely accurately.
As already mentioned, the life of any clutch is determined by its operating conditions. Without going into technical details of the interaction of clutch parts, you should understand that basically the life of the clutch and the wear rate of the discs depend only on the driver.
A clutch of the same quality and manufacturer can last 5,000 km for one driver, and 100,000 for another. Participation in drag racing, frequent slipping, abrupt starting at high speeds, ingress of foreign liquids and objects, unqualified installation and adjustment clutch - all this reduces the life of the clutch.
Clutch installation
Before you begin assembling the clutch, you must wash each removed element in kerosene. Then apply a thin layer of CV joint-4 lubricant to the guide sleeve of the release bearing and to the spline of the input shaft. The installation of parts begins with the release bearing, after which the clutch fork, spring and bushing are installed.
Next, the clutch is centered using a special frame inserted into the hole in the crankshaft end, while the driven disc is placed on the frame so that the protrusion located on the hub faces the gearbox. After this, the clutch basket is installed, and the centering frame is removed. Then you will need to install the gearbox in its proper place.
After installation, check and monitor the gear shifting process; they should turn on clearly, without clearly audible extraneous crunching sounds. In addition, ideally the car will move away without jerking.
Device and methods for adjusting the clutch of Lada Grants
The clutch is designed to connect and disconnect the gearbox and engine flywheel, smoothing out sudden changes in torque loads. The friction clutch allows the car to start and stop smoothly with the power unit running. If sudden braking is necessary with the clutch engaged, it slips, protecting the gearbox from possible overloads. In good condition, the mechanism should provide a reliable connection between the transmission and the power unit.