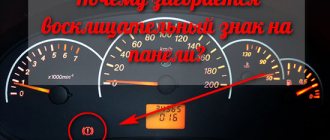
Hi all! Today I want to raise a rather current topic that, judging by the questions on the forums and the number of requests in search engines, worries a large number of people. I want to talk about a phenomenon where when you press the brake pedal, an exclamation mark on the dashboard lights up.
I will try to give a comprehensive answer to this question and explain why this happens and what kind of damage may be involved. Go!
Let me start, perhaps, with the fact that if a lamp (!) lights up on the panel, it means something is wrong with the brake system. As a rule, this indicator signals a low level of brake fluid (BF) in the system. As you can imagine, faulty brakes are no joke and the problem needs to be addressed. I’ll say more, if anyone doesn’t know, OPERATING A CAR WITH A BURNING INDICATOR (!) IS PROHIBITED! Since you don’t know what’s wrong and what caused this error to appear on the dashboard.
Why does the exclamation mark (!) light up on the instrument panel?
At the moment when the car brakes, the brake cylinders are pushed forward as much as possible, thereby acting on the pads. At this time, the cylinders are filled with the required amount of brake fluid in the system, and its level in the reservoir drops. It is for this reason that a similar exclamation mark lights up on the instrument panel, informing the driver about the minimum level of brake fluid in the reservoir, and accordingly in the system as a whole.
The following two tabs change content below.
- About the expert:
All my life I have been surrounded by cars! First, in the village, already in the first grade, I was rushing around on a tractor through the fields, then there was JAVA, then a penny. Now I am a third-year student at the Polytechnic Faculty of Automotive Engineering. I work part-time as a car mechanic and help repair cars for all my friends.
Video with an overview of all warning lamps on the VAZ-2112
Reasons for appearance
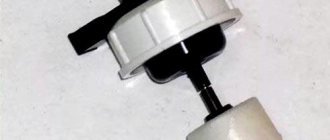
If such an indication occurs, first of all we check the sensor itself , which is located in the brake fluid reservoir. It is a float that actively interacts with the brake fluid.
When the float is dismantled, it must be put away on a rag.
In order to check its serviceability, it is necessary, with the engine running, remove it from the tank body and manually change the position of the float. If the indication on the instrument panel does not disappear and does not react in any way depending on the influence on it, then the sensor is faulty and needs to be replaced.
However, if the sensor is working properly, there may be a brake fluid leak.
Where might brake fluid leak?
It is very easy to find out whether the required level of brake fluid is in the system, since it can be seen visually through the brake fluid reservoir. Its level should always be closer to o , and if it is significantly less, or its level has dropped, then a leak is possible.
Brake cylinder
The front brake cylinder is leaking
First of all, inspect the brake cylinders on all wheels for leaks.
As a rule, leaks most often occur on the rear drums due to their excessive overheating. It is not difficult to notice a leak on the cylinders, since in the case of the front cylinder, the leaks will be noticeable on the caliper, and on the rear, it can drip directly from the drum. Problems with these elements usually arise during the cold season.
Brake hoses
The brake hose has cracks.
It is also very easy to determine the presence of ruptures or cracks in brake hoses, since this is all visible to the naked eye. Most often, they crack at bends or due to friction with adjacent elements of the car body.
Master brake cylinder
Traces of brake fluid are clearly visible on the body.
When inspecting the brake master cylinder, inspect its external condition for visible leaks.
The main place where a rupture can occur is the rubber seal located closest to the vacuum booster.
Location of the vacuum brake booster and master cylinder
If a leak occurs, brake fluid will drip onto the gearbox housing and then onto the CV joint on the left side. This is easy to notice, and only then proceed to replace it.
- If you find any of the above elements to be faulty, it must be replaced immediately. Since the operation of the car with such malfunctions is impossible.
- After the brake system element has been replaced, be sure to bleed the brakes, as air will accumulate in the system during the work.
SIGNS AND REASONS OF “ADJUSTMENT”
Engine trouble: what is it, and what are the signs to identify this malfunction? You can understand that the internal combustion engine is malfunctioning by the following signs:
- At idle speed, the engine operates unevenly, jerking periodically;
- The car does not develop the required power when driving;
- The car drives jerkily, when you press the gas pedal, there are gaps in operation;
- The exhaust from the muffler is uneven, with interruptions, pops and shots are possible;
- Fuel consumption increases.
There are many reasons why an engine misfires. There are such nuances that even experienced technicians do not immediately determine the nature of the malfunction. But the most common cylinder failures are the following (starting with the elementary ones):
- The candle does not work;
- The high-voltage wire is broken;
- The ignition coil has failed;
- The control unit is faulty;
- There is an air leak in the intake manifold;
- Exhaust valve burnt out;
- The cylinder head gasket is broken;
- The compression rings on the piston are broken,
- The piston itself has burned out, or the bridge on the piston between the compression rings has burst.
This article is about the VAZ 2114 car, so carburetor malfunctions are not considered, since this device was not installed on the 2114 model. This brand of car has a fuel system with distributed injection (injector), and the answer to the question of why the engine stalls may be hidden in this system.
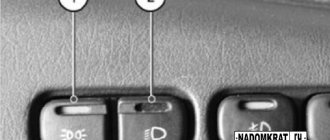
How the icons on the dashboard work
To understand what is happening with the car, first the car owner needs to understand how the icons on the instrument panel (pictograms) work and how they signal malfunctions.
On different cars, many different icons may be displayed on the instrument panel, informing the driver about the functionality of a particular system. This includes a braking system, an anti-lock braking system, a motion stabilization system, a battery charging system, an airbag system, a tire pressure monitoring system, and auxiliary systems such as cruise control.
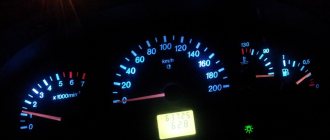
Every time you start the engine, all the icons on the instrument panel should light up and go out after a second or two - thereby showing that the bulbs in the icons have not burned out, the icons themselves are operational, and the systems that are monitoring are operational. If, when starting the engine, all the icons go out, but one or two remain on, it means that the system they are monitoring requires checking.
Sometimes icons may appear on the instrument panel while the vehicle is moving. Most often, this means that the car requires urgent intervention from servicemen and the driver needs to urgently stop and turn off the engine.
Also, on some car models, the “exclamation mark” icon may not be constantly lit, but periodically light up and go out – “blink”.
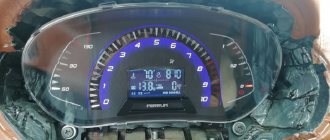
Briefly about the device
The 2114 instrument panel is an information block, a combination of digital and analog instruments that displays information of the following nature:
- engine operating mode (tachometer);
- current speed mode (speedometer);
- current mileage (odometer);
- active optical devices (side lights, headlights, direction indicators);
- parking brake mode;
- fuel level;
- oil temperature;
- other indication.
You can read more detailed information about the designation of icons on the dashboard in the material of our specialist.
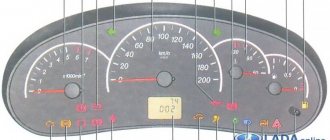
The “tidy” on the Lada Samara-2 generation has a standard design. Four analog instruments with white scales: speedometer, tachometer, engine temperature and fuel level indicators. Other information is read using multi-colored indicators and two monochrome displays located at the bottom of the unit.
Moreover, among motorists there are discrepancies in the interpretation of the concept of “dashboard”. Many consider this to be not only the information display, but also the central console, on which the controls for lighting, climate system, etc. are located. We will differentiate these concepts.
What does the exclamation mark on the VAZ instrument panel mean?
The exclamation mark on the instrument panel is a “brake failure” indicator. When the ignition is turned on, it lights up in red and goes out after the engine starts. If after starting the indicator does not go off and intermittent sound signals from the buzzer are heard (5 repeated on/off times of 0.5 seconds each) , then first of all you need to look under the hood and see what level of brake fluid is in the expansion tank of the hydraulic brakes (usually the tank is located on the master brake cylinder or connected to it by a tube). If necessary, add brake fluid to the required level, check if the float rod is stuck in the cover and restart the engine. If this does not help, it is better to contact a certified service station (which you trust more). And with a constantly burning warning light, operating the car is prohibited (for your own safety).
add to favorites link thank
The husband says this sign means the most increased attention for others, but he pays the greatest attention to the “woman’s shoe” sign and therefore he slowly and rapidly moves away from this car. But when he drives around the car and sees a blonde behind the wheel: she or on the phone says, or she paints her lips, or she has a tablet all over the steering wheel and she’s currently in contact - then it just explodes and blurts out “CHICKEN” - she needs to look at the road, and not take care of herself. How many of these madams then end up on the road in an accident and stupidly not understanding how this happened. Ladies of the road do not need your beauty, she needs your attention.
add to favorites link thank
This question comes up quite often on car enthusiast forums. If we summarize everything that has been said, the conclusion will be this: the manual says that this indicator indicates wear of the brake pads, but in practice it turns out to be a little different: just add brake fluid and the sign disappears.
Here is a literally verbatim quote:
Tires
First of all, pay attention to the compliance of the brand of the selected tire with the weather conditions. Do not console yourself with the thought that all-season tires will allow you to fully move in winter - this has long been a refuted belief.
Remember that traction on the road surface depends on tires, and therefore braking distance and handling.
Pay special attention to the age and tread depth of your tires. The value of the latter should not be less than 1 mm, since otherwise there is a high risk of aquaplaning or skidding even in light rain due to impaired drainage in the tread
The presence of so-called “bumps” - local swellings indicating that the tire may burst at any moment, cracks characterizing the age of the rubber itself, as well as the presence of protruding steel threads - cords - is unacceptable. All these indicators clearly indicate the need to quickly replace the entire set of tires, since installing tires with varying degrees of wear, especially on one axle, is unacceptable.
As a rule, there are special indicators on tires, by which you can estimate the percentage of their wear; it is made in the form of several colored stripes on the working surface, the gradual abrasion of which allows you to plan timely replacement.
Thus, by following these simple recommendations, you will not only ensure the safe operation of your car, but also prevent possible expensive repairs.
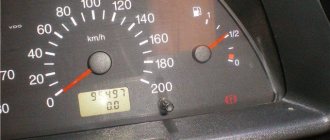
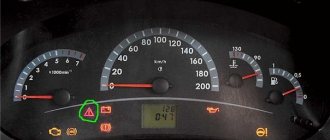
Why is the exclamation mark on the instrument panel of the VAZ-2112, what should I do?
Car : VAZ-2112. Asks : Sergey Smirnov. The essence of the question : An exclamation mark lit up on the instrument panel of the VAZ-2112, I don’t understand why?
Good afternoon I sometimes get an exclamation mark in a circle on my dashboard, most often this happens when braking! Please tell me what could be the reason and how to solve it?
- Thank you
- I do not like
logunoff 05 Jan 2010
I have a VAZ 2112 2001, please explain how the low brake fluid level lamp (exclamation mark on the instrument panel) is connected to the starter and ignition switch. The problem is that this light comes on when you start the car, i.e. when the starter works, then immediately goes out when the car starts. When the handbrake is raised, this lamp does not light up, although it seems like it should. What is the reason for this phenomenon? the problem is in the wiring. in the ignition switch. or starter.
Attached images
DTUZh is out of order
We looked at the fluid level in the reservoir, made sure that neither the reservoir nor the hoses were leaking, and there were no puddles of brake fluid under the car. We suspect a malfunction of the brake fluid level sensor (BLLS). This sensor is located in the reservoir of the master cylinder (GTC). To check it, you need to turn on the ignition and make sure that the lamp lights up. Then we disconnect the connector from the sensor to de-energize it. If the exclamation mark goes out, then the problem is most likely in the sensor, or rather, in the float, which sinks to the bottom when there is a normal amount of liquid in the container. By the way, the operation of the sensor is checked with a float: press the rubber seal on the lid, forcing the float to fall down. In this case, if the control device is working, the exclamation mark should light up. Conversely, if the sensor is not working, the warning signal will not light. The DTU cannot be repaired. If it is not working, you will have to buy a new one and install it. The price of the part is 150-250 rubles.
After making sure that the sensor is in order, you should check the electrical wiring. That could be the problem too. The wiring is checked as follows: first, the DTSZ is disconnected from the power supply, then they take a copper wire and connect it (close) the sensor power contacts on the wiring, and not in the sensor itself. If the exclamation mark lights up, the problem lies in the wiring. Arm yourself with a multimeter and ring the wires, check the contacts. Or contact an electrician for help.
“Crickets” have taken up residence in the cabin
At the time of the last report, nothing foreshadowed the appearance of extraneous sounds in the cabin, but closer to the 30,000 km mileage, a whole horde of “crickets” settled in the area of the central tunnel. Usually, extraneous sounds appear in the cold season, but ours made themselves known even when the temperature outside was above zero. Many Cret owners complain about similar symptoms. Everyone has their own recipe for solving a problem. Some go to the dealer and insist on eliminating extraneous sounds under warranty. Others disassemble the console themselves and glue all potentially problem areas with a special material like biplast. Some people just turn up the music louder. Each method definitely has a right to exist.
Device firmware
If a hard reset does not help, a complete software replacement is required. But there is a formality here: the firmware will only help if the “USB Debugging” function has been enabled in the device settings. This method is quite risky and the slightest violation of the instructions can lead to damage to the device.
Here it’s worth thinking about: should you try to restore the device yourself or trust the professionals? But if you decide to flash the gadget yourself, you should carefully study all the available information on this issue. Models from different manufacturers have significant differences and features regarding software changes.
In general, the process of replacing software looks like this: download the file with the firmware, study installation information, read reviews about this firmware version. Next, the file should be unpacked into the root directory of drive C and, if necessary, install drivers for the gadget. After this, the device must be turned off and using a key combination (usually a combination of the power button and volume up) switched to firmware mode. Then you should connect the device via cable to the computer and follow further instructions of the program. At the end of the process, you must perform a hard reset using the engineering menu.
Hard reset
This action is carried out in the device’s engineering menu and allows you to return the smartphone or tablet to its original settings, which is very useful when the android lies with an exclamation mark. A special engineering menu is called up by pressing certain buttons, but there are some difficulties here. Models from different manufacturers have different key combinations. There is a certain sequence in calling the engineering menu.
The device must be turned off. It is best if the battery is fully charged. For most gadgets, the following combinations of buttons to open the menu are suitable:
- The Volume Down key (or Volume Up key) is pressed and held together with the Power button.
- Both sound control keys are pressed and held, and then the power key is pressed.
- 3 buttons are held simultaneously: main screen, volume up and power.
- The Home key is pressed together with the sound control key down, then the Power key is pressed. You must wait until the manufacturer's splash screen appears and release the Power button. After the robot image appears on the screen, you can release everything and wait for the engineering menu to appear.
- Press and hold the power button for 2 seconds, then hold down the sound control keys and the power button and hold until a special menu appears.
After this, the gadget will either restart and return to factory settings on its own, or an engineering menu will appear. For your information, in this mode the touch screen does not work, all menu navigation is carried out using the sound control keys, and the selection button is the power key or the Home button. You must select “Wipe data/Factory reset”.
Replacing lamps
In previous posts we figured out how to remove the instrument panel on a Priora. There is no point in writing again, go ahead, read, film. This post is only about replacing lamps.
The instrument panel is illuminated by five lights. Bulbs are very easy to change. We take the base and turn it counterclockwise. You will feel the base with the light bulb come out of the seat.
Install the lamps in the reverse order. We insert the base with the lamp instead of the seat and turn it clockwise until it locks.
Video lesson
Experienced and experienced people may not read further, since this entry is for “dummies” like me, who are faced with replacing light bulbs in the dashboard for the first time. My light bulb for illuminating the coolant temperature and the amount of gasoline in the tank went out. The right side of the speedometer periodically went out and then came back to life on its own.
To replace, you will need a Phillips screwdriver, a thin flat-head screwdriver and 5-7 minutes of free time. It is better to take a shortened one (cross), as it is more convenient for it to operate in a limited space. Unscrew the 2 screws from the top.
Remove the panel under the steering column (simply snap off the top, turn the 3 plastic fasteners from the bottom). If you had to change fuses, then removing the panel will not be difficult. We see 2 more bolts (one on the left, the other on the right)
Unscrew them (be careful with the washers - they fly off quickly)
Next, remove the decorative trim that we unscrewed. Lower the steering wheel to its lowest position and pull out the trim. There is no need to remove the steering wheel!
Next we see 2 more fasteners (left and right), which secure the instrument panel itself.
We unscrew them carefully, as washers and screws can fall deep into the torpedo
Afterwards, you can pull the instrument panel towards you a little to gain access to the wiring harness and block. When you are already skilled in this matter, you will be able to change light bulbs without disconnecting the cable.
We see a green block at the back of the panel. It's easy to disconnect, but it's inconvenient the first time. Lightly press the stop tab with a screwdriver and pull the black lever up. The plug will come out of the socket on its own.
Let's take out the panel and see the mounting sockets for the light bulbs. Turning slightly counterclockwise, we pull out the burnt out light bulb. We install a new one. We reassemble in reverse order.
I bought the light bulbs completely assembled (lamp + socket), but some craftsmen replace burnt-out light bulbs, leaving the old socket. I decided to try a diode light bulb to have an idea of whether all the light bulbs should be replaced with LED ones. The diode lamp is slightly longer. Thus, it is closer to the filter and gives a light spot in the illumination area (the center is lighter, the edges are darker). The diode light bulb shines with a cold white light, which is noticeable through the light filter - the green has become brighter, more juicy. For now, I’m happy with the soft green light that came with warm incandescent lamps, so I won’t install diode lamps.
It turned out that the light on the right side of the speedometer was going on and off because it had burned out. But the shaking caused the filament to short circuit and burn again until the next bump “tears” it apart again. The lamp was replaced. I also bought some spare parts)))
Unfortunately, numerous car components can sooner or later fail, so car owners have to replace them. If the lamps on the instrument panel burn out in a Lada Priora or any other car, you can cope with this breakdown without the help of service station employees, which will save a lot of money. We will analyze how to change the light bulbs on the Priora’s instrument panel correctly and step by step in this article.
Experts strongly recommend replacing the failed component as quickly as possible, because it is these elements that warn car owners about the occurrence of a malfunction, which must be dealt with immediately. According to experienced drivers, it is better to replace not just one failed lamp, but the entire set at once, since the service life of these elements is approximately the same. If the first lamp burns out, you won’t have to wait long for the subsequent lamps to fail.
The fifth door is still rusting
You have repeatedly asked us about the condition of the fifth door of the editorial car - and we have repeatedly answered that everything is in order. Now the situation has changed. There are still no hot spots visible to the naked eye, but after a thorough inspection of the door during the preparation of a large investigative material, we still found four barely noticeable areas with swollen paintwork. The diameter of the largest is about 5 mm.
Unfortunately, Hyundai officials chose to refrain from commenting here too, although the problem is somewhat more serious than peeling steering wheels. We hope that this is just a desire not to wash dirty linen in public and that measures to eliminate the reasons for such low corrosion resistance of the fifth door will be taken in the near future. Or have already been accepted. As soon as new details appear, we will definitely tell you about everything.
Messages 18
1 Topic by 4istoff 2016-01-28 07:37:04
- 4istoff
- New member
- Inactive
- Registration: 2015-12-13
- Messages: 85 Thanks : 7
- Car: VAZ 2111
Topic: Resolved: Starter won't turn over, exclamation mark just lights up on dashboard
Hi all! When I try to start the car, an exclamation mark on the dashboard lights up (!) and the starter does not turn (((it starts fine from the pushrod. What is the problem? Thank you.
2 Reply from Slag 2016-01-28 08:03:56 (2016-01-28 08:09:29 edited by Slag)
- Slag
- Participant
- Inactive
- From: Dnepropetrovsk
- Registration: 2014-04-23
- Messages: 146 Thanks : 43
- Car: 2111 1.5 16kl. 2002
Re: Resolved: The starter does not turn, an exclamation mark just lights up on the panel
Try turning the starter by closing the contacts on it with a screwdriver. [video] Measure the voltage on the battery, maybe it's dead...
3 Reply from 4istoff 2016-01-28 08:26:47
- 4istoff
- New member
- Inactive
- Registration: 2015-12-13
- Messages: 85 Thanks : 7
- Car: VAZ 2111
Re: Resolved: The starter does not turn, an exclamation mark just lights up on the panel
The battery is fine, I'll try to close it now. The immobilizer cannot be modified?
4 Reply from Slag 2016-01-28 10:20:40 (2016-01-28 10:22:37 edited by Slag)
- Slag
- Participant
- Inactive
- From: Dnepropetrovsk
- Registration: 2014-04-23
- Messages: 146 Thanks : 43
- Car: 2111 1.5 16kl. 2002
Re: Resolved: The starter does not turn, an exclamation mark just lights up on the panel
With the immobilizer active (mine is activated), the starter turns, but does not engage the engine, since there is no connection with the ECU. So it's not about him. If it starts with a screwdriver, I think it’s worth digging towards the ignition switch and the wiring from it..
5 Reply from 4istoff 2016-01-28 10:29:54
- 4istoff
- New member
- Inactive
- Registration: 2015-12-13
- Messages: 85 Thanks : 7
- Car: VAZ 2111
Re: Resolved: The starter does not turn, an exclamation mark just lights up on the panel
Or maybe the starter is frozen? Damn, what's the matter?((
Added: 2016-01-28 11:29:54
And how can you understand why the “(!)” icon on the right side of the dashboard lights up when you turn the key to the starter position? Then when you release the key, does this icon go out? What the hell is this?
6 Reply from Slag 2016-01-28 11:03:53
- Slag
- Participant
- Inactive
- From: Dnepropetrovsk
- Registration: 2014-04-23
- Messages: 146 Thanks : 43
- Car: 2111 1.5 16kl. 2002
Re: Resolved: The starter does not turn, an exclamation mark just lights up on the panel
In general, as far as I know, it should light up when you turn the key to “Start”. Read here.. similar topic: autolada.ru/viewtopic.php?t=293907&start=25
7 Reply from lex0589 2016-01-28 11:11:06
- lex0589
- New member
- Inactive
- Registration: 2016-01-26
- Messages: 31 Thanks : 8
- Auto: 21102
Re: Resolved: The starter does not turn, an exclamation mark just lights up on the panel
Clean the mass that goes from the battery to the engine (a thick harness, but it’s better to clean everything) and clean (check) the positive contacts on the starter. I had such crap - the mass was to blame.
8 Reply from Admin 2016-01-28 11:28:13
- Admin
- Administrator
- Inactive
- Registration: 2012-02-20
- Messages: 3,257 Thanks : 624
Re: Resolved: The starter does not turn, an exclamation mark just lights up on the panel
In general, as far as I know, it should light up when you turn the key to “Start”. Read here.. similar topic: autolada.ru/viewtopic.php?t=293907&start=25
better here https://xn--80aal0a.xn--80asehdb/do-my-s ... rutit.html the diagram and table are the same for all cars
9 Reply from 4istoff 2016-01-28 16:23:07
- 4istoff
- New member
- Inactive
- Registration: 2015-12-13
- Messages: 85 Thanks : 7
- Car: VAZ 2111
Re: Resolved: The starter does not turn, an exclamation mark just lights up on the panel
Found out something. I cleaned all the wires and contacts, but it didn’t help; I started it with a screwdriver. From the negative terminal of the battery there are two wires, a thick one for the engine and a thin one for the body, so if you unscrew the thin one from the body, the starter starts to turn, but the car won’t start, it won’t even start. screwed it back again everything was as it was, an exclamation mark on the tidy and silence ((
10 Reply from Slag 2016-01-28 16:28:16
- Slag
- Participant
- Inactive
- From: Dnepropetrovsk
- Registration: 2014-04-23
- Messages: 146 Thanks : 43
- Car: 2111 1.5 16kl. 2002
Re: Resolved: The starter does not turn, an exclamation mark just lights up on the panel
And when you turn the key, when the exclamation mark is on, the instrument lights come on and the other lights dim?
What to do if problems arise?
ABS icon is on
If the brake system malfunctions, first check the brake fluid level and the integrity of the brake hoses.
- In the first case, it is worth rebooting the on-board computer, if there is one, or simply diagnosing the entire electronic system in a car service center or using special devices.
- In the second case, you just need to pump up the tires and check the integrity of the tube.
- In the third situation, try removing the terminals from the battery, and if this does not help, then you need to go for diagnostics.
- In the fourth case, it is worth checking the brake pads, ABS connections and the unit itself for moisture.
- The last sign should be taken very seriously. First of all, check the brake fluid level. If it is normal, then the reason may lie in worn brake pads. It will be much worse if the brake hose has been damaged somewhere, or the wire leading to the brake pads has broken; in such situations, you should contact a car service center as quickly as possible. You can also try to check the wire yourself, smoothly and effortlessly lift the handbrake, and if there is a feeling that it is simply hanging on a stick, then this is definitely a broken wire.
REASONS FOR UNSTABLE OPERATION OF MOTOR 2114
Let's consider several standard situations that can happen with an 8-valve 4-cylinder engine.
UNSTABLE OPERATION ON A COLD ICE
It often happens that a VAZ 2114 stalls when cold, but as it warms up the engine levels out and starts working stably. There could be several reasons:
- The ECU sets the fuel mixture too rich to cold;
- The spark plug does not work, but when heated, the spark plug still “breaks through”;
- The high-voltage wires are damp or moisture has entered the ignition coil;
- Parts of the piston group are worn out.
UNSTABLE OPERATION OF A HEATED ENGINE
It also happens the other way around - a cold internal combustion engine operates more or less steadily, but as it warms up it begins to throttle. Usually the engine starts when hot because:
- The cylinder head gasket has burned out;
- The ignition coil breaks;
- The engine control unit is faulty.
THE MOTOR STARTS AT IDLE SPEED
Most often, a situation arises when the engine stalls at idle speed. Moreover, it makes no difference whether this happens when it’s cold or when it’s hot. There can be many reasons for this, ranging from a simple spark plug failure to malfunctions in the piston group of the internal combustion engine. While it is very easy to replace a spark plug, wear on the cylinders in the block can lead to a major overhaul.
Most often, the engine does not operate stably at idle in the following cases:
- The valves are not adjusted (clamped);
- The timing belt is installed incorrectly (the marks do not match);
- The IAC is faulty;
- The cylinder head valves are bent or burnt out (the valves can bend during a water hammer when a large amount of water gets into the air filter housing);
- The piston burned out;
- There is a malfunction in the electronic engine control system. The sensors, the ECU itself, electrical wiring and I/O wires may be to blame here.
There are many options for why the car idles at idle, but there are still the most basic ways to determine faults.