If you need reliable advice, contact me and my workshop buddies. My guys have many years of experience behind them, and the company’s service center checks the quality of power steering oil changes, as well as the direct implementation of such a service at an affordable price. And today I will tell you how you can do it yourself.
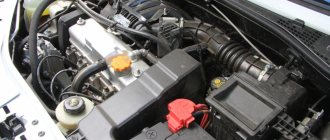
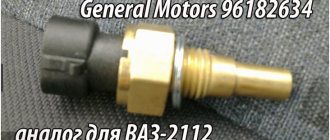
The VAZ 2114 sensor looks like this:
Knowing this will help you when replacing the sensor in your “swallow”.
Fluid replacement: Replace the spare - if it is faulty or has reached its usage limit. Find out useful information about the oil pressure switch.
Sensor repair and replacement
During maintenance and repair, the surface near the sensor mounting hole is cleaned, and consumables, including the liquid gasket, are replaced. Do not use sharp objects when cleaning to avoid damaging components. If the diagnostics showed that the cause of the malfunction was the sensor itself, then the entire component is replaced.
To install a new part, follow these steps:
- Remove the bottom engine cover.
- Disconnect the sensor connector and remove the component.
- Remove the old liquid gasket from the sensor and its mounting hole.
- Apply a small amount of liquid gasket to the threads of the service sensor and install it.
Engine control circuit for VAZ 2111 (January 5.1, Bosch M1.5.4N)
- Fragment of the mounting block;
- Electric engine cooling fan;
- Automotive anti-theft system status indicator;
- Automotive anti-theft system control unit;
- Coolant temperature sensor;
- Air flow sensor;
- Throttle pipe;
- Block connected to the throttle position sensor;
- Block attached to the idle speed control;
- Controller;
- A block connected to the air conditioner wiring harness;
- Oxygen sensor;
- Knock sensor;
- Crankshaft position sensor;
- Speed sensor;
- Adsorber;
- Accumulator battery;
- Main relay;
- A block connected to the anti-lock brake system wiring harness;
- Diagnostic block;
- Main relay circuit protection fuse;
- Controller protection fuse;
- Fuse for protecting the electric fuel pump and its relay;
- Relay for turning on the electric fuel pump;
- Electric fan switch relay;
- A block connected to the instrument panel wiring harness;
- A block connected to the instrument panel wiring harness;
- Ignition module;
- Electric fuel pump with fuel level sensor;
- Spark plug;
- Injectors;
F — Front harness wire going to the “B+” terminal of the generator; G - Front wiring harness wires.
The order of conditional numbering of plugs in blocks:
A - Controller; B — Control unit of the automobile anti-theft system; B — Indicator of the status of the automobile anti-theft system; G - Pads 26; D - Throttle pipe; E - Air flow sensor; F - Electric fuel pump and oxygen sensor; 3 — Speed sensor; And - Ignition module.
Purpose of plugs in block 26:
- To the low-voltage tachometer input in the instrument cluster;
- —
- To the engine management system control lamp in the instrument cluster (from the controller);
- To the dome light switch located on the driver's door pillar;
- To the engine control system control lamp in the instrument cluster (+ power supply);
- To the trip computer (fuel consumption signal);
- To the instrument cluster (vehicle speed signal);
- To terminal “15” of the ignition switch (plug 4 of the switch block)
How to replace it with a VAZ 2114
Sensors fail when the sensor light flashes or stays on when the pressure, if acceptable, or when the pressure gauge is at zero.
Remember that the internal combustion engine of any machine, without exception, depends on oil to operate. Pressure is used to create a layer between moving parts. This level of protection prevents moving parts from contacting each other. Without this layer, excess friction and heat occurs between the parts.
Simply put, a lubricant is designed to protect both lubrication and cooling. To provide this oil under pressure, the VAZ 2114 engine has an oil pump that collects the lubricant stored in the oil pan, creates pressure and delivers the now pressurized oil to several places inside the engine through passages built into the engine components.
The ability of such a fluid to perform these functions is reduced for several reasons. The engine heats up when running and cools down when switched off. This thermal cycle causes the oil to lose its ability to lubricate and cool the engine over time. As oil begins to break down, it creates small particles that can clog the oil galleries. This is why the oil filter is tasked with pulling these particles out of the oil and why oil change intervals exist.
To a lesser extent, the sensor/indicator can be used to inform the driver about the status of the lubrication system. As the oil begins to break down, pressure can drop. This pressure difference is detected by the oil pressure sensor and transmitted to the pressure gauge or warning light in the instrument cluster. The old rule of thumb for oil pressure was 5-7 kg per square inch of oil pressure for every 1000 rpm.
Now I’ll tell you how to replace a VAZ 2114 sensor. There are minor differences between different car manufacturers and models, but this article is written in such a way that it can be adapted to perform such work.
Why doesn't the light go off?
The main advantage that all level sensors have is their low price. Therefore, if the malfunction indicated by a burning indicator occurs in this particular element, then there will be no problems with replacing it. However, in many cases, the light on the dashboard “informs” of more serious problems.
The main reasons why the indicator lights up include the following:
- The signal transmission mechanism from the sensor has failed.
- Damage has occurred in the wires that connect this element to the vehicle’s on-board electronics.
- Low oil level.
- Oil pump malfunction.
- Dirty filter.
The greatest difficulties arise in cases where the indicator signals the last two faults. If a breakdown occurs in the fuel pump, or the filter is clogged, then either not enough lubricant is supplied to the engine, or the material has a lot of harmful impurities. As a result, the engine will fail quite quickly, since the fluid does not reduce the friction of the components of the power unit.
Part 1 of 1: replacing the sensor
- Sensor socket is optional.
- Screwdriver Set.
- Set of towels/rags.
- Thread sealant - if necessary.
- Set of wrenches.
Sensor installed during engine purging.
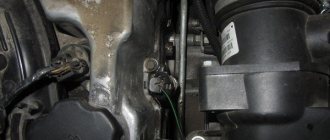
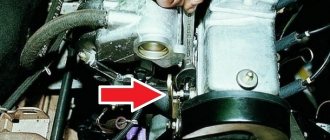
Step 1: Find the sensor. The sensor is most often installed in the VAZ 2114 engine block or cylinder heads.
There is no real industry standard for position, so sensors can be installed in any number of locations. If you can't find it, you may need to consult your 2114 repair manual or contact a professional repair technician.
Photo gallery
1. Schematic principle of operation of the DDM on Chetyrka
2. DDM with a dial indicator for displaying into the car interior
3. Scheme of operation of the device on Chetyrka
Loading...
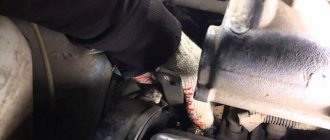
Mechanic disconnects sensor
Step 2: Disconnect the sensor electrical connector. Release the locking tab on the electrical connector and carefully pull the connector out.
As the sensor is exposed to operating elements under the hood, contaminants can build up around the plug over time. It may be necessary to push and pull the plug several times to release it when removing the latch.
Note. In some situations, a small amount of lubricant may help disconnect the electrical connector. You can also use a small screwdriver to carefully pry the connector out. Be careful not to damage the electrical connector when removing it.
What to do if the light comes on after replacing the DDM
It must be taken into account that when the engine starts, the oil pump pumps fluid from the crankcase to the main line. At the time of pumping, all liquid is forced to pass through a special filter, whose task is to remove contaminants.
Sometimes it happens that dirt remains on the crankcase, which clogs the filter. Due to this problem, the pump will not be able to fully operate and supply the required amount of liquid. If you encounter this situation, then you will need to drain all the existing oil from the crankcase and replace it with new one. Don’t forget about the filter itself; it will have to be replaced with a new one or simply cleaned.
Good day everyone, such a disaster happened. I went with my girlfriend to IKEA, got there, bought groceries, everything was fine. We were already heading back, we got stuck in a traffic jam, the temperature was rising, and then out of the corner of my eye it seemed like something, but the light on the oil pressure gauge blinked. ok, screw it, let's go. and then I notice that it regularly begins to blink, and then lights up completely. I’m in a panic, I brake, I smoke, the engine cools down, I start it, it doesn’t light up.
I'm moving on. only the temperature reaches 90C and it begins to burn. and it only has to do with it at idle, when you give it gas it stops.
In general, having arrived home, I started using the Internet and was already completely upset, who wrote what and at least it was necessary to remove the oil pan, and I just changed the oil (
what I tried to do:
- added oil. - tightened the filter - revved it up to 3500 thousand when cold (they wrote that debris can get into the valve and with such manipulation of the oil flow it is washed out because the oil is thicker when it’s cold.)
nothing helped.
the next day I decide to start small, go to the store and buy DDM.
I open the hood, look at the old one and see a drop of oil under the rubber cover. and in the hope that it is the problem, and not the liners, oil pump, etc.
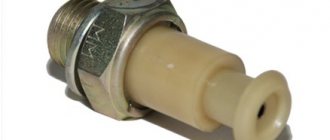
Removing the sensor using a connector
Step 3: Remove the sensor. Use a suitable wrench or socket to loosen it. Once released, it should be possible to unscrew it completely by hand.
Step 4: Compare the replacement device with the removed one. This is determined by the internal design, but the physical dimensions must be the same. Also, make sure that the area being threaded has the same diameter and thread pitch.
Warning: Since the sensor is installed in an area where oil will be under pressure, it is usually necessary to have some type of thread sealant. There are several different types of sealants, as well as a number of liquids, pastes and tapes that can be used. Just be sure to use one that is compatible for use with petroleum-based products.
Step 5: Install a replacement sensor. Screw the replacement into place by hand until you can no longer turn it by hand.
Step 6: Reinstall the electrical connector. Make sure the connector is fully seated and that the latch is engaged.
Step 7: Check for proper operation. Start the engine and make sure there is pressure on the pressure gauge or the oil pressure warning light goes out.
Warning: It may take 5-10 seconds for pressure to return. This is due to the fact that when removing the sensor, a small amount of air enters the system, which must be purged. If no oil pressure is observed during this time or the indicator does not go off, turn off the engine immediately. Also, if any strange noises occur during this time, turn off the engine and contact a professional.
Features of diagnostics
Before carrying out diagnostics, it is recommended to conduct a visual inspection of the device for damage to the controller housing, stains from fluid leaking from the motor and other changes. If oil traces are detected, you need to make sure that the malfunction is in the sensor; inspecting the power unit will help make sure of this. When consumables leak from the regulator, the cause of the problem is related to wear on the seal. And if oil dripping occurs from the terminal connectors, you cannot do without replacing the controller.
To more accurately determine malfunctions during the operation of the device, diagnostics using a voltmeter will help:
To do this, you will need a pit or overpass and follow the following instructions:
- unscrew the bolts securing the protective coating of the unit;
- dismantle the protection;
- if DDM is detected, start the engine;
- disconnect the power cord from the device;
- use a tester to diagnose the voltage (voltage norm is 12 volts).
If the voltage is low, the cause of the malfunction is the display unit or the contacts of the electrical circuit, as well as its break.