Lada Priora belongs to the small class of VAZ passenger cars; production of the model range lasted 11 years, the last car rolled off the assembly line in 2022. A modern car is equipped with an ECU, so the oil level is checked by the controller. Checking with a probe remains as a method of additional control.
The Priora oil pressure sensor belongs to the lubrication system of the internal combustion engine, has a factory article number 21083–3839210–03, 21083–3839210 and is a common consumable that the driver has to change every 1.5–2 years.
What you need to know about DDM?
The regulator in question is an important element of the lubrication system of the Lada Priora car, equipped with an electronic control unit (video author – SoftFelix).
Purpose and location
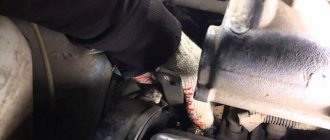
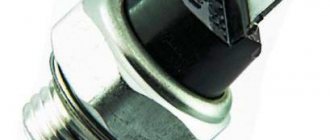
The indicator is designed to warn the driver of insufficient oil pressure. It is located on the engine cylinder head near the oil filter under the exhaust manifold. To carry out diagnostics, the device must be removed.
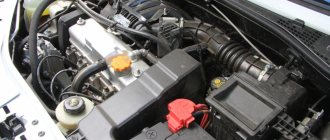
Location in the engine compartment
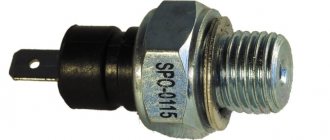
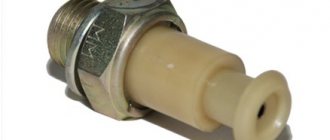
The operating principle of the device is simple. Under pressure, the membrane gasket bends and changes its shape. It acts on contacts that close or open.
Device operation diagram
Typical malfunctions and methods for their elimination
If the oil pressure warning light does not come on when the ignition key is in the “on” position, the following malfunctions are possible:
- broken wiring;
- the light bulb burned out;
- the regulator is faulty;
- bad contact.
A broken wire is looked for using a test light and repaired by replacing the damaged wire. The burnt out light bulb is replaced with a new one. To eliminate the cause of poor contact, you need to clean the connections and check the reliability of the wire connections. A faulty regulator should be replaced.
DDM on Lada Priora
Design Features
The oil pressure sensor on a Priora with an engine with 16 and 8 valves is located under the exhaust manifold pipe on the cylinder head, on the oil channel. Structurally, the controller is a transmission mechanism with a membrane built inside. When the oil level is sufficient, the diaphragm is in the maximum curved position, the contact group that transmits the signal to the instrument panel is inactive. When the oil level decreases, the membrane bends, the contacts close, an alarm signal is sent to the alarm, and the red indicator lights up.
Checking the oil pressure sensor begins with inspecting the oil filter and checking the power supply. In most cases, the cause of an incorrect signal is worn-out wiring, oxidized contacts, or a burnt-out dashboard light bulb where the indicator is located.
It is necessary to check the functionality of the part every time the engine is started; when the ignition key is turned to the “on” position, the indicator should light up for a few seconds. If this does not happen, all adjacent parts are working correctly, the sensor will need to be checked and replaced.
Alarm indication
Of course, now in almost all cars there is an emergency indication for a complete lack of pressure, this is known to us all - a “burning oil can”. If it does not go out for some time after starting, for example 10 - 20 seconds is one thing, it is almost always the fault of the oil filter. But if the lamp is constantly on, then this is already an alarm bell. Perhaps the oil pressure sensor has simply failed, or perhaps the oil pump has failed.
In any case, the emergency indication is very important, and I do not advise you to joke with it; nevertheless, this is fraught with a major overhaul of the engine.
Remember this rule, if the lamp comes on, then turn off the car and preferably immediately to a service station, either a tow truck, or in tow.
Typical malfunctions and methods for their elimination
If the oil pressure warning light does not come on when the ignition key is in the “on” position, the following malfunctions are possible:
- broken wiring;
- the light bulb burned out;
- the regulator is faulty;
- bad contact.
A broken wire is looked for using a test light and repaired by replacing the damaged wire. The burnt out light bulb is replaced with a new one. To eliminate the cause of poor contact, you need to clean the connections and check the reliability of the wire connections. A faulty regulator should be replaced.
DDM on Lada Priora
Where is the oil pressure sensor located on the 16-valve VAZ-2112?
If suddenly the oil pressure indicator light on the dashboard of your car lights up, one of the reasons for this phenomenon may be not only low oil pressure, but the failure of the sensor that records the internal pressure of this engine lubrication element. You will learn how to properly replace it, as well as diagnose its malfunction, below in our article. Fortunately, it won’t take much time to replace this device.
Where is the oil pressure sensor located?
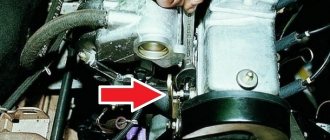
The oil pressure sensor is marked with an arrow and a circle
On 16-valve VAZ-2112 engines, the sensor is located on the left side of the engine, at the end of the housing near the camshaft bearings.
Purpose of the sensor
The oil pressure sensor is designed to promptly and accurately inform the driver about low lubricant pressure inside the internal combustion engine. So, as soon as the rapid detection of such a malfunction will allow you to avoid unnecessary problems and even greater engine breakdowns in the shortest possible time. It's no secret that dry engine operation can cause very serious damage to the engine. But on the other hand, you shouldn’t immediately panic and draw conclusions; it’s enough to first check the sensor itself.
Mistakes in hasty conclusions
When the oil pressure light comes on, many car owners sound the alarm and begin to fix this problem in all but not the most important ways, and these include:
- Oil change and fuel filter replacement.
- It is washed.
- The pressure is measured.
But after this, the result does not happen! Therefore, always check the oil pressure sensor first, as this is the most common and common cause.
Sensor check
It is necessary to check the functionality of the sensor in the following order:
- We remove the wire from the sensor and lean it against ground, possibly on the motor housing.
- Check to see if the light on the instrument panel lights up again.
- If the lamp stops burning, then the wiring is working properly and you can move on to the next stage of dismantling the faulty sensor.
- And if it continues to burn, then it is necessary to “ring” the wires at the entire stage from the sensor to the instrument panel to detect a breakdown or short circuit in the circuit.
Replacing the oil pressure sensor
To work, we only need a “21” wrench.
We make the replacement as follows:
- When the sensor is detected, we clean its surface and around it from dirt and deposits so that some of the dirt does not get into the engine.
- Then disconnect the power supply from it.
When dismantling, we inspect it for defects and damage.
It's easy enough to rip off the nut and then just unscrew it by hand.
Pay attention to the quality of the connection.
In this simple way, the work on replacing the sensor can be considered completed.
Replacing the “limit switch”
And there is no difficulty here. Without turning on the ignition, you need to follow the procedure from step 2 to step 5. After that, wipe the area around the device with a rag or rag. This is necessary to ensure that no debris accidentally gets into the hole.
Using a socket wrench, unscrew the sensor and insert a new one. Tighten well until the gasket ring fits tightly into place. Check as described in the verification chapter. After this, start the engine and wait until the lamp goes out.
All this applies to the Priora equipped with a 16-valve engine.
In very small quantities, this model is produced with an 8-valve engine. There, this sensor is also located in the head, but only at the back. Directly under the manifold, on the interior side. Near the timing belt. Like on regular VAZ 2108 and so on. Otherwise, all actions are similar.
Very useful video in pictures. It shows the process of replacing this unit on a 2112 engine. This is an absolutely identical process with the Priora engine with 16 valves.
Replacement procedure
All work on replacing the controller must be carried out on a cooled engine, since during operation the lubricant heats up to high temperatures. Dismantling procedure step by step.
- Remove the negative terminal from the battery.
- The sensor is located in a hard-to-reach place; for convenience, you can remove the air filter.
- Remove the wire plug, inspect the connector, check the wiring. In 20% of cases, breakdowns are caused by frayed wires.
- Using a 21 key, loosen the controller fasteners.
- Unscrew from the seat. Check the tightness of the seat ring that is in the socket and replace if necessary.
- Install the new controller in reverse order.
Replacing the pressure sensor on a Priora will require 10 minutes of work in the garage, but if the malfunction of the indicator is associated with a wiring breakdown, the car needs to be fully tested and the contacts cleaned. If you are concerned that your experience is not enough, it is better to contact the service.
Methods for checking the oil pressure sensor
The price of an oil pressure sensor is very low. Therefore, many car owners, if they suspect problems with their original DDM, buy a new one and replace it. If after this the operation of the low oil pressure indication system has returned to normal, then the previously installed sensor has exhausted its service life.
You can indirectly check the serviceability of the sensor using a voltmeter or multimeter. To do this, you need to check the presence of voltage at the terminal block suitable for the DDM. If there is no power, then the problem should be looked for in other places besides the sensor. Checking the DPM is possible using a pressure gauge. It is necessary to screw it into the seat instead of the sensor. After this, the power unit starts. If the pressure gauge shows a pressure of less than 0.65 kgf/cm2, and the indicator does not light up from the sensor, then the DDM must be replaced.
It is not very accurate, but still allows you to determine the serviceability of the DDM that closes the indicator circuit using the method presented below.
- Unscrew the sensor.
- Start cranking the engine with the starter, preventing it from starting.
- Inspect the mounting hole of the unscrewed sensor. If oil leaks from it, then the DDM gives false signals and needs to be replaced.
The method presented below is the most popular among car owners. It gives decent accuracy.
- Take a hose 25 cm long.
- Connect the pump to the hose.
- Insert the sensor on the other side of the pipe.
- Check resistance. It should be minimal.
- Pump air to a pressure of more than 0.65 kgf/cm2.
- Recheck resistance. The device should show a gap.
Electrical circuits of VAZ 2106 individual components
KIA Ceed SW EX 1.6 automatic transmission Logbook Changing the oil and filter in the automatic transmission
Below are wiring diagrams for the VAZ 2106 in color photos and pictures. Each system is equipped with an electrical plan that allows you to connect wires and connect electrical appliances.
Generator connection diagram
Identification of generator assembly wiring components:
- 1 - battery;
- 2 — “six” generator set;
- 3 - regulatory device designed to control the operating voltage parameter;
- 4 - lock;
- 5 — plastic module with safety elements;
- 6 - control light indicator that determines the battery charge;
- 7 - relay that protects the power line of the battery charge indicator light.
Starter wiring diagram
The “six” wiring for starting the power unit is tied to the starter unit:
- 1 — car starter device;
- 2 - battery;
- 3 - generator set;
- 4 - ignition switch.
The symbol P1 indicates the pull-in winding of the relay, and the symbol P2 indicates the holding coil.
Electrical circuits of contact and non-contact ignition systems
Depending on the modification, the domestic “six” can be equipped with a contact or non-contact ignition system. Both options have certain differences, indicated in the given diagrams.
- 1 — spark plugs;
- 2 - distributor;
- 3 — ignition switch;
- 4 - coil;
- 5 - switch;
- 6 - generator;
- 7 - battery.
Scheme of contactless SZ on the “six”
- 1 - battery;
- 2 - generator;
- 3 — ignition switch;
- 4 - coil;
- 5 - switch;
- 6 — sensor-distributor;
- 7 - candles.
Electrical circuit for controlling the carburetor solenoid valve 21053-1107010
- 1 - limit switching device of the carburetor unit;
- 2 - the engine valve itself;
- 3 - module used to control the carburetor unit;
- 4 — ignition coil;
- 5 - switching device;
- 6 - ignition switch, is a lock.
Wiring diagram of direction indicators and hazard warning lights
- 1 — lighting devices for turning lights installed in the front optical devices;
- 2 - battery;
- 3 - car generator unit;
- 4 — side turning lights located on the front fenders;
- 5 — main mounting module with safety elements;
- 6 - auxiliary control unit with safety devices;
- 7 — ignition switch;
- 8 - device for turning off and activating the light signal, mounted in the car interior on the center console;
- 9 - switching device for activating and disabling turning lights;
- 10 - interrupting device used for blinking turning lights and light signals;
- 11 — speedometer, equipped with a control light indicator for activation of turning lights;
- 12 — light devices for direction indicators in the rear optics.
Sound signal switching circuit
Description of the main elements of this component of the electrical circuit:
- 1 - sound devices used to reproduce impulses;
- 2 - relay for activation of sound impulses, protects the electrical circuit from overvoltage;
- 3 — switch of sound pulses;
- 4 — mounting module with safety elements;
- 5 — generator set VAZ 2106;
- 6 - battery.
Heater motor connection diagram
Designation of elements of the heating unit electric motor activation system:
- 1 - electric motor of the heating system;
- 2 - additional resistor element;
- 3 - switching device for the electric motor of the stove in the car;
- 4 - safety module;
- 5 - lock;
- 6 — generator unit;
- 7 - battery.
Diagnostics of DDM on Lada Priora
Controllers for Priora cannot be repaired, since the main failure of the part will be rupture of the membrane or oxidation of the contacts of the closing group. The cost of a spare part is in the range of 100–200 rubles, so it is more advisable to replace the part. Sensor diagnostics are carried out in two ways:
- pressure gauge;
- mechanically.
Checking with a pressure gauge is a more accurate method of diagnosis; you need to unscrew the sensor with a 21 head and install a pressure meter in its place. If the device readings are below 0.65 kg/cm², this means that the pressure in the lubrication system is insufficient, the indicator lamp should light up, the sensor is faulty.
The mechanical method is used if there is no pressure gauge at hand. It is necessary to remove the controller from the lubrication system, do not start the engine, and crank the starter several times. If oil appears from the socket, the sensor needs to be replaced.
We change DDT ourselves
If preliminary diagnostics reveal a malfunction of the oil pressure sensor itself, it must be replaced.
The replacement can be done either at a car service station or with your own hands. The only tool needed for replacement is a 21 key. First, remove the plastic cover from the motor. The DDT is located on the opposite side of the engine and is mounted on the right in the cylinder head hole. Next, disconnect the wire block from the DDM; to do this, press the block lock. Using an adjustable wrench, unscrew the DDT. The new sensor must be prepared for installation and mounted in the socket of the previous part. Finally, we clamp the contacts, install the plastic cover on the engine and check if the problem remains. If the light on the panel stops lighting, we can conclude that replacing this part was advisable.
For Soviet car models, getting the necessary part to replace it is not too difficult. For example, an oil pressure sensor for Priora can be purchased at your nearest auto store, and instructions for replacing it can be easily found on the Internet. If you do not dare to do this work yourself, then the nearest service station will do it for you in the shortest possible time and for little money.
Testing and diagnostics
It is impossible to check the sensor using a multimeter, since the sensor is completely mechanical. It is worth noting that this sensor fails extremely rarely.
You can only check the sensor's power circuit with a multimeter; to do this, you need to remove the connector from the sensor and measure the voltage on it; it should be at least 5V.
The engine oil pressure indicator is on, what to do?
For reliable operation of the engine, it is necessary that sufficiently high pressure is constantly provided in its lubrication system. When the pressure is low, the indicator for an emergency drop in engine oil pressure lights up on the car’s instrument panel. Let's figure out why this happens and what is the cause of the malfunction.
Attention!
If the oil pressure warning light comes on while the engine is running, stop immediately and turn off the engine. Otherwise, this may lead to serious damage and costly repairs.
1. Check the engine oil level.
2. Carefully inspect the engine for fresh oil leaks. Pay special attention to the oil filter. Oil may leak from under the rubber filter gasket if it is damaged or the filter is not tightened properly. Sometimes it is enough to turn the filter a little clockwise. If the oil pressure light does not go out immediately, then the oil filter may be defective.
3. Look under the front of the car to see if the engine oil sump is broken or leaking.
4. Add engine oil if necessary. If the warning light on the dashboard goes off after starting the engine, you can continue driving.
5. If the oil level is normal, or the lamp comes on again after topping up, check that the block is securely attached to the oil pressure sensor. It is installed on the cylinder head on the engine shield side.
6. If the block with wires is securely fastened, try replacing the sensor with a known good one.
7. If the indicator continues to light with a working oil pressure sensor, it is necessary to measure the oil pressure in the lubrication system with a mechanical pressure gauge, installing it instead of the sensor (contact your service station).
If the pressure at normal idle speed is more than 0.05 MPa (0.5 kgf/cm2) and increases with increasing speed, one of the possible reasons is:
- the electrical circuit of the sensor is faulty;
- oil pump is faulty;
- The engine crankshaft bearings are worn out.
Video on the topic
Source
As you know, the oil sensor in a car is used to determine the level of engine lubrication.
The importance of this small detail cannot be overestimated. Responsible motorists periodically check the oil level, as well as the engine and its surroundings for oil leaks. However, a car is a technically complex organism, so there are many reasons why engines (especially old ones) can leak oil - leaking oil seals, oil filter, cylinder head gaskets, problems with the intake manifold, excessive amounts of oil filled, etc. A car owner experiences a similar situation Often they are not able to track it in time and the oil leaks out (sometimes at a decent speed). This is where the pressure sensor is triggered, causing the lamp on the instrument panel to indicate insufficient oil pressure (leakage).
In this case, the engine parts undergo increased friction against each other - as a result, the engine life is reduced. It is, of course, better not to let it come to this.
Cars often use two types of oil sensors - mechanical and electronic. If the first is connected to an arrow on the instrument panel, which shows the oil level, then the second turns on only when the amount of oil drops below the minimum (the so-called “emergency”).
How to check oil pressure?
The actual check is carried out using a special device - a pressure gauge. It is also worth noting that you need to warm up the engine to operating temperature, usually 90 degrees Celsius.
If you measure with a cold engine, especially in winter, the pressure can jump to high values, from 0.5 BAR or even higher, but measuring with a cold engine is WRONG!
In order to check the pressure, you need to find the emergency sensor, which is responsible for the indication on the dashboard. It is worth noting that it is not always located nearby and it is convenient to unscrew it. We unscrew it, and in its place we attach the test output connected to the pressure gauge.
The check can then be divided into two options:
- AT “idle” it is usually from 900 to 1200 rpm.
- Then at “higher” speeds, usually 4000 - 5000 engine speeds.
It is also worth noting that if you unscrew the emergency sensor, the “oil can” will light up on your instrument panel, this is normal.
Principle of operation
It is important to understand that the vehicle's instrument light signal, i.e. when, as car enthusiasts put it, the Priora oil pressure sensor is on, this does not always indicate that the driver has forgotten to carry out measures to visually monitor the lubricant level on the oil dipstick.
With a high degree of probability, it may happen that the reason for the indication of the “alarm” light on the oil pressure sensor is the technical conditions of this electronic device, which determine the functionality of this product.
The standard emergency oil pressure sensor on the Priora is located on the cylinder head of the power plant, next to the oil filter. To determine the degree of serviceability of this electronic device, it is necessary to study the design of this device. This Priora oil pressure sensor, the price of which is very reasonable for Russian car enthusiasts, consists of a housing part, a mechanism for transmitting indicators and a measuring-type membrane gasket.
The general principle of operation of the oil pressure sensor on the Lada Priora is directly related to the value of the oil pressure on the measuring membrane gasket. Experiencing a certain degree of pressure, the membrane changes its geometric shape and is forced to bend. At the same time, it acquires the appropriate position, and the contacts in the electrical circuit of automotive equipment operate to open and close, depending on the position of the membrane gasket.
The simplest way to test the emergency pressure sensor for functionality is to connect a measuring device (pressure gauge) to the electrical circuit instead of the product being used. If, when the engine is idling, the pressure gauge shows values of 0.65 kgf/cm2 or more, then the oil pressure is considered normal and the cause of the defect lies directly in the sensor, which needs to be replaced.
If such a breakdown occurs on a trip where there is no pressure measuring device at hand, then you will have to resort to another, more effective option for testing the sensor. It consists of performing the following actions:
- Remove the emergency oil pressure sensor.
- Using the necessary tools, you need to crank the starter with outside help without turning on the power plant.
- In this case, oil should flow from the hose connecting the device to the lubrication system of the power plant. This means that the sensor is faulty and that is where the problem lies.
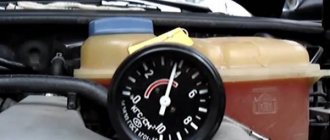
For simplicity and subsequent control, some car enthusiasts install a sensor from the dashboard of the “six” pointer type on the Lada Priora using a fitting adapter with a tee suitable for carrying out such a technological operation.
The estimated location of such an additional pointer device is the mounting socket of the hydraulic corrector of the front optics, while the wiring in the pointer-sensor circuit is laid through the partition separating the engine compartment and the passenger compartment of the vehicle.
Technical data of the Priora emergency oil pressure sensor:
- the required pressure value required to separate the contacts of the device is 0.2-0.6 kgf/cm2;
- applied value of threaded connection M14x1.5;
- used plug for connection to the electrical wiring of a Packard Electric vehicle network;
- maximum load of current parameters on contact connectors is 0.5 Ampere.