The throttle cable (gas cable) is the connecting link between the gas pedal and the throttle; when you press the pedal, you do not act on the cable, which in turn opens/closes the throttle valve. This way you regulate the flow of fuel to the cylinders, as well as the engine speed and vehicle speed.
A poor (untimely, delayed) response to pressing the gas pedal is most often a sign of problems with the throttle cable. The problem may lie in the fact that the throttle cable is incorrectly adjusted, its tension has weakened, in addition, the throttle cable may have stretched or completely failed and requires immediate replacement. If, when pressing the gas pedal, you feel resistance similar to friction, or pressing the pedal has become hard and not smooth, you need to lubricate the cable.
In this article I will talk about how to adjust the throttle cable, as well as how to lubricate the gas cable on a Lada Priora at home.
Attention! Before adjusting the throttle cable, make sure that the tight movement is not due to the carpet or other obstructions that may interfere with the free movement of the gas pedal. Very often, because of this banal “breakdown,” drivers make a lot of unnecessary movements and dismantle the engine almost to the ground in search of the reasons for the lack of engine power. As a result, it turns out that the new mat is simply bent or slipped somewhere and the pedal moves only half its travel.
Lubricating the throttle cable on a Priora at home
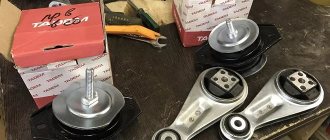
To work you will need:
- Flat screwdriver;
- Pliers;
- A syringe and a few drops of motor oil or WD-40.
Actually the work itself.
1. First you need to turn off the engine and let it cool.
2. Next, you need to open the hood and remove the decorative engine cover.
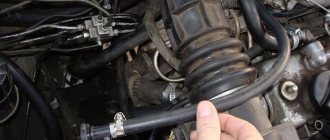
3. To remove the throttle cable, you need to remove it from the plastic bracket; to do this, pull the cable casing towards you and, pushing the rubber ring up, remove the cable.
4. Now you need to disconnect the cable from the throttle valve drive. To do this, remove the U-shaped metal bracket from the throttle actuator by prying off one edge using a flathead screwdriver.
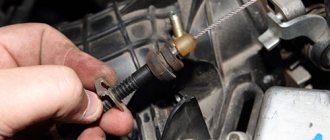
5. We remove the cable from the hook, overcoming the force of the spring.
6. Now that nothing is in the way, you can begin to lubricate the throttle valve actuator; to do this, you need to slide the transparent cap and generously lubricate the cable with a few drops of engine oil or WD-40 penetrating fluid. In the case of oil, prepare a syringe.
Try to pour oil into the housing, then move the housing to lubricate the cable along its entire length. Repeat the procedure several times until the cable is completely lubricated.
Next, put the protective cap back in place and reinstall the cable to the place of further service.
Inspection of high voltage wire
Often, the Priora stalls when accelerating due to a malfunction of the ignition system. This is especially true for the condition of the high-voltage wire leading to the spark plug. To inspect it, you will need to remove the tip attached to the spark plug. The structure of a high-voltage wire is as follows: the winding contains the central core of the wire. The tip, which is put on the candle, has a persistent metal penny. The main purpose of this element is to transmit current to the spark plug.
The core of the high-voltage wire should fit as tightly as possible to the “penny” of the steel tip placed on the spark plug. Due to aging, contact between this element and the wire may be lost due to oxidation of the metal. As a result, tripling occurs. The oxidation of the contact is checked as follows: with the second probe of the multimeter, you should touch the central core of the high-voltage wire; if the core of the high-voltage wire burns out along its entire length, then it is possible to identify such a section using a special multimeter tip.
How to adjust the throttle cable of a Lada Priora?
- The adjustment is carried out using a clamping bracket, which we previously removed. This bracket is a tensioner for the casing in which the cable moves.
- Remove the bracket and tighten the throttle cable so that it sags about 1-2 mm near the throttle drive.
- Now you need to install the fixing bracket into place in the casing. Make sure that the cable is tensioned optimally and that the throttle valve is not open when the gas pedal is at zero position. A cable that is too tight will cause the idle speed to be constantly elevated. Squeeze the gas pedal several times and check how everything works.
- Start the engine and make sure the throttle cable is adjusted correctly and the idle speed is normal.
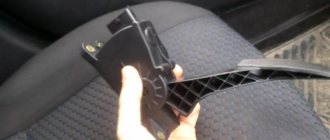
E-GAS or electronic gas pedal is installed on all Lada models (XRAY, Vesta, Largus, Granta, Kalina, Priora and Niva 4x4). Owner reviews about it are not reassuring; many complain that the e-gas pedal is “dumb” (less sensitive and informative than a conventional cable). Did you know that in some cases the electronic accelerator pedal can be adjusted to be more responsive and a little livelier?
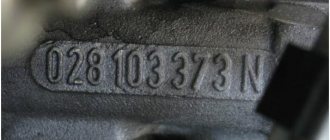
We determine the model of the accelerator pedal; this can be done by the catalog number, which is glued to the side of the body. If you cannot access the sticker, you will have to remove the electronic gas pedal:
- Disconnect the block with wires next to the gas pedal;
- Unscrew three nuts using a 10mm wrench;
- Remove the housing and pedal assembly.
The manufacturer installs at least two types of electronic gas pedals on Lada cars (depending on the year of manufacture):
- Old model (catalog number: 11183-1108500);
- New sample (article: 11183-1108500-01).
Each block is modified differently. Attention! You do all further actions at your own peril and risk. In addition, you may lose your warranty.
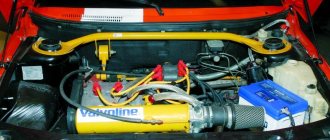
Tuning the Priora 126 engine for 20-30 thousand rubles
In the comments they asked a question about Priora. What can be done for 20-30 thousand rubles. with a motor to make it go better.
Let's first consider the situation for 30,000, and then the minimum for 20,000.
For 30,000 you can bore the channels, throw in the shafts , change the throttle valve, injectors and calibrate the engine.
Now let’s look at how much each position costs. First, let's go through the material. 16-valve shafts cost from 6500 and above. I would eventually install some turbo shafts. Because the engine will spin no more than 7000, the engine is quite low and in the future it will seem to you that the increase is not enough, you will get tuning disease and will continue to charge the engine. In order to have the most important foundation for development, you buy turbo shafts, say 9.6, and 10.1 for the intake and exhaust. In principle, a small overlap is very good for a low-end motor. They cost approximately 6800 from the manufacturer. By the exhaust. Install a spider that simply replaces the catalyst. It costs around 1500 rubles. You can also change the throttle valve . It costs about 1000 rubles, with a diameter of 54 for a standard receiver. Further, Bosch 107 injectors cost from 2000 rubles, depending on the store where you buy them. You will also need consumables in the region of 1000 rubles. There are all sorts of gaskets. Valves, light T-shaped ones, cost from 3500 depending on who the manufacturer is. This is all the material you have to buy. Now let's look at the work. Boring of channels starts from about 3500. Removing and installing the cylinder head head and assembling and disassembling it around 5000. You can find it cheaper, it doesn’t require high qualifications. Lay the shafts, i.e. make a cut for cams from 1000 rubles. It is advisable to have a more experienced person do this. Calibrate the motor. Naturally, when you have done all this, bored out the channels, installed valves, exhaust, throttle valve, injectors, now you can tune the engine, otherwise the car won’t really drive, there will be failures with an enriched mixture. In general, calibration costs from 5000. A fairly simple configuration. Don’t skimp on this because the calibrators will determine everything optimally.
Adjusting old-style E-gas
The block cover (11183-1108500) is fixed with bolts that are inserted into oval holes. The improvement is this. to loosen the 4 screws and turn the cover in the desired direction:
- Economy mode (counterclockwise). To drive smoothly, to accelerate, you should press the pedal a little more than before. Gasoline consumption is reduced;
- Active mode (clockwise). The car reacts even with slight pressure on the gas pedal. Gasoline consumption increases. The pedal becomes more sensitive and informative.
In other words, we get the same effect as after installing JETTER (Jetter or spur).
It has been noticed that the first minutes after such settings, the idle speed may be increased (about 1300 rpm). But after a minute, the ECU gradually adjusted and the speed dropped to the usual level. If this does not happen, turn on the ignition for a minute and then start the engine.
If necessary, you can easily return to the original position (mark it in advance).
Dips during acceleration
Most often, in the VAZ 2114 car, failures when pressing the gas injector occur during acceleration.
If you are faced with a similar situation, then the search for its problem should be carried out in the following sequence:
- If the spark plugs are oxidized or covered with soot, they should be cleaned with a cloth with kerosene or fine sandpaper (or replaced if they cannot be restored). In addition, the composition of the fuel mixture should be adjusted, since very often the cause of soot on the spark plugs is precisely its incorrect composition.
If on your VAZ 2114 failures occur when you press the gas injector while driving, then using the above plan you can easily find the causes of this phenomenon and be able to eliminate it.
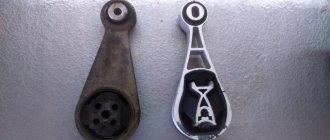
Refinement of a new electronic gas pedal
The pedal assembly (11183-1108500-01) does not have oval holes, which does not allow adjustment in the manner described above. Instead, it is proposed to cut off the protrusion (by 2-3 mm), which prevents the pedal from moving completely. This modernization made it possible to increase the pedal travel, which made acceleration with “pedal to the floor” more active. It is also noted that there is no hesitation when pressing the pedal sharply.
What I don’t like about the pedal assembly (8450008980), which is installed on Lada Vesta:
- tight gas pedal;
- large free play of the gas pedal (about 8 mm at the tip of the pedal).
What was decided to do:
- remove one of the return springs to make the pedal softer;
- Place a spacer to reduce the free play of the pedal.
How to measure pedal free play:
- Let's start the engine.
- Place a ruler at the tip of the pedal.
- Smoothly press the pedal until the engine begins to gain speed.
- We remember the distance on the ruler.
We remove and disassemble the electronic gas pedal:
- Disconnect the connector (by pressing the inside of the upper part of the latch)
- Unscrew three nuts (head “10”).
- Remove the top cover by unscrewing the fastening screws.
- Remove the rheostat slider by unscrewing the screw.
- Remove the spring (holding them with a screwdriver from the outside).
- Remove the white support spacers, remembering how they were installed.
- We measure the distance between the support pad of the return spring lever and the support rubber in the body, retracting the pedal to the amount of free play (indicated by an arrow).
- We glue the material of the same thickness (in this example we use 4 mm stickers for furniture legs and doors) using glue or double-sided tape.
We assemble the pedal assembly and install it in the car. The idle motion of the pedal should be minimal, about 1 mm. If the engine idle speed is higher than usual, and there is no free play of the pedal at all, then too much has been added. You will have to repeat the adjustment operation, adjusting the thickness of the lining. The same thing applies if the free play after adjustment remains more than 1-2 mm.
Feedback on the E-Gas modification
Car enthusiasts who have already completed the adjustment note that if you move the pedal assembly cover clockwise, the car becomes a little more lively. If you press the pedal as before and the car starts to move, you have to get used to it and not press the gas so hard. When you press the pedal to the floor, you can't feel the difference.
Those who adjusted the E-gas for a quieter ride noticed that driving on the highway became more comfortable. Now, to maintain speed, you need to press the gas pedal a little harder, which allows your leg to not be as tense as before.
Other motorists do not believe in the positive effect, saying that it is all self-hypnosis. The operation of the electronic gas pedal is based on changing the resistance difference. And even if you move the cover, when the engine starts, the ECU will still consider it to be zero and adjust the throttle from this point. And if you increase the sector stroke, the E-gas error “signal outside the permissible limits!” will appear.
Have you encountered such modification of E-gas? What feedback can you leave about such adjustments? Is there a positive effect or is it all at the level of self-hypnosis? Let us remind you that if necessary, you can check the E-gas yourself. By the way, an alternative to modifying the electronic gas pedal is chip tuning.
The throttle cable (gas cable) is the connecting link between the gas pedal and the throttle; when you press the pedal, you do not act on the cable, which in turn opens/closes the throttle valve. This way you regulate the flow of fuel to the cylinders, as well as the engine speed and vehicle speed.
A poor (untimely, delayed) response to pressing the gas pedal is most often a sign of problems with the throttle cable. The problem may lie in the fact that the throttle cable is incorrectly adjusted, its tension has weakened, in addition, the throttle cable may have stretched or completely failed and requires immediate replacement. If, when pressing the gas pedal, you feel resistance similar to friction, or pressing the pedal has become hard and not smooth, you need to lubricate the cable.
Fuel pump is faulty
A fuel pump malfunction may be caused by oxidation of the wires in the connector. The power supply to the fuel pump is unstable, and, as a result, fuel is simply not supplied to the engine. This can be fixed by simply cleaning the contacts. There may also be a problem with the pump itself. Nothing lasts forever, and it can fail. But the most common fuel pump malfunction is contamination of the primary strainer. There is no point in washing it; it is better to buy a new one and replace it.
In this article, we looked at the most common reasons for the engine stopping while driving. If the information presented in the article does not help solve the problem, we strongly recommend that you contact a car service center.
Lubricating the throttle cable on a Priora at home
To work you will need:
- Flat screwdriver;
- Pliers;
- A syringe and a few drops of motor oil or WD-40.
Actually the work itself.
1. First you need to turn off the engine and let it cool.
2. Next, you need to open the hood and remove the decorative engine cover.
3. To remove the throttle cable, you need to remove it from the plastic bracket; to do this, pull the cable casing towards you and, pushing the rubber ring up, remove the cable.
4. Now you need to disconnect the cable from the throttle valve drive. To do this, remove the U-shaped metal bracket from the throttle actuator by prying off one edge using a flathead screwdriver.
5. We remove the cable from the hook, overcoming the force of the spring.
6. Now that nothing is in the way, you can begin to lubricate the throttle valve actuator; to do this, you need to slide the transparent cap and generously lubricate the cable with a few drops of engine oil or WD-40 penetrating fluid. In the case of oil, prepare a syringe.
Try to pour oil into the housing, then move the housing to lubricate the cable along its entire length. Repeat the procedure several times until the cable is completely lubricated.
Next, put the protective cap back in place and reinstall the cable to the place of further service.
How to adjust the throttle cable of a Lada Priora?
- The adjustment is carried out using a clamping bracket, which we previously removed. This bracket is a tensioner for the casing in which the cable moves.
- Remove the bracket and tighten the throttle cable so that it sags about 1-2 mm near the throttle drive.
- Now you need to install the fixing bracket into place in the casing. Make sure that the cable is tensioned optimally and that the throttle valve is not open when the gas pedal is at zero position. A cable that is too tight will cause the idle speed to be constantly elevated. Squeeze the gas pedal several times and check how everything works.
- Start the engine and make sure the throttle cable is adjusted correctly and the idle speed is normal.
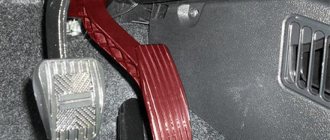
The gas pedal is very tight, so there are jerks when changing gears and generally when shifting the gas
There are few options: either the pedal itself in the cabin gets stuck (unlikely), or the gas cable gets stuck in the braid (very likely), where one hair comes off and begins to slow down the movement of the cable, and another option is that the throttle valve gets stuck. Disconnect the throttle cable (from the carburetor or from the remote control - depending on what engine you have), try the movement of the cable and the rotation of the throttle. If it is a damper, then rinse and adjust. If it's a cable, you'll have to replace it.
Well, if it really is 2121, then the problem is in the rods, rocker arms, and bushings. Maybe the opening is large, maybe it’s clogged with dirt, maybe something else. Or maybe the damper is not adjusted and is stuck in the channel.
Subscribe
to our channel in
Index.Zen
Even more useful tips in a convenient format
E-GAS or electronic gas pedal is installed on all Lada models (XRAY, Vesta, Largus, Granta, Kalina, Priora and Niva 4x4). Owner reviews about it are not reassuring; many complain that the e-gas pedal is “dumb” (less sensitive and informative than a conventional cable). Did you know that in some cases the electronic accelerator pedal can be adjusted to be more responsive and a little livelier?
We determine the model of the accelerator pedal; this can be done by the catalog number, which is glued to the side of the body. If you cannot access the sticker, you will have to remove the electronic gas pedal:
- Disconnect the block with wires next to the gas pedal;
- Unscrew three nuts using a 10mm wrench;
- Remove the housing and pedal assembly.
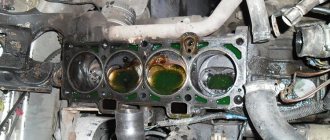
Signs of engine tripping
Regardless of the reasons, engine tripping is associated with the presence of various problems, which can be solved after finding out what caused the stoppage of one of the cylinders of the internal combustion engine.
The main signs of engine tripping include
| № | Signs |
| 1 | uneven operation at idle, as well as shaking of the engine |
| 2 | darkening of one of the spark plugs |
| 3 | change in exhaust sound |
| 4 | poor acceleration dynamics of Priors at any speed |
| 5 | increased fuel consumption |
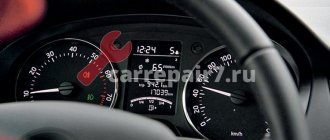
| 6 | floating speed, displayed on the tachometer by jerking the arrow |
| 7 | jerking when accelerating or driving |
Auto mechanics identify several reasons why jerking occurs and the engine begins to stall. The main ones are: incorrect ignition timing, faulty spark plugs and installed condenser, broken piston rings, piston and valve burnout, rocker wear, clogged air filter, and others.
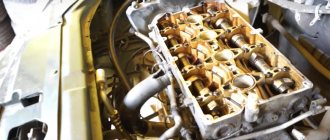
The cause of the jerking must be sought in the cylinders
To reduce the search for the cause of engine tripping, it is recommended to determine which cylinders are not working correctly or have stopped functioning. To do this, you will need to remove the high-voltage wire from the spark plugs one by one. This procedure must be performed carefully, as there is a risk of electric shock. Before performing this work, you will need to place a dielectric base in the form of rubber or wood under your feet. It is recommended to remove by the wire. Then the engine speed increases to 1500 rpm. The valves are removed from the cylinders one by one. If the sound of the vehicle changes when removed, then the cylinder is working correctly. Otherwise, it must be replaced.
Adjusting old-style E-gas
The block cover (11183-1108500) is fixed with bolts that are inserted into oval holes. The improvement is this. to loosen the 4 screws and turn the cover in the desired direction:
- Economy mode (counterclockwise). To drive smoothly, to accelerate, you should press the pedal a little more than before. Gasoline consumption is reduced;
- Active mode (clockwise). The car reacts even with slight pressure on the gas pedal. Gasoline consumption increases. The pedal becomes more sensitive and informative.
In other words, we get the same effect as after installing JETTER (Jetter or spur).
It has been noticed that the first minutes after such settings, the idle speed may be increased (about 1300 rpm). But after a minute, the ECU gradually adjusted and the speed dropped to the usual level. If this does not happen, turn on the ignition for a minute and then start the engine.
If necessary, you can easily return to the original position (mark it in advance).
Refinement of a new electronic gas pedal
The pedal assembly (11183-1108500-01) does not have oval holes, which does not allow adjustment in the manner described above. Instead, it is proposed to cut off the protrusion (by 2-3 mm), which prevents the pedal from moving completely. This modernization made it possible to increase the pedal travel, which made acceleration with “pedal to the floor” more active. It is also noted that there is no hesitation when pressing the pedal sharply.
What I don’t like about the pedal assembly (8450008980), which is installed on Lada Vesta:
- tight gas pedal;
- large free play of the gas pedal (about 8 mm at the tip of the pedal).
What was decided to do:
- remove one of the return springs to make the pedal softer;
- Place a spacer to reduce the free play of the pedal.
How to measure pedal free play:
- Let's start the engine.
- Place a ruler at the tip of the pedal.
- Smoothly press the pedal until the engine begins to gain speed.
- We remember the distance on the ruler.
We remove and disassemble the electronic gas pedal:
- Disconnect the connector (by pressing the inside of the upper part of the latch)
- Unscrew three nuts (head “10”).
- Remove the top cover by unscrewing the fastening screws.
- Remove the rheostat slider by unscrewing the screw.
- Remove the spring (holding them with a screwdriver from the outside).
- Remove the white support spacers, remembering how they were installed.
- We measure the distance between the support pad of the return spring lever and the support rubber in the body, retracting the pedal to the amount of free play (indicated by an arrow).
- We glue the material of the same thickness (in this example we use 4 mm stickers for furniture legs and doors) using glue or double-sided tape.
We assemble the pedal assembly and install it in the car. The idle motion of the pedal should be minimal, about 1 mm. If the engine idle speed is higher than usual, and there is no free play of the pedal at all, then too much has been added. You will have to repeat the adjustment operation, adjusting the thickness of the lining. The same thing applies if the free play after adjustment remains more than 1-2 mm.