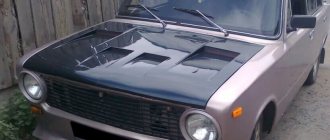
Despite the widespread stereotype, “no matter how much you tune a VAZ, it won’t become a Mercedes,” many car enthusiasts prefer to improve the interior of their car. Firstly, tuning will allow you to achieve a beautiful appearance, and secondly, the car will become more comfortable for both the driver and passengers.
In order to improve your car, it is absolutely not necessary to go to a service station or turn to professionals. With the proper desire and enough time, you can do the work at home. Today we’ll talk about how to do the tuning of a VAZ-2105 interior with your own hands, and watch a video that will tell you about the main aspects of the procedure.
Features of improving domestic cars
There are a large number of reasons why tuning car enthusiasts prefer VAZ family cars:
- These machines are considered the most accessible and cheapest.
- Simple car design. In fact, it is difficult to worsen anything here; as a result of incorrect actions, they can be quickly eliminated.
- Availability of all accessories and parts of main components. The modern automobile market offers many elements that are needed for tuning the VAZ-2105. In addition, their cost is low.
Foreign cars do not have such positive improvement factors as VAZ. Their structure is complex, and they require a qualified approach in the field of modernization. Tuning the VAZ-2105 is especially relevant today, because this model in its standard configuration looks very boring and even dull. As for the technical parameters, they also leave much to be desired.
Part one. Deformations
Deformations of the car body and its elements occur in two cases - either you crashed into something or it crashed into you
But this is not the point; the main thing is how we will eliminate the consequences of this embarrassment. Calculation First, you need to estimate the total amount of work, namely:
- all parts of the VAZ 2101 body must undergo defect detection (precisely ALL, since there is a high probability of detecting hidden defects);
- an estimate has been drawn up;
- the sequence of work performed is determined.
Improved body characteristics
Many car enthusiasts start tuning the VAZ-2105 from the body, but make a lot of mistakes during this work. So, what is better not to do:
- Don't rush to install side skirts, bulky spoilers and air intakes. These improvements are absolutely unnecessary, but provided that no powerful parts of the power unit were attached before.
- Lowering the body is considered a fashionable trend today, which is often used when tuning a car. Cars with low ground clearance have better handling, but at the same time speed parameters are reduced. Also, the lower elements of the body are at great risk, especially if we take into account the condition of our roads.
What to do?
- Attach additional body parts. Bumpers and other body kit options will allow you to change its shape.
- Tint the windows and repaint the body. This DIY tuning of the VAZ-2105 makes it possible to significantly change the appearance of the car.
Interesting solutions for VAZ-2105
Car tuning is done not only for beauty, but also for practicality:
- The safety cage enhances body rigidity. It does not deform during a collision. This is a system of pipes that are installed inside the cabin. There are dismountable (connected with bolts) and non-dismountable (welded). The first option is quickly installed, the second is more difficult to install.
- Suspension. Modernization does not start with tires and wheels. First, change the brake pads, because the location of the disc mounts may differ from the factory ones. Install double transverse stabilizers and brackets. This makes the car easier to drive and the car runs smoothly.
Particular attention is paid to the rear dependent suspension. This is an outdated option, so many car enthusiasts prefer adjustable traction.
To complete the suspension tuning, wheels and tires are mounted.
- Radiator grille. Dramatically changes the appearance of the car. Tuners install a new one or paint the old one. The new one improves the appearance of the bumper. A large selection of designs and materials, low price, easy installation - everything speaks in favor of a new radiator grille. The difficulty is that you have to remove the bumper.
Windshield tinting
A darkened windshield looks really stylish and impressive, but such VAZ tuning is rare. According to GOST, the tinting of the front glass should be no more than 25%. Also, to improve visibility on the windshield, experts advise attaching a reflective film, the width of which should be no more than 14 cm.
To do your own tuning of the VAZ-2105 (you can see photos of the results in our article), you will need the following tools and materials:
- Tinting film.
- Rubber eraser.
- Dry soft cloth.
- Industrial dryer.
- Putty knife.
- Cutter or knife.
- Glass cleaner (soap solution).
Work order:
- Initially, wash and dry the windshield thoroughly. To stick a special film, you do not need to dismantle it, just remove the sealing rubber.
- Measure the surface of the glass with a tape measure and cut the film according to these measurements with a margin.
- Spray the soap solution over the surface and over the film, freeing it from the protective layer in advance.
- Stick it on the windshield. Using a rubber eraser, remove any excess moisture that remains inside.
- It is best to smooth the film from the center to the sides. To make the tint take the shape of glass, heat it with a hair dryer.
- If you didn’t succeed in gluing the film beautifully the first time, you can remove it and re-glue it. While the film is wet, it will peel off quickly and without defects. However, when it becomes dry, it will not be possible to remove it without damaging it.
- After a certain time after sticking, trim off the excess material around the edges.
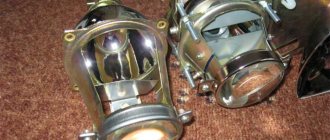
Lada 2101 Koteyka › Logbook › VAZ 2101 suspension repair not in garage conditions))
In general, the background is this - below is a list of spare parts that I bought, stocked up on pullers, but at the very first silent block of the upper arm, the puller burst, or rather the puller cup burst. Having examined the lower arm, I realized that it was also cracked, it was customary to buy upper and lower arms for the entire suspension, without silents and balls, since I had already bought them and wanted to install them on the old arms.
I pressed it like this - I soaked the silent block with liquid soap, put the pressing cup on the puller and hammered it in with a sledgehammer, everything came out smoothly, and faster than tightening it with a puller.
New levers are in place with ball joints, these are the conditions, there is sand all around, sand in my mouth, and I was assembling the engine here in the fall)))
Cushion and cushion mount, Delphi gas-oil shock absorber, assembled everything. Likewise on the other side.
It's funny that on the right side, instead of an upper and lower ball, there were two upper ones)) And the shock absorbers on both sides turned out to be different, gas, the length differed by more than 10 cm. The springs did not sag, so I did not change them. It was very difficult to use the Chinese dumb spring ties for the first time; I literally tightened it down to 290-300 mm and then installed it in the rack in the body and in the groove in the lower arm, I simply jacked it up and then screwed the ball pin in and removed the ties. In general, nothing complicated.
Next it was time to replace the rear reaction bars and shock absorbers. It was very difficult to unscrew, liters of VD40, a lot of swearing, I tightened it after coating the nut and bolt with lithol zinc 24. The rear shock absorbers also worked only on compression, they did not return on their own. I installed Delphi gas oil from Niva 2121.
All that remains is to replace the steering linkage assembly and the pendulum arm, I will do it when I find a normal steering gearbox, once I change it, the assembly is complete! More wheel bearings are on the way))
Source
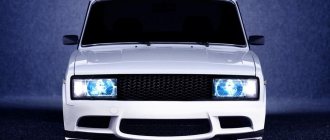
Headlight modification
The most popular way to tune a VAZ-2105 at home is to install LED lamps. As experts say, using LEDs instead of halogens is much more economical, and they provide better quality light. The main advantages of installing LEDs in VAZ headlights:
- The cost-effectiveness of such lighting allows you to significantly relieve the on-board network of the machine.
- Such lamps provide an even and diffused light, which will provide excellent visibility and will not dazzle drivers driving in the oncoming lane.
- LED lights are considered reliable and have a long service life.
- Tuning of this type looks really attractive in appearance.
Instead of LED lighting, it is quite possible to install xenon lamps, because they will shine many times brighter. But xenon can blind oncoming drivers, which is a big drawback.
Exhaust system tuning
A complete modernization of the VAZ 2105 is unthinkable without improving the exhaust system.
There are three types of exhaust system tuning:
- Audio tuning. This type of tuning makes it possible to influence the sound of the engine. You've probably seen more than once a car rushing through the streets, emitting a wild “roar” - this is the effect that audio tuning creates. To do this, it is necessary to replace the catalyst with a special flame arrester. After removing the catalyst, a direct-flow muffler is installed.
- Video tuning is a visual change in the muffler, that is, the use of special attachments.
- Technical tuning is used to increase engine power. It is quite difficult to do such work on your own, since during technical tuning all elements of the system change. Another disadvantage of such modernization is the increase in fuel consumption.
Direct flow muffler
By installing a direct-flow muffler, you can achieve an increase in power by 10–15%. Installing direct flow promotes rapid exhaust, which increases power. But this design is really effective on engines of high power and volume. Therefore, it is not recommended to install a forward flow when tuning a VAZ 2105; in this case, it is easier to install a sports “can” with a beautiful ending.
Exhaust manifold replacement
One type of exhaust system tuning is replacing the original exhaust manifold with an improved analogue called a “spider”. It differs from the factory design in the shape of the inlet pipes, as well as the method of attachment to the exhaust channels. "Spiders" are short and long. Short designs, as a rule, are installed on sports forced engines, as they provide an increase in power only at high speeds.
Long spiders are more practical because they make it possible to achieve increased power over a wider rpm range. For example, replacing the manifold on a VAZ 2105 will increase power by 7%.
As you can see, the VAZ 2105 is fertile ground for the embodiment of creative ideas. It all depends on your imagination, as well as the amount of free time and money that you are willing to invest in transforming your car.
Source
Tinting headlights with varnish
Let's take a closer look at the currently popular tinting of headlights using aerosol paint. This is not quite a simple varnish that we are used to using for car repairs. It is also sold in a can, but has completely different characteristics. You should remember that inside the headlight structure, while driving, a high temperature regime is noticed. Therefore, not every type of mixture is able to withstand such operating conditions. Therefore, you need to buy a special varnish. Sequence of work that you can do yourself:
- Wash and dry the headlights well. It is not necessary to remove them.
- Cover the area around the headlights with masking tape.
- Treat the headlights with a special degreasing solution.
- Apply the tinting varnish from a distance of 30 cm, so it will apply evenly.
- Remember to take a break between applying the first and second coat of varnish to allow it to dry thoroughly.
- When the last layer has dried well, polish the surface of the headlights. This will allow you to achieve the matte effect that is so popular today.
- This coating can be removed using acetone.
Part two. Corrosion
Causes of corrosion and sources of its damage Corrosion is the process of self-destruction of a material in the process of interaction with the environment. In our case, metal corrosion occurs due to:
- Winter “urban” operation;
- Cheap body restyling, under which all kinds of dirt accumulates;
- Storing the car in damp, unventilated areas.
Places of the VAZ 2101 body that are most susceptible to corrosion
As the experience of most car owners shows, the parts of the VAZ 2101 body that are most susceptible to corrosion are located in hard-to-reach places where moisture does not evaporate for a long time (gaps, bends, flanges), namely:
- wheel arches;
- hinged elements and places of their attachment (hood, trunk, doors, sills, fenders).
And if no measures are taken, then it can move to other, more significant power elements (spars, joints of the sub-engine frame, central pillars, etc.). Depending on the degree of surface destruction, it depends on how we will restore the damaged part.
Stage one
The oxidation process is in the initial stage (chips, scratches), only a slight color change has occurred. At this stage, you can get by with small losses - cleaning the surface with a fine abrasive wheel and then polishing the surface.
Stage two
Both the color of the paint changes and its swelling occurs, that is, the destruction process occurs evenly over the surface of the element.
Corrosion of the rear wheel arch of a VAZ 2101
This type of corrosion is not so terrible; it most often occurs due to poor preparation of the element for painting. It can be relatively easily cured by repeated stripping and subsequent filling with cold-set epoxy mastic. This type of mastic has high strength, sufficient adhesion, and is easy to apply to the damaged area. It contains plasticizers and hardeners, which increase the plasticity of the resin and its impact strength, as well as fillers that reduce the shrinkage of the resins and ensure that the coefficients of thermal expansion of the metal and the resins are brought closer together.
Sticker of special film on headlights
It’s easy to do this VAZ-2105 tuning yourself. It is believed that tinting with a special film is a fresher look at improving the optics of a car. The higher quality the material, the better. You can usually buy good quality tint film from auto parts stores and advertising agencies. Its cost directly depends not only on the quality, but also on the manufacturing company. When selecting a material for tinting headlights, it is important to pay attention to its light transmittance. The lower the percentage of light transmittance, the worse the lantern will shine. You can apply the film yourself:
- Wash and dry the surface of the headlights thoroughly.
- Degrease the structure.
- Cut the film to the size of the lights.
- Wipe the headlights with soapy water.
- Remove the protective backing from the film and apply the base material to the headlight.
- Using a rubber spatula, smooth out the film, removing excess air and water.
Utilities
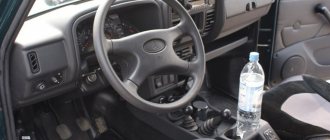
Useful modifications of the five additionally include: sound insulation of the interior (floor, dashboard, ceiling), replacement of the dashboard with a new one.
It also makes life easier for the driver by installing a “beard” from the VAZ-2107; many switch buttons can be displayed on it. It makes the carpet flap between the driver and passenger seats more noble in appearance. You can buy an armrest complete with it; this addition will appeal to drivers who like to drive the car with one hand.
If you really do auto tuning, then completely, you can replace the door handles with new ones that are more attractive in appearance than the standard ones.
If you are the owner of a domestic five, do not rush to sell it, because after some improvements it will serve you for a long time and can look bright and very impressive!
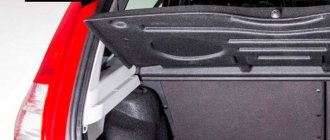
Rear window grille
An alternative option to darkening the rear window is decorative curtains. This decor is made of durable plastic and has a blinds-like design. Curtains for the rear window will be useful, as they perform several functions at once. First of all, due to their durable construction, they hold snow on their surface, and the glass remains clean. Also, this accessory not only protects from bad weather conditions such as heavy rain, snow and hail, but also from hot sun rays. The big advantage of plastic visors is their ease of installation. To attach the element to the car, you simply need to place the edges of the grille behind the glass seal.
Cable replacement technology
To eliminate this category of breakdowns, there is a certain technique. The clutch is released using a cable. And its regulation is carried out mechanically in the engine compartment on a support in the upper part of the gearbox housing. When disengaging the clutch, problems may appear, which can be identified by checking the serviceability of the pedal mechanism, as well as pressing it five times all the way. Adjusting the operation of the unit determines the free movement of the lever by 1 cm in the opposite direction to the usual movement.
If this is not possible, then the cable needs to be replaced. When removing it, you should make a sharp movement to separate it from the attachment point, then, by squeezing the outer shell, achieve compression of the cable adjustment mechanism at the point of the rubber cuff. To fix the cable mechanism on the gearbox, it must be unfastened from the mounting unit.
Removing the glove box is quite a labor-intensive operation. It is necessary to remove the relay panel (without detaching the wires from the terminals), the clutch pedal housing, only then unfasten the cable and pull it out of the car
Next, carefully pull it through the rubber bushing.
Installation is performed in reverse order. Installation of the roller at the end of the cable is carried out by securing the outer parts of the cable to the gearbox, followed by rigid fixation
It is important to stretch the cable sheath in the direction of travel and place a rubber damper in the clutch lever. If, during the process of replacing the clutch cable of a VAZ 2110, it is not possible to pull the sheath through in the recommended way, then it must be pushed in until you can compress the plug at the point where the rubber cuff is located. If the sheaths are not aligned, you should start the cable adjustment mechanics again
Then place the casing and relay panel on the mounting conductor and recheck the mounting terminals in detail.
If the sheaths are misaligned, the cable adjustment mechanics should be started again. Then place the casing and relay panel on the mounting conductor and recheck the mounting terminals in detail.
Depressing the clutch pedal and then checking the cable adjustment mechanism completes the installation. After all the preliminary manipulations, you can reconnect the battery.
There are times when the VAZ 2110 clutch cable has been replaced, but the vehicle is still impossible to operate. Probably the reason lies in a poor-quality cable mechanism. If it is in good working order, ensuring further operation consists of repeated repair operations. Duplicating previous actions will eliminate the possibility of an error and will also allow you to check the complex operation of the entire mechanism. If the attempt fails again, the cable must be replaced completely.
When replacing the VAZ 2110 clutch cable, it is important to know this key point: if the vehicle was produced in a pilot production batch, then the bracket can be fixed in the form of a bolted connection using a Phillips screwdriver. In this case, a traditional screwdriver will not cope with the problem of unscrewing, and a shortened version of the tool will be required. However, in the event of a sudden breakdown on the route, the fasteners can be released using a long screwdriver through the safety block
After completing the repair, for subsequent ease of maintenance, it is recommended to replace the old bolt with a standardized version with a wrench head.
However, in the event of a sudden breakdown on the route, the fasteners can be released using a long screwdriver through the safety block. After completing the repair, for subsequent ease of maintenance, it is recommended to replace the old bolt with a standardized version with a wrench head.
Replacing and installing a cable requires mandatory adjustment of the pedal travel from top to floor in the range from 12.5...13.0 cm. That is, the pedal must be placed at the same height as the others. Adjustment is carried out by loosening the nuts on the fastening holder located on the gearbox.
By changing the location of the tip using the nuts, you can control the amount of stroke. When a satisfactory result is obtained, tighten the nuts. At this stage, installation and adjustment of the clutch cable is complete.
Sources
- https://ncpauto.ru/marki-avtomashin/pokazat-razmery-trosika-scepleniya-vaz-2109.html
- https://ourvaz.ru/instrukcii/zamena-trosa-stsepleniya-na-vaz-2110-svoimi-rukami.html
- https://avtovx.ru/sceplenie-vaz-2110/zamena-trosika-scepleniya-vaz-2110-1/
New upholstery
Another option for tuning the interior of a VAZ-2105 (see photo above) is the choice of new upholstery for the seats. The most “old-fashioned” option is to purchase fur covers. The upholstery can also be made from natural materials, suede and even leatherette. To reupholster all the seats in the car, you will need about three meters of upholstery.
For the job you will also need plywood, which you should cut to fit the outline of the seat. Next, upholstery material is applied to it and excess pieces are cut off from it. It is important to leave about 1 cm at the edges for margin. After this, the upholstery is wrapped to the back of the plywood and glued using foam rubber and adhesive. Apply the glue carefully, as too much glue can damage the seat upholstery. If genuine leather is selected for the reupholstery, then only a construction gun and special staples should be used to fix it.
Interior tuning
Internal tuning of the VAZ 2105 provides:
- Replacing the cigarette lighter.
- Replacing the stove.
- Replacement of interior upholstery.
- Replacement of window regulators.
- Reupholstery or installation of new seats.
- Installation of high-quality acoustics.
- Modernization of the front panel.
- Improved lighting.
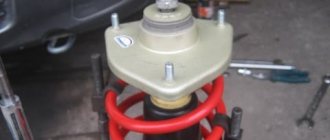
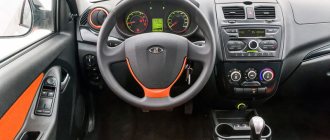
Changing the front panel
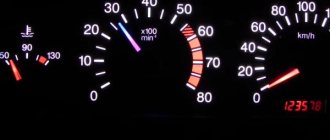
By tuning the dashboard, you can increase its functionality and make it more modern, because the dashboard should be stylishly organized and informative.
On the “five” tuning is possible in the following variations:
- You can buy a ready-made kit, which includes elements for lighting, instrument panels, sensor dials, terminals and a cable for connection.
- A budget option is to illuminate the devices with LED lamps of different colors. Such tuning will be especially effective in the dark.
- Changing the color or texture of the console is more difficult to accomplish. Note that this option is not always successful, so such tuning should be approached carefully.
Photo gallery: options for upgrading the front panel
Changing the skin
Replacing interior trim is a labor-intensive procedure that is best left to specialists. To reupholster the interior you can use:
Photo gallery: VAZ 2105 interior reupholstery
Changing the seat upholstery
If you decide to reupholster the seats yourself, be patient and prepare the required tools and materials:
- Fabric (it is better to use leather or Alcantara as a material for seat upholstery).
- Hair dryer.
- Scissors.
- Iron.
- Foam rubber.
- Spray glue.
- Hammer.
- Sewing machine.
- Standard set of automotive tools.
- We dismantle the seats.
- We remove the old covers from them. Be careful not to damage the fabric when removing it; you will need it later.
- Then you should cut out new covers. To do this, rip the old cover apart at the seams. Spread a new cloth and place the parts of the ripped cover on it. The cut parts should be reinforced with foam rubber using glue.
- We sew the parts together. The edges of the elements should fit snugly against each other.
- Glue the back seams and sew with a finishing stitch. Beat the seams with a hammer. We trim the irregularities with scissors.
- We pull the cover over the seat, to do this we turn the finished cover inside out, straighten it and put it on the seat frame. We press the cover tightly to the frame, and pull the free ends of the fabric to the seat cushion through the holes.
- Warm up the material with a hairdryer. As the fabric dries, it will stretch.
- Install the seats in the car.
Changing the door panel trim
The easiest option is to replace the door cards with new factory ones. But you can make door trims yourself by using thicker plywood. This will improve the durability of the upholstery as well as the acoustic performance of the vehicle. It is advisable to use leatherette as a material.
To work you will need the following materials and tools:
- Leatherette.
- Glue.
- Latches for fastening the upholstery (it is better to buy new ones, as the old ones harden during use).
- Plywood, its thickness should be 4 millimeters (to make the work easier, you can use the old door card base if it is in good condition).
- Foam rubber.
- First remove the old door trim. It will be our template for cutting a new one.
Changing the headliner
Replacing the headliner is usually carried out along with a general reupholstery of the interior. Car owners often choose carpet to reupholster the ceiling. This material is easy to work with, besides it is durable and stretches well. Carpet is considered a durable material - it does not deform and does not fade. Moreover, it makes it possible to trim the interior with a needle and thread, while the ties will not be visible.
A ceiling covered with leather or leatherette also looks good. It is durable and does not require special care. In addition, the skin creates a certain image of solidity. To reupholster the “five” ceiling you will need approximately 2x1.5 meters of any material.
Video: reupholstering the ceiling in a car
Replacing power windows
To increase the level of comfort in the cabin, it is recommended to replace the standard mechanical windows with electric ones. They can be installed on both front and rear doors. The device consists of drive and lifting mechanisms, as well as a control system.
Acoustics
Do-it-yourself acoustic tuning of the VAZ-2105 interior is considered a popular option for improving the car. This upgrade involves adjusting the holes for mounting speakers. This action is carried out with an electric jigsaw. Podiums are formed from boards 3 cm thick, and holes for speakers are drilled into them. The main nuance in this matter is the pull of the door handles, which is transmitted to the tongue, because it opens the door lock. It is necessary to take into account that this mechanism must have a reverse motion. Otherwise, the door may slam, but will not close due to the central locking or from inside the car. In this situation, the tip of the rod is wrapped and adjusted in such a way as to gain 5-7 mm for return. The rear doors of the VAZ-2105 are upholstered using a similar principle. The ashtray will have to be removed.
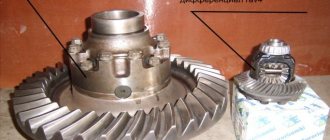
Engine tuning
The simplest option for tuning a VAZ 2105 engine is to install a DAAZ 21053 generation Solex carburetor. Of course, the increase will be small. A more significant increase in power can be achieved as follows:
- Boring cylinder holes to 82 mm is a fairly effective method of modernizing the VAZ 2105 power unit, as it increases the volume to 1400 cm³. It should be noted that such work is very complex, so only experienced specialists should perform it. Along with boring the cylinders, it is possible to install sports camshafts, a new oil pump and compressor. Thus, the engine power will reach 100 hp. With.
- A more radical method of increasing technical characteristics is to replace the standard internal combustion engine with a rotary VAZ 413, which was produced in small batches. Its power is 140 hp. With. With this tuning, the maximum speed of the VAZ 2105 can be increased to 180 km/h, and acceleration to 100 km/h will take only 10 seconds.
Note that an increase in the engine power of the “five” entails a decrease in its service life. So it was with the author of these lines: after increasing the power to 100 hp. With. the average resource of the power unit was only 75 thousand km. mileage before overhaul. Therefore, the car owner must decide whether he agrees to increase engine power while sacrificing reliability indicators.
Engine boost
Engine boosting (tuning) is a set of technical processes that are aimed at modernizing the power unit. Engine boosting is the replacement of factory stock parts with new, improved components.
In addition, factory engine parts can be lightened or modified. As you know, small engines have low torque. Therefore, in the case of the VAZ 2105, it is more advisable to install weighted parts rather than lightweight ones. For example, craftsmen in such cases install a flywheel from a Niva.