Today, car maintenance with your own hands is not a novelty. First of all, this is a significant saving of your own time, effort and money. In order to efficiently replace the coolant on the Lada Granta and Kalina, you need to use special step-by-step instructions with a clear sequence of actions.
When do you need to replace antifreeze on a Lada Kalina?
AvtoVAZ recommends replacing the coolant on injection engines after a mileage of 75 thousand km. However, there are a number of reasons to change antifreeze earlier. The fact is that coolant of different compositions and different manufacturers has different service life. When worn out, the coolant can lose some of its properties and cause damage to both the elements of the cooling system and the entire engine as a whole.
The first signs of antifreeze wear are:
- discoloration of the liquid, if initially it had a pronounced color, then after wear it will be dark brown, which indicates a loss of properties and contamination;
- plaque or sediment, suspension or other fractions may appear in the expansion tank;
- Oil stains were found on the surface of the liquid in the tank;
- frequent engine overheating;
- unsatisfactory operation of the heater;
- low density of antifreeze due to constant addition of distilled water;
- the appearance of foam on the surface of the antifreeze in the expansion tank.
What antifreeze and how much is better to pour into Kalina 8 and 16 cl
If such symptoms occur, replacing antifreeze on Kalina should be done as quickly as possible, and sometimes with flushing of the cooling system. When to change the fluid depends on its quality and composition. We know that modern ethylene glycol-based antifreezes of class G11 work without loss of properties for up to two years maximum. Hybrid and more modern fluids of classes G12, G13, G12+ need to be changed after 4-5 years of use, if everything is normal with the cooling system. It is generally better not to fill in counterfeit liquids and all kinds of antifreeze, since they do more harm than good.
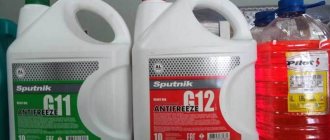
From the factory, the engine is filled with Felix Carbox 40 coolant. It has a bright red color, but you need to remember that, contrary to the firm belief that the color of antifreeze indicates its quality or composition, in reality this is not the case. Initially, all antifreezes are colorless, regardless of composition. The color of antifreeze can be any at the discretion of the manufacturer, and the choice should be guided not by color, but by temperature characteristics and factory recommendations.
First you need to remove (and maybe not completely) the ignition module to gain access to the drain plug. There is a danger that the drained coolant will fall on the module coil and damage it.
Having unscrewed the three fastening bolts (the last one can only be loosened), we move the coil to the maximum allowable distance and continue working.
It is necessary to drain the old antifreeze, for which it is enough to unscrew the plug
. But before that, you need to ensure that you have a sufficiently capacious container that will need to be placed under the drain. This can be any container of sufficient volume (some even manage to use a plastic bottle with a cut off neck, which is periodically emptied by plugging the drain with a finger - while changing containers).
Then in a similar way
drain the antifreeze from the radiator - for this purpose the latter has a special plug (located in the right corner - in the direction of travel).
After making sure that all the antifreeze has been drained, use a rag to remove all traces of it on the engine and crankcase protection. All plugs are installed in their places.
Choices
When choosing, do not neglect the color of the liquid. The color is intended to indicate certain properties of the antifreeze, so replace it only with an option with an identical color.
Recommended brands of antifreeze include the following products:
- “AGA 003Z” (temperature minus 40 degrees), has a red color, costs approximately 1 thousand rubles. for a 10 liter container.
- “Professional Premium” belongs to the “G-12” category, and the cost of a similar “tank” reaches 700 rubles.
- “SINTEC LUX G-12” is also characterized by a red tint and costs from 1 thousand rubles. for a volume of 10 liters.
- “FELIX Carbox-40”, a canister of the same volume with red liquid will cost the owner from 950 rubles.
- "NIAGARA", substance "G12"; for a volume of 10 liters you will need to pay at least 800 rubles.
- “Arctic Circle”, a substance with similar parameters; A 10-liter container costs at least 700 rubles.
Replacing antifreeze on Lada Kalina photo and video
Antifreeze or coolant is designed to cool all engine elements as a whole, namely the cylinder block, crankshaft and camshafts and, of course, other elements that belong to the cooling system. However, over time, antifreeze becomes unusable, gradually losing its properties, causing the engine to overheat prematurely and often, which can lead to its complete failure.
In the video, replacing antifreeze with flushing the cooling system on a Lada Kalina:
https://youtube.com/watch?v=CGGDk3F1hNY
Replacing antifreeze on Lada Kalina
This is what a used one looks like. Antifreeze, very tired
The entire cooling system of the Lada Kalina engine contains 7.6-7.8 liters of antifreeze, and according to official instructions it should be changed every 60,000 kilometers or five years of operation, whichever comes first.
Advice!
Possible option for replacing standard antifreeze
Lada Kalina cars are filled with Felix Carbox 40 antifreeze, red, from the factory. Therefore, it is up to you to decide what kind of antifreeze to fill in during a complete replacement, the main thing is that your desires coincide with the temperature range in which the car is operated.
Tool for the job
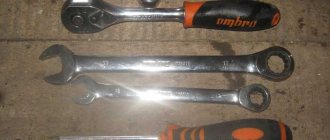
In order to carry out all the work, we will need the following:
- New antifreeze (coolant) in the amount of 8 liters.
- Crosshead screwdriver.
- The key is "13".
- Socket head for “13” and “17” with ratchet.
- Container for draining waste liquid.
- Rags.
Step-by-step process for draining antifreeze
Before you begin work on replacing the fluid, you must place the car on a flat surface or on a slight slope, provided that the front part is higher than the rear. Also take into account the fact that the machine’s engine must be cold to prevent the possibility of getting burned during operation, so it is best to carry out such work in the morning, after the machine has cooled down overnight.
- The first step when starting work is to remove the cap from the expansion tank. On a cold engine there will be no pressure under the cap.
- Next, we install a pre-prepared container for draining the liquid (a basin with a capacity of 10 liters is perfect).
- On VAZ-11183, VAZ-21116 and VAZ-11186 engines, before getting to the drain plug, you will need to remove the bracket together with the ignition coil, since during draining liquid may get on it and the module will fail.
- To dismantle the coil you only need to unscrew 2 bolts and loosen 1.
- First of all, unscrew the right bolt, located closer to the gearbox housing.
- The second one is located in the center and can be easily removed thanks to the key set to “13”.
- And the last bolt is located at the very bottom on the left side of the bracket; it is not necessary to unscrew it, just loosen it by 2/3.
- When the module does not fix anything, we lift it together with the body and place it in such a way that it does not interfere. Next, you can continue working on draining the liquid.
- We unscrew the drain plug on the engine block using a spanner and wait for the moment when everything flows out. To unscrew this plug, you will need a key set to “13”.
- Next, unscrew the drain plug on the radiator, which is located on the right side, and wait for the antifreeze to pour out from there. To avoid stripping the thread, unscrew the plug carefully.
- And the last step in draining the liquid will be to replace the O-rings on the plugs and return them to their place.
The process of filling new antifreeze
When all the plugs are tightened, you can begin the operation of filling in new coolant.
- First of all, loosen the clamp and take out the throttle hose. This is necessary so that during replacement, excess air escapes through this hose.
- Next, fill in antifreeze until it flows out of the disconnected hose, or until the liquid level remains unchanged in the expansion tank.
Final works
- The last step in replacing antifreeze on a Lada Kalina will be to replace the ignition module, connect wires to it, and check all plugs and connections for leaks.
- Next, start the engine and check the result of the work. To do this, you need to wait until the engine warms up and the Carlson starts working. Then we check the operation of the heater to ensure that hot air is blowing into the cabin; if it blows warm air, this means that an air lock has formed in the system.
- It is also necessary to take into account the fact that when the engine cools down, it is necessary to recheck the coolant level and, if necessary, add it.
As you can see for yourself, there is nothing difficult about changing antifreeze yourself; even the driver who is far from car repair can perform such work.
Replacement process
The replacement process itself on the Kalina 8 cl unit is simple and can be carried out under normal conditions, in the most ordinary garage with good lighting. When dismantling, place all removed parts in some previously prepared container so as not to lose anything. If the car has high mileage, you may need to purchase new bolts for tightening. But it will be possible to say more definitely after dismantling the head.
Required Tools
- torque wrench;
One type of torque wrench
- a set of keys;
- set of heads;
- hexagon;
- durable screwdriver.
Stages
Place the vehicle on a level surface.
Allow the engine to cool.
Power plant The first step is to remove the casing of the 8 cl power unit.
The number one cylinder piston should be set to the top dead center position.
De-energize the system by disconnecting the negative battery cable.
Drain the coolant.
Disconnect and set aside the air filter element.
Disconnect the heating hoses, other pipes and connectors.
Don't forget to disconnect all the wires from the spark plugs.
Next, remove the cylinder head cover.
Remove the camshaft drive cover located in front.
Insert a screwdriver into the hole in the pulley hub to prevent the camshaft from turning, and loosen the bolt securing the timing pulley.
Next you need to remove the timing belt.
Completely unscrew the bolt that secures the camshaft pulley.
Remove the pulley.
Next, you need to remove the camshaft drive cover, which is located at the rear.
Remove the remaining pipes and wires.
After disconnecting all the wires and pipes, you need to loosen the bolts that secure the cylinder head of the viburnum 8 class. This is done strictly according to the scheme.
Be sure to strictly adhere to this diagram when loosening the bolts. Next, you need to completely unscrew the cylinder head mounting bolts.
They are removed along with the washers.
We remove the cylinder head.
It is worth knowing that during long-term operation, the bolts with which the cylinder head is secured increase in length. Therefore, it is better not to save money, but to install new ones.
Before installing new bolts, they must be lubricated with oil.
We remove the Kalina cylinder head gasket.
The place where it was installed must be cleaned. This is done not mechanically, but using a special liquid. If you use a file or a wire brush, there is a high risk of scratching the surfaces. As a consequence, loss of tightness with all the ensuing consequences.
The surface was polished with an abrasive tool. Scratches are noticeable. Install a new gasket.
Installed new part We install the cylinder head. Make sure the crankshaft and camshaft are at top dead center.
This is a very important condition. We insert bolts into all holes and tighten them in a certain sequence:
We insert bolts into all holes and tighten them in a certain sequence:
The diagram for tightening the bolts. First, we walk around the first circle and pull, applying a force of 20 N•m (2 kgf•m);
Then we go around the second circle and pull, applying a force of 69.4-85.7 N•m (7.1-8.7 kgf•m);
Next, use a wrench to turn the bolts 90 degrees;
We go through it again and turn it 90 degrees again.
Next, you need to connect all the removed wires and pipes. Many car enthusiasts, performing this work for the first time, mark the parts or take photos.
At this point, the replacement of the cylinder head gasket on Kalina with an 8-cl unit is completed. The process cannot be called simple, but requires special care and accuracy. If, after reading the material and viewing the photo gallery, you still have questions, watch the video material.
How to drain all antifreeze from Lada Kalina yourself
Today Lada Kalina is a fairly popular type of vehicle. This brand of car is distinguished not only by high technical performance characteristics, but also by a moderate price category, which helps to increase demand among domestic consumers.
The car is presented on the modern market in three main body styles:
Despite the wide range of existing advantages of such a vehicle, owners often have a question: how to drain antifreeze from Lada Kalina? Is it possible to carry out such an event on your own?
Advantages of the Lada Kalina vehicle
Before you start replacing antifreeze in vehicles, you need to find out what advantages such a unit has
The creators of Lada Kalina paid close attention to various features of the car. This made it possible to create a high-quality unit, equipped with the following options:
- electric power steering;
- centralized lock;
- airbags;
- increased level of vehicle rigidity;
- modernized interior ventilation system;
- wide viewing angle.
The advantage of the Lada Kalina is also considered to be the presence of specialized belts equipped with pretensioners, since such an element complies with existing norms and standards of the highest quality.
Replacing antifreeze Lada Kalina
Western experts at service centers recommend replacing antifreeze in a car at least after every 50 thousand kilometers. Often, before replacing the fluid, the car owner is faced with problems associated with replacing the radiator expansion tank, water pump or thermostat.
Of course, to carry out such actions, it is necessary to drain the coolant. That is why a fairly reasonable question arises: how to drain the antifreeze in a car yourself, without turning to experienced professionals?
Step-by-step instruction
Owners of a LADA kalina car should be aware that before starting to replace antifreeze, you need to know what it is.
Antifreeze, better known as antifreeze, is a coolant for the optimal functioning of all vehicle systems and mechanisms. This liquid does not freeze at extreme temperatures and is diatomic. Professionals recommend replacing antifreeze or antifreeze if the temperature changes.
That is why car owners know that, in principle, water can be used for the summer period
In winter, it is important to pay attention to such a criterion as increased resistance to frost. Professional experts have created step-by-step instructions that will help every car owner change the antifreeze on their own
- Place the unit on the inspection hole;
- Cool the engine;
- Remove the plastic motor boot. This action can be carried out if you use specialized tools;
Remove the hidden plugs for the fog lights;
Unscrew the hidden screw;
- Place a specialized container under the vehicle radiator;
- Unscrew the specialized plug located at the bottom of the radiator;
- Drain the coolant;
Pay close attention to the car engine to drain the fluids from it;
- Place another container under the engine;
- Unscrew the specialized bolt, which is also called a plug;
Drain off the remaining liquid.
After such measures are completed, the drainage of the liquid is considered complete. Now you can start cleaning the system, replacing faulty components, or simply adding fresh antifreeze.
How to drain antifreeze in Kalina
Useful expert advice
If the expansion tank cap leaks and does not hold pressure, it should be replaced
- The lid will expand. tank 2108 2108-1311065 Automatic device - price from 130 rub.
- The lid will expand. tank 2108 LUZAR LL 0108 price from 100 rub.
- The lid will expand. tank 2108 Chistopol 2108-1311065 price from 70 rub.
After replacing the antifreeze, check all pipes for signs of leakage. If necessary, replace the pipe clamps.
For 15 years I have been repairing various types of cars, including brands such as VAZ, UAZ, Chevrolet, Mazda, Kia and many others. Everything related to the gearbox, engine or chassis. You can write me your question below in the comments and I will try to answer it in detail.
What kind of liquid should be poured into the cooling system according to the passport?
Open the hood and look at the expansion tank. We see a sticker on top: it says “TC Felix-40”. This means that Felix TC-40 antifreeze, produced in the city of Dzerzhinsk (Tosol-Sintez LLC), was filled with antifreeze.
If there is no sticker, we identify the liquid by color:
- Green - as indicated above;
- Yellow-green (light green), there is a fluorescent effect - CoolStream Standart 40 (Tehnoform, Klimovsk).
There may be a blue coolant, but like the previous two, it is a G11 class antifreeze. The red liquid belongs to class G12 - further on it says how to dilute it.
Antifreeze can be sold in the form of a concentrate. Usually you need to add water (distillate) in a 1 to 1 ratio. Be careful!
G11 and G12 (antifreeze or antifreeze)
Read more about the difference between antifreeze and antifreeze in this material.
Compatibility table for antifreeze:
- Antifreeze class G11 - color blue, green or yellow-green. Can be diluted with antifreeze or G11 class antifreeze.
- Class G12 - red color. In principle, it is impossible to add coolant of another class (not G12).
When buying, you need to look not at the color, but only at the designations.
In the VAZ-2114 tank, the coolant can be colored red. If it was filled upon release, then we are talking about Felix Carbox TC-40 (G12) antifreeze
When inspecting the tank, pay attention to the presence of smudges. If they are present, then the antifreeze is knocked out of the tank and the coolant boils.. Educational program on names: “antifreeze” is one of the types of antifreeze classified as class G11.
Educational program by name: “antifreeze” is one of the types of antifreeze classified as class G11.
Concentration and proportions
Standard concentrates contain 3% water and freeze at low temperatures. To increase it to “-40”, the water content is adjusted to 50% (proportion “1 to 1”). According to VAZ requirements, the freezing temperature should be “-40” or lower. Draw conclusions.
If antifreeze freezes at “-50”, adding 1/10 of water raises the temperature to “-40”, and 1/5 to “-34”.
About the cooling system in general
The volume of the cooling system of engines 2111, 11183 and 21124 is the same. It is equal to 7.8 liters. Part of the “old” fluid (1-2 l) remains in the system when replaced. Therefore, they do this: they fill the system with water (distillate), drive 10-20 km, and carry out the final replacement. All actions, of course, are performed in the warm season.
To get to the drain plug, you need to remove the ignition module from the 11183 engine. What needs to be done: disconnect the low-voltage connector, unscrew the three screws (see photo). You can then remove the module along with the bracket.
It is better not to apply all the “folk advice” about adding various acids to the wash water. It is unknown how a liter of antifreeze will react with vinegar or citric acid. But the stove tap must be opened when flushing.
For replacement (factory recommendations for choosing coolant)
For a complete replacement, it is recommended to choose any material from the list:
- CoolStream Standard - green, G11;
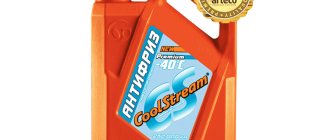
- CoolStream Premium - orange, meets the requirements of class G12+, but belongs to class G12 or G11 (the manufacturer does not specify);
- “Lada Concentrate” - G11, manufactured by “Bulgar Lada Plus” (Kazan) or “Oil Center” (Togliatti);
- "Lada A-40" - the same as "Lada Concentrate", but in a ready-to-use form;
- OZhK, also OZh-40 or OZh-65 “TOSOL-TS” - different names and concentrations of antifreeze from the city of Dzerzhinsk (see above);
- OZhK, OZh-40 or OZh-65 “TOSOL-TORSA” - blue-green, G11;
- "Antifreeze G-48" - G11. The material has been discontinued and was produced in the city of Perm.
The photo below shows an example of a fake.
The name contains everything - both Dzerzhinsk and A-40. Be careful.
Antifreeze and its volume
To fill the cooling circuit in the Lada Kalina with new fluid, a volume of approximately 8 liters will be required. Initially, the manufacturing plant uses the substance “Felix” with a red color. In order to practically replace the fluid, you will need to purchase a 10-liter container with the specified antifreeze or, as an alternative, two 5-liter canisters.
Search
How to change the coolant (antifreeze or antifreeze) on a Lada Kalina
To avoid overheating the engine, you need to monitor the level of the cooling water, even if you have added antifreeze or antifreeze. Look at the water level in the expansion tank and check for leaks in the pipes and their connections, as well as in the pump. Complete replacement of filters in accordance with these rules is recommended every 5 years or every 75 thousand kilometers at the factory.
Which antifreeze to choose and how much do you need?
To completely change the cooling water in the car, you need Lada Kalina / Kalina 2nd generation 7.8 liters of antifreeze or antifreeze, depending on your choice. At the factory, reddish Felix antifreeze is poured.
To completely replace the coolant (cooling water), we will need to buy one 10 liter canister or two jokes of 5 liters each.
Select replace antifreeze
If reddish antifreeze was poured out at the factory, we recommend creating a replacement reddish antifreeze.
- AGA 003Z (-40) reddish 10l price from 1000 rub.
- Professional premium G-12 reddish 10 liters from 700 rubles
- SINTEC LUX G-12 reddish 10l price from 1000 rub.
- FELIX Carbox-40 (10 l) red price from 950 rub.
- NIAGARA G12 (10 l) red price from 800 rubles
- G12 Arctic Circle (10 l) red price from 700 rubles
All of the above manufacturers have proven themselves, since antifreeze from these manufacturers can be used to replace them.
What will need to be replaced?
- A container for draining old antifreeze of 6-8 liters.
- Head 16mm
- 13mm wrench for removing the drive for the 16 valve version of the viburnum
It's better to create a replacement for a cool engine. Before changing system pressure, you must remove the expansion tank cap. To freely access the drain plug, you need to remove the middle dirt flap.
Instructions for replacing coolant
In Kalina with 8 and 16 valves, the engine coolant is different. Old fluid can be drained from the radiator without any problems, but from block 16 the engine valve is more difficult. You will have to unscrew the starter.
Replacing the coolant. Kalina
It's time to change the coolant, and the question arose about how to refill antifreeze or antifreeze
, and how it's done.
You may also like
replacing antifreeze
produced after 5 years.
Replacing antifreeze on the 8th valve of the Lada Kalina engine
So, we relieve the pressure in the system by unscrewing the cap of the expansion cylinder. Then remove the engine protection to get to the drain plug.
We take a container of 6-8 liters. and place it under the drain hole located at the bottom right of the radiator. To reduce pressure, turn the barrel extension back.
We disconnect the drain plug on the radiator and let the water drain from the radiator one hundred percent.
Drain the cylinder block on an 8-valve engine
It is easy to drain the old coolant from the traction box into the 8 engine valve. The drain plug is located under the ignition coil.
Using 13 heads, unscrew the drain plug, replace the tank and drain the liquid.
Drain the fluid from the cylinder block up to the 16th engine valve
You will need to remove the starter to get to the drain plug. If you do not remove the starter, but unscrew the plug and drain the fluid, it will flow directly onto it, which can lead to breakdown.
Disconnect the wiring block from the traction relay on the starter. Remove the protective cap from the positive wire and use a 13mm wrench to unscrew the nut and remove the wire.
You may also like
Then unscrew the key from 13 three starter mounting bolts and remove it.
Now all that remains is to unscrew the drain plug and drain the coolant from the cylinder block.
After draining the liquid from the device, wind the drain plug with a force of 25-30 Nm. We also wrap the radiator cap and pour coolant through the expansion tank until it is full.
We begin to move and push all the pipes, thereby stimulating a better flow of antifreeze or antifreeze and filling the entire system. Do not forget to monitor the fluid level in the cylinder, which should be between the minimum and maximum.
How to tell if the thermostat is working
When the engine warms up, we touch the lower exhaust pipe. It will be cool, and later it should quickly warm up, indicating that coolant has begun to circulate through the large circle. Watch the fan as it turns on and lowers the temperature, turn off the engine and check the coolant level in the expansion tank.
This completes the antifreeze change.
After replacing the antifreeze, check all injectors for leaks. If necessary, replace the clamps.
1449660640_2279_4_9a_02
On a vehicle with a 16-valve engine equipped with a cable-driven gearbox, access to the drain hole in the cylinder block is prevented by the starter. In addition, the leaking liquid will inevitably get inside the starter.
Therefore, the starter needs to be removed. Disconnect the wire terminal from the negative terminal of the battery. By pressing the latch of the wire block, disconnect the block from the traction relay connector. Remove the protective cap from the nut securing the tip of the wire connected to the positive cable of the battery.
How to change the thermostat Lada Kalina
Instructions from the repair, operation and maintenance manual.
Replacing the thermostat actuator element Lada Kalina
- Drain the coolant - coolant.
- Remove the air filter housing.
- Loosen the clamps securing the hoses to the thermostat pipes using a Phillips screwdriver.
- Disconnect the hoses from the connections.
- Unscrew the three thermostat bolts with a 5mm hex key.
- Open the thermostat housing and remove the sealing ring.
Replacing the Lada Kalina thermostat assembly
- Disconnect the hoses from the pipes on the thermostat cover (repeat steps 1-4 of the previous instructions).
- Disconnect three more hoses in the same way.
- Disconnect the wire connector from the coolant temperature sensor.
- Using a 13 mm socket wrench, unscrew the nut securing the wire to ground.
- Use it to unscrew a couple of nuts securing the thermostat to the cylinder head.
- Remove the thermostat and remove the rubber gasket.
- Unscrew the coolant temperature sensor, if necessary.
- Installation is in reverse order; the gasket must be replaced.
- Pour new coolant into the system.
- Check for leaks; if there are, tighten the clamps on the hoses.
This is what the new thermostat looks like.
First of all, drain the coolant. Next, you need to remove the air filter. To do this, you need to unscrew the 2 bolts on top.
And one nut from the engine compartment.
A recirculation valve is attached to the filter body itself - you need to remove the connector from it, and move the recirculation valve itself up and take it to the side along with the tubes.
Next, remove the connector from the mass air flow sensor and, loosening the clamp, pull off the air supply hose.
After the work has been done, loosening and at the same time turning the housing of the filter itself, pull it up and put it in a convenient direction.
Next you need to clean the seat. After cleaning, apply a thin layer of approximately 1-2 mm of sealant. Instead of sealant, you can use a paper gasket.
Next, use a 12mm wrench to unscrew the nut that is located on the top of the thermostat, then remove the ground wires. Next, use a 13mm wrench to unscrew the pin at the top and the nut located at the bottom of the thermostat. Shaking a little, we pull off the thermostat.
After 5-10 minutes, put everything back together in reverse order. The main thing is not to forget to put the ground wire in place.
How to find the reason
Start checking with the electric motor. To do this, disconnect the electrical wires from it and connect it directly to the battery, observing the polarity. If the fan does not turn on, that is the problem. If it works, you need to look for another reason.
Check all contacts on the connectors, and then the relay and fuse. They are located in an additional mounting block, which is located to the right of the instrument panel near the lower heater air duct.
The fuse (50 A) can be checked with a tester; it is better to take a relay that is known to be working and install it in the appropriate socket. If the problem is not solved, move on.
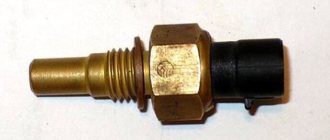
Checking the temperature sensor. To do this, warm up the engine to operating temperature, turn it off and disconnect the sensor. It is located on top of the thermostat housing. When the sensor is disabled, the controller must independently start the fan to operate continuously.
Start the engine and wait for the fan to turn on. If the coolant temperature has reached a critical value and the fan does not turn on, you need to look for a break in the electrical wiring.
Do I need to change the fan?
If you have determined that the problem is in the fan itself, or rather in its electric motor, you can try to repair it. Most often, it stops working due to failure of the brushes, or due to problems with the rotor bearings. Less often the collector becomes unusable or a break occurs in the winding.
If the fan cannot be repaired, it must be replaced.
Under no circumstances should you drive a car with a non-functioning fan. Overheating of the engine will inevitably lead to the destruction of the rubber hoses of the cooling system, gaskets, and also threatens the failure of parts of the piston group.
What antifreeze does AvtoVAZ recommend?
For all VAZ engines (Lada Granta, Kalina, Priora, Niva 4x4), the manufacturer’s recommendations are the same (data from books on the operation, maintenance and repair of Lada cars):
- Antifreeze G-48;
- Cool Steam Standard;
- Cool Steam Premium;
- TS-Felix;
- Felix Carbox;
- SINTEC (for example, “Antifreeze SINTEC” TU 2422-047-51140047-2007);
- Long Life;
- G-Energy Antefreexe.
For K4M and K7M power units that are installed on Lada Largus, the manufacturer recommends GLACOEL RX antifreeze (type D). For Lada Vesta and XRAY, it is recommended to use Type D antifreeze based on a mixture of water and ethylene glycol.
AvtoVAZ's response
: coolant in the VAZ 21179 engine cooling system - Antifreeze Sintec LUX G12 (Sintec ANTIFREEZLUX G12).
Coolstream NRC in yellow is also used.
Functional range of elements of a car cooling system
The standard cooling system consists of the following elements:
- sensors – determine t° in certain auto mechanisms; one of the management elements of the system;
- pump – makes it possible to circulate liquid in the SOD; operates in a forced mode;
- pipes – coolant moves through them;
- expansion tank - compensates for the volume of antifreeze, since due to temperature fluctuations it narrows and expands;
- radiator - a device that discharges excess heat into the environment;
- fan – activates the cooling process by forcing air; With its help, the cooling intensity increases;
- Thermostat - although small, is a very important element that regulates the amount of antifreeze; provides a “comfortable” temperature regime throughout the entire system.
Operating principle
The cooling system operates in a self-regulating mode, which is aimed at maintaining optimal temperature in the power unit. If the oil temperature rises significantly, the system does everything to ensure that the temperature inside the engine decreases.
Thus, with the close interaction of the above elements, the system functions. It automatically sets the necessary conditions for the inclusion and operation of structural parts, which ensures effective cooling of the power unit.
And if any problems arise with the functionality of the components of this system, it is necessary to carefully examine the safety of its main components. If the driver is qualified and experienced enough, he can cope with the task independently. Otherwise, it is better for an owner who is not very knowledgeable about cars to seek help from a service station.
Features of front and rear wheel brakes
The bolts are placed in the passages of the guide blocks, pressed by the guide spring grooves. A piston with a sealing ring of rectangular cross-section is placed inside the cylinder. This ring provides the most rational distance between the disc and the brake pads. This organization of Kalina's braking system contributes to its efficient functioning.
In addition to the head system, the developers equipped the Lada with a mechanical parking brake, which is driven by the brake mechanisms of the rear wheels.
- adjusting rod;
- lever arm;
- two cables;
- equalizer;
- spacer bars;
- pad drive levers.
Possible malfunctions of the ODS, diagnostics
Almost always, a breakdown of the cooling function of a car is caused by an antifreeze leak. You should inspect the car under the hood for possible leaks. The cause of the leak may be:
- or a leaky clamp;
- or a radiator failure.
Then in the first case the element is replaced; this is not difficult and does not take long. As for the radiator, it is better to have it repaired. There are also no particular difficulties here: often you just need to solder the holes.
The reasons for overheating of this car can also be:
- thermostat. Its suitability is checked using both pipes: the temperature of the latter should not be sharply different (this is determined on a warm engine). Otherwise, the thermostat is faulty and antifreeze circulates in a small circle;
- clogging of radiator honeycombs. You can solve the problem by cleaning the outside of this element. Often this is not always easy to do, but there are no other methods other than manually cleaning the honeycombs;
- Fan malfunction. When the heating level of the coolant increases, this part should begin to operate. If this does not happen, check the relay, wiring or t° sensor;
- air in the coolant system. Lada Kalina is not insured, among other things, against the so-called air lock inside the system. In general, previous types of breakdowns are eliminated quite quickly and almost everything is clear with them. In the latter case, it is necessary to understand in more detail. The question - how to remove air from the Kalina cooling system - is really very important for the optimal functioning of the totality of the elements of this car.
Airlock
If the cooling system becomes airy, you need to do the following: with the expansion tank cap open, start the power unit, squeezing the gas pedal from time to time, warm it up until the t° sensor “reaches” the red scale. After “starting” the ventilation device, “add up the gas” a little more and then you can turn off the ignition.
If the cooling system is still leaking air and the above measures have not led to anything, you should act more radically. What needs to be done to remove air from the cooling system?
First, remove the power motor screen (dismantling is done in an upward direction).
Loosen the clamp with a screwdriver and remove one of the tubes from the heating fitting of the throttle assembly.
Unscrew the cap of the expansion tank. Cover the neck of the opened container with a clean piece of cloth. Now blow into the tank: coolant should flow from the tube that was removed. If you fail to break through the above container, close the lid and place the tube in its place.
Next, warm up the engine again and turn off the ignition. Then the tube must be removed again, without removing the lid from the tank, and wait until the antifreeze flows.
Since this liquid is very poisonous and dangerous for people, drain the coolant with extreme caution. Remember about safety: get rubber gloves
Monitor the temperature of the tubes. Keep in mind that you only need to drain the coolant when the engine has cooled down.
Now the tube is put on the fitting, the clamps are tightened. At this stage, the problem of how to remove air from the cooling system of the car has been successfully solved. As you can see, it is possible to eliminate faults in the ODS without the participation of professionals.
SOD Lada Kalina in a certain sense requires improvement.
At the moment, there are the following methods to improve it:
- rework. The car is equipped with a new thermostat. Thus, the temperature of the antifreeze will become stable, and the activity of the interior heating elements will return to normal;
- to minimize coolant malfunction, the machine is equipped with a coolant filter;
- an additional pump in the above-mentioned power unit system. This will force the antifreeze to circulate through the appropriate channels faster, which will definitely reduce engine overheating. And a plus - in cold weather you will not freeze in the car.
How to replace coolant on Kalina
Coolant must be poured into the Lada Kalina car in order for it to perform several of its functions, such as maintaining the temperature (temperature sensor), cooling the engine, and it must also eliminate the unpleasant odor that enters the cabin from the street. For all these “moments” to work 100%, Kalina antifreeze must be replaced on time.
Several additional functions that coolant performs:
- Maintains normal temperature (temperature sensor) during engine operation.
- Maintains low temperature (temperature sensor) in PC operation. Using hydraulic fluid, which must be poured into the automatic transmission.
- The interior is heated in winter. Due to the fact that antifreeze passes through the heater, it provides warmth in the car. The liquid heated by the motor is inflated by a fan. And thus, the interior warms up in winter.
- Eliminates unpleasant odor in the driver's cabin (passenger compartment).
Adding liquid to the tank So if you smell any of these signs, even a fleeting, incomprehensible odor, then you need to think about it and replace the liquid substance. Also, antifreeze or antifreeze in a Lada Kalina car should be replaced every two years or every 45,000 km, whichever comes first. Because over time, the quality deteriorates and the element may succumb to corrosion.
How to change coolant
Before changing the coolant, you need to figure out where the procedure is located, how many liters need to be filled, where the indicator should be located and how to determine the level. You need to find the expansion tank. It is located in the engine compartment, on the mudguard on the left, in the area of the bracket and is held on by clamps.
Then purchase 10 liters of antifreeze or antifreeze. Which is better, judge for yourself. Antifreeze is slightly inferior in functionality to antifreeze; moreover, antifreeze is mostly sold ready-made, which makes it much easier to use. Choose only high-quality and reliable products
Before the replacement begins, you should pay attention to the smell, the temperature sensor and the fluid level. All this indicates an immediate “replacement” procedure.
How to check the level:
- unfasten the rubber belt;
- unscrew the cap on the tank and measure the level;
The normal level should fluctuate somewhere around 3-4 mm above, if this is not the case, then you should replace the coolant on Kalina.
How to drain
To get started, you will need to acquire some tools:
- antifreeze or 10 liters of antifreeze;
- screwdriver;
- delivery key for 13.
Now with all this baggage you can begin the first part of the work. Let the engine cool down first.
- Place the machine on level ground.
- Open the hood and remove the engine splash guard.
- Remove the negative terminal from the battery.
- We take out the plug from the tank. Unscrew the cap from the tank
- Place the drain container and unscrew the drain plug.
- Remove the ignition module and bracket.
- Remove the plug from the radiator. And now you need to drain all the antifreeze.
How to fill
- After successfully completing the first part, you can move on to the second.
- We screw the drain plugs back, as well as the plug from the radiator.
- Disconnect the hose from the tank by loosening the clamps.
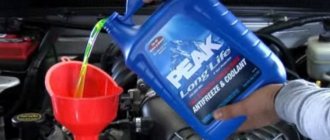
- Fill in the required amount of antifreeze.
- Reconnect the hose and continue pouring until the liquid reaches the 3 cm mark below the “max”.
- We tighten the cap of the expansion tank.
- Reconnect the terminal.
- Turn on the engine and warm up until the fan turns on. Check the level. We remove or restore the hoses in place
Done, the replacement in the Kalina car has been successfully completed.
Why does it flow
If the level of the recently filled substance began to decrease sharply, then this action may be the consequence of some breakdowns. Now we will look at them.
- The pipe is cracking; in this case, you need to check the clamps and tighten them tighter.
- Mechanical damage in the radiator, the situation can be corrected by welding or gluing the necessary parts.
- The pump has broken down, or rather the pump has worn out; in this situation the pump will have to be replaced.
- The most difficult failure to fix is when the element leaks from under the head. With this breakdown, you will most likely have to contact a service center, where they will disassemble the engine and repair the head.
- The leak occurs directly into the interior of the car, try to look under the carpet on the driver or passenger side, if it is wet or damp, it means that the element is leaking here.
The volume of antifreeze in viburnum is 1.4. Basic filling volumes
- Or after 2 years of operation
- Or after 60,000 km (whichever comes first)
The mileage of my Kalina has not yet approached the recommended one, but in terms of time, it was necessary to carry out this procedure last year. I delayed this a little, but I think it’s okay, since the antifreeze in the expansion tank is pure red - a little darker than new. Below is a list of necessary items that will be needed to perform this type of maintenance:
- Socket wrench or open-end wrench 13
- Head for 13
- Driver or ratchet handle
- crosshead screwdriver
- 17 socket or wrench for unscrewing the ignition module housing
Draining coolant from the Lada Kalina system
Before you begin this procedure, you must place the machine on a flat surface, or on a slight slope, provided that the front is slightly higher than the rear. It is also worth keeping in mind that the engine must be cold, otherwise you may get burned during draining.
First of all, we unscrew the bolts securing the ignition module (using the example of engine 21114), since the drain plug is located under it and during draining, antifreeze can get on the coil, which can lead to its failure. There are three of them in total, one is located on the right side, closer to the gearbox, unscrewing it is not very convenient, I had to use a ratchet wrench:
