The trunk release button does not work - what to do, how to repair it
The trunk lid of many modern cars (Volkswagen Passat, Chevrolet Cruze, etc.) is equipped with a special button, which can be pressed to open the trunk lid.
During active use of the car and frequent transportation of things in the luggage compartment, this function turns out to be very useful, since there is no need to constantly stick the key into the lock or open the driver's door in order to reach a similar button in the cabin.
However, like any other electrical devices that operate in conditions of constant exposure to changes in temperature and humidity, the button may work intermittently or even break down.
As a rule, everything happens precisely because water gets inside the mechanism due to its insufficient tightness.
If your trunk release button is broken , do not rush to contact an auto electrician - this problem can be fixed with your own hands without difficulty and large financial costs.
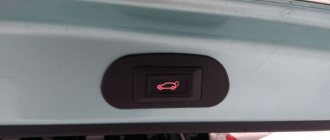
First you need to understand how the button itself works and what the principle of its operation is. And here everything is extremely simple: when you press the button, the activator is activated, which removes the latch, opening the trunk. The button itself is a regular switch in a plastic-silicone housing.
Installation of a standard electric drive on a Lada
Frets of the “tenth” family of recent years of production are equipped with an electric drive for opening/closing the trunk directly at the factory. Earlier series of cars do not have such equipment, so owners will have to install the electric trunk drive themselves.
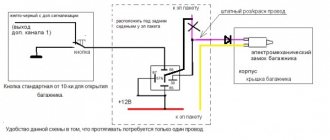
Our example involves the operation of the electric trunk drive through a separate button in the cabin. Some alarm systems have an additional ability - to open the luggage compartment, so it is to this system that we will connect the electric drive. For installation you will need the mechanism itself and a mounting plate.
In addition, you will need four meters of electrical wire and a switch button.
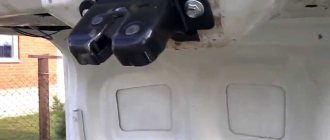
Before installing the electric drive, be sure to disconnect the negative terminal of the battery. Then we attach the lock drive and remove the protective casing, first removing the fastening clips. Using pliers, we straighten the rear end of the electric drive, unscrew the screw securing the rod, but not completely. The lock drive rod has been disassembled. Now the compartment cannot be opened from the outside, since the lock unlocking mechanism is disconnected from the lock cylinder.
Repairing the trunk release button - using the example of a Chevrolet Cruze
To determine the cause of the breakdown of the Chevrolet Cruze trunk release button, you need to remove it, inspect it and ring it.
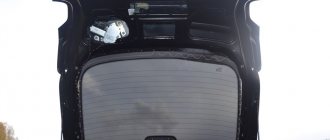
- To remove the panel (saber) with the button and license plate lights, you will have to remove the trim on the inside of the trunk lid.
- Under it there will be 4 10mm nuts and 2 yellow plastic clips.
- The nuts are unscrewed, and the clips are carefully pressed inward and snapped off.
- After this, it is enough to disconnect the connector connecting the wires going to the button and the backlight to completely remove the saber.
When visually inspecting the button from the inside, traces of moisture will usually be visible under the transparent silicone sealant filler.
It gets there during rain through small gaps between the button key and the body, or at the place where the wires are connected (there is also a small gap there). Trying to dry the button with a hairdryer without disassembling it will lead to nothing.
In this case, there are only two possible solutions to the problem:
- Buying a new button and replacing it completely.
- Complete disassembly of the button body and cleaning/drying and sealing it.
The first option is the simplest, but there is one “but”: the trunk opening button is not sold separately, but only in a group with two license plate illumination lamps.
The original part costs about 2000 rubles. The Chinese analogue from Aliexpress will cost three times less, but there are doubts about the quality of production. Therefore, before going to the car market for a new button, you can try to repair the “native” one.
For repairs you will need a minimum of tools and materials:
- multimeter (tester);
- screwdriver;
- sharp knife;
- hair dryer;
- sealant or hot glue gun;
- sandpaper-zero.
An electric multimeter is needed to check (“ring”) the button. To do this, just join the contacts button and click on it.
If the multimeter shows resistance, then the button circuit is intact. The absence of resistance indicates a violation of the integrity of the circuit.
The procedure for carrying out restoration repairs:
- Remove the button from its seat. To do this, you will have to remove the hot melt adhesive on which it is attached. This can be done using a knife;
- Remove the rubber cover from the button body and disassemble the button itself;;
- We clean the contacts (if necessary, you can use fine sandpaper), dry the insides with a hairdryer;
- We assemble everything in the reverse order, glue and seal all joints with sealant or hot glue;
- We coat the seat with sealant around the entire perimeter;
- Install the button, let the sealant dry;
- We return the saber to its place.
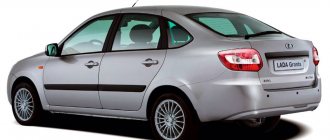
Lada Granta trunk does not open from the button
The Lada Granta Liftback “Norma” and “Standard” configurations do not have a mechanical button for opening the trunk lid. Often, owners are forced to turn off the engine and then run with the key to open the luggage compartment. This is not always convenient or practical, especially in bad weather.
The equipment of the Lada Granta Liftback “Lux” has a button to open the lid. Owners of other assemblies can independently install the trunk button on the Granta Liftback by following the instructions below.
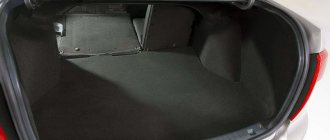
About the features and disadvantages of the liftback trunk
Practice shows that it is not possible to place a subwoofer in the trunk without the risk of damaging it, although the volume of the trunk allows it. Therefore, it is recommended to choose practicality over excessive aesthetics.
You can open (unlock) the trunk, or rather its lid, by pressing a specially provided button on the key. It opens with your hands up, so there is a high probability of getting your palms or clothes dirty. In addition, there is one minus - when we forget the key in the ignition system, we definitely have to go back for it.
The owners of the Lada Granta liftback described the luggage compartment handles as impractical, their design similar to recesses. They can also be seen thanks to the photo. The compartment lid slams shut silently, which prompts you to re-check whether the trunk is closed. The fifth door of the LADA Granta liftback will disappoint you with its heaviness, which is why you have to push it up when opening it.
When the button (in the cabin) is activated to open the trunk (not included in the standard version), the lid will not close, causing the lock to malfunction. To do this, you need to press the button again to return the lock to its original position, which will allow the lid to close.
According to the president of AvtoVAZ, the Lada Granta liftback has a more progressive design, which allows expanding the functionality of the car through a two-volume body structure. Based on the fact that advertising videos from the manufacturer hint at the stylish and sporty notes of the Grant, youth become the priority target audience for this model.
It’s not always stylish, rich and beautiful – it’s convenient! Although you can “turn a blind eye” to the minor shortcomings of the Lada Granta liftback. This is how the exterior turned out: tolerate it or buy it – it’s up to each individual to decide.
https://youtube.com/watch?v=6P24JY_3CmE
The trunk is wide enough, and the trunk volume is impressive, which cannot but please summer residents. You can see this from the photo. The silhouette of the hatchback is more rapid and sporty in comparison with the sedan. It is very difficult to design a spacious trunk if there is a limiting factor - the existing wheelbase. Therefore, this decision led to the shortcomings of the model described here.
Financially, Granta looks preferable to its competitors. It will appeal to people who want to travel in comfort, because it can fit almost half of the essential items for recreation, thanks to the size of the trunk, because its volume in liters is impressive. In this case, the LADA Granta liftback is doomed to success. This model is a significant step in the development of the domestic auto industry, which is a reason for pride among compatriots.
- https://xn--80aal0a.xn--80asehdb/do-my-self/repair/repair-lada-granta/4773-kak-vypolnit-diagnostiku-zamka-dveri-bagazhnika-lada-granta-liftbek.html
- https://litezona.ru/lada-granta-ne-otkryvaetsja-bagazhnik-s-knopki/
- https://prodemio.ru/lada-granta-liftbek-kak-otkryt-bagazhnik/
Where to buy a power trunk lock
To protect yourself as much as possible from purchasing non-original spare parts, service center technicians recommend using the services of official representative offices, service stations, dealers, and specialized auto stores.
Do not purchase goods from third-party suppliers who sell spare parts at unusually low prices. Always ask the seller to provide documents identifying the manufacturer, and check that the package includes a warranty card.
Recently, it has been popular to order parts and then install them at a service center. There are many advantages of this method, for example:
- efficiency of delivery;
- professional installation;
- quality guarantee for work performed;
- Possibility of individual ordering for tuning and local upgrades.
Sequence of actions for self-installation of an electric lock
- We place the machine within the perimeter of the repair area; you can use a flat platform with unobstructed access around the perimeter. A road overpass or inspection channel in this case is not so effective, since the driver is limited in movement.
- Open the luggage compartment lid, unscrew the two mounting screws, and remove the inner part of the plastic trim.
- We connect the block with two wires (“plus” and “minus”). “Mass” is black. We pack the cables in a corrugated cable, lay it along the inner cavity of the trunk lid, and lead it out into the technical hole.
- We run the wiring in the corrugation under the side decorative inserts and lower it into the lower channel. First remove the plastic covers and sound insulation.
- We go to the fuse block, namely to fuse No. 10A.
- Next, we install a four-pin relay, connect the terminals of the wires from the trunk, fuse and mechanical button. We power the minus from the radio.
- We install a mechanical button instead of a plug under the optics regulator (hydraulic corrector).
- We assemble the casing and check that the system is working properly.
Installation and connection of an electric lock to the central locking
Car enthusiasts who have installed an electric lock on the trunk of their car with their own hands recommend using standard kits from retail chains. Installing high-quality components means ensuring the operational reliability of the electric lock. Chinese manufacturers offer good installation kits for trunk lid locks. Machine kits include: electric drives; buttons; rod sets; wires with fuses; relyushki; installation strips. It is impossible to install electric locks without the appropriate tools and auxiliary materials, such as insulating, corrugated tubes, and fasteners.
Having decided to install it yourself, you will have to perform a number of plumbing works on the machine. This includes marking for electric lock components, drilling holes for fasteners, installation, fastening. The sequence of work is similar to the previous ones:
- On the trunk of a particular car, locations for mounting an electric locking device are determined. After marking, installation holes are drilled, the drive and clamp are attached.
- If necessary, the electric lock components are modified. The lock drive rods are installed with preliminary markings.
- The battery terminals are disconnected; according to the electrical diagram, it is necessary to install and lay the wires and connect them to the appropriate contacts and connectors. Use a multimeter to check the correct connections of the electric lock on the trunk of the car. The terminals are connected to the battery.
- The lock is connected to the main central locking button, or to an individual one installed in a convenient place inside the car.
- The operation of the electric lock is checked. If necessary, adjustment and fitting work is carried out.
source
Reviews
Conclusion
In the Lada Granta “Norma” and “Standard” trim levels, a mechanical button for activating the trunk lid is missing. Provided you follow the installation algorithm and purchase original consumables and spare parts, the service life of the relay will exceed 5 years.
Cheap components for the lock, violation of installation technology, short circuit in the circuit contribute to rapid wear and damage to the mechanism. A number of negative reviews are unfounded; the damage was caused by the driver.
Is it necessary to install a negative cable into the interior of the car? Can I get power from the rear lights and side lights? This will save two meters of wire.
Konstantin, it is possible, even necessary. There is no fundamental difference where to connect the minus.
On the Lada Granta from 2022, the trunk opens from a button located on the trunk lid. To make opening the trunk easier, you can install an additional button in the Grant FL's interior.
Standard VAZ button worth 50-100 rubles
We connect the gray wire to Ground in its normal place
Review of Manufacturer Prices
| Name/article | Price, rub.) |
| electric lock 2191-5606010-10 | from 1500 |
| 2191-5606452 | |
| 2191-5605789-00 | —/— |
| 2191-5603652 | —/— |
| 2191-5604521 | —/— |
| Vartex 56526454 | from 1700 |
| Apollo 54654 | —/— |
| FX-F 82665/22 | —/— |
| Monado fd515545 | —/— |
*prices are current as of 10/09/18.
The opinions of the service station masters agreed on the choice of manufacturer - there is not much difference. When purchasing original products, the service life of the equipment exceeds 5 years.
Installation in “makeshift” conditions and poor-quality manufacturing only shorten the period of use of the equipment. Often the owner is to blame for the breakdown, violating the vehicle maintenance regulations.
Repairing the trunk release button - using the example of a Chevrolet Cruze
To determine the cause of the breakdown of the Chevrolet Cruze trunk release button, you need to remove it, inspect it and ring it.
- To remove the panel (saber) with the button and license plate lights, you will have to remove the trim on the inside of the trunk lid.
- Under it there will be 4 10mm nuts and 2 yellow plastic clips.
- The nuts are unscrewed, and the clips are carefully pressed inward and snapped off.
- After this, it is enough to disconnect the connector connecting the wires going to the button and the backlight to completely remove the saber.
When visually inspecting the button from the inside, traces of moisture will usually be visible under the transparent silicone sealant filler.
It gets there during rain through small gaps between the button key and the body, or at the place where the wires are connected (there is also a small gap there). Trying to dry the button with a hairdryer without disassembling it will lead to nothing.
In this case, there are only two possible solutions to the problem:
- Buying a new button and replacing it completely.
- Complete disassembly of the button body and cleaning/drying and sealing it.
The first option is the simplest, but there is one “but”: the trunk opening button is not sold separately, but only in a group with two license plate illumination lamps.
The original part costs about 2000 rubles. The Chinese analogue from Aliexpress will cost three times less, but there are doubts about the quality of production. Therefore, before going to the car market for a new button, you can try to repair the “native” one.
For repairs you will need a minimum of tools and materials:
- multimeter (tester);
- screwdriver;
- sharp knife;
- hair dryer;
- sealant or hot glue gun;
- sandpaper-zero.
An electric multimeter is needed to check (“ring”) the button. To do this, just join the contacts button and click on it.
If the multimeter shows resistance, then the button circuit is intact. The absence of resistance indicates a violation of the integrity of the circuit.
The procedure for carrying out restoration repairs:
- Remove the button from its seat. To do this, you will have to remove the hot melt adhesive on which it is attached. This can be done using a knife;
- Remove the rubber cover from the button body and disassemble the button itself;;
- We clean the contacts (if necessary, you can use fine sandpaper), dry the insides with a hairdryer;
- We assemble everything in the reverse order, glue and seal all joints with sealant or hot glue;
- We coat the seat with sealant around the entire perimeter;
- Install the button, let the sealant dry;
- We return the saber to its place.
If the above repair method does not produce results, you will have to buy and replace the entire set (button + license plate backlight).
Soldering a separate trunk button
Replacement occurs according to the following scheme:
- Using a Phillips screwdriver, unscrew the fastenings of the license plate lights (4 self-tapping screws);
- We remove the button from its regular place by removing the hot-melt adhesive;
- We install a new kit: we recommend placing the backlights and the new button on silicone sealant to protect them from moisture and dust.
Preparatory stage
- impact screwdriver;
- cross bits;
- pliers;
- plastic clips in case of damage to the standard ones;
- liquid for removing rust and corrosion;
- a new lock, the modification is chosen individually by the owner.
Procedure for independently replacing the driver's door lock on a Lada Granta Liftback
- We install the car within the perimeter of the repair area and provide unobstructed access around the perimeter.
- We take priority safety measures when carrying out work. We fix the rear row of wheels with wheel chocks and engage first gear to avoid arbitrary movement.
- Open the driver's door, use an impact screwdriver to unscrew the two screws securing the shackle to the car body, and remove it from its seat. We install a new shackle with soundproofing material.
- Let's start removing the constipation: unscrew the plastic float and remove the stem.
- We unscrew the car door card, two screws, eight plastic clips around the perimeter.
- We disconnect the block with wires from the double-glazed window control unit, speakers, and central locking.
- From the outside, unscrew the three screws that secure the lock body to the door.
- We remove the two rods, having first disconnected them with pliers.
- We carry out preventive maintenance, clean the seat, remove old grease, and apply a thin layer of new one.
- Let's start installing the new lock.
- We assemble the structure in the reverse order, unless there are other breakdowns that require surgical intervention or elimination.
During the installation process, we pay attention to the integrity of the electrical wiring, insulating layer, terminals, and blocks with wires. If there are signs of wear, replace them with new ones. Do not operate a machine with faulty electrical wiring.
Do not operate the machine with faulty electrical wiring.
Typical door lock malfunctions
- tightness of locking the door;
- increased noise when opening/closing;
- the central lock does not lock the door and does not respond to signals;
- unlocking is accompanied by a creaking, metallic grinding sound;
- While driving, the door vibrates, cracks are visible in the places of contact with the standard seal.
Common Causes of Premature Wear
- failure to comply with the deadlines for technical inspection, preventative maintenance, lubrication, and replacement of worn elements;
- third-party mechanical damage resulting in deformation of the door or lock;
- manufacturing defects at the factory;
- the lock has become loose due to loosening of the fastening;
- violation of the adjustment algorithm;
- human factor: systematically locking the door with force.
The defect is eliminated by replacing the constipation assembly.
Replacing the rear (passenger) door lock
The procedure for preventing locking of the front/rear passenger door is carried out by analogy. The design and method of fixation are typical.
Installing a trunk lock on Lada Granta Liftback
- We place the car on a level platform and provide access to the trunk lid.
- We take safety measures when carrying out work.
- We unscrew two screws and remove part of the lower plastic trim of the trunk lid.
- Unscrew the two screws securing the lock body to the trunk lid;
- Using pliers, remove the rod from the button to the body.
- We remove the constipation, carry out preventive maintenance, lubricate the threads and the rod end.
- We install a new lock and assemble the structure in the reverse order.
- We unscrew two screws, remove the standard shackle, install a new one with sound-insulating material.
Replacing the hood lock
- Inside the car, under the dashboard, there is a hood release lever. We pull it towards ourselves.
- Release the latch and lift the hood.
- Using a TORX key set to “10”, unscrew the two screws holding the lock body to the body.
- Using pliers, remove the cable eye from the seat.
- We remove the lock, install a new one in its place, and assemble the structure again.
- Lubricate the bow-clamp with silicone grease/solid oil.
The trunk of the Lada Grant does not close, what should I do?
Car : Lada Granta. Asks : Vasilissa the Beautiful. Question : The trunk on the Lada Granta does not close, what should I do?
Good afternoon everyone. I opened the trunk on my Grant, but couldn’t close it. I stopped near the house, took things out of the trunk, bang-bang, but the fifth door wouldn’t close. No matter how much I knocked with it, I tried with the key, nothing worked. Why might the trunk not close, is the lock broken?
How to open the trunk if the lock is broken: simple methods ⋆ CAR WORKSHOP
Many car enthusiasts are concerned about the question of how to open the trunk if the car lock is broken. Currently, there are several of the simplest and most effective ways to solve this problem without involving expensive specialists from repair shops.
The main reasons why the trunk does not open:
Clogged mechanism (dirt flying out from under the wheels while driving is often the cause of failure of the car trunk lock)
Failure of the electric drive (the electric drive is responsible for activating the latch of the locking mechanism)
Mechanical failure (failure of the locking mechanism - in this case it will not be possible to open from the outside)
Oxidation of contacts (a diagnostic scanner will be required to identify the breakdown).
If all attempts to open the luggage compartment from the outside are unsuccessful, you need to use access from inside the car.
Sources:
https://avtotop.info/lada-kalina-ne-otkryvaetsja-bagazhnik/ https://chinzap.ru/uhod-za-avtomobilem/pochemu-ne-zakryvaetsya-bagazhnik.html
You have to eat more porridge and press the trunk release button longer
It’s a joke about the porridge; girls don’t have to eat it in large quantities. But about the button - that's right! This is a known disease of the Lada Granta car.
Button for opening the trunk in the cabin
This problem occurs due to the fact that the trunk opening button was pressed briefly, so to speak.
You just need to hold the button down for about a second and there won't be any problems.
If the trunk does not close
If the trunk does not close, then press and hold the button longer
If your trunk does not close, you need to press the open button for more than one second. Almost all Grant owners know about this, as they have encountered such a situation. Some people found a specific problem by poking, others tried everything and the problem went away.
There is no need to twist anything here!
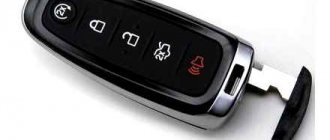
The trunk release button can also be operated from the key fob
In this situation, opening the trunk with the key will not help. Also, some alarm systems can open the trunk using the key fob, and if a problem arises with this opening, then it is necessary to increase the interval (pulse) of the button!
Features of opening the trunk of the Lada Kalina
Owners of the LADA Kalina car are almost unanimously surprised: with all the bias towards Europe, the trunk lock of the Kalina hatchback in the basic configuration for some reason can only be opened with a key. For many, the situation immediately became quite common: the driver gets into the car, starts the engine and then remembers that he needs to put something from the passenger compartment into the trunk . Further actions are similar to a joke.
You need to turn off the engine, remove the key from the ignition, get out of the car, and so on. If you imagine all this in an environment of time shortage, one can only feel sorry for the owner. In addition, if someone happened to approach the trunk of a car with something heavy in their hands, the procedure for opening it with a key turned into something difficult. Another problem could have arisen: in regions where real frosts occur in winter, the lock cylinder would at times freeze tightly.
What’s interesting is that any car owner sees a separate button on the Kalina key, which for this brand of car replaces the standard key fob. She's supposed to open the trunk . If you press and hold such a button for a couple of seconds, you can hear a click - this is a signal that everything is in order with the electrical package control unit.
Then another interesting detail became clear: the craftsmen who climbed under the trunk trim to understand the internal structure realized that there was still a place for the lock activator and even a standard electrical connector for wires. And then the same craftsmen began to solve the problem of how to modify Kalina to increase the comfort of use. The complete trunk lock drive is not available for sale as a single set, so the parts will have to be obtained separately.
READ Installing gas struts on the trunk of a VAZ 2115
Lada Granta liftback (2019). Guide - part 3
If during a call (while the 3 key is illuminated
SOS" flashes red) initiated
by pressing the 3 " key
SOS", press key 3 again
SOS" and hold for at least 2 seconds, then emergency
the call will be canceled (key 3" backlit
color will be turned off).
The SVEOS is in this mode if no emergency call is made and if the ignition is turned off. In the “Off” mode, there is no backlighting of key 3 “
SOS”, and also the indicator 4 of the system status is not lit.
. In the “Off” mode, SVEOS does not respond to
pressing key 3 "
SOS". SVEOS exit from mode
“Off” is performed when the ignition is turned on.
The testing mode is intended to check the functionality of the SVEOS components. In the testing mode, the functionality of the SVEOS status indicator, the microphone and loudspeaker in the interior lighting unit, the backup battery and other internal components of the SVEOS is checked. If you wish, you can independently check the performance of the SVEOS by running the test mode. To start the test mode, you must: – make sure that the engine is turned off; – turn the key in the ignition switch (ЗЗ) to the “Ignition on” position and wait 1 minute; – turning the ignition off and on three times. After the 3rd switching on of the ignition (switching ZZ No. 6), the SVEOS goes into test mode if the engine did not start during the entry procedure.
In this case, the sound prompt “Testing procedure has started” will be played. During testing, the functionality of the microphone and loudspeaker will be checked. After playing the sound prompt “Say the control phrase”, you will need to say any phrase lasting no more than 5 seconds. Immediately after this, the audio prompt “Playing a control phrase” will be played and then the phrase you spoke will be played. The audio prompt “Enter your verification result” will then play. If testing of the microphone and loudspeaker was successful, then it is necessary to switch the protection zone 2 times according to the algorithm described below within no more than 3 seconds: