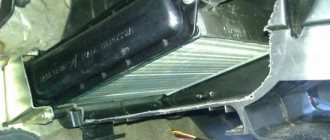
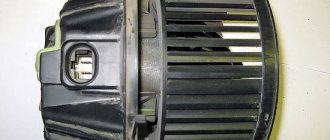
Replacing the heater motor without removing the panel
Hi all!
For the second year now, the heater motor on my Kalina has been beeping frequently. If before this happened quite rarely, now for the second day in a row the fan practically does not stop. I decided that there was nowhere to delay and this morning I stopped by BB with a new engine, the price of which is 1,400 rubles. I took the Luzar company, since it was the one that was praised by the majority of potassium growers. So, the first thing I did was remove the front passenger seat by unscrewing the 4 bolts that secure them, which resulted in much more free space.
Then we open the glove compartment, take out all the things from there, and unsnap the “curtain” mounting plate, then unscrew all the screws that are visible in the photo below:
Then unscrew one screw on the left side:
And another one on the right side. After this, you need to unscrew three more screws in the upper part of the glove box lid:
In general, next we remove the side trim of the passenger compartment pillar, as shown in the photo below:
After this, unscrew the screws from below using a short screwdriver or a bit and a ratchet:
Now we lift the upper black cover and unscrew the two nuts under it using an extension, a socket and a ratchet, as well as two self-tapping screws (shown by arrows):
Next, slightly lift the side air duct and unscrew the bolt:
So, we still have to deal with the lower bolts, two on the left and one on the right:
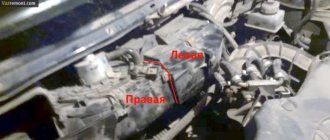
After performing all these manipulations, it seems that nothing will interfere anymore and now you can move the right side of the instrument panel to the side, and then put something under it to fix it in this position:
The photo above does not show an ideal option, and in my case I had to move it back a little more so that I could pull out the stove fan. Then you can crawl up from below with your hands and disconnect the power plug from the heater motor, after first bending the block clamp:
Next, unscrew the three screws that secure the heater fan to the housing:
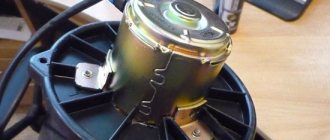
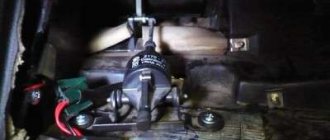
And after that we try to pull the motor out, if you manage to do this. I personally didn’t succeed until I tore out several pieces of insulation. As a result, after an hour of effort, we finally managed to pull the motor out, resulting in the following picture:
Then we put the new fan in its place without any problems! In fact, this is true - installation compared to removal is just idleness! In total, the whole job took me 3 hours.
The new motor works at least twice as well, and now blows better at first speed than before at second! It is not noisy, although the sound is not much different from the standard one.
In general, if you have any questions, ask, I will try to answer. If I messed something up in the description, please correct me, as I was in a hurry and might not have mentioned something!
Source
Replacing the electric motor of the Kalina heater with air conditioning - AutoTop
How to replace the heater motor (fan) of a Lada Kalina car with your own hands. Replacement occurs without removing the panel or seats. Everything should take no more than 1 hour.
With the onset of cold weather, the stove motor began to buzz loudly, and then jammed and stopped working altogether, which was saved by a strong blow to the panel. The owner did not wait for it to completely break down and decided to replace it. There is no need to completely disassemble the panel; just remove the glove compartment, unscrew a couple of plastic covers and we get direct access to the motor mounts. It is necessary to remove the old motor carefully, as the “snail” can easily be damaged.
New motor with LUZAR double bearing system:
The new motor performed well, the only drawback was that the operating noise was slightly increased compared to the original.
Video of replacing the Kalina stove motor:
Youtube video reserve:
When they pulled out the old stove motor, it turned out that the bearing in it was broken.
If the stove does not heat well or blows cold air on Kalina, see our detailed instructions in the problems and solutions section.
A couple of weeks ago there were real frosts in our city, below -40! I always set Kalina to warm up according to the temperature when the average daily temperature outside is below -25. In this case, I always close the damper, set the heater regulator to the minimum value, set the air flow direction to the front and leave the electric heater fan on at speed 1. This practically does not affect the maximum warm-up temperature, because The temperature regulator is in the minimum position, but you don’t have to worry about the integrity of the windshield, and the interior is no longer at a street temperature.
The first thing IPG did was to say that it was my own fault for not changing the cabin filter. What nonsense? Having poked him in the face with the order paid for TO3 from them a week ago (the regulations for which include replacing the cabin filter), he immediately agreed to the guarantee. He made an appointment for me to see electricians in the near future, and that’s in 3 days. So I drove for 3 days in such conditions at -35 outside the window! Hoping that now they would replace the resistor with a new one, based on the results of the work done, I was disappointed with how the AvtoVAZ warranty works, although rather this Auto Show. Instead of replacing the resistor assembly as prescribed by the factory, I had a piece of wire soldered in parallel to the burnt thermal fuse.
Everything would be fine, but the next day the wiring began to smell and a melted 25A heater fuse was noticed in the mounting block. But he is not only responsible for the heater fan, but also for the EUR! Having learned that the resistor costs a penny (180-210 rubles), I stopped at the nearest store, bought it and changed it. The good thing is that it is very easy to change - through the provided hatch under the glove compartment.
True, the new resistor lasted literally for a week, and the thermal fuse in it blew in exactly the same way.
There was no point in buying another one. I decided to revive the one I bought by replacing the thermal fuse (by the way, it is 127 degrees and 15A) with a regular flag fuse. Instead of a thermal fuse, I soldered terminals and inserted a 20A flag fuse there. The stove began to work normally.
But after some time, I began to notice a strange “rustle” when the fan was running at speed 1.
And then I noticed that the fan stopped starting at speed 1-2-3 until you turned it on for at least 2-5 seconds at speed 4! The problem was definitely not in the resistor, but in the electric motor itself.
Having stopped by IPG and describing the situation, it was decided to change the electric heater fan under warranty. But, as usual, I would have to wait for it for 1-2 months, which didn’t make me particularly happy, being left without a stove for the winter!
Having studied LKForum, it turned out that from the Kalina factory they install an electric fan on bushings and after 1 year, with intensive work (and I worked with it all summer with an air conditioner), the lubricant is completely used up, and adding it there is quite problematic. And under warranty they would have sent exactly the same one, until next winter at the most. It was decided to buy our own, but with 2 bearings, and let them change it.
The choice of electric fan was again based on LKForuma reviews, I decided to go with Luzar’s. Although it was difficult to find it in our city, the only official representative of Luzar did not have it in stock. After shopping around, I came across a scam from sellers: they were trying to sell a Bauller electric fan for viburnum with air conditioning for 2500 rubles, but for a regular one it already cost 800 rubles. If you suddenly encounter my problem, please know - email. The fan of a viburnum with air conditioning is exactly the same as that of a regular one.
After calling a bunch of stores, I finally found it in one. Although the store was on the other side of the city from me. And the price tag pleasantly surprised me; it was lower than the manufacturer’s recommended retail price - 1030 rubles. Although when I picked him up, it turned out that he had been with them for almost a year, perhaps that’s why...
Actually, now I’ll tell you a little about the fan itself. The most important reason I decided to go with it is the manufacturer’s 2-year warranty or 125,000 km. Therefore, in case of replacement, it is important to record the current mileage, and it is advisable to have the work done by an official so that there is a stamped entry in the service book.
There is also a rubber cap, under which you can see the non-serviceable bearing. I still don’t understand the purpose of this design, because... It is not possible to pour grease into the bearing through this hole.
Now about the replacement itself. Previously, replacement was carried out only after completely removing the entire panel, but now we have learned how to do this much easier. And again, don’t see if they tell you that it’s much more difficult to do this on a Kalina with air conditioning than on a regular one, and they charge a price tag of 3500-4000 rubles for replacing it. Everything changes in exactly the same way in 20 minutes, by unscrewing the screws from the right side of the panel and bending it back.
The master did the job in no more than 10 minutes; it took me longer to remove and put away the trash from the glove compartment!
They gave me a removed factory fan, told me that when the one ordered under warranty arrived, they would immediately call me and agree when it would be possible to exchange it.
Already at home, I examined the factory fan and saw that the impeller was rotating with great difficulty.
About a week and about 1000 km have passed since installation. I can feel that the fan on the bearings is a little noisier than the factory one at speed 1. But it creates a much more powerful air flow, at speed 1 in this weather there is enough heat so that the side windows don’t get drawn in, and at speed 2 in Kalina it’s already real hot that you have to undress or turn down the temperature on the regulator (although everyone knows that Kalinas have climate, at maximum it’s hot, and if you reduce it by 1 division it’s already cold).
As they say, prepare your sleigh in the summer, because with the onset of cold weather, the “car stove” becomes our indispensable friend. In most cases, the cause of cold air from the stove is a lack of antifreeze, but it also happens that when you turn on the stove nothing happens, this means that the fan is not working and requires replacement.
Why doesn't the fan work?
There are several options:
- it's a matter of wiring
- broken fuse
- non-working fan
If the fan malfunctions, if it burns out, you can smell the smell of burnt wiring throughout the cabin.
Replacing the Lada Kalina fan
First you need to disconnect the negative terminal from the battery. By pressing the two stops, open the glove compartment and remove the lid by pulling it up. Next, using a screwdriver, unscrew the fastening screws inside the glove compartment and on the side of the tunnel.
Now we are looking for the top screw which is located under the glove compartment lid.
Unscrew the three screws arranged in a row at the top of the glove compartment. In the place of the right passenger deflector, unscrew another screw.
We remove the plastic covers from the windshield pillar, where the two fastening screws are located. Unscrew them and remove the deflector. Unscrew the remaining mounting screws.
We remove the cover from the right end of the panel; there is no need to unscrew the two bolts, they are usually 13”. We pull the panel towards the interior and find the fan. Since getting a fan is quite difficult, we will need a cut piece of felt sound insulation. We unscrew the three screws and take out the fan of the Lada Kalina stove.
Now you can carry out a visual inspection for damage and, if any, replace or attempt to repair. Reassemble in reverse order.
autotop.info
The principle of engine operation and main breakdowns
A heater motor is an electrical machine designed to convert electrical energy into mechanical energy. The motor operates on the principle of electromagnetic induction. Structurally, the unit consists of two main parts - stationary (stator) and movable (rotor). Let's look at the reasons why the engine starts to get very hot and then fails.
The most common breakdowns:
- freezing or wear of motor brushes;
- short circuit to ground of the armature winding;
- damage or oxidation of wiring;
- collector oxidation.
All faults can be eliminated, but if breakdowns have become the norm, then the best solution is to replace the stove motor.
Replacing the stove motor
First of all, we purchase a new engine. The cost of the motor varies in the price range from 1500 to 2500 rubles. Most Lada Kalina owners prefer products. However, this is a subjective opinion and the choice, of course, is yours.
Quite often there are sellers who want to make money on the trust and simplicity of people. They tell customers that supposedly the electric motor for Kalina with air conditioning costs much more than for a regular one. In this case, the difference can reach 1000 rubles! If you suddenly come across such a “specialist salesperson” in a store, you shouldn’t trust him. The engine on the Lada Kalina with air conditioning is the same as the regular one. Accordingly, there cannot be a difference in price.
Replacing the motor should be carried out in a well-lit place. All parts are neatly folded in the order in which they were removed from the car. This simple measure will allow you to quickly install all components and assemblies in place after replacing the stove motor.
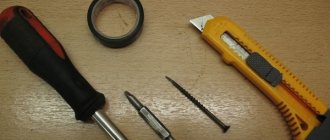
- a set of flat and Phillips screwdrivers;
- set of heads;
- a set of keys.
- lamp;
- pliers.
- dismantle the driver's seat (freeing up space for work);
- remove the glove compartment;
- remove the side trim of the passenger compartment pillar;
- unscrew the fastening bolts and move the instrument panel to the side, fix it;
- go around the block retainer from below and disconnect the power plug from the heater motor;
- remove the engine and replace it with a new one (When installing a new unit, you need to fix the impeller axis with glue so that it does not accidentally fall out).
As a rule, in order to remove the motor, you have to tear out several pieces of insulation. The whole job takes about 3 hours.
Replacing the heater motor Kalina 2 (VAZ 2192, 2194)
| If you notice that the heater is howling or humming in your car, then the reason may be a faulty fan bearing in the Kalina 2 heater. To solve the problem, you will need to replace or repair it. Do you know how to remove the heater motor of the new Kalina? |
On Kalina 2, the heater fan is used exactly the same as on the Lada Granta and has a catalog number: 21900-8118020.
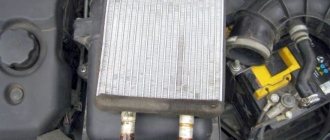
Thus, the designers did not come up with anything new and placed the motor of the Kalina 2 stove under the panel. The practicality of this arrangement is that to replace it you will need to remove the glove compartment. Then remove the screws (No. 1) securing the heating and air conditioning fan (No. 2) to the instrument panel cross member bracket. Then disconnect the block (No. 3) with the wires from the fan, and remove the four brackets securing the fan to the air conditioner evaporator unit. For clarity, the process is shown on the removed instrument panel:
Installation of the stove fan is carried out in the reverse order. Keywords:
Similar materials
- Replacing the heater radiator Kalina 2 (VAZ 2192, 2194)
- Replacing the cabin filter Kalina 2 (VAZ 2192, 2194)
- Replacing the windshield wiper trapezoid Kalina 2 (VAZ 2192, 2194)
- Differences between Lada Kalina 2 (VAZ 2192, 2194) and Kalina (VAZ 1117, 1118 and 1119)
- Car blanket for Kalina 2 (VAZ 2192, 2194)
- Multifunction steering wheel for Kalina 2 (VAZ 2192, 2194)
- Installation of footlights in Kalina 2 (VAZ 2192, 2194)
- How to remove the panel on Kalina 2 (VAZ 2192, 2194)
- How to remove the ceiling on Kalina 2 (VAZ 2192, 2194)
- Sound insulation of doors Kalina 2 (VAZ 2192, 2194)
xn—-8sbabr6ahc3e.xn--p1ai
Conclusion
Treat your car with care, carry out timely maintenance of the stove and there will be no problems with heating the Lada Kalina. Removal and replacement of the motor will be required only after its maximum operational capabilities have been reached.
Perhaps you know some other interesting ways to replace an engine? Or there is a desire to share with readers your own experience of carrying out repairs. Write comments. Any information would be very helpful.
Source
Disassemble and clean the fan
The main thing is that before starting work, do not forget to disconnect the terminals from the car’s battery so that a short circuit does not occur.
There are two options for developing actions:
- Just clean it: to understand what the problem is, you will need to spin the already removed engine; if it turns over with difficulty, sometimes even familiar noisy sounds appear, then in this case you will need to vacuum the engine and lubricate the bearings and other rotating parts. You can lubricate with any silicone grease or WD-40. Also be sure to clean all dirt from the shaft. In 65% of cases, these actions are enough to get rid of extraneous sounds from the stove and will last for a long time.
- Repair or replace shaft bearings: To determine whether any work needs to be done on the shaft bearings, you first need to look at their condition. If they don't turn at all, then you will have to disassemble the motor. Bearings may fall apart or become jammed from prolonged operation. Of course, you can just buy a new motor and not have to worry about repairs, but a new part costs a lot and if you try really hard, you can still fix the old one yourself.
Why do you need a heater fan on the Lada Kalina?
The main purpose of the heater on Kalina is to maintain the required temperature in the car interior and prevent the windows from freezing. If the heating system stops functioning for some reason, then operating the car in winter is practically impossible. The operating principle of Kalina's stove is traditional, and does not differ much from similar systems in other cars. Antifreeze is heated in the engine heating system, and then enters the heater radiator through pipes. Next, according to the principle of heat exchange, the hot liquid heats the air, is cooled and sent to cool the motor. The fan blows on the heater core and directs hot air into the passenger compartment. If the motor fails, it’s cold in the cabin.
How to independently change the heater fan in a Lada Kalina car
If the car interior is left without heating in the cold season, this does not bode well for either the driver or his passengers. This rule applies to all passenger cars, and the Lada Kalina is no exception. In general, the heater in this car is quite reliable. But it has one weak point: the furnace fan. It is this part that most often fails and becomes a source of real headache for the Kalina owner. Is it possible to replace the stove fan on a Lada Kalina yourself? Can. Let's figure out how this is done.
Signs and causes of furnace fan failure
The owner of the Lada Kalina will immediately know that the stove fan has broken down. Here are the characteristic signs of failure of this part:
- the pressure of hot air blown out of the deflectors is greatly weakened and practically does not depend on the position of the stove regulator;
- The operation of the heater is accompanied by a loud creaking noise, which turns into a grinding noise when the fan speed increases.
Replacing the heater motor, Lada Kalina. (Replacing the stove motor)
All this happens for the following reasons:
- One or more fan blades are damaged. The fact is that the fan on the Lada Kalina is made of plastic, and this plastic is far from being of the best quality. This is especially true in severe frost. If there is a small crack on the blade, then at low temperatures it is guaranteed to increase and the blade will completely collapse. This, in turn, will reduce the pressure of air pumped into the cabin, which will immediately become noticeable to the driver and passengers by the lack of pressure in the deflectors;
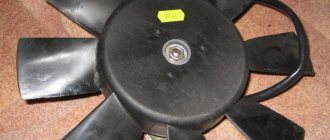
- Fan squeaking occurs due to wear of the bushing on which the fan is mounted. This bushing lasts an average of five to six years, after which it will inevitably have to be replaced, since during this time it wears out almost completely (and it is advisable to install a ball bearing in place of the bushing, since its service life is twice as long).
The ball bearing heater from Luzar is currently in short supply
Methods for replacing the unit
Replacing the Kalina stove fan is not the most difficult procedure. Even a novice car enthusiast can cope with it. The whole problem is that the unit is not very conveniently located. Therefore, before removing the device, you will have to tinker a little. There is an option to contact the service station. However, this repair is quite expensive. If you don’t have extra money or you want to personally change the fan, just out of “sporting interest,” then we’ll consider several options for replacing the unit.
Replacing the fan with removing the dashboard
This method is recommended by the manufacturer of the Lada Kalina. However, due to its complexity, not many car enthusiasts in the “domestic” conditions of an ordinary garage decide to change the unit using this method. If you want to try it, here is the sequence of the operation. To work, you will need a set of Phillips and flat-head screwdrivers, heads for 8, 10, 13.
- Removing the dashboard:
- separate the negative terminal of the battery;
- drain the antifreeze;
- separate the pipes;
- remove the cabin filter;
- unscrew the fastening nuts and lower the steering column to the stop;
- remove the stop signal switch from the wiring;
- snap off the plastic clips and remove the upholstery of the pillars;
- unscrew the fastening bolts and remove the front panel trim;
- disconnect and move the air ducts;
- remove the dashboard.
- Removing the fan:
- disconnect the block with wires from the electric motor;
- remove the ventilation hose;
- remove the engine;
- we change the unit.
Next, we carry out all the steps in reverse order. As can be seen from the description, replacing a fan in this way is quite problematic and will take a lot of time. You also can’t do without assistants. For this reason, many car enthusiasts prefer to change the device in a simpler, so to speak “folk” way.
Replacing the stove fan without removing the panel
It is not wise to remove the entire dashboard just to change one fan. The problem can be solved much easier. You only have to lift the right side of the panel. We take a position upside down. Take a knife and a flashlight. We cut off pieces of sound insulation that prevent access to the fan. Unscrew the mounting screws and remove the unit. Everything is much simpler and faster than in the first case.
Replacing the Lada Granta heater motor (VAZ Granta)
If the fan motor that supplies air to the interior of a Lada Granta car fails, it is necessary to inspect the electric fan and make a conclusion about repair or replacement. This article will provide information on removing the interior heater (stove) fan for a Lada Granta car. It is worth saying that the fan, compared to previous models of VAZ cars, is installed quite conveniently for its dismantling and installation.
You will need: flat-blade and Phillips-blade screwdrivers.
Operations carried out when removing the heater fan (stove) of the Lada Granta interior
1. Disconnect the wire from the negative terminal of the battery.2. Open the glove compartment lid
3. Press the two stops...
4. ...and open the box lid.
5. Pull the cover up and away from the brackets on the panel
6. Disconnect the wiring harness block from the fan motor terminals.
7. Remove the three mounting screws...
8. ...and remove the Lada Granta “stove” fan from the air blower housing.
9. Install the fan in the reverse order of removal.
Inspection and testing of the heater fan motor (stove) Lada Granta
The functionality of the stove fan can be checked by applying 12 volts to the power terminals. If you notice any extraneous noise, first check the condition of the heater impeller. The blades must be of the correct shape, clean, without any inclusions (debris, leaves, etc.). If increased fan noise is still present despite the absence of the above-described deviations, then most likely the bearing in the fan motor is faulty. In this case, you will have to replace the fan motor or the entire assembly.
It happens that the culprit is antifreeze, of which there is very little in the system, as a result the stove blows cold air. However, there are other situations, for example, when nothing happens at all when you turn on the stove. This is all due to problems with the fan. The fan does not work , so air is not pumped. There can be several reasons for a non-working fan; it could be a simply failed fuse or wiring problems, or in the worst case, a completely non-working fan. Very often the fan burns out, and an unpleasant burnt smell of wiring can be clearly heard in the cabin.
Replacing the Lada Kalina fan at home - step-by-step instructions
2. Next, open the glove compartment and, pressing the two stops, open the glove compartment lid. Remove the cover by pulling it up.
9. From the right end of the panel you only need to remove the cover; you do not need to unscrew the two bolts at “13”. Afterwards, we pull the panel towards the seat and find the fan. It is quite difficult to get the fan, and in order to do this you need to cut out a piece of felt sound insulation.
I have everything, I hope I helped you solve your problems. I think it’s described and shown more than clearly, and you won’t have any problems during disassembly. Thank you for your attention and see you again at vaz-remont.ru.
Removal of the fan (supercharger) of the heater stove on a Lada Granta car is carried out in the event of its failure for subsequent either complete replacement with a new (working) one, or for disassembly and repair in order to replace worn parts. To perform repair work you will need a standard set of tools. Perform the following sequence of actions, having first de-energized the car and disconnected the minus terminal from the battery:
- Open the glove box lid and, pressing the two plastic latches, tilt it back.
- Pull the cover up and remove it from the brackets on the panel.
- Disconnect the block with the power wires from the heater heater motor.
- We unscrew the three screws securing the fan and remove it from the air blower housing.
- Make the necessary repairs, then install in the reverse order.
At this point, the repair work to remove the heater fan on the VAZ 2190 has been completed.
Replacing the viburnum stove motor without removing the panel
Hi all! For the second year now, the heater motor on my Kalina has been beeping frequently. If before this happened quite rarely, now for the second day in a row the fan practically does not stop. I decided that there was nowhere to delay and this morning I stopped by BB with a new engine, the price of which is 1,400 rubles. I took the Luzar company, since it was the one that was praised by the majority of potassium growers.
So, the first thing I did was remove the front passenger seat by unscrewing the 4 bolts that secure them, which resulted in much more free space.
Then we open the glove compartment, take out all the things from there, and unsnap the “curtain” mounting plate, then unscrew all the screws that are visible in the photo below:
Then unscrew one screw on the left side:
And another one on the right side. After this, you need to unscrew three more screws in the upper part of the glove box lid:
In general, next we remove the side trim of the passenger compartment pillar, as shown in the photo below:
After this, unscrew the screws from below using a short screwdriver or a bit and a ratchet:
Now we lift the upper black cover and unscrew the two nuts under it using an extension, a socket and a ratchet, as well as two self-tapping screws (shown by arrows):
Next, slightly lift the side air duct and unscrew the bolt:
So, we still have to deal with the lower bolts, two on the left and one on the right:
After performing all these manipulations, it seems that nothing will interfere anymore and now you can move the right side of the instrument panel to the side, and then put something under it to fix it in this position:
The photo above does not show an ideal option, and in my case I had to move it back a little more so that I could pull out the stove fan. Then you can crawl up from below with your hands and disconnect the power plug from the heater motor, after first bending the block clamp:
Next, unscrew the three screws that secure the heater fan to the housing:
And after that we try to pull the motor out, if you manage to do this. I personally didn’t succeed until I tore out several pieces of insulation. As a result, after an hour of effort, we finally managed to pull the motor out, resulting in the following picture:
Then we put the new fan in its place without any problems! In fact, this is true - installation compared to removal is just idleness! In total, the whole job took me 3 hours.
The new motor works at least twice as well, and now blows better at first speed than before at second! It is not noisy, although the sound is not much different from the standard one.
In general, if you have any questions, ask, I will try to answer. If I messed something up in the description, please correct me, as I was in a hurry and might not have mentioned something!
A couple of weeks ago there were real frosts in our city, below -40! I always set Kalina to warm up according to the temperature when the average daily temperature outside is below -25. In this case, I always close the damper, set the heater regulator to the minimum value, set the air flow direction to the front and leave the electric heater fan on at speed 1. This practically does not affect the maximum warm-up temperature, because The temperature regulator is in the minimum position, but you don’t have to worry about the integrity of the windshield, and the interior is no longer at a street temperature.
Removing the blower motor
The stove fan is a fairly reliable unit, but when used in difficult conditions (heat, a lot of dust or high humidity), its electric motor may fail. Repairing a burnt-out motor is more difficult and more expensive than buying a new one, so in such a situation, the Kalina heater fan is replaced.
To carry out the work, you need a standard set of tools, and even “star” socket wrenches. Such grooves have all self-tapping screws that will have to be unscrewed during disassembly. The latter begins with removing the outer plastic grille and removing the cabin filter. All debris from the seat must be removed so that it does not fall on your head when dismantling the stove fan.
Replacing the heater motor will require you to take an acrobatic pose inside the Kalina's cabin, unless you remove the front passenger seat in advance. Its runners are fastened with 4 nuts, so this operation does not take much time. Then you need to open the glove compartment, empty it of things and unscrew the 4 screws located on its back wall. Another screw is located outside, under the airflow grille, it also needs to be unscrewed.
Next, the decorative trim is removed from the right front pillar, underneath it you will find 2 screws securing the plastic panel and the blower unit. They are unscrewed, the blower unit is removed and the plastic panel is lifted (held on by Velcro). There are 2 nuts under it, they should be loosened with a socket wrench. To remove the stove fan, you need to move the dashboard as far as possible and fix it in this position.
The last step is to lie on Kalina’s floor and remove the heater fan by disconnecting the electrical connector. It is necessary to replace its turbine with a new electric motor. Then the unit is installed in place, and then assembly work is carried out. The replacement process is shown in detail in the video.
Conclusion
Any breakdown in a car, as a rule, is not associated with the failure of just one part. Before you start replacing the fan, diagnose the entire heating system. Otherwise, you will have to change the stove motor very often. Carry out vehicle maintenance in a timely manner and there will be no problems with the operation of Kalina.
Perhaps you know how to fix a broken stove on a Lada Kalina using some other method? Or are there any additions or recommendations to the methods described in the article? Share your experience and opinion in the comments. Any information will be very useful to readers.
See you soon and good luck on the roads!
How to change the stove motor on a viburnum
It's been about 3 months since I wanted to change the heater motor on the viburnum. This morning it became a little cool, the glass was not thawing very well - I listened and the motor was barely breathing. I decided that I needed to prepare the “sleigh” in the summer, otherwise in the winter it wouldn’t be an ice-breaker to lie “under the car.” Bought: motor. The box says: Electric heating motor assembled with impeller on a universal bearing lFh-01230. Also, in the 4th position of the fan, the 25A fuse blew out and at other speeds the fan barely turned and even “whined”; in winter I remember it worked fine, but sometimes it whistled. I made the diagnosis - I read the questions there on the Lada-Kalina forum and everything is clear - NATURAL WEAR OF THE MOTOR - needs replacement. After reading the manual, I realized that I don’t want to remove the entire dashboard because... it's terrible))) and long. To replace such a part, you have to remove so many things))) I found a couple of instructions on the Internet, the point is to unscrew the right side of the dashboard and bend it back to pull out the motor. You need to put your legs on the seat, and your head under the dashboard and unscrew the 3 screws that secure the stove motor))) It seemed like nothing complicated, but I had to fray my nerves to pull out the motor and install it especially. Installation turned out to be much more difficult than removal, because... until I cut off the noise at the right leg of the front passenger. The motor did not want to climb. For convenience, you need an assistant to bend the dashboard and support the impeller from under the hood.
There were some problems too. In short, I plugged in the motor, tightened all 3 screws, put on the hose, put on the wire plug and decided to plug this plug in until it clicks so that the tongue bites the recess (IF YOU DO THIS, HOLD THE MOTOR IN THE CENTER!). I didn’t expect that the fastening with 3 screws is bullshit. While I was pressing on the plug, the motor came off one screw. And as a result, one of the three fastenings was broken, not on the motor, but in the car. The head of the screw slipped through the rubber band. No washers are provided because a cylinder with a small hole inside (see photo) falls into the hole in the rubber band, and a self-tapping screw is screwed into this cylinder, covering part of the rubber band with its cap and resting against the cylinder itself. In the photo I showed where I had to drive the self-tapping screw so that the motor would be fixed in all 3 positions because... one of the three cylinders on which the motor is attached broke))) this is not critical because where I drove the self-tapping screw next to the shock-absorbing elastic band and did not particularly change the principle of fastening - the main thing is not to get into the impeller, DRIVE THE SCREW CLOSER TO THE EDGE))) (there is plenty of space for the self-tapping screw! In the photo, although it’s not particularly visible) it stays on the self-tapping screw even more reliably than on flimsy ones rubber bands that could not hold the motor while plugging in the plug)))
Afterwards I put everything back together in reverse order. Replaced the cabin filter. I turn it on and everything works as it should, it blows like new and blows strongly)))) at 4th speed the fuse does not blow!
The story with the stove began back in August. First the fuse blew, and the problem was quickly fixed by replacing it. One day in September, on a not particularly beautiful morning, the stove did not start working again. 1. The fuse turned out to be normal. (F5 in the mounting block on the left under the steering wheel) 2. The additional resistor was also excluded because and at 4th speed the heater fan did not work)
Removing the old and installing a new radiator
Before replacing a leaking heater radiator, you need to prepare all the necessary tools, namely:
- hacksaw blade for metal;
- a set of socket and open-end wrenches;
- pliers, screwdriver;
- cut plastic canister or basin for antifreeze.
The first and main question: how to remove the stove on Kalina, so as not to disassemble the entire dashboard? First, you need to empty the cooling system by draining the liquid into a prepared container. Then the air filter is disconnected and removed along with the pipe, and the battery is also removed. This opens up access to the pipes leading to the interior heater. They must be removed from the stove fittings, draining the remaining antifreeze into a basin.
Next to the fittings you can find a nut that secures the protective plate located inside the passenger compartment. It also needs to be unscrewed so that later the plate moves freely and does not interfere with dismantling the stove. Then you need to move into the interior and dismantle the following parts:
- Accelerator pedal. It is held on by 3 bolts; first you need to disconnect the cable and bend the plate.
- Side decorative panel.
- Plastic side cover of the stove.
- Brake pedal. There is no need to remove it entirely, just remove the metal rod so that the pedal rises.
Since the heater fittings stick out in the engine compartment, and its frame does not allow the radiator to be pulled out in the desired direction, for freedom of action it is necessary to cut out a piece of plastic from the side.
To do this, use a hacksaw blade to make the cut neat. After which the stove moves back a little and towards the driver's door, being removed from the socket. The new heater is installed in the same way, and the opening is sealed with plastic that was cut out earlier. The rest of the assembly is done in reverse order.
When the radiator is removed, it is possible to change the heater damper gear motor in case of incorrect operation. The gearbox and damper position sensor are manufactured as one unit, attached with 3 screws. You need to unscrew them, disconnect the gear motor and install a new one. Also, with the radiator removed, the heater tap can be easily replaced if such a need arises.
motor, how to remove and change
With the advent of the cold season, many owners of domestic small-class Lada Kalina cars are faced with an annoying situation when the heating system “refuses” to effectively heat the interior space. This state of affairs prompts you to venture into searching for the causes of the malfunction; in some cases, the stove fan needs to be replaced, and sometimes the stove motor needs to be replaced.
Causes of stove failure
In some cases, the “culprit” of a non-working stove is the coolant, which is simply not enough. In this case, the stove fan simply “drives” a cold air flow into the cabin.
However, there are much more serious situations when, for example, the driver turns on the stove, but does not detect any manifestations of its functioning. The obvious factor here is a non-working fan. It is for this reason that the owner does not observe the flow of air into the interior of the Lada Kalina.
There are several reasons that caused the fan to stop. Among the banal factors, one can highlight the burnout of the working element of the fuse link. Wiring can also be annoying at the wrong time in the form of a break or oxidation of contact groups.
If the fan motor or wire is burned out, then an unpleasant odor with a characteristic sign of burning will begin to penetrate into the interior of the Lada Kalina, and then the heater motor will need to be replaced.
Lada Granta wiring diagram
Lada Granta Sport owner reviews
Granta sport technical specifications
Replacing a stove fan in Kalina
Today we will look at the algorithm for independently replacing the heating circuit fan of the Lada Kalina interior, and we will tell you how to remove it, as well as how to change a non-working device. The main advantage of the method we have outlined is that there is no need to dismantle the front panel. The owner will spend no more than one hour on the entire process. As your “helpers” you should take a pair of ordinary keys and a small screwdriver.
- First, we de-energize the network by simply removing the terminals from the battery.
- Next you will need to remove the glove compartment lid. This can be done by pressing on a pair of internal stops. Then the cover is hinged and removed by pulling upward.
- Now you need to unscrew two screws in order, the first of which is located in the glove compartment cavity, and the second on the side panel of the tunnel.
- We find another screw under the compartment cover and unscrew it.
- We move on to the three fastening components, which should also be unscrewed. They are located on top of the glove compartment.
- There is a screw “hidden” next to the deflector on the right side, which we can safely “defeat” with a screwdriver.
- The plastic decorative trim of the body pillar must also be removed. After this, remove the screw holding the deflector itself and remove the ventilation system component.
- We unscrew the remaining fasteners one by one.
- At the right end of the panel we see a small cover, which we dismantle. A couple of bolts at “13” should not be unscrewed.
- Now, by pulling, we move the corresponding side of the panel in the direction of the seat and find the fan located behind it.
- To remove the part we are considering, you will need to cut out a section of the felt soundproofing panel.
- The fan is held in place by three screws and you will have to unscrew them to remove it.
- After removing the faulty component, we install a new or repair fan in this place.

