Who remembers my last fart-bursting BZ, welcome to the continuation)) Well, in general, this, let’s say, the second part is precisely for those who are faced with the same problem and want to get by with a little blood. A year ago I already changed the gear motor and for this I disassembled, so to speak, the entire motor shield. Namely, I cut half the stove body and, bending it, changed the gear motor. This method is much simpler than what some do, namely with the removal of the GTZ and vacuum. But this time I decided to try to make it even simpler. I think the experience will be useful to someone. I was surprised how quickly I did everything. What’s nice is that you don’t need to unscrew, remove or move the stove.
I’ll describe step by step how I did it:
1.
Unscrew and remove the wiper arms and frill;
2.
In my case, I unscrew the spacer of the glasses, unscrew the small air venting pipe from the expansion barrel (nothing will flow out):
We pull this pipe out of the upholstery and bend it back somewhere to the left, towards the receiver, just so it doesn’t get in the way. 3.
Now you can safely pull out with your hands a small part of the engine shield upholstery, which is behind the expansion tank:
4.
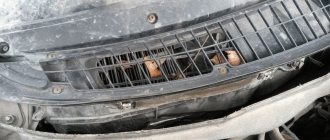
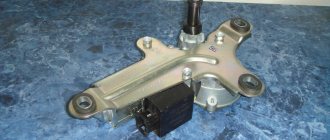
Next, without unscrewing the pipes or draining anything, pull the expansion tank up and move it to the side. Now is the most convenient time to unscrew and pull out the trapezoid. We turn on the ignition, wave the wipers, and when they are in the maximum vertical position, turn off the ignition. In this “position”, the trapezoid is most conveniently pulled out. After removing the trapezoid, unscrew the mounting area for the expansion barrel on the side of the wing (two 10mm bolts). There is no need to remove it completely. We also bend it, it is very soft. We see this picture:
5.
Next, bend the small bracket that holds the wiring:
6.
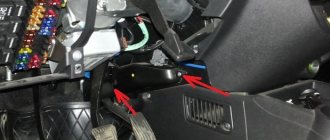
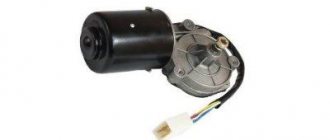
At this moment, the very notorious gear motor is revealed to us:
7.
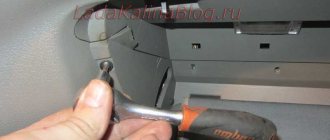
Next we need a short Phillips screwdriver. We will unscrew it in place:
8.
In theory, it was possible not to remove the expansion tank, not to unscrew the platform under it, but then we would not have taken out the trapezoid, and with it it is not possible to get to the gearmotor.
Plus, I couldn’t rip off one of the self-tapping screws of the gearmotor with a screwdriver. It's cramped there, you know)) I used 2-3 extension cords, a cross cue ball and a ratchet, passing all this just from the side of the expansion barrel. Having torn off the screws, I then unscrewed them in place with a screwdriver. I note:
you need to unscrew the screws very carefully, without losing them. There are no ordinary bedbugs there. You can pick these up in a store without any problems, but you don’t want to go buy a self-tapping screw, this is the time...
9.
After unscrewing the screws, it is not easy to remove the gearmotor by hand. Without fanaticism, I pushed it with a huge flat screwdriver and it fell off)) The main thing is not to overdo it, but as they say: you can do it with a fool...
And now an equally important digression in my opinion:
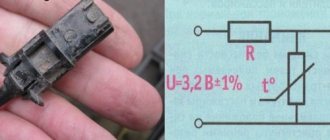
Having removed it, I disassembled the gearmotor I bought a year ago and my suspicions were not in vain:
Why I’m writing: when replacing, I think it’s better not to take this company.
This is exactly what they offered me in absolutely all stores. I barely found something else. There is no faith that it is the best, but I saw absolutely no point in installing the same))
10.
Well, then assembly in reverse order. The only thing I’ll say is that since the old gearmotor wasn’t easily removed from the guide, the new one didn’t want to be inserted so easily either. We lubricate it with lubricant (a place for a joke about lubricants and caresses) and it starts to fly in more pleasantly ^___^ But I still had to help with a pry bar, since it’s convenient there and the place allows me to do it. At the same time, we center the seats, and, as they say: it’s in the bag (c)
11.
the gear motor is in place, we are great and can bend everything back and assemble it in the reverse order)) Friends, a lot has been written... I think 90% will not even read) But I will say that it took me longer to write than to replace it.
If you do everything as described, it doesn’t take much time at all. An hour maximum. The only thing is that you need an adequate tool, namely: a short screwdriver and extension cords with a small ratchet; there is no point in even trying with a simple screwdriver. I really hope that with this post I have simplified or will simplify in the future for someone the process of replacing this part.