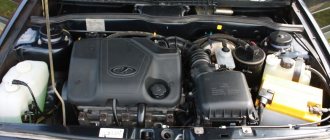
The cylinder head gasket is an element of an internal combustion engine installed between the cylinder block and its head. Designed to prevent the escape of gases from the combustion chamber, as well as lubricating and cooling liquids from the channels through which they circulate.
Damage to the cylinder head gasket can lead to leaks from under the head, decreased compression, engine tripping and loss of power, overheating, problems with the stove, etc.
The easiest way to recognize a malfunction is by external signs: the presence of oil leaks, a sharp increase in its level and a change in color, the appearance of carbon deposits on the spark plugs, exhaust gases “shooting” from under the cylinder head when the engine is running and a change in their color when exiting the exhaust pipe.
Below we will consider whether it is possible to drive with a broken cylinder head gasket, what are the signs and reasons for its breaking, and will dwell in detail on the methods for checking and eliminating the malfunction. Let's discuss the subtleties of choosing this element of the internal combustion engine.
Is it possible to drive with a broken cylinder head gasket?
Car owners often ask whether it is possible to drive with a broken cylinder head gasket. It is not always possible to immediately fix the problem, for example, when the malfunction occurs on the road or far from a service station.
Experts say that it is impossible to travel in such a situation. This is especially true if antifreeze gets into the oil or vice versa. The only way out is to move only in tow. If you ignore this requirement and drive even 200-300 km, the engine may need to be overhauled.
In a situation where oil and antifreeze do not mix, driving a short distance is allowed. Here we are talking about minor damage, but it is necessary to monitor the engine temperature and coolant level. After all, if the gasket is punctured from the inside, then there is a high risk of damage to the valves and pistons as a result of antifreeze getting into the cylinders.
Fuel combustion problems
Failure to ignite fuel properly will cause the temperature to rise significantly. An increase in pressure due to untimely ignition increases the load on the cylinder head: its bolts begin to “stretch” and, accordingly, press the gasket less tightly. Destruction is enhanced by possible detonations.
Visually, a gasket that has burned out due to ignition problems can be identified by damage between the cylinder holes or by a change in the color of the surround.
After replacing the cylinder head gasket, you need to check the correct ignition timing and compliance of the glow number of the spark plugs with the regulated values.
Signs of a broken cylinder head gasket
The main difficulty for novice car owners is to promptly detect damage to the cylinder head gasket. Almost all cars are in the “risk zone”, but most often the problem is faced by owners of Niva Chevrolet, VAZ 2106, 2109, 2110, 2112, 2115, 2114, 2107, BMW E39, Opel Astra, ZMZ 406, Daewoo Lanos and Kalina. This is an incomplete list of cars in which the cylinder head gasket periodically fails (burns out). Symptoms of a malfunction may differ depending on which area is broken.
Damage to the cylinder head gasket between the cylinders
In VAZ cars and a number of other models, the gasket very often burns out between the second and third cylinders.
The easiest way to recognize a malfunction is by the following signs:
- Uneven operation of the engine during operation of which you will feel a missing spark plug due to coolant or oil getting into it. As a result, the internal combustion engine will triple.
- Reducing engine compression. Damage to the cylinder head gasket leads to exhaust gas leaking from the cylinder block during the piston stroke, causing compression in the problem area to drop or decrease to minimum values.
- Addition to clause 2. At the moment when a compression stroke occurs in one cylinder, and a power stroke occurs in the adjacent one, when the gasket is broken, the exhaust gases, in our case, of the second cylinder are mixed with the air-fuel mixture of the first. This will lead to problematic starting of the engine, but after warming up the latter operates stably.
To diagnose the problem, it is enough to remove the caps of the high-voltage wires from the spark plugs one by one and pay attention to changes in the operation of the engine.
If no changes occur when removing a cap, this may indicate damage to the cylinder head gasket in this area. Also check the compression in the engine cylinders.
Damage to the cylinder head gasket between the cylinder and the cooling system
Sometimes the problem occurs between the cylinder and the cooling channel. In this case, the malfunction can be recognized by the following symptoms:
- Uneven operation of the power unit (as in the previous case). A cylinder spark plug that gets antifreeze on it will not work.
- Reduced coolant level. This factor is explained by coolant leakage due to a violation of the integrity of the gasket.
- Formation of steam or air bubbles inside the expansion tank. It is better to carry out diagnostics on a cold internal combustion engine, because when checking “hot”, the cause of the problem may be poor-quality coolant. The problem occurs due to exhaust gases entering the cooling system. For diagnostics, you can put a rubber glove or a condom on the outlet of the expansion tank. We will dwell on this issue below.
- The appearance of thick white smoke from the exhaust system. Appears due to active vaporization. This is facilitated by the combustion of antifreeze in the combustion chamber and subsequent removal through the exhaust pipe.
- The presence of a kind of “emulsion” in the expansion barrel. Car owners often call it “mayonnaise” or “sour cream” because of its characteristic yellowish color. The reason is the mixing of antifreeze and oil. The problem can be identified by looking into the tank or removing the oil level dipstick from the engine.
Other signs
There are a number of other signs that can be used to draw conclusions about a damaged cylinder head gasket.
Let's briefly look at their features:
- Exhaust gases exit from under the cylinder head. The symptom appears when there is damage between the cylinder and the outer part of the cylinder head. This is because gases find their way through the damaged area of the gasket. If the gasket burns out significantly, loud sounds uncharacteristic of engine operation will be heard.
- The appearance of oil at the junction of the head and cylinder block. If the integrity of the gasket is damaged, it allows lubricant to leak out and contaminate the outside of the engine.
- Problems with the stove. Due to disturbances in the cooling system, difficulties arise in warming up the interior. Gases from burnt fuel enter the “corridors” of the cooling system. As a result, air reaches the heater heat exchanger, which works worse.
- Soot or moisture on spark plugs. To diagnose, unscrew the spark plugs one by one and look at their condition. The appearance of oil or antifreeze on the contacts, as well as carbon deposits, often indicates a violation of the integrity of the cylinder head gasket.
- Increase in oil level. This occurs due to antifreeze entering the lubrication system.
- Engine overheating. Damage to the cooling and lubrication system impairs heat dissipation, and the engine quickly gains temperature.
- Release of coolant from the exhaust system. Antifreeze droplets fly into the air, which are easy to diagnose.
- Deterioration of internal combustion engine characteristics. Indirect signs of a malfunction include an increase in the “gluttony” of the motor, a decrease in power, etc.
- Increased pressure inside the cooling system pipes. A hole in the gasket where the coolant passes through will result in exhaust gases entering the cooling system pipes. The latter, due to the creation of increased pressure in them, will be very hard (like stone) to the touch.
Please note that it is necessary to analyze the malfunction as a whole. For example, the appearance of carbon deposits on spark plugs or problems with the stove may indicate other malfunctions of the machine.
Diagnostic methods
When direct or indirect signs are detected, a new task arises for the car owner. He needs to figure out how to check the cylinder head gasket for a breakdown.
There are several methods in total. Moreover, the diagnostics are quite simple and can be used in garage conditions. Experience does not play a key role here, since even novice motorists can cope with the task.
If you are interested and need to know how to check whether the cylinder head gasket on a car engine has been broken, perform the following manipulations. Any of the presented methods is suitable for obtaining an accurate answer regarding the integrity and current condition of the seal between the block and the head.
- Visual inspection. The simplest option is how you can determine for yourself that the cylinder head gasket on the engine is broken or worn out. There is no specific and strict algorithm of actions here. The malfunction is determined simply by visual observation. First you need to start the engine, open the hood and take a closer look at the area where the block and head connect. If even a small amount of smoke comes out through the cracks, there is a problem. You can also listen to the behavior of the motor, which may begin to produce uncharacteristic ringing sounds.
- Checking the radiator and coolant expansion tank. It is also necessary to check the neck, with the help of which new engine oil is filled as part of scheduled maintenance. The method is also visual. Just unscrew all the caps and look at them carefully. Don't forget to look inside the tank. If coolant has penetrated into the engine, you will see a characteristic red emulsion on the oil filler cap. If the oil is in the antifreeze, then oily spots will appear on the radiator cap or expansion tank.
- Exhaust pipe monitoring. Start the engine. You can ask an assistant to rev the throttle a little to increase the volume of smoke coming out of the exhaust pipe. If you see white smoke coming out, which is actually steam, there is probably a problem with a broken gasket. When using antifreeze, white smoke with a characteristic sweet tint usually comes out of the pipe. Additionally, look into the coolant expansion tank. If the level gradually drops, then you have probably diagnosed a gasket failure. Although the sign is considered indirect.
- Checking the presence of exhaust in the cooling system. To do this, you can use one of 2 methods. The first method involves unscrewing the cap on the radiator or expansion tank. If there is active seething inside, this is a bad sign. The second method is to use a balloon or a regular condom. The product is pulled onto the neck of the tank, having first removed the lid. Then the engine starts at a speed of about 3-5 thousand per minute. If the balloon or condom inflates (quickly or slowly), a leak has occurred. This means that the gasket will need to be replaced in the near future.
All methods have been used for decades, but continue to be effective, simple and quite accurate. Yes, you can spend extra money and go to a car service for diagnostics. But in order to save money, it is better to determine the fault yourself, and then entrust the replacement to specialists or do everything yourself.
Replacing the gasket yourself is potentially complex and difficult to do without the appropriate experience and special tools. Also, you should not trust garage service stations that do not have a license. Here it is better to spend more money, but put the car in the safe hands of specialists who will provide guarantees for the work performed.
About mixing oil and antifreeze
The appearance of antifreeze in the oil or vice versa is one of the main signs of a broken cylinder head gasket. In this case, the operation of two systems at once is disrupted: lubrication and cooling.
In the future, rings and pistons may become deformed, and engine efficiency will decrease significantly. You cannot drive a car with such a malfunction; it is better to immediately go to a car service for repairs.
When mixing oil and antifreeze, other consequences may occur:
- clogging of cooling system elements with oil, which reduces their efficiency;
- damage to rubber or plastic elements of the cooling system (CO);
- overheating of the motor even in cold weather and reducing its service life, etc.
Due to mixing of the two compositions, a yellowish emulsion appears. Its appearance requires not only replacing the cylinder head gasket, but also performing other repair measures. Be sure to clean the CO, the pan and the channels through which the lubricating fluid flows.
The most unpleasant consequence of oil getting into antifreeze is engine wedge. This occurs due to the appearance of rust on the cylinder walls. The problem is especially acute on diesel engines.
As the engine cools down, coolant enters the combustion chamber, and upon subsequent start-up there is no longer enough coolant in the CO. If you do not track this moment on the instrument panel, the power unit may jam.
An additional disadvantage is the increased formation of soot, which subsequently settles on engine elements. The oil filter that suffers the most is the one that requires replacement. But this work can only be done after eliminating the cause of the leak (in our case, installing a new cylinder head gasket).
Why does this happen?
There are several most common reasons why this malfunction occurs. The first is overheating of the power unit. This often happens due to low-quality antifreeze. The driver simply does not have time to keep track of the rising temperature, and as a result, overheating occurs. You should also not drive on old antifreeze. This coolant should be changed every 2 years. Over time, it loses its properties, precipitates and heat transfer deteriorates.
Signs of engine overheating
When diagnosing a breakdown, it is important to correctly determine the fact of engine overheating.
There are several main features here:
- Sharply rising coolant temperature according to the indicator in the cabin.
- The appearance of condensation on the surface of the unit.
- Steam from under the hood.
- Reduced power.
- Noisy and rough operation of the internal combustion engine, detonation, and will not start.
- White deposits on the spark plug electrodes.
Operation of the machine in case of overheating of the internal combustion engine is prohibited, because this is fraught with its wedge and the need for major repairs.
How to find out if the cylinder head gasket is blown
The greatest difficulty for many car owners is to determine that the cylinder head gasket is the cause of the problem.
To check, follow these steps:
- Start the engine and inspect it. Pay attention to the presence of smoke from the gap between the head and the cylinder block itself. During operation there should be no ringing or other suspicious noises that have not previously been observed.
- Inspect the expansion tank of the cooling system, the container for filling the lubricant and the radiator cap for the appearance of a reddish emulsion. If the lubricant gets into the antifreeze, traces of the emulsion can be seen on the cap of the expansion tank and radiator tank.
- Check compression in different cylinders. Its sharp decrease may indicate a broken gasket; also read why different compression occurs in the cylinders.
- Start the engine, let it run and look at the condition of the exhaust gases. The appearance of thick white smoke often indicates damage to the element in question. Pay attention to the smell of smoke. If you use antifreeze in the cooling system, it will be slightly sweet.
- Check the fluid level in the expansion tank. Its decrease indicates a problem.
- Measure the engine oil level. If antifreeze gets into the lubrication system, you may notice a rise in the level above the MAX mark.
- Open the radiator/expansion tank cap and check the coolant for gas emissions. For diagnostics, you can use a rubber glove or bag (we will discuss this in detail later).
Additionally, pay attention to the signs of a broken gasket, which were mentioned at the beginning of the article.
Foam on dipstick
Check the remaining oil level in the engine. If there are characteristic bubbles on the dipstick, as in the photo, this indicates a malfunction in the engine.
It may also be under the oil filler cap. Why does this happen? Since we have a breakdown in the gasket, the antifreeze begins to penetrate the engine’s oil jacket, mixing with other liquids. It happens that both components are mixed due to a crack in the block (they say “the cylinder head is bad”). At the same time, the gasket itself is intact.
This occurs when trying to suddenly cool the engine. If water is poured onto it, this may cause the block to deform.
Why does the cylinder head gasket break?
Car owners often ask why the cylinder head gasket fails and gets damaged. Let's highlight the main reasons.
Overheat
Most often, the cylinder head gasket burns out due to engine overheating, so it is important to identify the problem at an early stage and fix it. Due to changes in temperature conditions, the block cover “moves away” and the contact between parts of the motor deteriorates. The result is a lack of tightness of the power unit with consequences for the gasket.
As a rule, aluminum cylinder heads are susceptible to this problem. The cast iron head (installed on diesel engines) is more resistant to temperature changes. But it may become deformed or damaged.
The effect of temperature often leads to deformation of the gasket itself, which breaks the tightness of the system.
Incorrect torque when tightening cylinder head bolts
When assembling the engine, it is important to know the exact tightening torque of the bolts holding the head to the cylinder block. Increasing or decreasing this parameter can lead to destruction or deterioration of tightness, respectively.
In the second case, the cylinder head and cylinder head do not fit tightly to each other, which is why gases with atmospheric air pass into the existing holes and destroy the gasket.
To avoid such consequences, it is necessary to tighten the bolts using a dynamometer and strictly follow the manufacturer's instructions.
An equally important point is compliance with the screwing sequence. Detailed information on how to perform the work is given in the instructions for the car.
For example, the VAZ uses the following rules:
- First, the central bolts are screwed in, and then diagonally.
- The force is 3 kg*s, and then they reach 6 kg*s and 9-10 kg*s.
In 8 out of 10 cases, the cause of a broken gasket is non-compliance with the broaching rules in matters of torque, sequence and other nuances.
Therefore, be sure to read about the correct tightening of the cylinder head and with what force this should be done.
Low quality material
When purchasing pads, choose products from trusted stores.
Products come in the following types:
- Multilayer steel. Contain from two to five layers. The surface is treated with silicone for channel edging.
- Composite. Old technology that is almost never used. The base is asbestos and graphite, and the piston part is surrounded by steel rings.
- Copper. They are characterized by a high degree of reliability and are used on some types of cars.
- Elastomeric. Made of steel with a plastic material applied to the surface. There are steel rings at the gas joints, and the passages are edged with sealant.
- Non-asbestos. Manufactured using more modern materials.
The cost of a cylinder head gasket is not too high, so it is not recommended to save much on this, since such savings can be costly later.
Places where cylinder head gaskets burn out
Additional reasons
There are a number of additional factors why the gasket may burn out:
- Natural aging.
- Violation of the fuel combustion process. Most often, problems arise in the head, where cracks occur. The cylinder head, as a rule, has an aluminum base. When heated, rapid expansion occurs and the head presses on the gasket. The latter cannot withstand and is damaged.
- Increased temperature in the combustion chamber due to incorrect ignition angle, etc.
The car owner must understand the difference between a “breakdown” and a “burnout.” In the first case, there is serious damage to the gasket or its elements, and in the second, minor damage to integrity occurs, which sometimes cannot be found on the surface.
Replacement
If signs of breakdown are confirmed after removing the “head”, the broken element is replaced. The cylinder block is one of the most important parts of the engine. Therefore, when purchasing a gasket, experts advise purchasing a set of new mounting bolts. The old ones, when unscrewed, will no longer meet those requirements. New bolts cost no more than a thousand rubles. If you have a 16-valve engine and the length of the elements is at least 95 millimeters, you can limit yourself to just buying a gasket. You will also need a torque wrench for replacement. Before installing a new gasket, you must ensure that the cylinder block is intact. If it needs additional grinding, a part of increased thickness is purchased. It should compensate for the layer of metal removed during grinding.
How to check the cylinder head gasket
During the diagnostic process, the car owner must know how to check the head gasket for serviceability. To do this, use the following methods.
Using a glove, bag or balloon
Place a rubber glove, a bag (must be secured at the base), a condom or a balloon on the expansion tank, then start the engine and leave it for three to five minutes. It is advisable to increase the speed to three to five thousand. The more serious the damage, the faster the product fills with gases.
Use a bottle
On trucks to check, find a 0.5 liter bottle.
Next, do the following:
- Locate the breather on the expansion tank.
- Fill the bottle with water.
- Insert the tube into it.
The appearance of air bubbles indicates the presence of damage.
Intake manifold gasket: malfunctions and consequences.
If the driver is not familiar with the intake manifold gasket and the problems caused by untimely replacement
Learn more about this vital part of the car from the following article
Old cracked cylinder head
Every new car owner, although ignorant about the workings of the car, sooner or later learns about the intake manifold gasket. Like any other car part, it wears out over time. A worn intake manifold gasket needs to be replaced as it can affect the car's performance in unexpected ways. Putting it off may force the car owner to pay more than necessary to get the replacement done in a timely manner.
What is an intake manifold gasket?
Knowing exactly where it is located in the car can help you understand its importance and function. It is located in the internal combustion engine between the intake manifold and the cylinder heads, as well as the block
Its main function is to fill and seal the gap between these parts. When installed correctly, a good gasket prevents air or the air-fuel mixture from escaping from the gaps between these parts of the vehicle.
As is well known, in an internal combustion engine, a mixture of cold air and fuel is burned to produce energy, which is then transferred to propel the vehicle. The required cold air is drawn into the intake manifold from the atmosphere, which is then mixed with fuel drawn from the carburetor. The intake manifold then transfers this mixture to the cylinders. In fact, this mixture is sucked into the vacuum in the cylinders and acts on the closed intake valves. This sudden flow of the mixture causes it to change direction, creating a high pressure wave and heating inside the collectors. As mentioned above, they are connected to the cylinders using a gasket that must withstand this enormous pressure.
To get high performance and fuel economy from a vehicle, it is necessary to provide it with the appropriate percentage of air and fuel (14.7:1) in the mixture. Cold air, due to its higher density than hot air, is very important for achieving high fuel economy. It expands more when the mixture burns in the engine than hot air and provides more thrust. A leaking intake manifold gasket can impair performance by allowing hot air from the engine into the intake manifold. The same problem can allow a mixture of air and fuel to enter the intake manifold. This affects the amount of mixture available during ignition and the thrust created leads to transmission problems.
There are many factors that can harm this delicate part. Pressure and heat are the most likely culprits that she must confront. Along with this, the type and quality of fuel or antifreeze used in the car's engine can also affect this auto part.
The design and quality of materials used for the gasket also affect its functionality. Decreased fuel consumption, increased emissions and poor engine performance in terms of thrust and acceleration generated are just some of the many signs of a leak.
Manifold gasket faults
This small car part has a dramatic effect on the car's mileage per liter. If you postpone car repairs for an indefinite period of time, then one day this problem may force you to resort to the services of a tow truck. This situation can cause serious property damage. Unexpected expenses in the form of transportation from the place where you got into trouble to towing the car to the auto repair shop, unexpected expenses and the like can really cost a lot in terms of time and money.
Checking for microcracks
When checking the cylinder head gasket, it is important to pay attention to the presence of cracks. Several methods are used here.
Magnetic particle testing
The action algorithm is as follows:
- Place magnets on all sides of the head.
- Place metal shavings on top of the cylinder head.
- Pay attention to the "drawing". The chips will be drawn to the magnets, but they will remain in places of depressions and damage.
Using liquid
To check, do the following:
- Prepare the colored liquid using kerosene, acetone or another solvent.
- Apply the composition.
- Wait five to ten minutes.
- Remove excess liquid.
If there are defects, they are easy to notice even without a detailed inspection.
Pressure test
There are two ways used here - with or without immersion in water.
When immersed in water, do the following:
- Close all circuit channels.
- Place it in a container and pour in warm water.
- Apply compressed air to the area where bubbles appear.
Without dipping:
- Close the holes.
- Pour more liquid into the channel.
- Using a pump, pump in air to create a pressure of 0.7 MPa.
- Let the head sit for two to three hours. If the water leaks, we can talk about the need for repairs.
For repairs, a gas installation with additives is used with mandatory heating of problem areas to a temperature of 200 degrees Celsius or more. After completing the welding work, the seam is cleaned and pressed.
We change it with our own hands
Replacing a gasket correctly with your own hands without experience is not so easy. But if checking the injection engine showed that the reason is a broken seal, then you can try to do everything yourself. To do this, follow the instructions below.
Required Tools
What you will need to complete the task:
- set of wrenches;
- socket wrenches;
- set of hex keys;
- two screwdrivers - with a Phillips and a flat tip;
- new seal for the cylinder head of the VAZ 2114;
- a bucket or cut-off bottle into which the used refrigerant will be drained;
- clean rags;
- torque wrench for tightening the cylinder head bolts.
The Jecos Presents channel published a video showing an overview of a damaged cylinder head gasket on a VAZ 2114.
Algorithm of actions
Instructions for replacing the gasket yourself:
- Drive the car into a garage with a pit. Work on the overpass is allowed.
- Turn off the voltage in the vehicle's on-board network. Open the hood, loosen the bolt on the negative terminal of the battery and disconnect it.
- The piston of cylinder 1 must be fixed in the top dead center position. To do this, set the gearbox selector in the passenger compartment to the neutral position. Place bricks or wheel chocks under the wheels. Unscrew the bolts securing the right wheel of the car and remove it. Unscrew the screws securing the engine compartment mudguard and remove the product. Then unscrew the screws securing the front camshaft drive belt cover, and then disconnect it. The engine crankshaft is rotated by the screw that secures the generator set pulley to it. The device is rotated until the marks on the camshaft pulley coincide with the marks on the rear cover. Remove the plug from the service hole on the clutch housing, make sure that the marks on the flywheel match.
- Open the coolant drain plug by placing a bucket or cut-off bottle underneath it. Wait until the refrigerant has completely drained from the system.
- Relieve pressure in the vehicle fuel lines.
- Loosen the clamp and disconnect the exhaust system intake line from the exhaust manifold.
- Dismantle the cylinder head cover; to do this, you need to disconnect the throttle, as well as the receiver and the intake and exhaust manifolds.
- Using a screwdriver, loosen the clamp that secures the air supply line to the throttle. Remove it from the assembly with the air flow intake pipe and the cleaning device housing.
- To the left of the cylinder head of your car you will see several ground wires, that is, ground. They must be disconnected and the fuel rail and other system components removed.
- Unscrew the bolts securing the front cover, and then remove the timing belt. The crankshaft must be secured against turning.
- Loosen the bolt securing the tension roller and remove it. Also remove the spacer washer. Unscrew the screw securing the camshaft toothed disk and remove it.
- Remove the back cover. To do this, unscrew the nut that secures it, and then unscrew the other screws that secure the device. Using a Phillips head screwdriver, unscrew the bolts and loosen the clamps, disconnecting all lines from the cylinder head exhaust hose one by one. We are talking about the inlet pipe of the radiator unit, thermostat lines and hoses of the throttle and heating system. Check their integrity and replace if necessary. After unscrewing the nuts, disconnect the fuel drain and fuel supply lines.
- Using a hex wrench, remove the ten retaining screws. When unscrewing, we recommend turning them alternately by half a turn, first the middle bolts, and then the side ones. This will reduce the pressure and prevent the possibility of cylinder head deformation. The bolts are removed from their seats with washers.
- Remove the cylinder head with the sealing gasket.
- Clean the surfaces of the head and block from remnants of the old gasket and dirt, as well as metal dust. Make sure there is no engine fluid in the threaded holes. Otherwise, it must be removed. Clean carefully so as not to damage the surfaces.
- Install a new gasket. When installing, take into account the position of the two centering sleeves. The installation must be done so that the hole with copper edging is located between cylinders 3 and 4. This hole is used for the passage of engine fluid through the lubrication system. Before installing the head, make sure that the valves on the first cylinder are closed.
- Install the cylinder head. During installation, the bolts are placed in the technological holes. All screws are tightened in accordance with the diagram below - first the central ones, then the side ones. As for tightening, first tighten the bolts with a torque wrench with a force of 20 Nm. After this, observing the tightening sequence, the bolts are tightened to 69.4 - 85.7 Nm. All elements must be tightened with the same force. Then the screws are tightened 90 degrees, and at the final stage the bolts are turned another 90 degrees.
- After installing the cylinder head, all previously disconnected components are installed in the reverse order. The disconnected pipes, as well as the wires with the controller plugs, are reconnected. At the final stage, perform diagnostics and adjust the clearances in the valve drive. Reinstall the timing belt. Make sure it is intact and well tensioned.
- Fill the cooling system with fresh antifreeze. Start the engine, warm it up and make sure there are no coolant leaks.
Photo gallery
Photos of the replacement are shown below.
1. Use a Phillips screwdriver to loosen the pipe clamps
2. Unscrew the bolts securing the cylinder head
3. Install the new gasket in place
4. Tighten the cylinder head mounting bolts, observing the order
What to do if the cylinder head gasket breaks
If a malfunction is identified, the only way out is to replace the faulty element and determine the cause of the breakdown. The cost of the gasket varies depending on the brand of the machine and the quality of the product.
It is useless to repair the cylinder head gasket, because the work of a specialist will cost even more.
Other steps may be required:
- Replace the bolts if they become warped or if the manufacturer recommends installing new bolts each time the head is removed. If the bolt cannot be unscrewed due to bending, try tearing it off.
- Sand the cylinder head plane if it is bent. To do this, you need to contact specialists who use special machines. After removing the layer on the head, use a felt-tip pen to indicate the thickness of the removed metal, and you need to buy a gasket taking this thickness into account.
After eliminating the technical faults, you can begin installing a new gasket.
Follow these tips when doing this job:
- Clean the cylinder head from carbon deposits, scale or old gasket elements.
- Inspect the surface using a measuring ruler. It helps determine the presence and size of gaps. The latter should not exceed 0.5-1.0 mm. If this parameter is greater, the head requires grinding or replacement. If you don't have a ruler, use a thick sheet of glass that is 5mm thick. Place the product on the cylinder head and pay attention to the presence of interlayers. For greater accuracy, the surface can be lubricated with oil.
- Before replacing, treat the gasket with a graphite-based lubricant. This step makes the product softer and promotes better pressing to the surface. In the future, after such treatment, the product will be easier to remove. In addition, graphite is not squeezed out during use.
After completing the work, you should be interested in the stability of the engine. Pay attention to the signs of malfunction that were mentioned at the beginning of the article. At the same time, do not force the operation of the internal combustion engine. Give it a little load first so that the head gasket finds its position.
Please note that removing/installing the BC head is a labor-intensive process. It is necessary to discard many components, drain technical fluids, screw in bolts correctly, etc. If you lack experience, it is better to entrust the work to professionals.
By the way, some car owners complain about increased power consumption of the engine after replacing the gasket.
Reasons for gasket burnout
There are few reasons why a cylinder head gasket burns out, but with a new engine there is only one – overheating. Even a short time of engine operation at temperatures above normal can cause this malfunction. In this case, the gasket may burn out quite a bit, and inexperienced motorists will not notice the first symptoms that appear. With further operation, the burnout increases, and the symptoms become more pronounced. Due to the fact that many car owners turn to specialists not after overheating, but after some time of operation, when the malfunction becomes a clear fact, they do not connect the burnout of the gasket with the recent overheating and demand from motorists other explanations why the cylinder head gasket burned out.
If the volume of coolant is insufficient, you may not notice a slight overheating of the head, since the liquid, circulating in the system, manages to cool in the radiator, but does not have time to remove heat in the required amount. Instruments in a car show the temperature of the coolant, not the temperature of the engine parts. Thus, when operating a car with an insufficient level of antifreeze, you can burn the gasket without realizing that the cause was overheating.
Burnouts occur due to poor-quality gaskets, but this mostly applies to engines after repair. This happens extremely rarely on new cars. Even on repair engines, the cause of such a malfunction may be factors related to the quality of the repairs performed:
- unsatisfactory condition of the mating surfaces (remains of the old gasket, shells or scratches on the surfaces are poorly cleaned, head deformation);
- incorrect tightening torque of the cylinder head bolts;
- the order of tightening the cylinder head bolts is incorrect;
- the thickness of the gasket is incorrectly selected (on engines where they come in different sizes).
Which cylinder head gasket is better: selection rules
When choosing a cylinder head gasket, you must focus on the following criteria: resistance to corrosion, high temperatures, pressure and service life. Above we looked at the types of such products. Now let's take a closer look at their features.
Metal
Cylinder head gaskets made of metal are very popular among car owners.
Their advantages:
- increased strength;
- load uniformity;
- long service life;
- the presence of sealing elements that protect against depressurization.
Metal products are recommended for use on machines with a turbine or equipped with forced motors.
Asbestos
Asbestos-based gaskets are in great demand among car owners.
Their advantages:
- High temperature resistance.
- Affordable price.
- Slight shrinkage.
- The presence of metal elements in places where it is necessary.
Of the minuses:
- Deterioration in quality with prolonged use.
- Sensitivity to vibrations and temperature changes.
- The health hazards of asbestos (more relevant for people involved in production).
Non-asbestos
This category includes products made from modern composite materials.
They have a number of advantages:
- Almost complete absence of shrinkage.
- Long service life.
- Elasticity, guaranteeing a good fit to the surface.
- High temperature resistance.
- No fear of pressure changes.
- Reinforcement of main areas with metal components.
It is important to take into account that the service life of the cylinder head gasket depends not so much on the material as on the correct installation. If you don’t hit the shrink spot, there will be problems even with the most expensive product, so this issue must be approached with all responsibility.
The main sign of improper installation is its rapid damage and the appearance of the signs that were mentioned at the beginning of the article.
On diesel engines, improper installation may result in knocking of the piston system due to the fact that the moving element touches the edge of the gasket.
Which gasket material is better?
Gaskets made of different materials
When replacing a gasket, many car owners have a reasonable question: which gasket is better - metal or paronite? Each of these materials has its own advantages and disadvantages. At the same time, you need to understand that if the manufacturer recommends using gaskets made of a certain material, then you must adhere to these requirements.
As a rule, a metal gasket is stronger than its paronite counterpart. Therefore, it is advisable to install it on powerful turbocharged or forced engines. If you do not plan to tune the engine of your car, but simply operate it in a gentle mode, then the choice of material does not matter much to you. Accordingly, a paronite gasket is quite suitable. Moreover, this material is more flexible and is able to adhere more tightly to work surfaces.
Also, when choosing, it is necessary to take into account that the material from which the gasket is made does not have a primary impact on its service life. A much more important indicator is how the gasket was installed. The fact is that there are very thin walls between the individual groups of holes. Therefore, if the gasket is not installed exactly in the seat, then there is a high probability of burnout even in the strongest material.
The most obvious sign that the gasket was installed incorrectly is its rapid failure. Also, if you installed it incorrectly, the car may simply not start. In diesel engines, the knocking of the pistons may also be heard. This happens because the piston touches the edge of the gasket.
Conclusion
If you have a broken cylinder head gasket, then it is not advisable to drive a faulty car . Therefore, we recommend that if you discover a gasket break, replace it immediately. In addition, it is important not only to detect the very fact that it is broken, but also the reason for this. In particular, why the engine overheats or other malfunctions occur.
During the replacement process, monitor the torque on the mounting bolts. Timely replacement of the cylinder head gasket will save you from large financial expenses on repairing more expensive components. The longer you drive a car with a blown cylinder head gasket, the more likely it is that other, more expensive and important engine components will fail.
Results
In conclusion, we note once again that if you identify signs of a broken cylinder head gasket, you must immediately go to a service station for replacement or do the work yourself.
It is important not just to replace the damaged element, but to find the cause of the malfunction. For example, if it is an overheating of the engine, you must first deal with the problem, and only then install a new cylinder head gasket.
When replacing, follow the manufacturer’s recommendations in terms of the sequence of actions and tightening torque, because if these rules are violated, the product will not last long. But in such matters, the right thing to do is to find a good specialist and entrust all the work to him.
Found a mistake or disagree with something? Write in the comments.
Gasket mounting location
In some cases, at the junction of the head and the block, gases escape from the combustion chamber to the outside. Oil is also leaking from here. But this is due to improper tightening of the bolts. If this unit has been repaired previously, ask the technicians at what torque they tightened the bolts. Each car has its own standard. If they tightened it “by eye”, the cylinder head gasket will soon be broken. Signs (including VAZ-2114) - severe oil leakage at the junction of both engine components. Tighten the bolts on the block using a torque wrench. At the end of the article we will tell you at what torque you need to tighten the cylinder head.