All work on replacing the license plate lamp lamps must be performed with the lighting completely turned off.
Open the trunk lid. At the end there will be two license plate lamps:
In order to remove the lampshade from its seat, you need to pry it off with a thin screwdriver...
and, pressing lightly on the screwdriver, pull the lampshade out.
The lamp body is enclosed in a rubber housing, from which two contacts protrude:
they need to be disconnected.
Removing the rubber casing
and replace the lamp with a new one.
We put everything back together in the reverse order and, turning on the ignition, check the operation.
To replace the trunk light bulb, follow the same steps in the same order.
VAZ cars are equipped with trunk lighting, which turns on together with the side lights and license plate lighting. Oddly enough, many cars of this brand do not even have the “Lux” configuration, although there is room for it. You can install the lamp yourself. The figure below shows the location of the standard location of the trunk light lamp:
The regular place is located in the trunk immediately behind the rubber seal of the trunk lid, where you will also find a technological cutout for the lamp and power wire contacts.
To install you need:
- approximately two meters of wire with a cross section of 0.25 square centimeters
- trunk light
- button for installation in trunk
- insulating tape
- 2 small and one large female connectors
Before installation, it is extremely useful to study the electrical diagram for connecting the trunk light.
We start by installing the mounting plate (the button for automatically turning on the lamp when the trunk is opened will be attached to it). We fasten it to the trunk beam with two self-tapping screws as shown in the figure:
by adjusting it in such a way that the trunk lid touches the button pin almost at the very end of closing.
Next, you need to remove one license plate lamp from the grooves. It is more convenient to take the left lamp due to the fact that it is closer to the trunk button. We measure the wire from the trunk light to the switch, passing it along the trunk beam. The wire length should be slightly longer than shown in the picture.
Having measured and cut the wire of the required length, remove the insulation of the wire from both ends by about 5 millimeters and install a small connector on one end,
and on the other big one:
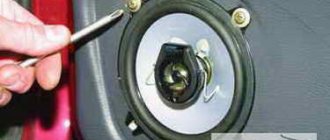
Now you need to find the wire near the license plate light that receives the current. To do this, you can use either a multimeter or the device shown in the following illustration:
One of the contacts of the device must be attached to ground; in our case, it can be the strike plate of the trunk lock:
We will power the trunk light from this wire. Now you need to pass the wire that will power the lamp itself through the trunk lid, first exposing one end and installing a small “female” connector on the other.
Now you need to expose the power wire with a knife:
And connect the bare end of the lamp's wire to it (by twisting, or even better by soldering)
ATTENTION! This area must be well insulated to prevent sparks!
It is not entirely clear why AvtoVAZ did not come up with illumination for the luggage compartment of the VAZ-2114. Or was there a calculation for license plate lamps, which barely illuminate the number? I wanted to make a trunk light myself. Before that, I read several articles about this modification. Having weighed all the pros and cons of the proposed installation methods, fastening and the principle of turning on the backlight, I decided to make it so that it satisfies the following conditions: - turning on the backlight regardless of the dimensions being turned on (I don’t always climb into the trunk when the dimensions are on, so I don’t see the point of turning on the dimensions for the sake of turning on the trunk light ); — turning on the backlight when opening the trunk lid (fortunately, there is a limit switch for the signaling. Although this is not necessary during the day, the consumption of 1 m of LED strip is very small); — placement of the LED strip in fixed places on the sides of the trunk, and not on a folding and removable shelf (often you have to remove the trunk shelf to increase the volume of the luggage compartment. Now you’re going to the village, now to the country, now renovating a house...). Based on all of the above, the circuit for turning on the backlight was as follows: “+” (which is always present there) was pulled from the central interior lamp with an MGShV wire through the roof into the trunk. Then, through the fuse and stabilizer KR142EN8B, it was routed along the tapes. Minus from the trunk end switch. Now, in order. First I opened the ceiling of the cabin. To do this, you need to work hard and prepare three ceiling mounting pistons at the rear in advance, since they simply broke during dismantling. We see the connector for the central interior courtesy light. The central white wire is what we need. I cut the insulation and soldered the MGShV wire. Isolated.
Then I laid the wire together with the factory wiring. Once again I was convinced that some alarm installers clumsily and clumsily route wires to the signaling elements, in particular to the trunk limit switch. The wire was just lying inside the ceiling...
I laid the wire through the rear side roof pillar. There is just a cavity that comes out in the trunk. I also pulled the wire from the alarm trunk limit switch there, thereby correcting the installer’s hand-wringing (the wire in one place had been pinched with a plastic cover for years, as it ran on top of the rack).
The minus was soldered parallel to the one on the trunk end. I insulated and secured the limit switch in place.
Then I put the wires into a box from some StarLine unit (my father-in-law had it lying around) into which the KR142EN8B stabilizer fit, and from there I brought out two wires to the LED strips. Well, as I wrote, the incoming plus from the lampshade first passed through the fuse.
I ran the wire to the LED strip on the left side along with the factory wiring for the headlights.
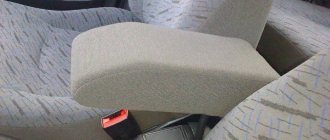
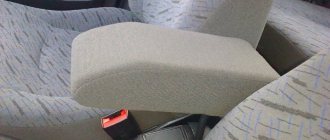
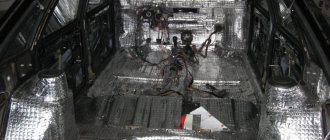
Well, now about the placement of the LED strip. I repeat once again that there is no point in attaching the tape to a removable shelf due to its frequent removal. Therefore, I glued the tape from the bottom along the edge of the plastic shelves on the sides of the trunk, on which the radio speakers are located. But I ran into a problem. The surface there is not completely flat, but there are ribs (plastic bridges). Apparently these shelves were cast this way or for rigidity. But this can also be solved. We fuse the protrusions with a soldering iron and you can glue the tape.
It took exactly 1 meter of tape. 0.5 m on each side exactly. But the quality of the tape is getting worse and worse, in particular the adhesive base, and the price is getting higher and higher. Therefore, in some places it could not be done without Cosmofen.
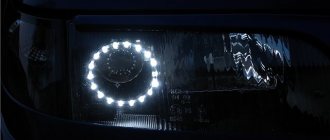
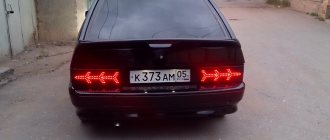
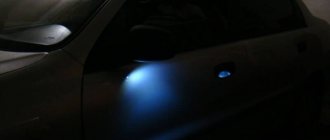
It turned out great. The strips shine mainly on the sides of the trunk, but due to the scattering of light in the center, everything is also visible. I’m uploading a video of the ribbons shining in the dark. Due to the fact that it was filmed on a phone and in poor initial lighting, the quality leaves much to be desired and it may seem to the viewer that there is blackness in the center of the trunk. In reality, no - the center is weakly illuminated, and this is enough, at least for me.
Do-it-yourself light in the trunk of a VAZ 2114
The most common and inexpensive type of car tuning is trunk lighting using LED strips and LEDs.
This way you can stand out among the continuous mass of city traffic. How to properly illuminate the trunk, interior or wheels, and what is required for this? Trunk lighting is not only a tuning element, but also additional lighting
LEDs have become popular due to their moisture resistance, small size, affordable price and extended service life. Modern cars already come with pre-installed LEDs in headlight bulbs that are as bright as xenon bulbs. If your car does not have LEDs, you can install them yourself, because kits of LEDs with controllers have appeared on sale. It is convenient to control them from the interior, switching LEDs located in different locations of the car, or changing their color.
So, to illuminate the trunk, it’s enough to buy a set of LEDs, but you can get by with a flexible LED strip:
- LED kit with remote control. This system is designed for installation in the electronic circuit of a car. Easy installation allows even a beginner to connect LEDs, since the kit usually comes with an installation diagram. If you expand the backlight area, you will have to buy additional diode strip and toggle switches.
- LED Strip Light. It is cheaper than the kit. You will have to correctly measure the length of the strip so that it is enough for all illuminated areas and you do not have to buy separate pieces. For the tape, buy toggle switches to turn off the backlight in the planned places or change the color. If you need LEDs in two colors, you will have to purchase two strips of double measured length. It is desirable that the tape is moisture resistant and has a silicone shell.
Welcome to the website https://lada110atricom.ru
Many people have their own cars, of various brands, configurations, tuned and simply “gray” cars for everyday driving. Some make various gadgets for cars with their own hands, some send them to special services, and others simply admire how people do it. Actually, this is what I would like to talk about – tuning!
I didn’t have a car before and somehow didn’t need one, but in my heart I always wanted to sit, steer and enjoy the speed. The first step to buying a car was getting a driver's license, which I also went to study for spontaneously. In general, I studied for 3 months in DOSAAF and on February 29, 2008 I received my driver’s license. From time to time there was a desire to buy a car, but there was no money to buy it, and I began to think about it – “where should I go?”, it’s a 15-minute walk to work, the dacha has long been abandoned and it turns out that the car is not needed.
Time passed, years flew by, rumors circulated about a crisis. By that time, we had managed to save up a little cash, which we finally decided to invest in some kind of automobile before it disappeared. One wonderful morning, we got ready and went to the car market in Saratov to choose a car for me. I had to borrow a considerable additional amount of cash from friends, otherwise my savings were not enough.
What you need to install an LED lighting system
Before installing the LED kit or individual strips, you must prepare the materials and tools:
- Electrical wires of different colors (red and black) to avoid confusion. The length will depend on the places where you will lay the LED strip. Since you will be lighting the trunk, you need to measure the distance from the trunk to the dashboard with a tape measure.
- There are sufficient female terminals for all fuses, toggle switches or buttons.
- Rubber bushings in case the wires are pulled through drilled holes in the body.
- Buttons or toggle switches in such a quantity that there are enough of them for ribbons of different colors.
- Plastic zip ties for fixing wires.
- A block with fuses, of which you need as many as the number of colors of LEDs (LED strips) you are going to install.
- Silicone sealant.
- Double-sided tape if there is no sticky layer of glue on the back of the LED strip.
- Heat-shrinkable cambric.
- Soldering iron with solder.
- Scissors with a sharp knife.
- Roulette.
In addition to measuring the distance from the trunk to the bottom, and then to the dashboard, you need to decide where on the front panel the fuse box will be located so that the toggle switches or switch/disable buttons are comfortable to use. Alternatively, you can place the toggle switches under the dashboard so as not to drill holes. If you are going to illuminate the tailgate, you will need to measure the distance on the door in the area of the LED strip.
Backlight connection process
To connect the lighting in the trunk, you will need to stretch long wires from the dashboard under the floor covering through the entire car to the rear partition - there will be technological holes in it. In some cars you will have to remove the rear seat.
- The tape is carefully cut to the desired size at an equal distance from both LEDs. Be careful not to damage the diodes and the base of the tape; to do this, use a sharpened knife, or you can take a stationery knife. Then a red wire is soldered to the positive part of the tape, and a black wire to the negative part. Be sure to fill the joints with hot glue or silicone.
- Make the length of the positive red wire sufficient for comfortable accessibility of the fuse, that is, in a place convenient for the driver. It is necessary to carefully prime the hole in the body wall and insert a rubber bushing, through which the wire is then pulled.
- Cut the black negative wire at such a distance that it is long enough to lay under the front panel to the location of the button/toggle switch for turning on the backlight. Then we connect the second wire from the button to the body hardware.
- After soldering, carefully glue the strip with LEDs in the routing areas, also with the wires, which it is advisable to hide so that no one can see them.
Do-it-yourself trunk lighting will be clearer if you draw a diagram of the wiring, tapes and installation locations of the toggle switches on paper.
Replacing the wiring harness in the rear of the car
The vehicle manual warns that harsh climatic operating conditions have a negative impact on the vehicle's electrical components. And electrical connectors and wires are among the first to suffer. And since the price of parts is low, the car owner can replace:
- Collapsed terminal block;
- Wire with damaged insulation;
- Components and devices approved for installation from other models of the VAZ family.
Wiring diagram for VAZ 2112 - harness and connectors for the rear of the car
Advice: for this you need a VAZ 2112 wiring diagram with decoding in order to clearly understand which electrical circuit is responsible for what and controls what.
Features of connecting the trunk lighting
The LED strip requires strict adherence to the polarity marked on it by the manufacturer. Therefore, for the red wire from the battery positive, the connection must be strictly to the positive on the tape. If you want to connect the plus to the cigarette lighter or ignition switch instead of the battery, you will have to disassemble the dashboard. In any case, when connected to the battery, the backlight will be on even after you remove the key from the ignition. If you don’t want a constantly lit trunk, make a separate button on the dashboard to quickly turn off the LED backlight. Car enthusiasts with extensive experience working with electrical equipment can install an AC resistor on the front panel, with which you can adjust the brightness of the LED lighting. Think about how you want to design the lighting, look at photos on the Internet or ask friends. The main thing is to think through all the steps at the very beginning of the work, so that later you don’t have to correct a crooked diagram or incorrectly designed lighting. If you want the backlight to turn on automatically when you open the trunk, install a switch under the trunk lid instead of a button.
For variety, you can connect a second LED strip of another color, ideally through a different toggle switch. You will get a unique trunk, illuminated in different colors.
In the trunk itself, glue a strip with LEDs in several ways. Choose places according to your imagination. Illumination of midbass or subwoofers will look very impressive if they are located in the trunk. You can highlight them in a circle of speakers. The amplifier will look beautiful if you install an LED strip underneath. Either way, you'll have plenty of options for unique lighting. Those who like to listen to music will love the original version of the car audio flashing in time with the bass.
Effective LED lighting of the trunk in the shape of a “smile” can be achieved if a strip with LEDs is glued to the rear horizontal part of the trunk, covering part of the side vertical walls.
If you are not familiar with electricians, entrust the creation of the backlight to an experienced specialist in automotive electrical circuits.
Now your trunk will be pleasantly illuminated or wink when in the dark you want to load it with bags of groceries purchased at the supermarket or pack your things before a trip.
Good afternoon my few subscribers