Problems with voltage in the on-board network are typical for many AvtoVAZ cars. They worry owners because they damage various electrical equipment to the point of making it impossible to operate the car. Therefore, motorists are interested in the question of how much a VAZ 2114 generator should produce.
In this article we will tell you what the voltage of the generator should be and how many amperes it is designed for. We will also look at the main causes of low and high voltage, their consequences, and ways to check the generator.
The principle of operation of the generator on the VAZ-2114
In order to convert one type of energy received from the engine into another, created by the generator, the presence of a magnetic field is necessary. And in order to create all the conditions for its appearance, the generator contains two main and very important elements - the rotor and the stator .
Generator rotor and stator
- The rotor in the generator is a movable element equipped with a steel core with tips. On these tips there are special coils for excitation, to which external power is supplied.
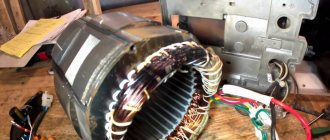
- The stator , in its design, is a ring, motionless according to the principle of operation, assembled from individual steel elements isolated from the winding. Inside the stator there is a winding made of fairly thick copper wire.
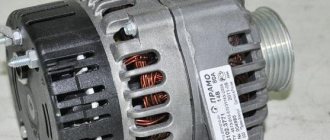
The above-mentioned elements of the generator are assembled together inside a metal case, in which along with them there are bearings that ensure proper rotation of the rotor, impellers, a pulley, a diode bridge, and a voltage regulator.
- The pulley is the direct drive of the unit, onto which the belt is placed, transmitting the energy of the engine.
- bearings in the generator , front and rear. If the rear bearing fails, it can simply be replaced, which cannot be done with the front one, since it is pressed directly into the housing, and if it breaks, the entire part of the generator housing must be replaced.
The unit body has two removable parts, front and rear, which are fixed with bolts. The fixation is carried out in the same way for the stator, only it is already located on the inside of the housing.
Design of the VAZ-2114 generator
Features of operation
The generator on the VAZ-2114 is a fairly unpretentious device that can withstand heavy loads even in the most severe operating conditions, if all the rules for its operation are followed.
During its operation, the following basic rules must be observed:
- Do not allow the generator to operate when the battery terminals are disconnected . This is due to the fact that in the absence of a battery, there will be constant surges of electrical energy in the network, which can negatively affect all devices and the condition of the generator in particular.
- When carrying out welding work on a car, make sure that the wires are disconnected not only from the battery, but also from the generator .
- Make sure that all wires are connected according to polarity , because incorrect connection of wires, even for a short period of time, can render the entire system unusable.
- Checking the functionality of the generator should be carried out only in a strict order of work (indicated below - approx.).
Charging VAZ 2106
Cars are equipped with alternating current generators. Depending on the model and electrical equipment installed on the vehicle, Delco Remy CS generators of various capacities CS-121 and CS-130 can be installed. The numbers indicate the outer diameter of the stator plates in millimeters.
CS generators are equipped with a built-in voltage regulator. The electrical characteristics of the Delta stator, rectifier unit and rotor with slip rings and brushes are similar to those used in earlier generators. A standard pulley and impeller are used, however, no hole is provided for testing.
An automobile relay is a switch that serves to close and open sections of electrical circuits at certain levels of electrical and non-electrical input quantities. It acts as a load current switch when the performer, for example, a starter, generator, fan or other structure, consumes more current.
Electric relay device:
electromagnet - a wire that is wound on a coil with a core of magnetic material;
anchor - a special plate that controls the contacts;
switch (switching, opening, closing).
When an electric current passes through the winding of an electric magnet, an electric field arises, pressing the armature to the core, using a pusher to move it, switching the contacts. There are two main types of autovoltage regulator relays used on Zhiguli 2106 cars.
How many volts and amperes should the VAZ 2114 generator produce?
The generator of the “fourteenth”, like any other car, is designed to convert the energy produced by the motor into electric current. The electricity it generates powers all the electrical equipment of the car. For normal operation, the generator must have a certain current strength and produce the required voltage.
In this regard, many owners are interested in how many amperes the VAZ 2114 generator produces. If the car has a standard part, then it is designed for 90 A. question of how many volts a generator on a VAZ 2114 should produce is no less than 13-13.2 V. On average, this value is 13.6 V. But this is at full load. When consumers are turned off, it is much higher.
Malfunctions
The following signs indicate that there is a problem with the generator:
- the loud noise it makes;
- The battery light installed on the panel is brighter than usual;
- The lighting in the car is too bright;
- Electrical appliances do not turn on when the battery indicator goes out.
A hum or noise from the generator indicates that the bearings have become unusable. Most often, failure occurs in the front. You should not use a machine with such a malfunction - if the generator jams, then, most likely, it will completely lose its functionality. New ones, as you know, are not cheap.
Bright lighting of the lights (even when the engine is turned off) indicates that the limit voltage in the network has been exceeded.
How to check the generator voltage on a VAZ-2114 battery?
The operating condition of the generator on the VAZ-2114 should be checked every 6 months (best before and after winter - approx.), because it is in winter that the electrical network experiences increased loads. The check must be carried out regardless of whether it is working or not.
The importance of checking the generator is high, because if it is not capable of delivering a charge of a certain power, then the battery will simply discharge and the car will not be able to start, and if the voltage is excessively high, then problems can arise directly in the wiring and circuit of the car.
Signs of a generator malfunction
If one or more of the following symptoms appear on your car, then the generator must be checked:
- There is extraneous noise or hum coming from the generator. The noise will indicate that the bearings have failed (in most cases the front one breaks - approx.). You cannot drive with such a breakdown, because its jamming can lead to failure of the entire generator after the destruction of the bearing.
- On the instrument panel, Battery warning light is too bright, even when the motor is not running, this will indicate an excess of energy in the network.
The lamp burns brighter than usual. - The battery light does not light up, the turn signals and other electrical devices do not work - this is because the battery is not receiving energy due to a non-working generator.
Recharging the battery
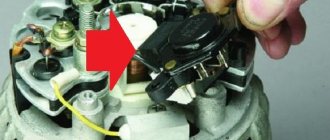
Sometimes when the generator breaks down, the battery overcharges. This can be noticed not only when taking measurements with a multimeter, but also in the readings of the on-board vehicle. And if the set voltage is greatly exceeded, various electrical equipment may fail or the battery may boil out. Also, the headlights may shine brighter than usual, and the battery charge indicator on the dashboard will constantly light up. These are the main symptoms of overcharging. It occurs most often due to a faulty voltage regulator. This part on the VAZ 2114 can be easily changed with your own hands.
And the battery and generator diagnostics described above will help determine the exact presence of the problem.
Recommendations
Comments 31
Compare the charging: on the generator, on the battery terminals, on the instrument panel (or BC) and then you will think further.
when it’s hot under the hood, the charge is 13.6-13.7, who cares what with the consumers or not! still cold 14.3. and why hasn’t my battery drained in 6 years? look for current leaks when the car is stationary if the battery drains
Any radio will produce a decent amount of current leakage if the yellow and red wires of its power supply are twisted together and connected to “+”. The permanent plus goes only to the radio memory (yellow wire), and the other (red) either through the button into the gap or to the ignition switch
I just left work and it shows 13.1. Is that voltmeter that shows on the dashboard lying?
I just left work and it shows 13.1. Is that voltmeter that shows on the dashboard lying?
Electrics is generally the science of contacts. If the contact is bad, any device will lie
I installed a diode bridge and a relay regulator from a Chevy Niva. Basically the voltage is 14.8V, if many consumers are turned on then 14.1V. Sometimes it drops to 13.8 V
13.9 with consumers is ideal. True, right now I have 14.4 consumers, but this is because of the new Genoa at 100 amps
I'm thinking maybe I should change the gene or continue driving with it
I went with this and everything was fine. Or if it’s really not possible, then buy and install a 3-level relay, there you can set the voltage to 14.7
I have the same charge, when I put on the music, nothing changed either, only sag appeared from the subwoofer, but my battery did not run out.
The ideal charge from the generator was always from 13.8 and a maximum of 14.2, anything higher is overcharging and death of the battery, and sometimes when you start the car in the morning in the cold, the regulator can briefly give more than 14.2, but as it warms up, all indicators return to the recommended ones, and the battery drains maybe simply because one bank in it is short-circuited, and it drains the battery from the inside, it’s difficult to check this on modern batteries, but on old black ones, with lead jumpers, it was possible, and even now battery manufacturers have completely forgotten that the plugs of the jars should only be white, why yes, because they used to also monitor the condition of the battery, namely by the black coating on the plugs, which is difficult to see on black plugs, and in conclusion, I want to say that your car has very decent indicators, on charging.
Right now I’m on my way to work, the dashboard says 13.6 -13.7 ((
On our cars there was always a problem with charging: www.drive2.ru/l/8654851/ my observations, of course not the generator itself, but maybe I can give you an idea
Right now I’m on my way to work, the dashboard says 13.6 -13.7 ((
Generator device
The pulley transmits energy from the motor to the shaft using a belt.
Covers on the housing are needed to accommodate the rotor supports, install the unit on the motor and secure the stator. The back cover is needed for the brush assembly and outputs for powering electrical equipment. The stator produces power through a three-phase winding. The rotor is a steel shaft with two bushings. The terminals of this winding are connected to copper rings. The regulator stabilizes the voltage under various factors:
- electrical load surges;
- rotor speed delta;
- temperature changes in nature.
The brush assembly is a plastic element with brushes attached to it that interact with the rotor rings. The electric generator also includes six diodes (three in “-” and three in “+” heat sinks).
Step-by-step procedure for checking the generator
- Turn on the ignition and make sure that all the dashboard lights are on.
- We start the car, and if the generator is operating normally, the battery warning light should go out.
- We wait until the car warms up to its standard operating temperature of 90 °C.
- When it warms up, it is necessary to load the network as much as possible. To do this, we turn on everything that is in the car, including heated mirrors, lights, music, etc.
- We take a pre-prepared multimeter and set it to the “voltage” check mode.
- Next, we call an assistant and ask him to keep the engine speed at idle (within 3500 - approx.).
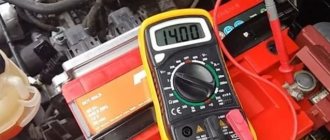
- Using a multimeter, we connect its probes to the battery, and at the moment when all consumers are turned on, the readings should not fall below - 13-13.2 V.
If the readings are lower at such engine speeds, this will indicate that the generator is not producing the required amount of energy. And when they are normal, we continue testing with switched off consumers at the same speed. In this case, the multimeter readings should be about 14.5-14.7 V.
Checking the voltage supplied by the generator
After diagnosing the battery, we go directly to the generator using the same multimeter.
- When the car is started, we connect the probes to its terminals, and the voltage should be at least 14-14.3 Volts.
- Next, as the speed increases, we monitor the instrument readings, where the values should not change by more than 0,5 volt. If this is not observed, this will mean that the generator and voltage regulator are functioning correctly.
There is an excess of overvoltage in the network.
Now, having reliable information about how many volts the generator should produce, you will know for sure whether it is working or not. And if the readings differ slightly from the norm, then first of all you should pay attention to the malfunctions described below.
- Thank you
- I do not like
fedww Oct 2010
to mid-range volts, density measure, should be 1.27-1.31 in all banks
PS leakage is permissible 60-80mA
Akum is new. 2 or 3 months. The density was measured to be 1.27-1.28. Tomorrow I will look for a voltage regulator on the generator.
✔ The generator does not charge. Problem solved. — Lada 2115, 1.5 l., 2010 on DRIVE2
The first thing I want to advise, which will be useful to everyone: buy a voltmeter on Ali for about 100 rubles + free shipping and install it in the car interior: aliexpress.ru/item/32888405381.html You need to connect it directly to the battery and connect it to a separate power button. It is on a separate one, and not with the ignition turned on - this will more than once help you control the charge and not drain the battery. It’s even better to buy two of these voltmeters, install the second one under the hood - you will monitor the charge there during repairs and diagnostics, if necessary - well, this is already an “extra”. option,” let’s put it this way.
So first: the charge on the battery appears after re-gassing
(usually over 3000-3500 rpm). The problem manifests itself when there is no excitation to the generator, the solution is to replace the battery monitoring lamp with a working one in the tidy, and if you once replaced the standard lamp with an LED, then return the first one; under no circumstances should you put the LED there. Also, this problem may appear if you have recently changed the tidy. Rather, it’s about her, and specifically, again, about the supply of excitement. Example: I once installed a device from a dozen, some model, where instead of a battery indicator lamp (we look at the lower right part of the board), microscopic diodes were soldered in, i.e. There are no lamp sockets visible there at all:
Full size
Well, how do you replace the lamp?
The resistance of a diode is different from lamps. But this is what the setup should look like:
as we see there are light bulbs, not microscopic diodes
But I came across a device of the first type and even with diodes, I bought it and the problems were not solved, and do you know why? I distinguished them visually: the logo is in the middle of the tidy in the central part. Let's look carefully:
round here
and on tag the VDO text:
The round logo did not fit my car. To make sure, I took two devices with a round logo and neither one had a charge, i.e. excitation was not supplied to the generator at all. I really wanted to change the generator. But I decided to pay attention to this seemingly trifle. So install VDO and you will be happy.
Many craftsmen connect a regular lamp to the LV, only in this case keep in mind that leaving the car in this position overnight with the ignition off will drain the battery. Another method, more relevant: one end of the lamp to excite the genes, the second to the wire on which + after turning on the ignition, or something like that. In general, I didn’t bother. I like everything to work properly and in a normal way, and not with the collective farm. And the problem can sometimes be solved by revving up to 3000 rpm, if the problem is in the excitation wire...
I also read on the Internet that they are trying to cause excitation by throwing the excitation terminal to ground... But isn’t mass a minus, and isn’t the excitation terminal a plus at startup? Tell me who did this, did you burn the wiring? I personally didn't take the risk.
Next: the charge has become lower over time
. It is likely that the contact rings are worn out, by the way, yes, the problem manifests itself gradually, i.e. The charge does not drop instantly. Or the reason for the gradual drop in charge is that the brushes of the Voltage Regulator (aka RN, chocolate bar, tablet) themselves have worn out. Let's talk about the latter: there is nothing complicated with its installation - remove the generator cover, unscrew the two bolts and replace it with the terminals connected as before. But not in my case, I had a Chevrolet Niva and it was connected according to the diagram:
The diode bridge is from a VAZ, and the RN is from a Chevrolet Niva
(don’t forget to connect the capacitor in the photo on the left side, it is required to protect the on-board network from power surges during operation of the ignition system and reduce interference with radio reception) From the above picture we see that an additional one is installed. “male” terminal to the lower right contact (second from the right, and NOT the top right as many have seen), which goes to one of the winding terminals and the right terminal of the voltage regulator is powered from this contact. Everything else is standard: the left terminal is a permanent plus with a thick bolt (there was initially a male terminal there, I didn’t draw it), the middle one goes to the excitation contact. And someone says that with my scheme it is necessary to solder the diodes, as one person did in this photo:
Full size
except for soldered diodes, in his case the right contact goes to the right upper contact of the winding
Since, according to him, I have a connection to a three-level regulator, like on a Chevrolet Niva, and they do not have additional diodes (which should be visually visible from above) I did not solder anything, everything worked properly. In general, I don’t recommend soldering anything, since generators come in different models and in our case, the assembly is exactly as factory-made, i.e. generators with such a connection exist, we just have a bridge from a VAZ, and a LV from a Niva Sh. The solution to the problem here is clear - by replacing the regulator, we return the previously missing voltage to the battery charge. But there is one caveat. A case, again, that came across on my difficult path, when one day there was neither the opportunity nor the desire to buy a regulator, I had to simply replace the brushes in the presence of a donor, aka a broken old regulator, but with intact brushes. Which is what I did. First I'm at
HOW TO REMOVE THE GENERATOR FROM THE CAR
It is installed in a special bracket on the cylinder block; there is also a bar for tensioning the generator belt. Find the generator in the front part of the engine compartment on the right side in the direction of travel of the car. To remove it, you need to prepare the following tools:
- Wrench set to “10”;
- The same key for "13"
- Open-end wrench 17x19;
- Head at "15"
- Mount.
Article on the topic: Do-it-yourself replacement of rear beam silent blocks on a VAZ 2110
We remove and do not touch the engine protection
Removal is carried out in several ways, where it is necessary to remove the engine protection. They are well described in various sources. Let's try to remove it without removing the protection. The procedure will be as follows:
- The first step is to disconnect the terminals from the battery;
- Loosen the belt tension, remove first the belt, and then the entire tension mechanism;
- Disconnect the wires from the battery, they are covered with a rubber cover, and the connector for supplying voltage to the excitation winding;
- The generator on the bracket is mounted on a long bolt and nut. It’s not very convenient to get it, so use a “15” head to unscrew the two bolts securing the bracket to the block. They are found at the back of the generator, one bolt is long and the other is shorter. Now the generator can be turned clockwise and it will be possible to remove the axis of its attachment to the bracket;
- Unscrew the nut with a wrench to “19” and remove it together with the spacer sleeve;
Use a small punch or something similar to knock the axle out of the bracket. The generator is lifted up. Now you can use it to repair the generator or perform maintenance.
Additional weight for the generator and battery — Lada 2115, 1.6 l., 2007 on DRIVE2
In general, the car’s battery, which was less than a year old, often ran out. The voltmeter showed low voltage. Having read on the Internet about increasing the number of volts produced by the generator, I did the same as many do.
Initial tension
when I just started the car (all buttons, heater and music are turned off)
So, we will need:
a thick wire (I still have extra from the subwoofer) and 4 terminals. Soldering iron and electrical tape
[1]
I cut off the wire, soldered the terminals to it on both sides, and insulated the soldering area just in case.
[2]
Next, remove the negative terminal from the battery. We take the wire we made and screw one end of it to the generator, the other end to the body ground, I screwed it to a bolt near the windshield washer reservoir (it could have been to the bolt that holds the headlight, but it doesn’t matter where)
close-up
general form
The voltage increased to 13.5 - 13.6 V.
[3] The next step is to connect additional ground to the battery.
There is a thin black wire on the negative terminal of the battery (I even had some kind of factory label on it). We unscrew this wire from the terminal, put a second, our homemade, wiring under it, after which we twist the wire together with the factory one. Let's look at where the factory wire goes, it goes to the left wing, parallel to the battery. We unscrew the wire from the ground (from the wing), wipe the nut, the terminal of this wire, and the washer with a rag. We fasten the homemade wire and the factory one on top of it. That is, we have everything. It turned out that there were two wires going to ground from the battery. The factory one can be removed if desired.
RESULT:
I’m glad that we managed to increase the battery charging from the generator at least a little. Closer to winter, I plan to install a “Three-level voltage regulator”.
NUANCES OF OPERATING THE VAZ 2114 GENERATOR
A generator is a fairly durable device that, if all the rules for its use are followed, can last for more than one year without breakdowns.
Let's consider the main features of operating the VAZ 2114 generator:
- Make sure that the generator is never operated with the battery disconnected. When the device operates without a battery, there will be constant voltage surges in the on-board electrical network, which can cause failure of electricity-consuming devices and systems, as well as overheating of the generator itself;
- When welding work on the car body, it is necessary to disconnect all wires going to the battery and generator;
- Make sure that the device is connected to the battery correctly: the minus of the battery should go to ground, and the plus to the generator terminal. Even short-term operation of the unit if connected incorrectly can lead to equipment breakdown, since the diodes will immediately break due to a voltage surge;
- Checking the VAZ 2114 generator should be carried out in full accordance with the methodology given in the article: do not engage in amateur activities - never try to check the “spark” of the generator, as this can lead to damage to the diodes.
Generator produces low voltage
A more common problem in the “tag” is low voltage in the on-board network. It is not only detected through measurements or dashboard readings. The following phenomena indicate low voltage:
- The battery indicator is constantly on;
- Headlights and dashboard lights glow dimly or flicker;
- Electrical appliances are unstable;
- The engine runs intermittently and the engine stalls while driving.
There may also be several reasons for this problem:
- The voltage regulator or diode bridge has failed;
- A short circuit has occurred in the stator winding;
- Bearings are worn out.
However, it is not always the generator set that is the problem. Sometimes the voltage may drop due to battery faults or oxidized terminals. Powerful electrical equipment (subwoofer or amplifier) can also cause voltage problems.
Failures that occur during operation
- When the ignition is turned on, the light on the dashboard does not light up and the main instruments do not work.
- The control lamp did not light up after turning the ignition key and does not light up after starting. The battery is low.
- When the machine is running, the light glows brightly or dimly. The battery is low.
- The light glows brightly when the car is running. The battery is overcharged.
- Increased noise level during operation of the electric generator.
- Thank you
- I do not like
t06 Oct 2010
Today I'll find the generator current pin
The main reasons why the generator does not charge the battery
To identify problems, it is necessary to diagnose both the entire on-board network, which may draw too much energy, and the generator itself. If you have tuned your car, equipping it with additional electrical equipment, you will need to check its energy consumption level and serviceability.
Very often, to compensate for the current consumption of third-party devices, car enthusiasts install high-capacity batteries. However, the generator power remains at the same level, so this measure has no effect.
Reasons for failure
If the symptoms described below appear, carry out diagnostics. You can do it yourself or take the car to a car service. To determine the cause of the failure, special equipment is needed. If you decide to figure it out yourself, master a multimeter tester.
Five possible sources of difficulty are described below:
- bearing wedge (lubricant is used up, sometimes the belt breaks - you will need to replace or rebuild the unit);
- the winding has burned out (a common cause is the reagents used to treat winter roads);
- brush wedge (cause - wear of graphite cores);
- the regulator relay is faulty (this element prevents the battery from overcharging and stabilizes the voltage);
- The diode bridge is broken.
Useful video
You can get additional useful information from the video below:
READ What is the clearance of the VAZ 2110
Generator device
The pulley transfers energy from the motor to the shaft using a belt.
Covers on the housing are necessary to accommodate the rotor supports, install the unit on the motor and secure the stator. The back cover is needed for the brush assembly and outputs for powering electrical equipment. The stator produces power through a three-phase winding. The rotor is a steel shaft with 2 bushings. The terminals of this winding are connected to copper rings. The regulator equalizes the voltage under various factors:
- electrical load surges;
- rotor speed delta;
- temperature changes in nature.
The brush assembly is a plastic element with brushes attached to it that interact with the rotor rings. The electric generator also includes 6 diodes (three in “-” and three in “” heat sinks).
Check the battery charge from the generator
After replacing the brushes. Check the battery charge.
- The power source must not allow operation with a disconnected battery. This causes splashing with possible damage to the alternator and vehicle components.
- Make sure the battery plus is always connected to the power supply terminal and the battery minus to ground. If you mix the contacts, the diodes will receive a higher current and they will break.
- Under no circumstances should you try an electronic generator on a “spark”; the diodes will instantly fail due to overvoltage. It is necessary to inspect only using special counters or near the shield.
- The valves cannot be controlled by voltages higher than 12 V or by a fan, which can cause short circuits.
- Inspect vehicle wiring using a magnet or voltage greater than 12V only when the power is off.
- If necessary, welding units or body parts are required to disconnect the wires from all terminals and connection points of the generator and battery.
Generator voltage under load
To ensure the functionality of the power supply, it is recommended to perform a load test.
To begin with, let us remember that there are 3 types of voltage:
- Nominal - indicated in the instruction manual. It is 12 Volts. This figure is far from the actual U value.
- Actual. Here we are talking about the voltage parameter after installing, connecting and starting to use the car battery. On average, this parameter is 12.6-13.2 V (this was mentioned above).
- Under load. Here the voltage parameter supplied by the generator can change.
The presence of a load allows you to verify the health of the battery and generator.
A seemingly serviceable battery with 12 V output can drop significantly after consumers are turned on. During the testing process, an additional device is used - a load fork, which allows for an increased load on the battery.
If your battery capacity is 60 mAh, the load value should be 120 A. The connection duration is 3-5 seconds.
You can say that the power source is working properly if the voltage does not drop below 9 Volts. If the parameter drops to 5-6 V, this indicates a complete discharge of the battery. After testing under load, the voltage should return to 12.2-12.4 V.
If a strong drawdown is detected, you need to check the battery, and then repeat the experiment with the plug again. If there is no drawdown, we can say that the battery is working properly.
To check the generator, you can do the following: start the car, turn on as many consumers as possible, and then perform a measurement. The voltage should be 13.5-14 V.
If it is lower, this indicates a failure of the generator. The lower critical limit is 13.0 V.
If the voltage of the car's generator is very low, do not rush to conclusions - make sure that the contacts on the battery are not oxidized. If so, rub them with sandpaper.
How to check the operation of the generator
The battery in a car is a fundamental element of the system, which is responsible for providing the car’s on-board network with electricity. The generator is used to charge the battery while it is active. Unstable operation of a device generating electricity becomes a prerequisite for a voltage drop in the network and the failure to restore the capacity of the power source.
Normal generator performance refers to the timely and genuine replenishment of the battery charge level, which decreases under load. Checking the battery charge level from the generator is ordinary and can be done by the car owner without the help of others.
Diagnostics of an auto device that generates energy includes a visual inspection of the unit, its parts and related parts, as well as measurements of voltage and current.
At least twice a year, you should check the tension of the drive belt, excessive weakening of which leads to a decrease in the performance of the generator, and from time to time may lead to breakdown of the device. Once a year, you can check parts of the equipment - fasteners, diode bridge, voltage regulator and others.
Timely battery service - cleaning the terminals, adding distilled water - will also guarantee the absence of problems.
Diagnostics of such characteristics as voltage, current, resistance are also needed twice a year. To implement it, you will need special devices - a voltmeter, a multimeter or a load fork.
Design and features of using the VAZ 2114 generator
An auto electric generator is a synchronous three-phase alternating current machine with electrical excitation.
It converts the mechanical energy of a running auto power plant into electronic energy needed to operate electrical systems and other devices and equipment that consume electricity while the engine is running. This transformation uses a rotating magnetic field.
The main working parts of an auto generator are:
- the rotor is the moving part of the device
- The stator is the stationary part of an electronic machine
The stator is assembled from pieces of sheet iron insulated from each other. The generator's armature winding is laid inside the stator.
The rotor core is made from a single piece of electromechanical steel. The ends of the poles are made of sheet steel. The field coils are located on the poles, which are powered by an external source of constant current.
READ Why is the oil in a diesel engine black?
There is a housing for protection from external influences. The main workers there are prisoners. auto parts Power supply. Exists:
- bearings - the rotor spins on them;
- Working wheel;
- diode bridge;
- relay regulator;
- pulley - drive; he wears a belt.
The front and rear covers of the generator, which is its body, are firmly fixed to the starter, ensuring its immobility. The rear bearing is firmly mounted on the rotor shaft and covered with a sleeve. The front bearing is pressed against the front cover of the power unit and can only be replaced. The shaft itself rotates on bearings; the oils in them, filled at the factory, do not change.
The winding in the stator slots is assembled according to a star circuit. And the wires are connected to a common point.
On the other hand, the phase wires are connected to the diode bridge. It contains 6 pieces of silicon diodes, also called "valves". There are three positive and three negative.
They belong to the poles and are pressed into horseshoe-shaped duralumin plates. There are also three parts of the diode on the record. The field coil is activated through them when the power plant is started. The diode bridge is installed on the back cover.
There is also a capacitor that protects against unexpected flashes.
What charge should the generator produce in winter and summer? A couple of tips
The instrument panel has a control indicator that lights up when the ignition is turned on. At this point, the voltage from the light bulb is supplied from the battery to the field coil. When the power is turned on, the winding is powered by additional diodes and the light should go out. If this does not happen after starting and the lamp continues to glow, the VAZ 2114 generator does not work.
Generator voltage at idle
To check the functionality of the generator, you need to start the engine and measure the voltage at the battery terminals. Typical U is 13.5-14 V.
- If this parameter increases above 14.2 V, we can come to the conclusion that the battery charge is decreasing and the generator is switching to an enhanced charging mode.
- This situation occurs in the rarest cases when the battery is discharged due to a long period of idle time in the cold or an attached load.
- There are likely situations when the car’s electronics do not allow an increase in the generator voltage, focusing on the ambient temperature.
The increase in the level of U, which is supplied to the battery from the generator, is not critical. If the electrical equipment of the machine is working properly, after 5-10 minutes the charge voltage will drop to the required level of 13.5-14.0 Volts .
If U does not decrease, it is necessary to begin repairing the power circuit or generator. Otherwise, it will end with boiled-off electrolyte.
If, when the engine is running at XX, the generator produces a voltage of 13.0-13.4 V, this indicates problems with the battery (the latter does not take part of the charge).
In such a situation, it is worth checking the generator when all consumers are turned on - headlights, music, air conditioning and others. We'll talk about this below.

