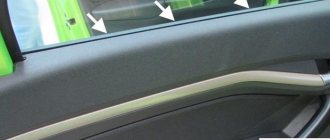
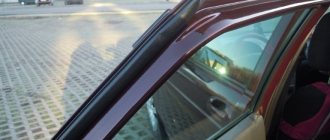
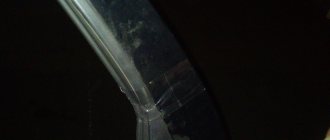
*32* External glass seals (velvet) Lada Granta.
Good afternoon Grantavoda and guests of my blog. I decided to share my experience in modifying and replacing the stock Lada Granta “velvet” valves. It's no secret that the windows on Ladas get scratched when lowering and raising them; this problem also affected me. A year ago (summer 2022), to eliminate this problem, I removed the stock “velvet covers” (there was no layer of velvet on them, they just had rough rubber seals). Following the advice of many Grantavodov, I taped Madelina on both the outer and inner stripes (there is a lot of information on Drive2) and put everything back in place. Based on the results of use with Madelin, the glass became scratched much less, but it was not possible to get rid of this completely; small scratches appeared. And also in the spring of 2022. (after 9 months of use) on the outside around the edges, the glass began to get dirty from the Madeline adhesive base (I glued it according to all the rules with degreasing, etc.). I decided to buy external seals with velvet, as expected. I installed 4 seals to replace the stock-modernized ones and what happened: - yes, the new seals themselves are softer, there is a layer of velvet and it is not small, but sand still gets under them, this can be seen from the inside ((; - the glass still they are a little scratched on the outside, although much less, by the way, I didn’t change the internal velvets, the previously glued Madeline is holding perfectly there, and there is not a single strip. There is an opinion: -The design of the seals on the Lada Granta (especially critical for external ones) is made like “G” "figuratively, which allows sand and other debris to easily linger and get between the glass (couldn’t AvtoVAZ have left the good old seals from SAMAR (13, 14, 15)); I see a way out of the situation: - Install side windows that are less susceptible to scratches (I have OVER ones.) Who can tell me if there are glasses that are more durable (not scratchable or something)? Some people advise washing them often with Karcher, but that’s not an option at all, for example, I can’t and don’t want to wash the glass with Karcher every day (if less often) , then the effect is zero); -Or maybe someone has experience installing other seals (from other car models)? In general, the issue of external seals is not closed for me yet! Thank you for your attention! All the best!
Lada 2101 1976, 71 l. With. - with your own hands
Cars for sale
Lada 2101, 1979
Lada 2101, 1977
Lada 2101, 1974
Lada 2101, 1976
Comments 28
Hello! There are 4 and 2 (back and front separately), I have 4)
Hello, please tell me about replacing the seals, I heard that when they are dismantled, the molding becomes unusable, is this true? if not, how to avoid it?
Hello. I changed these velvets of mine, I didn’t remove the molding, carefully either from below or from above, probably better from below, just stick the end in its place and push it up, this way you don’t have to remove the molding and you won’t damage it. But this only applies to the velvet boots that I changed. As for those velvets with chrome that you asked about, if you change them, then yes, you need to be careful, otherwise you will damage the chrome for 5 seconds. I personally haven’t taken off this supposed velvet cover with chrome, but I was wondering how to remove it, there are protrusions on this baohotka, or on the Daeri I don’t remember, like three, and with these protrusions they cling to each other and therefore hold on, so you will need to remove The glass is for convenience, you can look from below and see, you just need to bend it and pry it off. The photo was somewhere I can’t find it I guess.
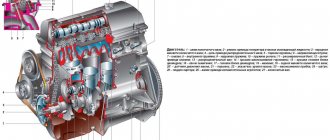
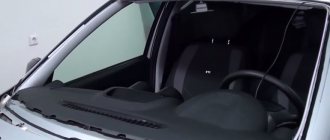
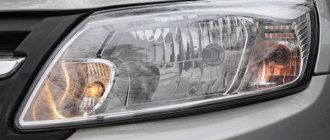
Replacing the front windshield and rear windshield on a VAZ are, in principle, very similar processes. Why the glass is being replaced is completely clear. Let's look at what else glass removal can be used for. This process is carried out when it is necessary to tint these windows, or when body work is being carried out for which the glass is a hindrance (for example, painting).
To replace the front windshield and rear windshield we will need:
Having found all this, you can begin the repair process.
- We free the interior from absolutely all interfering decorative interior details. The front side pillar trims are removed first. Then we dismantle the internal rear view mirror, also remove the sun visors and the decorative trim on the ceiling;
Issue No. 16: Eliminating rattling side windows in the doors of the Lada Granta
This music will last forever if I don't change the seal
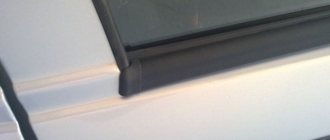
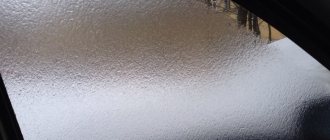
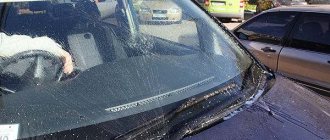
Thanks to VAZ’s “innovative” side door glass seals, the road in a Lada Granta is never boring. This is especially evident in winter, when these same seals “tann”, turning into “plastic”, and the glass in them simply dangles, producing a “melodic” rattling sound on bumps.
When the windows are tightly closed, the rattling is not so strong and does not always appear. But the problem is that while driving, the windows tend to lower themselves by 0.5-1.0 cm. I don’t know how to explain this, maybe from shaking while driving. However, this does not make it any easier, because they begin to rattle again. In order not to listen to this “music”, you have to turn them up again and again. Fortunately, I have electric windows in front. There you just need to use a button, but on the rear doors there are “oars” that need to be turned.
It's all in the hose
This problem is not new, everyone is well aware of it and almost everyone resorts to the same method of eliminating rattling noise - inserting a windshield washer hose into the seal.
After this simple procedure, the rattling of the side windows will no longer annoy you.
Which hose to use and what length
As mentioned above, the windshield washer hose is used as a seal. It can be found at any auto parts store. The washer hose can be of a certain length, cut and packaged, or can be sold by the meter (by the meter is the best option). The main thing is that the sections of hose inserted into the side window seals are solid and not made up of scraps.
On the Internet you can hear a lot of advice about the length of the hose. Some say the length is 4.5 meters, for others 5 meters is enough. But when I measured the length of the hose on my Grant, it came out to 1.5 meters for the front doors and 1.4 meters for the rear. In total, four doors required 5.8 meters. How did I take the measurements? I simply took the hose and applied it to the seal into which it would be inserted. Then I measured the resulting length with a tape measure and this is what happened. Below is a photo of the hose measurement for the front door:
And here is a photo of measuring the hose for the rear door:
Why is there such a difference in size from what I learned from the videos I watched earlier? They probably have different window openings on Grant :)) (just kidding). Actually I do not know. But, as they say, you can’t argue with facts. I trust my measurements, so I had to go to the store again and buy additionally the missing meters of washer hose, since what I bought earlier was not enough. This is what it means to blindly trust unfounded advice from the Internet. Trust, but verify - golden words. Let's move on.
Insert the washer hose into the seal
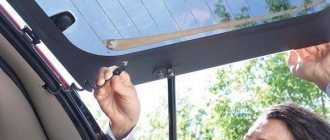
Using the example of a rear door, let's look at the process of installing a hose into a rubber seal. The glass in the rear door does not go down completely, so you need to start installing the hose from the glass side (from left to right, if you are standing outside facing the door). So let's get started.
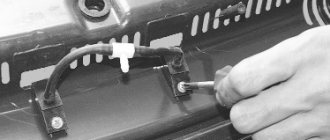
First, bend the inner part of the seal with a screwdriver
By pulling out the seal, you will see a free space inside where the hose will be inserted.
So that the glass does not interfere with the hose “passing” inside, it must be pressed by hand close to the outer part of the seal, as shown in the photo.
We insert the hose and try to push it as deep as possible. If he “goes” 10 centimeters, then that’s good.
Next, bending the seal with a screwdriver, we lay the hose inside.
We lay the hose in the upper left corner of the seal, also bending it with a screwdriver.
We continue to lay the hose in the upper horizontal part of the seal.
Place the hose in the upper right corner of the seal.
We finish laying the hose. As you can see, the hose was cut exactly to size.
By analogy, we insert the hose into the side window seals on the other doors. This completes the modification of the side window seal on the Lada Granta. Now the rattling glass will not bother you. See you in new issues of the in-flight magazine!
Replacing glass seals on a VAZ 2106
about a year and a half ago I installed an ESP, which were installed on a VAZ 2106 Lux from the factory link, in general, suddenly before winter they were impatient to break, well, how could they break, the driver’s motor has been turning very sluggishly lately, the window lift cable has broken, the eye (bracket) has broken under two screws that clamp the plate that clamps the window lift cable, well, they all had to break together! ok, everything is in order