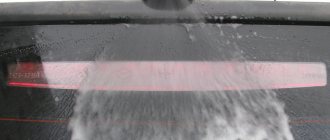
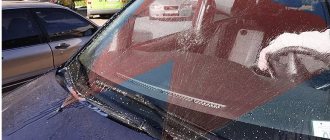
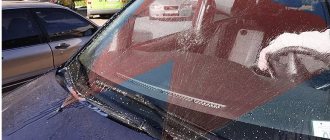
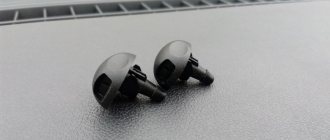
A good overview of the road situation through the windshield of the car allows the driver to safely drive the car in heavy traffic conditions. Therefore, the condition of the windshield needs to be given proper attention. Meteorological precipitation and temperature differences outside and inside the cabin worsen the transparency of the glass, negatively affecting the safety of control. Dirt from under the wheels, stuck insects, snow and rain streams from the outside of the glass should be removed as quickly as possible by a cleaning system consisting of automatic mechanical wipers, front and rear window washers, and a reservoir with antifreeze liquid.
Operation of windshield washer nozzles
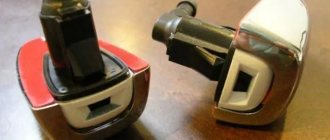
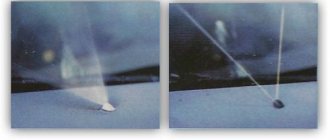
Fan windshield washer nozzles are a more recent and fashionable development of the system for supplying water to the glass, compared to the classic jet water sprayers. They have their own application features, knowledge of which will allow car enthusiasts to more consciously approach the choice of one type of injector or another.
Which washer nozzles are best to choose?
Instead of standard jets, a large number of fan injectors can be installed on Lada cars, here are some of them (the table is in the process of being filled out, leave feedback in the comments):
| Name | Catalog number | Note |
| Universal fan nozzles | You can buy it on the market at a price of 50 rubles per piece. | |
| Volvo injectors | 30655605 | You will have to cut the latches and grind the holes to the required diameter, cut the threads with an M8 nut. |
| Injectors from Ssang Yong | 7845009010 | Like from Volvo only with seal |
| Great Wall injectors | 5207300-K00 | It is possible to adjust up and down, left and right, the thread is cut with an M8 nut. |
| Injectors from Renault Logan | 7700846456 and 289321198R | Numbers of the old and new samples. |
| Injectors from Chevrolet Niva | 00001-7504676-00-0 |
In addition to new injectors, another modification recommended is the installation of a check valve.
It is worth noting that not only the quality of windshield washing, but also fluid consumption depends on the type of jets. Spraying too much will not allow you to spray the entire area of the glass at high speed (small splashes from the wind will only fall on the lower part of the windshield), and too much spray will quickly empty the washer reservoir. What washer nozzles do you recommend?
Let us remind you that other modifications of Lada cars can be found in the corresponding categories (Priora, Granta, Kalina, Largus, Niva 4x4, Vesta or XRAY).
Source
FakeHeader
Comments 19
I liked the wall hover, it really needs some work, it’s in the BZ, it’s very well watered, and the quality is up to par. First I really took it off, then I put it back on))
They stood like that, the brain is constantly floating... then half of the jet hits one side...(((I installed it from a Chevrolet Niva, the price of 95 rubles is much better... but look, time will tell...
Shnivovsky installed these ones. Everything is fine except fluid consumption. Compared to the standard ones - heaven and earth. VAZ-2123 windshield washer jet, GM pcs General Motors General Motors 00001-7504676-00-0
I put these on for 15 minutes and took off, g..., complete.
I tried to install the Chinese ones, to be honest, I didn’t like them, I installed the VAZ ones, it’s just brutal) such a mist of water falls on the glass, my wife saw it for the first time, and asked in surprise, “Is it raining or something?” I don’t like it, but I don’t remove it because they are still better than a regular stream )
I saw in the drive that they install from Volvo, but I couldn’t find them in the store.
Another thing)) They splash in different ways. Complete crap. Better get a new Chevy Niva (they are adjustable)
Do you have an article? I want to transfer them to the frill
There is no article. Look on the drive. They wrote a lot here
I’ve had fan-shaped ones for 4 years now, only a little different, there’s a calibrated hole - a vertical slot, not adjustable, they spray like crazy, I got them at a local parts store. The price is the same, 25 per piece, their only two advantages are that they do not clog and irrigate the windshield evenly. Good luck on the roads!) All the best!
general information
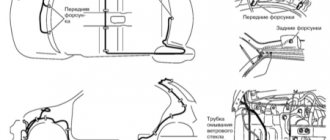
Nozzles are fairly simple devices, the operating principle of which is based on pumping liquid from the reservoir using tubes into the washer spray arms.
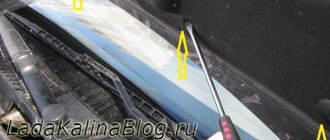
As a rule, the jets are placed on the hood of the car, but on new Grant models they are located directly on the windshield lining. The manufacturer is confident in the practicality of this design solution, since this arrangement of nozzles allows you to wash a large area of the windshield, because once it hits the wipers, the jet is automatically distributed over the entire surface of the glass. Also, this arrangement of nozzles allows you to save washer fluid.
There are two types of nozzles:
- Jet, having the shape of a hollow cylinder, with a fitting connected to the hose at the bottom and a sprayer at the top. The feed force of such a jet can be adjusted using a special screw;
- Fan type, which is characterized by the presence of at least three nozzles. At the same time, in fan jets, the washer fluid passes through a fairly narrow channel, which is why it is sprayed under higher pressure.
Note that jet nozzles are mainly typical for relatively old cars, as well as for most domestic cars (for example, VAZ-2110, etc.). But on cars produced recently (including domestically produced cars), fan injectors are mainly installed.
How do they work
In fact, there is nothing complicated in this system. This is a simple mechanism that lets water or other liquid flow through glass. There are jet and fan nozzles. Jet ones simply release a stream, while fan ones distribute the liquid over the entire surface of the glass. By the way, fan wipers also allow the wipers to last longer, since they will constantly slide over a wet surface.
Installation process of fan nozzles
Typically, windshield washers on Grants are equipped with jet nozzles. Many car owners are not satisfied with jets of this design, and then the way out of this situation is to replace them with fan nozzles, especially since such manipulation can be carried out independently without any problems.
The procedure for replacing jets is simple and does not differ in any Lada car models. To carry it out, you must perform the following steps sequentially:
- Open the hood and remove the tube from the injector;
- Unscrew the nut using a 12mm wrench and remove the jet;
- Install the new injector by performing the above steps in reverse order.
After installing new jets, it is recommended to carry out one more modification to the washer - installing a check valve.
Purchasing a new heated front window
The option is good if your car is equipped with a heated front window. You can simply purchase such glass and install it instead of the old one. This item will be original and of high quality.
If such equipment is not available, you can purchase Chinese non-original heated glass. This option is already a lottery, because it is not a fact that this frontal approach will work well.
Do not forget that this glass will have to be installed either independently or at a service center. It’s best to do it yourself, because purchasing new heated glass is an expensive purchase (the cost of such glass starts from 10,000 rubles).
Advantages: when buying the original, the highest quality option.
Disadvantages: high cost, risk of low-quality products when buying non-original ones.
Possible damage to the windshield washer
Washer failures are divided into electrical and mechanical. Mechanical faults are much more common than electrical faults, however, and they are much easier to fix.
We list the malfunctions that arise for mechanical reasons:
- The washer fluid in the reservoir has run out. If there is no fluid in the reservoir due to damage, it is recommended to replace it immediately. In addition, the fluid can freeze if it is selected incorrectly (for example, when using washer fluid in winter intended for use in summer).
- Perhaps the hose came off the jets, or it was crushed.
- Liquid cannot pass through the nozzles. This is possible if there are any foreign impurities in the washer fluid, but it happens that the injectors are simply clogged with dirt.
The second group of reasons leading to incorrect operation of the washer includes electrical faults. Let's list them:
- Blown fuse.
- The washer motor is not receiving power. In this case, the cause of the breakdown lies in the washer terminals, which will oxidize over time and sometimes fall off. Such a malfunction is detected by visual inspection.
- Broken relay, faulty wiring, switch or washer motor. Such a breakdown can be calculated using a multimeter connected to the terminals of the electric motor. The absence of voltage will confirm the presence of a breakdown. In cases where there is voltage, but the washer still does not function, we can conclude that its motor is broken, which will need to be replaced immediately.
- The pump terminals are oxidized. As noted just above, the terminals oxidize during operation, which in turn leads to the cessation of fluid pumping due to a failed motor. It is possible to restore their functionality; for this purpose, the oxidized terminals must either be cleaned or replaced with new ones.
Lada Kalina Sedan › Logbook › Refinement of the interior lighting of the Lada Kalina
Hi all! It's time for the first modification, it will affect the interior lighting. It's no secret that in normal mode it is not possible to install diode bulbs in the side sectors of the lampshade. The reason for this is not the standard connection polarity. I found four ways out of this situation. The first one is to buy diode bulbs and change the polarities on them. But I didn’t like this option, I eliminated it immediately. I will present the second option and subsequent ones in this article. So, let's begin:
Full size We buy LEDs with this base. Full size We remove the lampshade and see this picture. Full size So we saw the reason for these extreme diodes not working.
We pick up a soldering iron and two wires and start creating.
Full size Reconnect everything as I showed in the photo))))) Full size Now the picture has changed, the polarity is as it should be. This is the simplest method, but it is not without its drawbacks. This is because, as shown in the pictures, the switch from the door opening lock must be turned off, because When the door is opened, a minus goes along it, and after reversing the polarity, where there was a minus, it became a plus, this action will cause a short circuit. So when the door is opened the light will not come on. ATTENTION I REPEAT THE GREEN WIRE IS ISOLATED AND DO NOT CONNECT! Full size This is what everything looks like assembled!
Now the third method, in general this method is the result of refinement of the second method. To implement it, you need to do all the steps that were in the second method. Buy a 20A light relay.
Full size We buy this relay, but it is possible to buy a large size.
We connect everything according to the diagram.
Full size: According to this diagram, everything needs to be connected.
When everything is connected, we figure out how to attach the relay and show our imagination.
Full size I did this. Full sizeIn the end we get this design, we run and install it. Full size Now, when you open the doors, the light lights up, and everything works as normal. Using the third method, it becomes possible to turn on the light when opening the doors not on the central sector of the lampshade, but on the two outer ones, for this you only need to add one wire and a 1N4007 diode. The wire that, according to the relay circuit, goes to the central sector socket, solder to the plus of the outer lamp from this reed through a diode and make a jumper with the plus of the other outer lamp. The diode is necessary so that when one extreme sector is turned on, the other does not light up. Full size In order for the outer sectors to light up, you need to connect everything based on what is shown in red.
Now let's look at the fourth method. It is more vandalistic, but cheaper. And so let's go...
Full size We take a hacksaw or grinder and use the red marking mode; to ensure safety, the cut areas can be sealed with sealant. Full size Disconnect the wires marked with a cross and solder them to the places marked with a circle Full size Now we solder two more wires to the red wire and connect everything as shown in the pictures with yellow light. Full size It turns out something like this)
This is where I end my article; of course, many will say it’s easier to remake diodes by changing the polarity on them, and even easier not to install diodes at all. And everyone will be right in their own way, but we find the road to a solution ourselves, so let everyone decide for themselves. Thank you all for your attention!
Description of the check valve installation process
A delay in the supply of fluid to the windshield at the initial moment of movement of the wipers leads to the passage of these devices over a dry surface, which contributes to the appearance of scratches and abrasions. Not only Grant owners, but also owners of cars of other models are familiar with such a defect. A simple modification of the washer system will help eliminate it.
To ensure that liquid gets onto the windows at the very beginning of the wipers' movement, the washer systems of expensive cars are equipped with a check valve, which must be installed on the Grant. For this purpose, for example, an element from a Toyota car (article 85321-26020) is suitable, the estimated cost of which can vary from 50 to 150 rubles.
The DIY installation procedure is quite simple. First, cut the washer hose, then install the valve in the cut so that the arrow on it is located in the direction in which the liquid will move. Installation completed.
Product delivery options
Note! Below are the shipping methods available specifically for this product. Payment options may vary depending on the delivery method.
Detailed information can be found on the “Delivery and Payment” page.
Parcel by Russian Post
Available payment methods:
- Cash on delivery (payment upon receipt)
- Using cards Sberbank, VTB, Post Bank, Tinkoff
- Yandex money
- QIWI
- ROBOKASSA
Shipping throughout Russia. Delivery time is from 5 to 12 days.
Parcel by Russian Post 1st class
Available payment methods:
- Cash on delivery (payment upon receipt)
- Using cards Sberbank, VTB, Post Bank, Tinkoff
- Yandex money
- QIWI
- ROBOKASSA
Shipping throughout Russia. Delivery time – from 2 to 5 days. More expensive than regular delivery by Russian Post, approximately 50%. Parcel weight up to 2.5 kg
Express Parcel EMS
Available payment methods:
- Cash on delivery (payment upon receipt)
- Using cards Sberbank, VTB, Post Bank, Tinkoff
- Yandex money
- QIWI
- ROBOKASSA
Shipping throughout Russia. Delivery time – from 3 to 7 days. More expensive than regular delivery by Russian Post, approximately 100%.
Transport companies
Available payment methods:
- Using cards Sberbank, VTB, Post Bank, Tinkoff
- Yandex money
- QIWI
- ROBOKASSA
Delivery is possible to any locality where there is a representative office of the transport company. Delivery time – from 2 to 10 days. Sending large parcels is approximately 50% more profitable than by Russian Post.
Method for heating washer jets without using electricity
In winter, anti-freeze is poured into the glass washer system reservoir, but this procedure does not always prevent the liquid in the system (including the injectors) from freezing. However, there is a simple technique that can ensure that the washer jets are heated in cold weather with the heat coming from the car’s engine. This technique is suitable for all cars whose washer jets are located on the hood, including Grants. It can be done independently and quite quickly, within about five minutes.
First, right under the injectors, certain places are marked on the thermal insulation of the hood; the diameter of the marks should not exceed 2, maximum 3 cm. Then holes are cut out in the marked places with a stationery knife. This concludes your work. Now the thermal energy released by the engine will be spent on warming the hood near the injectors and the jets themselves, contributing to the natural defrosting of the washer fluid. Thanks to this modernization, you will be able to use the washer services even in the most severe frosts.
Source
Let's warm up
Fan nozzle models are in many ways superior to their jet counterparts, but still have some disadvantages that appear during long-term operation. The most unpleasant problem for most car enthusiasts is the mechanism’s ability to freeze at low temperatures.
You can avoid unnecessary expenses in another simple way. On the inside of the hood, where the injectors are installed, you need to cut out the insulation - a circle with a diameter of 20 cm. This will help warm the jets with the flow from the running engine. The method showed itself perfectly even in severe frosts. The main advantage of this modification is its simplicity and low cost.
How to adjust windshield washer nozzles
Hi all! Are you bored? I am very! Today I propose to talk about windshield washer nozzles. If you want, we can discuss this topic in the comments.
In fact, injectors play an important role, no matter what kind of car you have. After all, these devices are an integral part of Nissan Qashqai, Ford Focus, Kia Sid and Rio, Mercedes or Toyota cars.
Have you ever seen a Hyundai Solaris, a Volkswagen Polo sedan or even a regular VAZ 2110 without nozzles through which water is supplied and brushes that effectively remove all dirt from the windshield? I did not see. Some have regular jet nozzles, others prefer fan nozzles. The latter, by the way, are superior to standard devices. These are universal nozzles, which are often heated.
Thanks to the heated system, the glass washer fluid does not freeze and ensures effective operation of the wipers in any weather. But that’s not about that now.
If there is a problem with the injectors, replacement is not always the best solution. You shouldn’t hastily look for the product article and think about what to get. You will always have time to buy.
Most often, to restore normal operation of the injectors, it is enough to clean and adjust them. This is what I will try to teach you today. True, there are cases where the washer motor fails, I already wrote about this in this article, but today we are not talking about it.
Washing with removal
In particularly advanced cases, nebulizers do not want to be cleaned using traditional methods - using needles, wires and syringes. There is only one option left - to remove the injectors from the car, wash them thoroughly, and if that fails, buy and install new parts.
On many modern cars, the sprayers are held in the holes by plastic clips. Dismantling is carried out in this order:
- Find a narrow flathead screwdriver in the garage.
- To remove the washer nozzle, use a screwdriver to pry the product at the bottom pad and pull it up.
- Pull the element out along with the pipe.
- Disconnect the handset. As a rule, it is pulled over the fitting without being secured with a clamp.
Reference. In some cars, the nozzles may be attached differently - you have to unlock the latches from below.
Immerse the removed element in a soap solution for a day or try treating it with a chemical detergent. Finally, blow out the nozzle with a pump or compressor and replace the nozzle in reverse order. Check where the jet hits and adjust the element if necessary. If the above manipulations do not lead to the desired result, simply replace the atomizer - the spare part is inexpensive.
The urgent need to figure out how to remove the windshield washer nozzle can arise for various reasons. The most primitive and most common is cleaning it as a result of clogging. No matter how high-quality the liquid for washing the windshield is poured into the reservoir (and some drivers, for example, in the summer do not even pay due attention to it and pour plain tap water into it), its active components in any case settle on the thin insides injectors. Slags are formed, which at first are not even noticeable to the naked eye.
Features of work
There is nothing complicated about the operation of the injectors. This device is designed to supply water or a special washer fluid to the windshield of a car.
All nozzles are divided into two types.
- Jet. They release a stream of water and that’s it. Basic principle, nothing special. Mainly used on older cars;
- Fan. Their feature is the uniform distribution of water or liquid over the surface of the lobovka. Such devices extend the life of the wipers because they allow them to glide over a constantly moistened glass surface.
They are characterized by several situations that require mandatory driver intervention.
- Lack of liquid. Usually it simply runs out in the tank, and the driver simply does not notice this and does not add a new portion in time. Check regularly how much liquid is in the container and monitor the level;
- A hose that has come off. I think you won't need instructional videos or photos with instructions here. Just put the hose in place and that's it. The renovation is complete;
- Freezing of liquid. Usually occurs due to low temperature and the use of ordinary water instead of a special washer. Warm up the engine more. Due to the generated heat, the liquid will defrost;
- Clogging. The most common trouble that you can deal with yourself. Everything is done quickly and without any difficulties.
What types of malfunctions are there?
In fact, there are not so many problems, and they are divided into electrical and mechanical. Most often, problems arise in the mechanical part. Mechanical problems are simple, the first problem is lack of fluid. That is, it either simply ran out in the tank, or froze due to the low temperature. In the first case, you just need to top it up, and in the second, warm up the engine well, and its heat will defrost the liquid.
The hose could also have come off; it needs to be installed back, and the problem is solved. And the most common problem is clogged injectors. They can become clogged due to the use of low-quality fluid or due to the ingress of dust and weight.
Poor flow can also be due to problems with the pump or seals, so you should find out what the problem is.
Cleaning methods
Now about how to clean the windshield washer nozzles. There are many methods that were invented by folk craftsmen. They are effective and easy to implement.
I'll tell you several methods. And you decide for yourself which path to take.
- Application of a compressor. It is considered the most useful and fastest cleaning method. But you will definitely need the compressor itself. It’s not worth buying it just to clean the device. The compressor hose is connected to the nozzle nozzle and the air supply is turned on. Literally 30 seconds is enough to blow out all the dirt.
- An ordinary medical syringe. It is inferior in efficiency to a compressor, but consumables and tools cost pennies. Water with a small amount of citric acid is poured into the syringe. All hoses from the nozzle are disconnected. It is better to read in advance in the operating manual of your car how to remove the sprayer on it. A special feature of the method is that the syringe is inserted where the water comes out and does not enter. That is, on the back side of the nozzle. This will make washing more effective.
- A simple pin. Some people believe that you should not use pins and needles, since they can damage the glass washer spray. Well I do not know. I have used this technique many times and have had no problems. The main thing here is to be careful. Please note that pins only remove minor dirt. This is a kind of road method when you don’t have a compressor or at least a syringe with citric acid at hand. A pin or needle is inserted into the nozzle and the dirt is carefully picked out. Only those contaminants that have accumulated near the nozzle are cleaned. There's no point in going deeper.
- Detergent and cleaning agent. The method is effective, but will require quite a lot of time when compared with other methods. Remove the nozzle and place it in a container with water and cleaning agent. Sometimes it is enough to hold the sprayer there for a few minutes. But after that you still have to wash it. With a syringe or a compressor, decide for yourself.
As you can see, there are no particular problems with cleaning windshield washer nozzles. The procedure is simple, regardless of the method you choose.
Keep in mind that cleaning is not a panacea. In some cases, the injectors may wear out and permanently fail. Then the only way out will be to completely replace them. Well, at least they cost a little.
What to do if the anti-freeze is frozen?
Frozen washer fluid is a fairly serious problem, as it deprives the car owner of the opportunity to properly clean the windshield, thereby reducing visibility and preventing the driver from adequately assessing the situation on the road. Also, such a situation directly threatens the washer pump.
If you find that the anti-freeze has frozen, you can take the following actions:
- Park the car in a heated parking lot and wait for the ice to melt naturally. Note that this method will require not only time, but also the presence of a heated parking lot nearby, and therefore is not suitable for everyone.
- If the first method does not suit you, then it is better to remove the tank and take it to any heated room to defrost.
- Another technique is to pour heated water into the tank. Despite its apparent effectiveness, this method has obvious flaws. Therefore, let’s immediately clarify that if there is not enough hot water, then the ice simply will not melt, and if there is a lot of it, then the risk of damage to the tank itself, made from low-temperature varieties of plastic, will significantly increase. In addition, even with melted ice in the tank, you will not get rid of ice in the tubes and jets. Consequently, within half an hour the temperature of the liquid in the tank will drop so much that ice will begin to form in it again. As a result, the problems will only get worse, and therefore this method cannot be recommended.
- Let's describe one more method. Turn off the engine, take a bottle of cheap vodka and pour it into the washer reservoir. The alcohol will help dissolve the antifreeze without deteriorating its properties. If you don’t have anything containing alcohol on hand, you can heat one to two liters of high-quality low-temperature anti-freeze to a temperature of 40-60C by placing the container with it in boiling water. After heating, the liquid should be poured into the washer reservoir (with the engine off, of course). Then the engine needs to be started, after which the injectors are watered with water heated to 30-40C. After a few minutes, press the washer control lever and, if there is no damage to the pump, streams of anti-freeze will spray out of the jets.
Adjustment
Another important element of maintaining your car's windshield washer system is adjusting the nozzles. It is required if the jet coming out of the nozzle is directed in the wrong direction.
The process itself is simple and will take just a few minutes. And how to adjust? There is no need to remove or dismantle anything. Just do the following:
- take a regular needle or pin;
- insert it with a sharp edge into the nozzle (there are 2-3 nozzles in total);
- depending on where the jet is directed, start turning the needle in the required direction;
- if the jet goes above the glass, we turn it down, and if it sprays very low, we move up;
- left and right are adjusted in the same way.
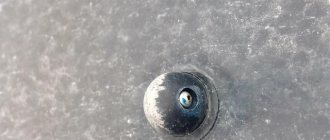
Such manipulations are possible due to the fact that the sprayers themselves have the shape of a ball rotating inside a plastic housing. Therefore, a simple needle can act as an excellent adjustment tool.
As you can see, cleaning and adjusting the windshield sprayers on your car is very simple. You just need to monitor their condition and carry out preventive measures on time. But if the injectors completely stop working, then you will have to spend from 60 to 600 rubles, depending on the car, and replace the old devices with new ones.
Read this article on how to choose windshield wiper blades.
Thank you for reading this far! So it was interesting and useful for you! Don't forget to subscribe! More new content awaits you ahead!
(
3 ratings, average: 5.00 out of 5)
Subscribe to updates and receive articles by email!
We guarantee: no spam, only new articles once a week!
It’s unlikely that anyone would argue that the windshield is an important part of a car. After all, it provides good visibility, if, of course, it is in perfect condition. All drivers use a windshield washer to remove any dirt in bad weather, this increases the level of safety.
Of course, sooner or later the injectors fail and they must be adjusted in any case, since this is for your safety. It may seem that you can do without them, in most cases this is true, but in bad weather you will regret your decision.
Briefly about the operation of washers
Every car enthusiast who has been using one car for a long time has encountered an unpleasant problem - sooner or later the nozzle stops supplying washer fluid or splashes past the glass. There are several reasons for the problem - from a simple lack of water in the tank to severe clogging of the supply tubes. To separate injector malfunctions from other problems, it is advisable to understand the structure of the washer system, which includes the following elements:
- plastic tank with a supply of clean water;
- electric pump;
- connecting tubes;
- 2 nozzles installed in front of the windshield or directly on the wipers.
There are 2 types of sprayers - with one and two holes in each.
When the driver presses the corresponding lever, the electric pump turns on and pumps water through thin tubes to the nozzles. The latter spray liquid onto the surface of the glass. If necessary, the direction of the jet can be adjusted by turning the plastic tips, inside of which the jets are located.
Cleaning injectors
If you determine that the problem is due to simple blockage, you can clean it in several ways.
Compressor
This is the most effective and fastest way, but only if you are at home and have a compressor. Disconnect all associated hoses and wash the injectors with soapy water. Now you need to take the compressor hose and connect it to the nozzle. Why turn on the compressor for 30 seconds?
Syringe
A very simple method, but not as effective as the previous one. Pour plain water into the syringe; it will be good if you add citric acid there. Of course, we disconnect all the hoses and then wash them in the opposite direction. That is, the syringe must be inserted from the water outlet side, not the inlet side.
Pin
This method will not save you if the pollution is very strong. You can use it on the road. Your task is to take a pin or something similar and clean out all the dirt near the nozzle; unfortunately, you won’t be able to go deeper.
The best way
The best option, but it takes quite a long time, is to remove the nozzles and soak them in water with a cleaning agent. Leave them like this for a few minutes and then rinse them anyway, in some way.
Tips for choosing
When a driver decides to buy something for a car, the following problem arises. What is the best way to choose and not make a mistake with the decision. This applies to both fan nozzles and foam generators for cars. But if you read our material, you won’t make mistakes.
There are two main approaches to selection:
- buy original ones;
- take universal ones.
But not all cars have the opportunity to complete or purchase original injectors. Therefore, we have to look for an alternative solution. There are no fans that fit literally every car. Be sure to take this into account, otherwise no adjustment will help you.
There are several most popular options:
- Set of injectors for Volvo S80. Suitable for many Japanese and Korean cars. One piece will cost 350 rubles;
- Korean sprayers from SsangYong. This is a high-quality clone of the previous version. Used on many machines, plus it costs only 160 rubles for 1 unit;
- Devices from Camry. Quite versatile, effective and high quality. The current price is approximately 300 rubles per piece;
- Devices from Skoda and Volkswagen. Suitable for German and Czech cars, plus well adapted to Lanos and Aveo. But the price is also high, about 300 rubles.
Look for options that are suitable specifically for your car. I absolutely do not recommend using cheap devices. This is exactly the same as choosing the wrong fog lights. They will stand on the car, but will not be able to effectively perform their functions.
Adjusting the nozzles
So, if the fluid is supplied poorly or there are problems with the direction of this fluid, then it is necessary to make adjustments. It's not that difficult and you can do it yourself without any problems, you just need a pin or a needle.
Everything must be done very carefully, as the plastic case can be damaged. First you need to insert the needle into the nozzle hole and then start making adjustments. You need to use careful movements to achieve the correct position so that the stream has the correct direction.
If you have a foreign car, then you need to be more careful here. The fact is that the nozzle supplies several jets in different directions and this should be taken into account when adjusting. The reason is that if you don't take this into account, three or four jets will be sent in one direction and less of the windshield surface will be affected.
In the end, you need to check what you end up with. Is the glass washed well, will visibility be safe in bad weather, if the answers are “yes,” then you did everything right.
Cleaning jets on a car
To clean the windshield washer without removing the part from the car, try using a thin needle or pin. Carefully insert the end of the needle into the hole and push it all the way, then pull it out and check the operation of the sprayer. If the dirt plug was close to the outlet, a stream of water will throw it out.
When cleaning with a sharp, thin tool, observe the following safety rules:
- If you use thick pins and awls, you risk damaging the calibrated hole. The nozzle will spray with an uneven stream that does not reach the top of the glass.
- Do not push the tool too deep. The needle may get stuck tightly or break.
- When cleaning, do not move the tool to the sides. The position of the plastic sprayer may be disturbed and the jet will begin to hit past the glass or through the roof of the car.
If superficial cleaning does not work, try rinsing the nozzle with a 20 ml syringe equipped with a thin needle. The algorithm is like this:
- Prepare a soap solution that is enough for 2-3 refills of the syringe.
- Disconnect the fluid supply tube from the sprayer.
- Insert the needle into the spray nozzle and with a sharp movement of the piston, squeeze out the cleaning solution. Repeat the operation 2–3 times.
Warning. Do not backwash with a syringe with the supply tube connected. In this way, you will send dirt back into the system, which is why after the first turn on the nozzle will again become clogged with debris.
There are two other ways to clean injectors with disconnected tubes:
- insert a thin steel wire with a diameter of 0.2–0.3 mm into the nozzle, pulling it through using pliers;
- blow out the holes with a compressor.
The first option is not suitable for sprayers with two nozzles - the wire will probably not pass out and will get stuck. Blowing with compressed air gives excellent results when the compressor is capable of providing a pressure of 6–8 bar. Point the gun at the nozzle - if it is inserted into the fitting, the nozzle may fly out and get lost.
Dismantling
It will be much better if you remove the nozzle, as this will be more convenient for adjustment. This will also be useful if you just want to replace it with a new one. In order to do this, you must first remove all suitable hoses. There is a nut for fastening, you need to unscrew it and then calmly remove the washer.
If it gets hard, it’s better to spray in WD-40 and wait a little, as too much force can break the washer. Putting it back is more difficult and you need to be even more careful here than when removing it.
New injectors will cost you about 300 rubles, and for AvtoVAZ models you only need to pay 60 rubles. The price may be slightly different due to the brand of the car; of course, they will cost more for expensive cars.
Adjusting the windshield washers is not difficult, but the main thing is to do it all carefully. For more information, watch the video instructions.
Removing the viburnum fuel rail
You will need: relieve pressure in the fuel system, prepare two “17” wrenches, a “10” socket, and a “5” hexagon.
- Disconnect the block with wires from the injector wiring harness by pressing the lock.
- Unscrew the ramp tube fitting with a 17mm wrench, holding the hose tip with the same wrench.
- Remove the rubber O-ring from the tip of the ramp tube.
- Remove the air supply hose to the throttle body.
- Unscrew the nut securing the clamping bar using a 10mm socket.
- Remove the clamping bar.
- Remove the fuel supply pipe by pressing the spring clamp on the tip.
- Unscrew the two screws securing the fuel rail to the intake pipe using a 5mm hex.
- Move the fuel rail so that all injectors come out of their seats in the intake pipe.
- Remove the Kalina fuel rail with injector assembly.
Step-by-step replacement instructions
Despite the fact that different car models have distinctive windshield washer design features, the diagnostic and replacement process is similar. The repair will not take you much time. New components, if needed, are inexpensive and will cost you about 500 rubles. The tools you will need are a flathead and Phillips screwdriver and a set of standard wrenches.
- Using the technical manual for your model, we find the exact location of the tank and motor.
- Turn off the power supply. To do this, disconnect the wires that go to the pump.
Disconnect the wires that supply the windshield washer pump
Remove the tank after disconnecting the hose and fitting
Disconnect the windshield washer pump and clean it
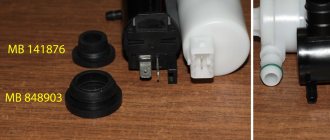
When disassembling the pump, it may be discovered that the bushing has become unusable and needs to be replaced. Such a part is inexpensive and when repairing it is better to purchase it in advance to increase the service life of the mechanism.
How to replace (video tips)
If problems arise with the windshield washer, do not delay repairs. In bad weather, you cannot do without cleaning the windshield, and low visibility often leads to emergency situations on the road. Replacing the motor or cleaning it can be done on your own, it will take very little time.
